• Skip to main content
  • Skip to secondary navigation
  • Skip to primary sidebar
  • Skip to footer

M.D. CREEKMORE

  • Blog
  • Books
  • Newsletter
  • Gear I Use
  • About
  • Contact
  • Facebook
  • YouTube
  • Blog
  • Books
  • Newsletter
  • Gear I Use
  • About
  • Contact
  • Privacy Policy
You are here: Home / Archives for Bushcraft

Bushcraft

Here you will find information on bushcraft, outdoor survival, and camping topics. If it happens in the woods then it will be found here.

5 Powerful Life Lessons from Outdoor Adventures

October 19, 2019 M.D. Creekmore

test your bug out bagby Mike J

Believe it or not, your next outdoor adventure could be doing more than merely fulfilling the adrenaline junkie in you. There are a surprising number of powerful life lessons thrown into the mix when embracing the great outdoors. And you probably aren’t even aware of them.

Take a leap of faith and embrace the great outdoors and you could be giving yourself much more than an exhilarating day out or weekend away. Life in the great outdoors has an extraordinary way of teaching us the greatest of life’s lessons. We’ve picked out 5 powerful life lessons you can make the most of on your next outdoor adventure.

Living in the present moment: Mindfulness for the adrenalin junkie
Much has been written about mindfulness and meditation and you’d be forgiven for thinking it’s not something the average adrenaline junkie would give much time for. Surprisingly though, participators of extreme sports dedicate a huge amount of concentration and effort on one particular thing. Mountain and rock climbers, for example, are focused on the task in hand as a matter of safety. They are practicing mindfulness without even realizing it.

When engaging in an outdoor activity you are truly absorbing and observing your surroundings. It’s a far cry from everyday life, which is in most cases driven by a zillion distractions and the constant pinging of your phone. The pull for outdoor adventure is more often than not associated with a desire for adrenaline-laced activities. The irony is, outdoor adventures offer much more than excitement and release. They also offer direct, no-nonsense mind training.

A sense of connection part 1: Appreciating community
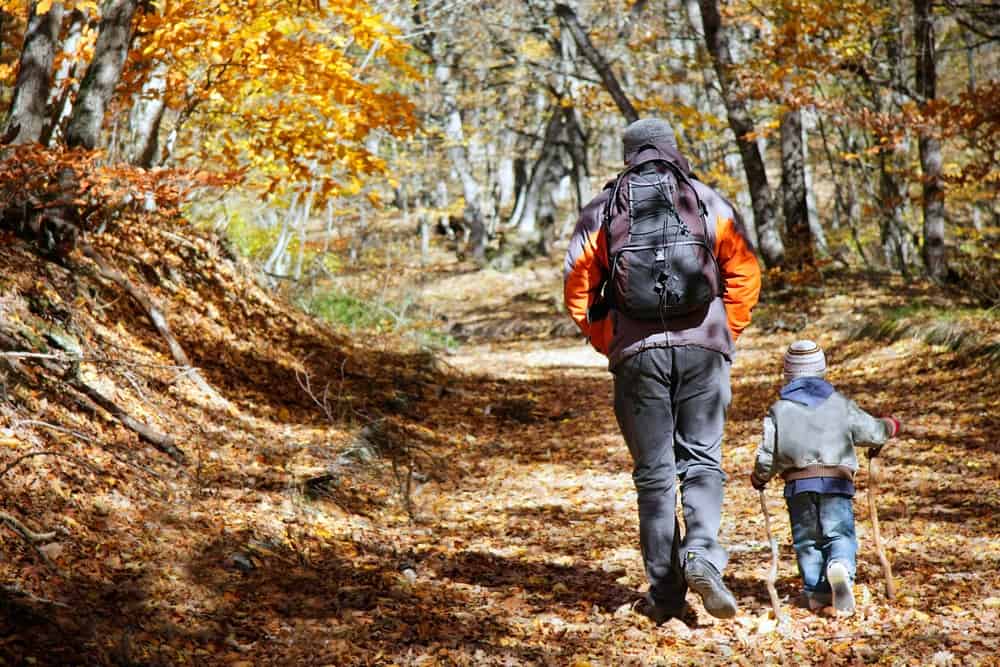
Our sense of appreciation for community is all too often dumbed down by busy modern living. Community happens around us all the time, but we often fail to appreciate it. There’s nothing quite like a team outdoor adventure in the wilderness to inspire appreciation for our diminishing community involvement. Hiking with a group in the wilderness gives us a stark reminder that our own existence depends upon the co-operation and involvement of others.

A sense of connection part 2: Appreciating nature
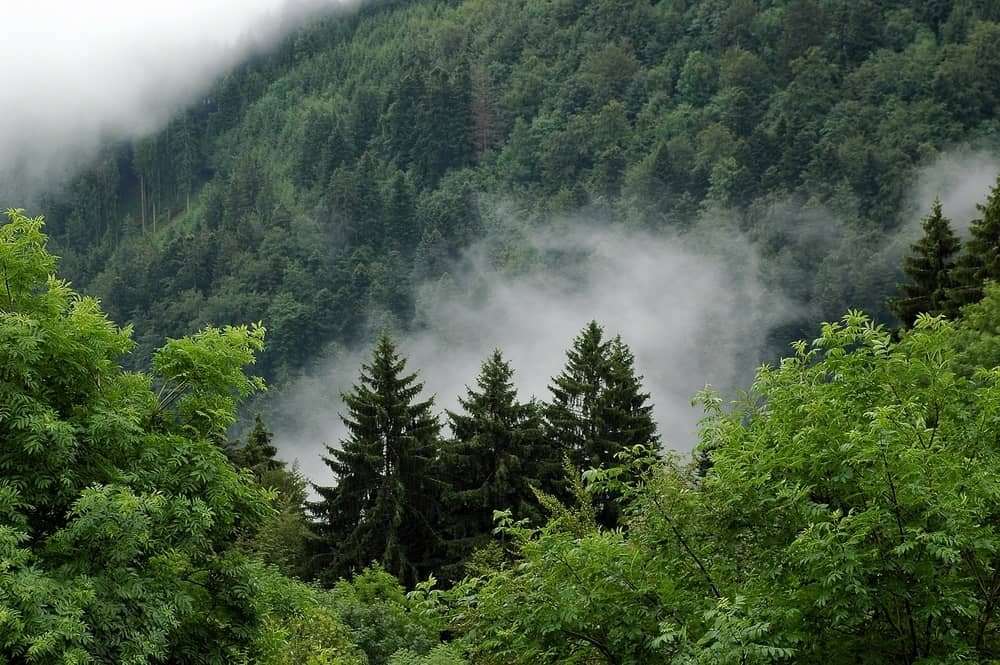
It’s a terrible thing, but many of us in the modern Western world are slowly disconnecting ourselves from nature. We are inadvertently closing off a general fascination with the natural world around us. Let’s face it, the closest many of us get to nature is an episode of David Attenborough’s Planet Earth on TV.

The fact is, connecting with nature is important for our well-being. It nurtures our natural creativity. A study last year conducted jointly by the University of Derby and The Wildlife Trust measured the impact of a daily practice to connect with nature over a period of 2 months. As reported by the BBC, the study showed that there was a scientifically significant increase in people’s health and happiness in accordance with a connection to nature, from simple activities such as feeding birds or planting flowers.

Appreciating nature comes with the territory of outdoor adventures, and that connection with the wild is it seems good for our health and our happiness.

Connecting to inner-resources
Part-taking in an outdoor adventure brings a great sense of accomplishment and can be extremely empowering. Whether you choose to rough it in the wild for a couple of weeks with friends or spend a day on an organized adventure activity, like those offered by Into The Blue, you’ll need to rely on your wits to get you through.

The Wilderness Foundation UK teaches adults and children to love our wild and wonderful planet. In their mission statement, they go as far as to say “The wilderness is an irreplaceable catalyst for personal transformation and growth.” Outdoor adventures offer the opportunity to discover inner resources we are unaware we have, or more succinctly we have forgotten about. The great outdoors presents the opportunity to strengthen life skills and reinforce crucial life lessons.

A sense of perspective
In the great outdoors many people experience a real sense of perspective. It’s so easy when we are running from pillar to post to lose perspective of what is important in life. We think we can’t live without checking our phones, Snapchatting or watching YouTube or even looking in the mirror. We see pretty much everything we rely on in modern life as a necessity.

An outdoor adventure reveals that it’s not only possible to live without checking social media channels and cooking in microwaves, but that in the right environment something as simple as cooking over a campfire is actually an unforgettably enjoyable experience. Swapping the TV dinner for a foraged bowl of soup in the great outdoors may not feel very appealing at face value, but try it and you’ll be surprised at how quickly your reliance on home comforts ebbs away.

It’s a wonderful world!

Filed Under: Bushcraft

Complete Guide to Concealed Carry While Backpacking

September 29, 2019 M.D. Creekmore

Appalachian National Scenic Trail Sign

Those of us who carry a handgun while hiking in the backwoods quickly realize that carrying a handgun while also carrying a backpack presents its own set of challenges. Sure you could put the handgun in the pack with the rest of your hiking gear, but then it wouldn’t be easily accessible should you need it on the trail.

Carrying a handgun in your backpack while hiking is kind of like carrying a handgun in the trunk of your car when driving. If a bear or human attacker is threatening your safety, what are you going to do… ask them to halt their attack while you remove your pack and sort through the contents until you can find your handgun so you can defend yourself…

That’s not going to work! If you’re going to carry a handgun while backpacking then it must be easily accessible and able to be drawn and brought into action quickly.

Don’t make the mistake of throwing a handgun in your pack and then thinking you’re protected. You’re not, really all you’ve done by doing that is added extra weight on your back while giving yourself a false sense of security.

Those of you reading this who have never actually hiked are probably asking yourselves why not just strap the handgun on your side, a shoulder holster or use an IWB type holster to carry while backpacking and those might seem feasible at first, however, as soon as you strap on a pack you realize that everywhere you want to carry a handgun there is a strap from the pack that’s crossing directly over that position.

Fortunately, there are several solutions to carrying a handgun while backpacking and we will get into those in detail below, but first, you need to ask yourself do you really need to carry a gun while hiking? Some people don’t and you need to be honest with yourself about this before strapping on a handgun.

Should YOU Carry Handgun While Backpacking?

black bear

If you aren’t proficient with your handgun via competent training and actual live-fire practice then please get some training and become efficient and effective with your handgun before carrying it while backpacking or at any other time.

Please read our article on where to find concealed carry firearms training and become proficient before carrying a handgun and relying on it as a tool to defend your life.  Don’t think that just because you’ve shot it a couple of times a couple of years ago that you’ll be able to use it effectively during a stressful situation… like when a bear is charging at you from 25 yards away and closing fast!

Okay, so who else shouldn’t carry a handgun while hiking? I’ve talked to people who are so opposed to taking a life, any life, that they have told me that they couldn’t shoot anyone even if it was to save their own life.

If you’re one of those folks who deep down you don’t think you could actually shoot anything or anyone even if your life depended on it then no you don’t need to carry a handgun when hiking, backpacking or at any other time.

Carry a can of pepper spray instead, or better yet a large can of bear spray – you can read my article on pepper spray here.

To me that type of thought process is incomprehensible, but those people have made a conscious decision to never take a life no matter the circumstances and I’ve found that trying to convince them otherwise is nearly impossible.

Realistic Threat Assessment

agressive dogs while hiking and packpacking
In my experience domestic aggressive dogs have been the most common threat when hiking through and near rural areas or when meeting other hikers with dogs.

Before deciding how to carry when hiking and backpacking you’ll need to do a threat assessment. What are the most likely dangers that you’re likely to face while on the trail or at camp? While it’s easy for many people to let their imagination run wild and foresee themselves being caught up in a scene from the moving Wrong Turn or Deliverance, in reality, you’re much more likely to have to deal with a wild animal or aggressive dog(s) when hiking trails run near farms and rural homes than anything else.

When it comes to dealing with aggressive dogs near rural homes and farms extra caution should be taken because pulling a gun and shooting someone’s dog can quickly spiral downward and into a deadly encounter with the dog’s owner.

Most dog owners aren’t going to be giving you a pat on the back and an apology for their dog’s aggressive behavior after you shoot it. No, most will be pissed off, to say the least, because after all, you are a stranger and the way they see it their dog was only trying to protect their home or farm when you shot it.

A situation like this could quickly turn into a deadly encounter with the dog’s owner and that’s something that you don’t want. A much better option when dealing with aggressive dogs when hiking near rural homes and farms is to use bear or pepper spray which is why I always carry both a handgun and bear spray while hiking.

So remember that even though a human threat is possible a threat from a wild animal or domestic dogs is far more likely, so plan accordingly.

Open or Concealed Carry When Backpacking?

Should you open or concealed carry when backpacking? The answer to that question will depend on several factors with the first factor being where you are backpacking and the open and concealed carry laws in that state. Another factor would be… do you have a handgun carry permit/license and does it allow for both open and concealed carry in your state?

In some states, such as Kentucky, for example, open carry is permitted by state law without a permit as long as you’re legally allowed to own a firearm, but you’ll need a license to carry concealed in the state. Another question you’ll need to find the answer to if you’re carrying outside of the state where your carry permit is issued is does that state have a Concealed Carry Reciprocity agreement with your issuing state?

And the last question you’ll need to consider is which do you prefer? Do you prefer open or concealed carry? I personally prefer open carry whether it a day hike, section hike, or through hike that crosses several states like the Appalachian Trail.

Best Concealed Carry Gun for hiking?

What handgun and in what caliber you carry will depend on your location and what threats you perceive. The most common handgun calibers recommended for “bear country” are 10mm and .44 magnum and I can’t argue with those recommendations.

My advice is to carry as large of caliber and as heavy a bullet as you’re comfortable and proficient with. I’m in “black bear country” and carry a Glock 19 X loaded with Cor Bon +P 125gr Self-Defense JHP ammo. This handgun and bullet have almost identical ballistics compared to the .357 magnum with the same bullet weight, but with the advantage of having 17-rounds in the magazine.

Some people will probably disagree with my handgun and caliber choice and that’s okay, however, if I were hiking in grizzly bear country I’d definitely up my handgun choice to a 10MM or larger because when it comes to large and aggressive wild animals bigger is usually better. But then my first line of defense against a black bear that gets to close or other animals like aggressive dogs is bear spray.

I carry the handgun mainly for those aggressive two-legged predators… aka humans who are intent on robbing and or killing me should we cross paths or if they come into my camp at night with the intent of doing me harm.

9mm vs Bear – while not ideal it can work… when in doubt empty the magazine (accurately).


The Best Way to Carry a Gun While Backpacking

There are several viable options for concealed as well as open carry of a handgun while backpacking and day hiking with my favorite for open carry while lugging a backpack being the Kenai Chest Holster (check current price and availability at Amazon.com).

For concealed carry, while backpacking I suggest this Active Pro Gear Jogger Concealment Holster. There are others that are similar to the Active Pro holster but the Active pro is one of the lowest cost options that are still well made and functional.

The Alien Gear holsters ShapeShift Backpack Holster is another option and I’ve read some great reviews recommending it, however, I don’t own one myself so I can’t give you a firsthand recommendation on it (you can check availability and the current price on Amzon.com).

Related Question

Can I carry a rifle or shotgun when hiking or backpacking? It depends on your location and the laws there. It’s best to do independent research for your area to find out what laws there are regarding carrying a rifle where you’ll be hiking. Start with online research and then contact the park service and fish and game enforcement for each state where you plan to hike. Remember that some hiking trails (such as the Appalachian Trail) pass through several states.

Personally, I would not want to lug around a rifle and ammo while covering miles of trails and then there is the question of what do you do with a rifle when you have to go into or through a town while on a long-distance through hike. A handgun is much easier to deal with.

Filed Under: Bushcraft

Escape and Evasion Survival Kit [aka Wilderness Survival Cache]

July 15, 2019 M.D. Creekmore

Escape & Evasion Cache

Please note: I wrote this post way back in 2010 and wanted to share it here with you by re-posting. I hope that my writing ability has improved at least some since then. 

I’m sure everyone reading this is familiar with the bug out bag – essentially the escape and evasion kit is based on the same concept, but with several advantages.

Don’t get me wrong, having abug out bagis a good idea, however a back-up plan, for your backup plan is even better – let me explain.

Depending on the situation, getting to your bug out bag may not be an option and let’s not forget the possibility of loss to fire, theft or another unforeseen event.

If the bug out bag is plan B, the escape and evasion kit should be considered plan C.

I know what you’re thinking – what is an “escape and evasion kit” and how do I get one? For the purposes of our discussion, an escape and evasion kit is basically a cache of supplies, hidden in a secure place. 

Unfortunately, I don’t know of any ready-made kits or at least none on par with what we need, so you’ll have to assemble yours yourself. 

Obviously, the first thing you’ll need is a container for securing your kit. I make mine from four-foot sections of 6-inch Schedule-40 PVC pipe with a permanent end cap on one end and Cleanout adapter and Threaded Plug on the other, both held in place with PVC cement.

Contents will depend on location and need – every situation will be different with kits being modified toward specific individual needs. Here are several areas to consider…

  • Shelter – Space Blanket, Plastic Trash Bags, Thermals.
  • Fire – Matches, Flint and steel, Magnifying Glass. Cotton wool.
  • Water – Sterilizing tablets, Filter, Collapsible Canteen and Cover.
  • Food – Fish-hooks and Line, Snare Wire, Slingshot Rubber, Food.
  • Cooking – Sheet of Aluminum Foil, Small Cooking Pot, and Utensils.
  • Medical – First-aid kit and Related Gear.
  • Tools – Mora Knife, Swiss Army Knife, Multi-Tool, Ka-Bar Kukri Machete.
  • Navigation – Compass, Topo Map of Area.
  • 0514173144/Light – LED Flashlight, Headlamp, and Batteries.
  • Rope and Cordage – Fishing Line, Spool of Dental Floss, Para-Cord.
  • Repairs – Sewing kit, Duct Tape, Crazy Glue.

It’s a good idea to pack items with a potential for leakage at the bottom of the tube,  and items of an immediate need (first-aid, etc) near the top.

Remember this is an escape and evasion kit, a last-ditch effort at survival, you could be wounded, pursued or both. Keep those items near the top and within reach.

Since you won’t be checking or replacing contents often, food items should be of low moister and suitable for long-term storage. You may find it a good idea to have a separate cache of food items aside from your main escape and evasion kit. I have one stuffed full of Mountain House Pouch foods and another with beans and grains.

After you get your tubes assembled and filled, it’s time to start thinking about security, or more specifically where and how to hide your kit. You don’t want to go through all this trouble and expense, just to have some two-bit thief or jackboot thug come along and steal what you’ve worked to put away.

Bug Out Bag Checklist (Ultralight Survival Pack)

The escape and evasion kit should be hidden away from your home or retreat and not buried in your backyard. Remember this is an effort of last resort. The escape and evasion kit acts as an insurance policy should you lose or be denied access to your home storage.  Having it buried in your backyard would be self-defeating.

These tubes (if constructed properly) are waterproof and could be submerged underwater without risk of damage to the contents. But erring on the side of caution, I look for a well-drained area not easily accessible to heavy machinery such as logging equipment.

When moving to the cache site, it’s a good idea to have someone scout the area ahead, hopefully averting the possibility of you being seen. The last thing you want is to run face-to-face with a group of hunters, hikers or police.

The scout can move ahead alerting you, by two-way radio if anything is out of the ordinary or if someone is heading your way, allowing you time to react and avoid detection.

When digging, it’s best to go slowly – stop often and scan the area for potential threats. Again, the scout can offer security by watching the most likely avenues of approach and giving advanced warning. 

Use a manual post hole digger to excavate a hole straight down and as deep as possible. Insert the tube in a vertical position into the hole and bacK-fill with dirt.

Carry an old tarp to pile the dirt on as you dig. Dispose of this in a discreet way out of sight and away from the cache area – when you finish, the area should look the same as it did when you started.

Foiling Metal Detectors:

  • Bury in a junkyard or a dump.
  • Seed the area with ferric chloride
  • Litter the area with metal shavings and debris
  • Old abandoned farms usually have pre-existing metal debris
  • Abandoned surface-mines are naturally seeded with discarded metal
  • Deserted log landing and yards can be good areas

It’s best to hide in an area with “naturally” occurring and pre-existing metal debris in fact seeding an area with metal can have the negative effect of drawing attention to it. 

Look for locations where such metal deposits would be considered normal and if needed add to this. Remember the best security is keeping your mouth shut.

A bug out bag is great for getting out of dodge in a hurry – a bug out bag combined with an escape and evasion kit and you just might make it. What do you think…?

Filed Under: Bushcraft

How to Build an Emergency Shelter in The Woods

July 14, 2019 M.D. Creekmore

How to Build an Emergency Shelter in The Woodsby Alex P 

Veteran survivalists innately understand the Rule of Threes. The Rule of Threes is as follows: humans will die after 3 minutes with no air, 3 days without water, or 3 weeks of going without food. At least, those are the most commonly known rules. One that is equally essential and that gets glossed over is the fact that people can die in three hours without shelter that thoroughly protects them of fatalities in harsh conditions.

You may not think the weather in your area is harsh enough to kill you but you might be surprised. During a 1964 race in England, three competitors were cut down by the cold even though it never dropped to freezing temperatures.

Even without the threat of imminent death, you can still face abundant health risks if you spend an extended period of time exposed to the elements. You name it, Heat, UV rays, cold, rain, snow, all these and more can quickly shorten your lifespan if you are continually exposed to them without a proper shelter to safeguard yourself.

In this world full of uncertainty, there’s always value in being prepared. Knowing what to do in a survival situation could literally determine life or death. If you know how to create survival shelters in the wild you could survive a situation you would have died in otherwise. That’s why we are sharing our top 6 ideas for creating survival shelters in the wild.

Build a Lean-To

Lean-to is probably the most well-known option for creating a survival shelter. You need to find two trees that are close together and a thick stick that can be wedged between the trees. If you can’t find trees and sticks of the right size, you can hammer two sticks into the ground and secure a third between them.

If possible you should then tie the main pole to the supports to prevent a collapse. From there you simply lean a large number of sticks against the pole to create something that looks like half of a roof. Sticks are essential but they aren’t enough, you’ll need to fill in the open spaces between the sticks with moss, leaves, twigs, and other flora to act as a sort of insulation.

Overall, since the lean-to is open on one side the heat that can be kept in is minimal, the lean-to is mainly for achieving a basic level of protection.

Quinzhee 

Getting trapped on a mountain with nothing but snow in sight is in many ways a worst-case scenario, but that doesn’t mean it’s hopeless. Survival structures can be constructed using snow. You’ve probably heard of igloos, and the idea here is similar. It’s just that in our idea you don’t need to have the expertise used by Northern natives to create homes from packed snow. You can create what is known as a Quinzhee must faster.

You begin by piling up your supplies over an area that is larger than your body. You then pile snow up around your supplies and pack it down until it’s about 30 inches thick all the way around. Try to keep the snow-packed smoothly and evenly to prevent collapse.

You then dig your way through the side and to your supplies, remove said supplies carefully, and take shelter in the cave you’ve created. Just make sure to poke a small hole in the top for air to come in or else you might be trading exposure for suffocation.

Basic Teepee

For this famous shelter, you need to start by either finding a thin but sturdy tree or a long pole that you can secure down in the ground. From there you will want to find as many long, straight branches as you can and circle the pole with them, leaning them up against it until you have a completely closed cone of empty space in the middle.

You should then somehow secure the pieces of wood together, tying them at the top with rope or fashioning a sort of cord from materials you find in the woods. Finally, you need to add the insulation, packing on anything you can to contain the heat without leading a collapse.

Debris Hut

The debris hut requires two sticks that stretch a bit beyond the length of your shoulders and one long stick that is larger than your height. You begin by sticking the two short sticks into the ground and leaning against each other so that they form a triangle. You then place one end of the long stick on top of the triangle sticks and the other on the ground around 6 feet away.

You then find as many sticks as you can and lean them up against the one long stick to form a sort of wooden pyramid that leaves just enough room for your body in the space left open. Small debris huts may feel claustrophobic, but that can actually be a good thing.

A small shelter may feel cramped at first but it actually seals in your body heat more effectively. And on the topic of body heat, don’t forget to insulate it, the debris in debris hut refers to the sticks used for the skeleton of the structure and the leaves and grass used for insulation.

Tarp Tent

One of the most helpful things you can have in a survival situation is a tarp. It makes shelter construction so much more simple, all you need to do is find a way to prop it over yourself and secure it down so that it will cover you safely through the night.

The second most helpful thing to carry is probably some sort of rope. If you can tie a rope between two trees and toss your tarp over the rope, you’ll have a tent ready. If you don’t have a rope, then you can wedge a sturdy stick between two trees to create the necessary support.

You can actually make just about any of the structures we’ve listed using a tarp, you simply have to put the tarp on top of the basic support instead of leaves, grass, and other natural types of insulation. Just make sure to secure the tarp with heavy rocks or logs to keep it from being blown away by winds.

Find Natural Shelter 

The final of our top 6 ideas to creating bug out survival shelters in the wild offers something to think about in all the previous five scenarios. When creating survival shelters you don’t have to do everything yourself, and in most cases the less you can get away with doing the better off you will be.

Time and energy are everything when it comes to survival, you don’t want to waste time getting fancy with your construction ideas in a survival situation. That’s why it helps to start out with an existing foundation you can build on. If you can find a cave, cliff wall, large leaning tree, or some other sort of natural wall or enclosure then half of the job will be done for you.

The average entirely self-built structure might last a night but if you could be stranded for a longer period of time then finding something solid and natural to build around will save you time and effort in the long run.

Though at that point, you also need to consider things like access to fresh water and sources of nutrition when choosing where to set up your survival base camp. For your convenience, we put together a List of Emergency Essentials for you to check off. Survival is about planning ahead so life doesn’t catch you off guard

Filed Under: Bushcraft

DIY Homemade Mosquito Trap [That Actually Works!]

June 27, 2019 M.D. Creekmore

Homemade Mosquito Trap - girl spraying on mosquito repellent

By Matt D

You can keep mosquitoes away from your home for good with a few homemade mosquito traps and other simple and easy DIY steps that you can do at home cheaply and quickly…

(Note: If you want to skip all of the details about mosquitoes and how they can spread sickness and disease and get right to the details of how to make a homemade mosquito trap then simply scroll half-way down the page to get all of the nut and bolts details about how to make a DIY homemade mosquito trap…  

Okay, then let’s get started…

Anyone who loves the outdoors knows mosquitoes can be a nuisance. Their relentless search for blood and whining buzz can drive even the toughest outdoor enthusiasts indoors with ease. Along with the allergic reaction that causes itchy red bumps, mosquito bites pose numerous health risks to humans all around the globe.

From the West Nile and Zika viruses to malaria and yellow fever, illnesses spread by mosquitoes can be serious and even potentially deadly (such as microcephaly and encephalitis).

How do mosquitoes spread disease?

mosquito bug
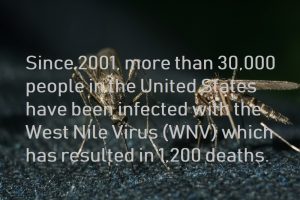
Mosquitoes are primary vectors for numerous human diseases, which together infect and kill millions of humans each year. The female mosquito sucks blood because it provides nutrients for its eggs. Besides drawing blood when they bite, female mosquitoes also inject an enzyme to prevent blood from clotting.

Therefore, there’s an exchange of fluids between your bloodstream and the mosquito. Mosquitoes are vectors which carry infections between animals and humans.

When the mosquito feeds off an animal or person with a disease, it passes on the infection when it bites another person or animal. The itchy red bumps are an allergic reaction to this enzyme. Mosquitoes find their targets using chemical signals, observing our movements, and by detecting the infrared radiation emitted by warm blood.

Learning how mosquitoes spread disease and how to control them is an important step toward protecting yourself and your loved ones from mosquito bites and the diseases they spread.

The dangers of mosquitoes

According to the WHO (World Health Organization), mosquitoes infect more than 300 million people per year with Dengue and malaria, just two of the most dangerous illnesses mosquitoes can carry. Of those 300 million people, 800,000 die from malaria, and another 20,000 people from Dengue.

West Nile virus deaths illustration

Since 2001, more than 30,000 people in the United States have been infected with the West Nile Virus (WNV) which has resulted in 1,200 deaths. In 2002, the cost of West Nile Virus-related health care alone in the United States was estimated at $200 million.

Besides carrying infections that can be transmitted to humans, mosquitoes can also transmit several parasites and diseases that dogs and humans are very susceptible to (such as West Nile Virus, eastern equine encephalitis, and dog heartworm). Mosquitoes have a 4-stage life cycle (egg-larva-pupa-adult) and they lay their eggs in different breeding areas such as:

  • Ponds
  • Lakes
  • Tree holes
  • Toys
  • Old tires
  • Tarpaulins or plastic covers
  • Buckets
  • Potted plant saucers and trays

These sites are also potential breeding areas for some of the most dangerous species such as the Asian tiger mosquito.

What types of illnesses do mosquitoes spread?

? Chikungunya

Most commonly found in North and South America, Africa, the Indian subcontinent, Asia and Europe, the chikungunya virus is now spreading in the United States. Chikungunya is transmitted by a mosquito species known as the Aedes aegypti mosquito.

It causes fever, severe muscle and joint pain, nausea, tiredness, headache, and a rash that may last several weeks. Patients usually need fluids and rest until symptoms go away. Doctors may also suggest pain relief medication.

? Zika

Zika Virus is transmitted by the Aedes albopictus (Asian tiger mosquito) and Aedes aegypti mosquito. These mosquito species breed entirely around the home. Zika is found in the Pacific region, Mexico, South East Asia, Africa, and North and South America. Symptoms include joint and muscle pain, mild fever, irritated eyes (pinkeye), a skin rash and headache.

The symptoms are usually mild and run their course in less than 7 days. However, if a pregnant woman is infected, Zika can also impact the unborn child. Zika has also been linked to more serious health problems such as a birth defect known as microcephaly and a nervous system disorder called Guillain-Barre syndrome.

Microcephaly: This is a birth defect that causes the baby’s head to be abnormally small and not fully developed. Babies with Microcephaly may have intellectual and developmental delays.

Guillain-Barre: This nervous system disorder usually causes general weakness and mild paralysis. However, most victims recover over time. There’s no vaccine to prevent Zika virus.

? West Nile Virus (WNV)

West Nile Virus is found in Asia, Africa, Europe, North and South America, and the Middle East. WNV is transmitted by the Southern House Mosquito (Culex quinquefasciatus) and the severe version of the virus (neuroinvasive WNV) can be fatal.

Homemade Mosquito Trap

Although some people who get WNV do not have any symptoms, 1 in 5 will have flu-like symptoms such as mild fever, headache, a stiff neck, and weakness of the muscle. Some of the severe symptoms of WNV include confusion, convulsions, and coma.

However, the fatality rate of WNV is less than 1%. The virus usually starts out as a bird disease which is then spread from bird to bird by mosquitoes. WNV spreads to humans when a mosquito feeds on an infected bird and then bites a human.

However, man is the dead-end host (the virus cannot be spread from human to human). Neuroinvasive WNV can also cause more serious infections that cause meningitis or brain swelling.

? Malaria

Malaria is the oldest illness that is caused by mosquito bites. The disease is transmitted by the female Anopheles mosquito. Areasa that have the most cases of malaria include the Pacific islands (such as Papua New Guinea) and Sub-Saharan Africa. Malaria causes over 400,000 deaths worldwide per year. Its symptoms include headache, fever, and vomiting.

? Yellow fever

Yellow fever is found in Latin America and Africa and it is transmitted by a mosquito species known as the Aedes aegypti mosquito. Although some people who get the disease won’t notice anything, some may notice symptoms such as muscle and back pain, headache, fever, vomiting, and lack of appetite.

Yellow fever can be fatal and some people may feel tired and weak for several months. Some people who notice mild symptoms at first may develop serious symptoms such once they start feeling better, including bleeding, jaundice and high fever. Yellow fever can cause kidney and liver failure, and it can be fatal.

? Encephalitis

Mosquitoes can transmit viruses that can cause inflammation around the brain and spinal cord. The type of encephalitis you get usually depends on your location:

  • LaCrosse encephalitis: States on the eastern side of the Mississippi River
  • Eastern Equine encephalitis: the Caribbean, South America, and the Gulf Coast, Atlantic, and Great Lakes States.
  • Saint Louis encephalitis: Throughout the United States, especially the Gulf of Mexico and Florida states.
  • Japanese encephalitis: Western Pacific and Asia.

Some of the mild symptoms of encephalitis include sore throat and mild fever. However, you should seek immediate medical attention if you experience symptoms such as seizures, muscle weakness, and confusion, to help prevent brain damage and other serious complications. Encephalitis can be fatal.

? Dengue Fever

Found in Asia, Africa, Europe and North, and South America, Dengue Virus is transmitted by a mosquito species known as the Aedes aegypti mosquito. Symptoms of Dengue fever include joint and muscle pain, nausea, headache, and a fever. Some people may get a high fever and bleed a little from the gums or nose.

Dengue can be very uncomfortable and the only things you can do is treating the symptoms and resting.

Some victims may develop a more severe form of dengue fever, called dengue hemorrhagic fever, which causes the small blood vessels to become leaky. If fluid starts building up in the lungs and belly, the patient should seek medical care immediately. In the last 15 years, there have been dengue fever outbreaks in the Florida Keys, South Texas, and
Hawaii.

? Dog Heart Worm

This is a parasitic roundworm that affects various animals including dogs. The heartworm takes residence in the heart as it grows. This worm is a major concern in dogs.

What can you do to keep mosquitoes away from your home?

Eliminate stagnant water ?

Many female mosquitoes lay their eggs in stagnant water. Make sure there is no stagnant water anywhere around your house including in open cans, buckets, old tires, toys, plates under flower pots and even in bottle caps.

Improperly drained yards, kiddie pools, and ponds can also be breeding spots for mosquitoes.

Since most mosquito breeds can’t fly too far, eliminating breeding grounds can help reduce the number of mosquitoes that plague your home. It is also important to change the water in your bird bath regularly and ensure your yard has proper drainage.

Check hidden spots ?

Inspect areas such as gutters, which can easily collect water and become mosquito breeding spots. It’s also important to replace any window screens that are broken, ripped, or nor fitting well, especially if you live in a hot, humid area.

Clean up debris ?

Some mosquito species lay their eggs in damp soil and debris such as leaf piles and decaying logs. Be sure to get eliminate debris and leaves around your home and from gutters, too. You may also consider mowing your lawn regularly and trimming your trees to increase light levels, reduce shade in your yard and make the landscape less habitable to mosquitoes.

Make mosquito-repelling plants part of your landscape ?

The essential oils and fragrances in some plants such as marigolds and lavender naturally repel mosquitoes. Therefore, if you really enjoy spending time on your patio or deck, plant some of these plants around the perimeter of your yard or simply pot them up and place them around your home to ward off mosquitoes and improve the aesthetic appeal of your yard.

Other plants that can help keep mosquitoes at bay include lemongrass, catnip, peppermint, sage, basil, citronella, bee balm rosemary, and ageratum.

Use backyard mosquito and bug control ?

Treating your yard can also help reduce mosquito infestations. You should spray during the day because this is when mosquitoes tend to hide in humid areas such as thick brush, tree hollows, grass, and shrubs.

Light lanterns or candles that contain oil repellents ?

You can keep mosquitoes away from your porch or patio by lighting lanterns or candles that contain essential oils that repel mosquitoes. These essential oils include lavender, eucalyptus, geraniol, clove, cedarwood, and lemongrass. However, it’s essential to keep in mind that mosquito-repelling candles and lanterns work best in small areas with very little air movement.

How to make a homemade mosquito trap

You can also set mosquito traps to keep these annoying pests away from your patio or porch. However, most types of mosquito traps need to be changed on a regular basis.

If you’re having a barbeque or outdoor party, mosquito traps can be a very effective way of protecting guests from mosquito bites, especially when the traps are used along with other mosquito control methods such as repellents.

Here are some simple DIY mosquito trapping ideas that really work:

Photo Instructions of How to Make a Homemade Mosquito Trap 

Homemade Mosquito Trap bottle and bait

Items needed:

✅ 1 cup of water

              ✅ 1/4 cup of brown sugar

✅ 1 gram of yeast

✅ 1 2-liter bottle 

HOW:

1. Cut the plastic bottle in half.
2. Mix brown sugar with hot water. Let cool. When cold, pour in the bottom half of the bottle.
3. Add the yeast. No need to mix. It creates carbon dioxide, which attracts mosquitoes.
4. Place the funnel part, upside down, into the other half of the bottle, taping them together if desired.
5. Wrap the bottle with something black, leaving the top uncovered, and place it outside in an area away from your normal gathering area. (Mosquitoes are also drawn to the color black.)

Change the solution every 2 weeks for continuous control.

If you don’t like making things or can’t get this thing to work correctly for some strange reason, then you can always try one of these that are guaranteed to work.

Video Explanation of a DIY Homemade Mosquito Trap

i.Use limes and cloves ?

Slice limes in half and adorn them with cloves. Surround your outdoor area with the fruits to create a mosquito-free zone.

ii.Trick mosquitoes into drowning ?

Fill a bucket with water and add detergent into it. Mosquitoes will be attracted to the stagnant water you’ve provided because they need it to lay their eggs in. However, the water will have no surface tension due to the detergent you’ve added and the mosquitoes will drown.

You can increase the efficiency of this trap by aiming a light source to the water because mosquitoes are also attracted to light.

How can you stop mosquitoes from biting? ?

Whether you’re swimming, riding your bike, hiking, or enjoying other outdoor activities, mosquitoes will always find a way to ruin the fun. You can make yourself less desirable to mosquitoes by trying some of these ideas:

·Skip the perfume ?

Many lotions, perfume, deodorant, and even hairspray, attract mosquitoes to us. If mosquitoes seem to be particularly attracted to you, try wearing scents that have a strong eucalyptus, lavender, basil or even rosemary scents.

·Wear long sleeve shirts and pants ?

If you’re planning an outdoor adventure, wear clothes that will help keep away mosquitoes. Loose fabrics and light colors work best. A light-colored hat can also help keep mosquitoes away from your head and face.

·Apply repellent ?

Sprays or lotions containing IR3535, DEET, lemon oil, eucalyptus oil, or Picaridin are particularly effective when it comes to keeping mosquitoes away. Mosquito repellents usually wear off after a few hours and you may have to apply again when necessary. Lotions and sprays containing DEET are safe even for children when used as directed.

·Spray yourself with vanilla ?

Add three teaspoons of vanilla to a cup of water and put the solution in a spritz bottle. Simply spray yourself when you’re outside biking, hiking or enjoying other outdoor activities. Vanilla will mask your body odor and help keep mosquitoes away.

·Cover your feet ?

Mosquitoes love bacteria and sweat, making your feet one of the prime blood sucking spots. In fact, the mosquito species known as Aedes aegypti, which is responsible for spreading the Zika virus, tend to bite the lower parts of the body. You can consider wearing high socks or high-top sneakers.

Human and mosquito movement is to blame for transferring uncommon mosquito-borne diseases to new areas. Climate change also contributes by pushing mosquitoes into more suitable areas.

However, these simple ideas can help you keep mosquitoes away from your home and prevent them from biting.

Filed Under: Bushcraft

How to Tie a Knot That Won’t Come Undone

June 7, 2019 M.D. Creekmore

how to tie a knot

Do you know how to tie a secure knot? Well, every man should know how to tie a knot and you’re a man, right? Okay, then let’s get to it. Below are ten knots that every man should know how to tie. I suggest that you get some rope and tie each of the ten below twenty or more times each. Tie and repeat until you’re 100% sure that you know how to do it right the first time… even if you’re under stress.

These knots are great for everyday use at home and at work (depending on your job) and are also great to know for camping and survival purposes. You’ll be able to construct shelters, traps and snares, weapons and tools, and other devices, you should have a basic knowledge of ropes and knots and some of the terminology used with them.

The terms are as follows:

Bight. A simple bend of rope in which the rope does not cross itself.

Dressing the knot. The orientation of all knot parts so that they are properly aligned, straightened, or bundled. Neglecting this can result in an additional 50 percent reduction in knot strength. This term is sometimes used for setting the knot, which involves tightening all parts of the knot so they bind on one another and make the knot operational. A loosely tied knot can easily deform under strain and change, becoming a slipknot or, worse, untying.

Fraps. A means of tightening the lashings by looping the rope perpendicularly around the wraps that hold the spars or sticks together. Lashings. A means of using wraps and fraps to tie two or three spars or sticks together to form solid corners or to construct tripods.

Lashings begin and end with clove hitches. Lay. The lay of the rope is the same as the twist of the rope. Loop. A loop is formed by crossing the running end over or under the standing end to form a ring or circle in the rope.

Pigtail. That part of the running end that is left after tying the knot. It should be no more than 4 inches long to conserve rope and prevent interference. Running end. The free or working end of a rope. This is the part of the rope you are actually using to tie the knot.

Standing end. The static part of the rope, or the rest of the rope besides the running end. Turn. A loop around an object, such as a post, rail, or ring, with the running end continuing in the opposite direction to the standing end. A round turn continues to circle and exits in the same general direction as the standing end.

Whipping. Any method of preventing the end of a rope from untwisting or becoming unwound. It is done by wrapping the end tightly with a small cord, tape, or other means. It should be done on both sides of an anticipated cut in a rope before cutting the rope in two. This prevents the rope from immediately untwisting.

Wraps. Simple wraps of rope around two poles or sticks (square lashing) or three poles or sticks (tripod lashing). Wraps begin and end with clove hitches and get tighter with fraps. All together, they form a lashing.

how to tie a knot

The 10 basic knots and methods of tying them that you should know for survival purposes are as follows:

1. Half-hitch.

This is the simplest of all knots, and it used to be the safety, or finishing, knot for all U.S. Army knots. Because it had a tendency to undo itself without load, it has since been replaced by the overhand. 2. Overhand. This is the simple knot that most people tie every day as the first step in tying their shoes. It can also be used to temporarily whip the end of a rope.

This knot should replace the half-hitch as a finishing knot for other knots. This knot alone will reduce the strength of a straight rope by 55 percent.

how to tie an Overhand knot

2. Square.

A good, simple knot for general-purpose use, the square knot is basically two overhand knots that are reversed, as in right over left, left over right. It is used to tie the ends of two ropes of equal diameter together (just like your shoelaces) and must be secured with an overhand on both ends. It is easy to inspect, as it forms two loops and is easy to untie after being loaded.

how to tie a Square knot

3. Round turn and two half-hitches.

This is the main anchor knot for one-rope bridges and other applications where a good anchor knot is required and high loads would make other knots jam and be difficult to untie. It is used most frequently to anchor rope to a pole or tree.

Round turn and two half-hitches knot

4. Clove hitch and end-of-the-line clove hitch.

These knots can be used to fasten a rope to a tree or pipe, and they put little strain on the rope. They are easy to anchor knots, but tension must remain on the knot or they will slip. This can be remedied by making another loop around the object and under the center of the clove hitch.

how to tie a clove hitch

5. Sheepshank.

A method of shortening a rope, a sheepshank may also be used to take the load off a weak spot in the rope. It is a temporary knot unless the eyes are fastened to the standing part of the rope on both ends.

how to tie a Sheep shank knot

6. Double sheet bend.

This knot is used to tie together the ends of two ropes of equal or unequal diameter. It will also join wet rope and not slip or draw tight under load. It can be used to tie the ends of several ropes to the end of one rope. When a single rope is tied to multiple ropes, the bight is formed with the multiple of ropes.

 Double sheet bend knot

7. Prusik.

This knot ties a short rope around a longer rope (for example, a sling rope around a climbing rope) in such a manner that the short rope will slide on the climbing rope if no tension is applied and will hold if tension is applied on the short rope. This knot can be tied with an end of rope or bight of rope.

When tied with an end of the rope, the knot is finished off with a bowline. The non-slip nature of the knot on another rope allows the climbing of ropes with footholds. It can also be used to anchor ropes or the end of a traction splint on a branch or ski pole.

Prusik knot

how to tie a knot

8. Bowline and bowline finished with an overhand knot.

The around-the-body bowline was the basic knot used for rescue for many years, as it provided a loop to place around a body that would not slip or tighten up under strain. It has been replaced by the figure eight in most applications because the latter does not weaken the rope as much.

Bowline and bowline finished with an overhand knot.

Figure eight and retractable figure eight.

9. Figure-eight and retractable figure eight.

This knot is the main rescue knot in use today. It has the advantages of being stronger than the bowline and easier to tie and check. One disadvantage is that when wet it may be more difficult to untie than the bowline after being stressed. The figure-eight (or figure of eight) can be used as an anchor knot on fixed ropes. It can also be used to prevent the end of a rope from slipping through a fastening or loop in another rope when a knot larger than an overhand is needed.

Filed Under: Bushcraft

  • Page 1
  • Page 2
  • Page 3
  • Interim pages omitted …
  • Page 5
  • Go to Next Page »

Primary Sidebar

Subscribe to Blog via Email

Enter your email address to subscribe to this blog and receive notifications of new posts by email.

Join 7,197 other subscribers
  • Amazon
  • Facebook
  • Substack
  • Twitter
  • YouTube

“Do more with less.”

– Minimalist proverb

Recent Posts

  • Just so you know
  • Weather Update for My Corner of Appalachia
  • Why I’m Ordering Ivermectin + Mebendazole Every Year
  • The Website’s Shutting Down (But Here’s the Plan)
  • You Are Hated! Start Training Like It!

Footer

Recent Posts

  • Just so you know
  • Weather Update for My Corner of Appalachia
  • Why I’m Ordering Ivermectin + Mebendazole Every Year
  • The Website’s Shutting Down (But Here’s the Plan)
  • You Are Hated! Start Training Like It!

More about me

Books I’ve written

Books I’ve read

Follow Me on YouTube

Follow Me on Facebook

Gear I Use and Recommend

Newsletter

Search this site

Follow me elsewhere

  • Amazon
  • Facebook
  • Substack
  • Twitter
  • YouTube

© 2008–2025 M.D. Creekmore · As an Amazon Associate, I earn from qualifying purchases.