• Skip to main content
  • Skip to secondary navigation
  • Skip to primary sidebar
  • Skip to footer

M.D. CREEKMORE

  • Blog
  • Books
  • Newsletter
  • Gear I Use
  • About
  • Contact
  • Facebook
  • YouTube
  • Blog
  • Books
  • Newsletter
  • Gear I Use
  • About
  • Contact
  • Privacy Policy

Blog

10 Tips to Secure Your Apartment for Under $30

June 16, 2019 M.D. Creekmore

Tips to Secure Your Apartment

by Charlie

If you’re looking for simple and effective tips to secure your apartment without breaking your bank account then you’ve come to the right place……

Buying a ready-to-occupy or customized apartment is just one part of the story. There also is the need to ensure that the apartment remains in the best of the condition and also is safe and secure. It is common for most homeowners and tenants to hire professionals to take care of apartment security.

While there is no doubt that this could be a good decision, there are also many other options that could help you to secure your apartment without having to burn a big hole in the pocket.

How Do The Minds Of Burglars Work? ?

No burglar would like to get noticed as he or she attempts to rob or burgle a home. Hence, if they find that the home has surveillance cameras and other such monitoring systems, they would like to stay away from such homes.

Contrary to opinions and beliefs, robbers find day-time the most appropriate for burgling. This is because in most cases, the apartments and homes remain unoccupied and totally empty of human beings because of obvious reasons.

Robbers are intelligent in guessing whether an apartment is occupied or not. They look garbage bins, recycling containers and trashcans. A lawn that is unkempt and overgrown is a definite sign that the apartment in question could be unoccupied at a particular point in time.

Burglars always love to enter into a home without forced breakages as much as possible. They prefer improperly sealed or closed windows and doors as the easiest and safest means to break into a house and rob it.

Checking and testing the waters is a tactic that is often used by robbers and burglars. They knock at the front door or ring the bell and if there is a response from within, they come out with some vague and false stories. Professional robbers and burglars will not just break into the homes suddenly.

They certainly try and understand the overall plan of the home. They would rather break into the master bedroom instead of the kids’ bedroom. This is because they know for sure that some of the most valuable household belongings could be kept in the master bedrooms.

When we talk about intelligent security tips, we should bear in mind that robbers would not like to risk entering homes where there is the sound of a television or sound system running.

Now that we have some idea as to how the minds of the robbers work, we are happy to share some useful and pertinent information that could be quite efficient and useful. These ideas and tips will not cost a fortune and it could be completed just under $30. We firmly believe that they will be useful for all those apartment owners, who are running on a tight budget.

Further, it could be useful for those who are moving into an apartment on rent as a new entrant. Once a person decides to buy an apartment, in almost nine out of ten cases, he or she would have spent almost their entire savings and would also be in a big debt because of mortgage loans.

In such situations, spending a few thousand dollars more on answering for the question of how to secure an apartment could certainly be a tough ask.

They certainly would be on the lookout for cost-effective tips. We are sure that the following tips could be useful in more ways than one. They are all affordable but at the same time, we also believe that they are also efficient and perhaps even foolproof.

Get Inputs From The Local Police Station ?

Expenditure: Free – No Cost

There is no doubt that each and every neighborhood has a police station. It contains complete information about the law and order situation, in general, It has full details regarding the number of successful and attempted break-ins robberies and other such criminal activities.

They also will be able to give specific details about the specific localities that are at higher risk for such break-ins and robberies. This will help you to plan your apartment security accordingly and incorporate special features in areas that are more at risk.

Quality Window Locks

Expenditure: Under $10

According to cops and also experts who research burglaries and robberies, windows are considered to be the most vulnerable when it comes to home security. The job for robbers becomes easier if your window is located near a fire escape ladder.

Hence, you must try and find out ways and means by which it is possible to strengthen your windows. Simple and low-cost window locks can do the job adequately well. You have many options to choose from, including window wedge, sliding window locks and burgle bars.

You must do your research and then choose the right taking into account the exact needs and requirements depending on the type of windows that you have in your apartments. They are easy to install and by following simple DIY tips, anyone should be able to install the same.

Window And Door Alarms

Expenditure: A Pack Of 4 would cost around $20

This is another extremely cost-effective way of protecting your apartments from burglaries. It takes just five minutes to install these alarm systems. They work the same way as window and door alarms that are installed by security companies.

You don’t have to pay anything extra for monitoring the same. The siren or alarm is built right into the sensor. The sensors also have keypads. These keypads help in arming and disarming the system.

When you are home, you could disarm the system and open the windows and doors and enjoy some fresh air, especially during summer. They are extremely useful and robbers are paranoid about touching homes that have door alarms and windows.

Glass Break Alarms

Expenditure: around $12 or $25 for four.

Glass break alarms are considered extremely useful and effective in preventing robberies and burglaries. You could go in for window bars, or even choose a shatterproof film. These make it extremely hard for robbers to break the glass of your windows.

There are also vibration alarm systems that can be placed right to your glass window and is capable of detecting vibrations. If there is an attempt to break the window or open the window when the alarm is set, it will send a warning signal.

This will alert your neighbors and will also deter to robber to carry on further with the robberies. I like these ones that you can get at Amazon.com.

Door Barricades

Expenditure: Below $30

It takes just around a minute to install door barricades. The door is the most common place where intruders try their luck out. Just locking the doorknob may not be enough to completely secure your home.

Unless you have a deadbolt lock, it is quite easy for robbers to break through your door. These days even deadbolt locks can be easily broken open using sophisticated bump keys. This is where door barricades could come in handy. Check out current pricing here.

This is a device that helps to physically keep the door closed. They are much more effective than deadbolt locks. They could be perfectly suitable for rented apartments where the owners do not permit drilling holes in the floor.

Door Stop Alarms

Expenditure: About $7

If you are not keen on choosing the barricade route and are looking at some other efficient security tips then going in for door stop alarms could be the right choice. There are many apartment inhabitants who do not like to use the barricades even during the day.

This has a simple technology and it does work quite effectively and efficiently as far as securing your home is concerned. The alarm sits on the floor and a lever is pushed down when somebody tries to open the door.

Once the lever is pushed down, it sets off an alarm and sends an alert that somebody might have entered through your door. You can check out the ones that I use at Amazon.com.

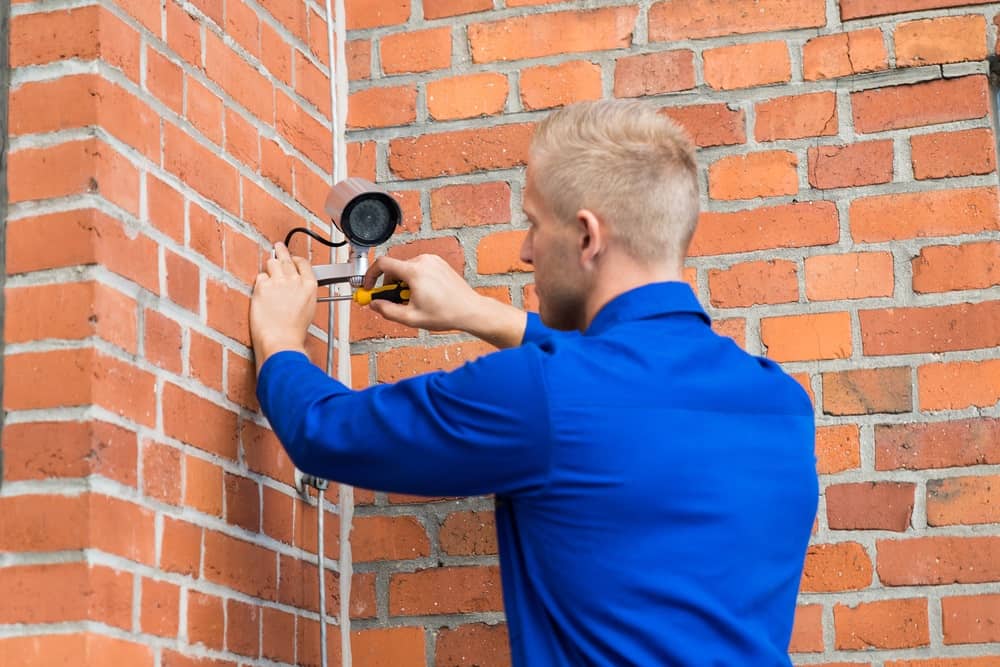
Dummy Security Cameras ?

Expenditure: Under $8

If you cannot spend big money on real security or surveillance cameras, it would be always better to look for something that is less expensive but also effective at the same time. You could install something that is not real but looks almost real.

This will make the intruders believe that they are entering a high-risk area. In nine out of ten cases, it has been found that intruders would prefer keeping away from homes. At the end of the day, burglars know that there is no point in robbing or burgling if the chances of getting caught are extremely high.

Just the thought that the home is a high-risk target is enough to keep the intruders away. We are talking about a dummy camera. They are low-cost but they look almost like real. In fact, at times even experts find it difficult to differentiate the dummy cameras from the real ones.

It comes with a blinking camera and it blinks, thereby giving it a near-natural look. The battery that powers the LED blinking lights lasts for many months. Yes, it is a fact that dummy cameras are not like real ones in terms of functionalities and features. It can have the desired impact on the intruders and robbers and act as a powerful deterrent.

You can, later, if you wish to go in for a real camera so that the real needs and requirements are taken care of. There are different models and makes of dummy cameras and if you do your research, you will be able to come across some of the best ones.

As mentioned above, they look as good as real cameras and it takes quite a bit of time and effort to make out that they are dummy ones. Robbers work under a lot of stress and time is against them always. Hence, it is almost impossible. These ones at Amazon are low-cost for a set of four.

Home Security Stickers

Expenditure: Just $8 for a whole pack.

Home security stickers, work almost like dummy security cameras. You can place stickers that talk about security systems on your doors and windows. In most cases, it will act as a deterrent and will shoo away possible intruders.

This is because they will be convinced the particular apartment may not be the right one to break into. You could install the security camera up there and back it up with a warning sticker stating that “the home is under camera surveillance”.Robbers will for sure be terrified and would rather try their luck elsewhere.

Hence, by spending a small amount, you could keep your home safe and in good condition. It would be better to buy these stickers along with a dummy camera. These are generally sold as a bundle along with dummy cameras.

Even if the intruders miss out on the cameras will most certainly not miss the colorful and eye-catchy stickers that have big words stating the fact that the home is under surveillance. You could also do away with the dummy cameras and instead go in for stickers making bold and fearful announcements.

You could use stickers that talk about the cameras and monitoring devices being placed out of sight and in indiscreet places

Solar Spotlights

Expenditure: $26

These are easy to install and cost-effective ways to protect your apartment from unwanted intruders and robbers. They offer around 45 feet of illumination range. They come in weatherproof casings. They certainly can work on the psyche of robbers and intruders.

This is because they would always like to carry on their work without being seen. These outdoor solar spotlights could give everything away as far as the robbers are concerned. However, it may not work on cloudy days and dark winter months because of the lack of sunlight that is needed to power the solar spotlights.

Also installing these could be against the rules at some apartment complexes. 

Etched Glass Window Film

Expenditure: Under $15

This could be helpful for keeping prying eyes away from the insides of the apartment. It could keep valuables like jewelry, clothing, electronics, and furniture out of view. It will reduce the temptation psyche of the robbers.

It is user-friendly and can be installed using simple DIY steps. These window films while ensuring privacy do not hinder the flow of light inside the rooms. They are available both in readymade sizes and also customized sizes.

They do not have a sticky adhesive that could damage the window glasses. You must research and buy only fully opaque ones failing which may not serve the purpose.

Conclusion

The above are some simple hacks and tips to secure your apartment that will go a long way in enhancing overall apartment security. The inhabitants of the apartments or the apartment owners can do it on their own without the need for professional help (and the cost).

Finally, these tips are extremely cost-effective and could prevent big and gaping holes in your pocket in the name of professionally thought out and implemented apartment security tips and solutions.

Filed Under: Security

The First 23 Things I Put In My Survival “Go Bag”

June 16, 2019 M.D. Creekmore

Some people might consider a bug-out bag and a 72-hour kit as essentially the same thing. For the purposes of this article, we will consider them as two separate kits. The 72-hour kit is more of a “stay at home and ride out the short-term disaster” kit, while the bug-out bag described below is more of a “grab and go” kit.

The very idea of leaving the security of your home to “bug out” to the woods has never set well with me.

In nearly every instance, it is better to hunker down or “bug in” than to bug out. Why leave the safety and familiar surroundings of your home for the open and unforgiving wilderness? For many people, fleeing is their first line of preparation against disaster.

Unfortunately, most will end up joining the multitude of other refugees freezing in a cave; dying from exposure, starvation, or violence at the hands of the mob; or becoming wards of whatever government entity is still functioning.

I live in a fairly safe area and have prepared to survive at home. I can conceive of only a few scenarios that would force me to leave. Even then, I would go to the house of an out-of-state relative with whom I have an agreement: if need be, he can come to my place or I can go to his after a disaster.

I know what you’re thinking: what about an “end of the world as we know it” type of event? Well, if such an event does take place, there will be no 100 percent safe place for most of us anyway, and do you really think you would be better off trying to hide in the open wilderness than hunkering down at home?

Don’t get me wrong—I’m not saying you should never bug out; you should keep all options open because you never know what you’re going to have to do to survive until the time comes to make that decision.

What I am saying is that there are better ways to survive most disasters than heading into the bush. You need to weigh the risks of bugging out vs. hunkering down and make your final decision based on logic and type of threat.

That’s the way decisions should be made. Unfortunately, when making survival decisions, many people rely on emotion (to run and hide) rather than more tried-and-true logic. Relying on emotion instead of logic can make for some interesting adventures.

However, without sound planning, those adventures are likely to be short-lived. For example, I recently asked a fellow in his late 30s what he would do if disaster struck his area. He thought for a moment and said he would gather his family and all the food, guns, and ammunition he could find and head for the mountains that lie some 75 miles north of his home.

Depending on the type of disaster, his “plan” might work short-term for a lone survivor or a small group of individuals in good physical condition and equipped with proper gear and mindset. But he is the father of a newborn, and his wife thinks missing an appointment at the nail salon is the end of the world as she knows it.


Making matters worse, the young father has no outdoor survival training or skills other than watching reruns of Les Stroud’s Survivorman television show and camping at a national park campground with all the utilities and hookups provided.

Why he thinks he can survive in the wilderness while dragging his young family along, I don’t know. He isn’t thinking logically, and if he ever has to put his plan to the test during a real emergency, his family will likely suffer or possibly even die.

Unfortunately, this “Batman in the boondocks” mentality will continue to be the chosen survival plan for many who haven’t thought survival through logically and come up with a realistic plan.

When making survival plans for your family, you have to honestly weigh the risks of your decision based on logic. In almost every disaster scenario, it is better to stay put (bugging in) or head to a prearranged safe place at an out-of-town relative’s or friend’s house than it is to head to the woods to eat twigs and pine bark.

Therefore, for most people, an evacuation bag is a better choice than a bug-out bag. An evacuation bag should contain the gear necessary to get you from point A to point B, whereas a bug-out bag (in most cases) is geared more toward wilderness survival. I have both, but admittedly my bug-out bag is an option of last resort. Knowing when to go is much more important than the contents of your survival pack or even where you will go.

You don’t want to jump and run before you need to, but if you wait too long you may never reach your destination. If you wait for the authorities to give the order to evacuate, it may already be too late.

The roads leading to safety could be blocked or impassable by motor vehicle, and walking to your destination may be impossible or too dangerous to attempt. On the other hand, if you jump and run in response to every potential disaster, you’ll soon deplete your resources and the patience of your family, school, and employers.

For example, say you live in an area prone to tornadoes, like Texas, and you evacuate to Arkansas (which has also suffered its share of killer tornados over the years) every time the clouds turn dark or the wind shakes the leaves.

You would be on the road nonstop during tornado season—which seems to be most of the time in Texas. But waiting until the twister is at your door will also put you at unnecessary risk. There are no easy answers.

All you can do is weigh the dangers of bugging out vs. hunkering down logically based on the situation at hand. You have to consider the nature of the threat and ask yourself which option gives you the better chance of surviving the type of disaster you are facing.

Of course, there are times when evacuation is a no-brainer. Say, for example, you live on the Florida coast and a category 5 hurricane has been predicted to hit your area within 72 hours.

In that case, you would be foolish not to go as soon as possible, even if you have no prearranged bug-out location. On the other hand, let’s say there is a snowstorm heading your way and you have food, water, heat, and a way to cook even if the power goes out for an extended time.

Then you are probably better off to hunker down where you are. In my opinion, the bugging out vs. hunkering down debate is moot because it all comes down to the type of threat you face, your personal situation, and your preparedness level. In the end, you’ll have to decide what to do on a case-by-case basis.

Survival Go Bag Checklist

Please note that the following list is intended only as a suggestion. Your bug-out bag should be customized to suit your
individual needs, plans, and location.

  • ❏ Antibacterial hand wipes
  • ❏ Cash—$100 in ones, fives, and tens
  • ❏ Cell phone and charger
  • ❏ Change of clothes
  • ❏ First aid tactical trauma kit
  • ❏ Fishing kit
  • ❏ Fixed-blade knife (the linked to knife is the best survival knife available in my opinion)
  • ❏ GPS navigator (handheld)
  • ❏ Handgun and 200+ rounds of ammunition
  • ❏ LED flashlight (small) with extra batteries, as well as a crank-type flashlight that doesn’t require batteries
  • ❏ Lighters – two
  • ❏ Map of area and compass
  • ❏ Multitool (the one linked to is the best multi-tool available in my opinion)
  • ❏ OC spray
  • ❏ Paracord, 25 feet
  • ❏ Prepaid calling card
  • ❏ Prescription medications, as needed
  • ❏ Sewing kit (small)
  • ❏ Space blanket
    ❏ Sterno folding stove (less than $15 on Amazon)
  • ❏ Trail mix, a box of energy bars (15), and electrolyte packets
  • ❏ Wooden matches in a waterproof container
  • ❏ Water filter or bottle

Note: If forced to bug out by car, load both your 72-hour kit and bug-out bags…

Special Considerations For Children

In stressful situations, it is important for you to appear relaxed, confident, and in control—even if you are a trembling bag of nerves on the inside. The last thing children need is extra stress brought on by a panicked parent. Another consideration concerning children is familiarity.

During a bug-out situation, you will be away from home, and this can be extremely stressful for children. It is important to eliminate as much of the stress as possible. One way to do this is by bringing along items that are familiar to them. If they have a favorite blanket, pillow, stuffed toy, or other objects that comfort them, be sure to pack it before heading out the door.

This is very important. Children tend to bore easily, so adding items to forestall or extinguish their boredom will make the time away from home much easier for all of you. You may want to put together a bug out pack just for them consisting of toys, books, cards, writing/drawing materials, and games.

Don’t forget extra batteries for those games and toys that need them. Of course, children aren’t the only ones who get bored; include things that will keep your boredom in check as well.

Filed Under: Bugging Out

Bug-Out Bag Guide and Checklist

June 16, 2019 M.D. Creekmore

bug out bag checklist
The Ultimate DIY Bug-Out Bag Kit and Checklist

by Mike

If you are like me, you may find prepping for everything to be a little overwhelming. It can seem that no matter how much you have, there just is never enough. I have read hundreds of articles and watched endless videos on what to carry for EDC and how to make a BOB/INCH bag.

I also seemed to focus on one aspect at a time and way overdo it while letting the rest slip by. So to keep me from having the most awesome arsenal in town and dying of thirst, or keeping me from caring an 80 lb. backpack everywhere I made a graph of what I might need in a survival situation vs. how long I need to survive.

My first concern in any emergency is can I breathe, see, or am I bleeding? Next question is am I in immediate danger and what can I do to remove the threat?

After that, I need to ascertain what threats are likely to come from this situation and prepare my surroundings to deal with them. Once the threat is no longer my focus, it should turn to how can I sustain myself in this situation?

Now many of the answers may change depending on what type of emergency you are facing. I am bleeding but an EMT is currently coming through my door would be handled a lot different than I am bleeding and marauders are currently coming through my door.

The two situations require both different responses from me as well as needing different gear.

To know what I need, I need to know how long the emergency will last. Here is where the problem comes in, I don’t know when what, or how long. Many Preppers feel the best way to combat this is to always be prepared for everything, and that is where the sense of overwhelming comes from. It’s almost impossible to be prepared for everything all the time.

So here is the solution I find works best for me.

I broke it down into 10 categories.

  1. How to transport my kit (Carry).
  2. How to deal with injury (Care).
  3. How to stay warm and dry (Cover).
  4. How to make what I need (Cutting).
  5. How to make light and fire (Combustion)
  6. How to transport/prepare food and water (Container).
  7. How to secure and repair (Cordage).
  8. How to replenish/get food (Collecting)
  9. How to stay in touch (Communications)
  10. How to obtain/replace gear (Currency)

I borrowed heavily from Dave Canterbury’s 5 C’s on this.

First I listed what I need to survive, then based on how long it might take I made my different kits. If the situation is over in an hour or so I should have everything I need in my pockets to survive. If it were to take the rest of the day then I would need my sling pack/handbag.

Overnight to a week then I would need my large pack. A week to a month I would need a cache, and a month to a year I would need to make it to my retreat. There will be some redundancy but the five should build on each other.

I am going to use level one through five for my emergencies. This is in no way an official scale, just me sorting what I might go through. Level one examples could be a power line down, flat tire, a fire, first date, minor accident, a confrontation, etc.

Can I breathe, am I bleeding?

For both of these, a couple handkerchiefs can help. To both cover the face to keep smoke, dust, and other stuff from being drawn into your lungs and as a makeshift bandage.

These are temporary measures until you can make it to help or help can find you. (Note, if you can’t breathe because of a windpipe, lung, or chemical issue that is not a level one emergency.) I also keep some gauze, alcohol wipes, anti-bacterial cream, and a few band-aids wrapped up in the handkerchiefs. For seeing I keep a small single battery flashlight.

Am I in immediate danger and what can I do to remove the threat? Here you have to make a decision, get out or stay. In level one cases removing yourself from the situation is usually the preferred method. If you don’t then you will focus on the threat.

For cold/rain I keep a paracord bracelet, space blanket, lighter, and a pocketknife. Seasonal, sturdy clothing and dressing in layers is a huge help in this. For danger from physical attack (dog, snake, biker, ex-wife) I have my knife and my CCW pistol, but in a level, one escape is still the best option if available to you.

Preparing your surroundings to deal with threats and sustaining yourself usually are not a worry as the emergency will have passed before you need either of those in a level one.

However, if I were to need to collect water or food I have my pistol and I keep the handkerchiefs in a ziplock baggie with a water filtering straw.

I can use the baggie to collect the water and drink through the straw. Communication during a level one can usually be accomplished with a cell phone, but I carry a sharpie as well just in case. For levels 1-3 Currency I carry cash.

Level two emergencies are ones that last several hours to all day. They might include breaking down, getting lost, flooded streets, bad break up, freezing rains, terror attack, second dates, all day power outage, riots, etc.

For this, I carry my kit in a sling pack or messengers bag, whichever looks less conspicuous. I have a small first aid kit, with tape, gauze, painkillers, antihistamines, anti-diuretic, and more options in band-aids and would cleaners.

For cover, I have a self-folding Rain Jacket/Wind Breaker, gloves, and watch cap, if you are already dressed appropriately these will make a great difference.

My cutting tool is a strong belt knife. I highly recommend you get a full tang, high-quality one as this knife seems to take the most abuse. I also carry a multi-tool, small pry bar, and lockpicks.

For combustion, I have another lighter and a 2 cell flashlight as well as spare batteries and a magnesium fire starter.

My container is a metal water bottle already full. For cordage, I have 50’ of paracord and zip ties. For collecting, I have my full sized pistol as well as extra ammo.

At this point, a few Cliff bars are going to get you a lot further then trying to set snares, fish, or hunt, and the pistol is more for protection but can still be used to collect game if needed.

Finally, in communication, I have my iPad mini, a notebook, and pens.

While in the first two levels of threat it is possible and even likely you would live through without preparations, a level three there can be a considerable danger.

A Three can be a tornado, hurricane, blizzard, coordinated act of terror, nuclear meltdown, helplessly lost, mother-in-law visit, martial law, etc.

In a level three, you are likely going to be spending several days away from your normal comforts and routine. In a situation like this staying put is not always a bad idea, and in most cases preferred. If you are home, don’t head for the hills.

If you are somewhere safe, going home could be more risky then staying put. If you are not safe, this pack should help you get to a place that is.

For carry, I use a full sized backpack. A good sized duffle or gym bag could also be used, but I find them to be less comfortable if you do end up heading out.

For care, I have a full first aid kit, including quick clot, bandages, scissors, irrigation syringes, Epi-pens, wound closers, etc.

Cover can change a lot depending on the time of year, but I like to always have at least a bivy roll (t-shirt, underwear, and socks), Sweat shirt, long underwear/base layer, extra socks, hammock, tarp, ground cloth, and blanket/sleeping bag.

Tent and change of clothes are nice if you have the room or don’t have to pack them far. For my cutting tools, I carry an entry tool, a tomahawk, and a large knife.

Combustion at this point can be one of the things that can make or break you. You will need it to cook food, make water safe, warm you up, and see at night. There is also a great psychological aspect to having a fire that can bring up your spirits.

For this, I have a wood burning camping stove that also accepts an alcohol burner for fast fires and to cook without smoke. I carry several fire starters for wet conditions, a head lamp to keep my hands free, flares for signaling and really wet conditions and rechargeable batteries for my lights.

For containers, I carry a water bag that can be used as a hydration pouch, metal cup, and hiking water filter. I also add light wire and tape to more paracord and zip ties for my cordage. For collecting, I now have snares, fishing gear, and a carbine as well as more ammo.

Finally, for communications, I have a solar panel that can charge the iPad, cell phone, or batteries for lights, and walkie-talkies.

While Level 3 are possible to die in, Level 4 emergencies are those you are likely to die in without proper gear/experience/help. They can last up to a month long and could include things like Katrina/Sandy, Nuclear accidents, large scale Terror Attacks, ending/becoming Engaged, run on the banks, or as in the only Level 4 I have ever been, a blizzard that lasted a month.

The first night power went out and we were stuck for weeks until the National Guard arrived.

A level four Carry for me is a stash. Now I know most people think of stash as something buried in a hole in the woods, and while it can be that, a Stash can be many other things as well. Supplies left in the attic, basement, closet, or spare room can be your stash.

Things you leave at a friend’s place, storage center, locker, hunting blind, or favorite campsite. Stashes are only limited by your imagination and can very well mean the difference between like and death.

For care, I recommend a full EMT kit. You can find them on Amazon pre-built, or buy a good bag and make your own. If you are on prescriptions meds it is a very good idea to have a supply of them in your bag, but remember they do expire so have a plan to rotate them. Cover should be something you can live in for some time.

One of my stashes is the RV I lived in while attending college, another is a shipping container several of us use.

RV for bugging out

Our stuff is already there along with the tools to make it a livable structure with minimal work, and still, another just has a tent buried along with the gear, and not to be discounted the homes of everyone in our group.

I also recommend at lease complete changes of clothes and 3-4 extra changes of undergarments never hurts to have. Whatever you choose just make sure you can live in it for 7-30 days. The last place you want to be is the superdome with everyone else.

Cutting at level 4 includes things like Axes, Bow saws, hammers, nails, shovels, etc. I have several places where we stashed enough tools to build a dugout cabin if necessary. Combustion includes things like a rocket stove, the Solo Stove Campfire, and whatever you start a fire with while camping.

I also like to keep a decent number of tinder/fire starters, you never know when you will get there and getting a fire going quickly could be vital. As for Containers, all the camping pots, plates, kettles, water bags, collapsible buckets, regular buckets, and bottles that were too heavy or just didn’t make it for the BOB’s can be used.

As for cordage you really want rope, straps, and even nails or screws to help make a secure and comfortable shelter. For collecting, I feel shotguns and high powered rifles work well here. Also steel traps, nets, and even cage traps.

For Communication, I like to have a wind up/solar radio and several drop points that are known to me and the rest of the group. For Currency, I like extra food, alcohol, batteries, candles, blankets, or pretty much anything that you would want to stay comfortable on the run.

When it comes to Level 5 I am really talking about something I know nothing about. These could include an invading army on our soil, nationwide EMP, stock market/total economic collapse, a divorce, Zombie Apocalypse, or cutting off welfare and food stamps.

Since nothing like that has happened in my life time I can only speak third hand what I have heard from those who have gone through it. The one thing I gather from those who have gone through it is decide ahead of time what you will and won’t do. I will leave that up to you to decide what that means to you.

For carry, I recommend it already be at your retreat, if it’s not, then plan on only bringing what you have in a level 3. For Care, I recommend learning as much as you can about alternative treatments and care.

We are lucky to have a Surgeon, a trauma nurse, and an EMT in our group and most of the care items has been left up to them.

If you do not have these you will have to decide how far you are willing to go and stock accordingly. Cover is the house at our retreat. It has wood stoves, beds, blankets, and most of the clothes that we no longer wear but still fit.

For cutting we have all the implements you would find on a farm, since it is on a small scale being used as such, we just have extra of everything we use (while we do have gas powered equipment, we have a section that is only farmed with hand tools to keep our skills and knowledge of needs up to date).

Combustion is the wood stoves, rocket stoves, wood grills, solar stoves, wood smokers and a fire pit, as well as lanterns, candles, candle making equipment, solar panels, rechargeable batteries, and spare part for all of the above.

For containers, we have pretty much what you will find in our homes, as well as larger ones to accommodate larger groups, canners, jars, lids, and bins in the cellar. Cordage goes from fishing line to logging ropes. Collecting we have raised beds, an orchard, a pond, two creeks, barns, pens, fenced fields, and the land we can and do hunt.

For communication, we have a Ham radio both at the farm and at our homes as well as the smaller hand held units. Currency is pretty much anything we have extra, as well as tools that can make both replacement and barter gear.

I could go on forever about the retreat and what we have done, but the truth is, if you aren’t living on one now (at least part-time), a lot of it will just be a waste. For the long term, it is my opinion that skills are what will bring you through and while I could tell you the best thing for me, it may not be the best thing for you.

A lot of full time farmers argue forever about how things should be done, and for you to know what works for you, you really need to be doing it. But then again I am only guessing, I have never been through a Level 5, and if you haven’t prepared for the lower level ones, maybe that’s where you should start. Anyways hope this helps.

Some thoughts on bug out bag firearms selection…

bug-out-bag-gunAdded by M.D. Creekmore

Most people will suggest a .22 caliber rifle, such as the Ruger 10/22 and this is a great choice. A .22 caliber rifle can take small game as well as larger game such as deer with proper shot placement.

Another advantage for having a .22 Long rifle is the relatively low-report especially when using CB caps and the ability to be effectively silenced with a commercial or homemade sound suppressor aka “silencer”.

Just remembered that such a device is illegal without proper government approval and will land you behind bars if you’re caught, and is suggested here for a worst case scenario only or after you have gone through all of the legal hoops.

The downside of the .22 Long rifle round is the limited range, penetration and stopping power all of which limit the rounds effectiveness when used for self-defense.

I suggest a backup handgun chambered for a cartridge suitable for self-defense. I would not go below a 9mm or 38 special and then us good expanding ammo.

Even with a 9mm and 38 special, you should seriously consider using only the +P rounds such as the 115 or 124-grain JHP +P in the 9 mm or 158-grain lead semi-wadcutter hollow point .38 Special +P for defensive purposes.

Your location would also determine weapons choice. For example, those bugging-out in grizzly country should definitely consider something more powerful than the aforementioned 9 mm or 38 special.

My first choice for protection against such large game would be a center-fire rifle chambered for 308 or larger. My second choice would be a magnum revolver with a 5.5″ to 7.5″ barrel chambered for .44 magnum or larger.

It is wise to avoid any armed confrontation if possible. Trust me you are not a coward if you avoid the possibility of being shot or having to shoot someone else. You are not expendable – neither are the lives of your family or those in your bug out group. Those with the macho kill ‘em all attitudes will not last very long after the poop hit’s the fan.

With that being said, a semi-auto military style rifle should be considered especially if you are trying to get from an urban area to the country, where facing organized gangs or other threats attempting to block your exit could be a possibility.

An AR-15 with collapsible buttstock or folding stocked AK-47 (for compactness and concealability) could help get you out of a dangerous situation if you’re forced into one while taking up little space and not adding significant weight to your overall survival gear.

The $10 Fire Kit For Your Bug Out Bag

Added by P. Mueller

FIRE-KIT-for bug out bag
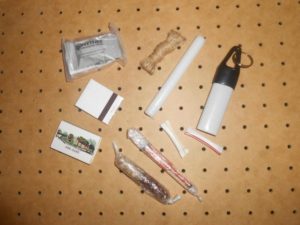
It all began this past winter while watching the national news. Apparently, an older couple decided to try an untested shortcut home from a nearby casino. This shortcut happened to be through a lightly traveled mountain pass. Did I mention there was a blizzard going on at the time?

Well, there was. You know what happens next. The folks got lost and their car became stuck in the snow and they weren’t going anywhere. They must not have believed in being prepared for situations like this because they had no useful supplies with them, not even a bit of food, water or matches.

After hearing this story, I decided that I would build an inexpensive fire kit for each of my vehicles, and while at it, another for a prepper friend whose birthday was coming up.

Since there are typically higher priorities for my cash, I thought I’d challenge myself to build a waterproof fire kit for under $10. And the challenge was on.

The first step was to comb the internet websites, blogs and YouTube for ideas. To say there are a lot of great ideas is an understatement by far. There are tons of styles and types of containers alone, from mint tins to plastic zipper bags, along with content suggestions too numerous to name.

As stated earlier, the container had to be waterproof, so mint tins and the like were out. I browsed an online retailer for containers and found dozens, so once I refined the search by cost, I stumbled upon a 14 cm x 10 cm x 4 cm, a waterproof plastic container for $5 with free shipping.

There went half the budget and I hadn’t even started on the contents. But that was okay because I knew that I had many of the contents already in the house. I bet you do as well. This hard plastic container is watertight and closes securely against a rubber gasket with a locking latch; a prolonged submersion test was performed on each to verify that fact.

The completed kits were placed into freezer zip bags as the first line of defense anyway.

Since I was already at the online retail site, I ordered small, but stout, 2” ferrocerium flint rods with red plastic handles and an attached striker. These cost about $3 each and also had free shipping.

While waiting for these items to arrive, I set about pulling together the rest of the contents of the kit. In an empty coffee can, I’d drop items as I found them, not knowing if they would actually be used.

FIRE-KIT for bug out bag containerFinally, the day came when the items were delivered; the assembly process could now begin. The first step was to pull out the 550 paracord that’s kept on hand for miscellaneous tasks and projects. The container had a cheapie cord which definitely needed replacement.

After watching various online videos, I decided on an attractive braid called the Cobra Weave. According to the video, there was approximately one foot of cord for each inch of braid; three feet of cord would be sufficient.

That should also be enough for a bow drill cord if needed. I attached a medium sized split key ring on one end and connected the other end to the box. Now the kit could be hung in a tent, a car or from a go bag,

By this time, the rest of the needed materials had been gathered so it was time to get to work. Below is the kit inventory is broken into three categories: ignition sources, tinder and miscellaneous.

IGNITION SOURCES

Disposable butane lighter – This is your standard, full-sized Bic lighter, not the mini or the cheapie. I guess the mini would work, but in an emergency situation, I would want as much fuel as possible. The lighter does have a leash clip cover with a split key ring to protect against the fuel being inadvertently released. The leash clip and lighter cost approximately $2 each.

Ferrocerium flint rod – There are many options to choose from when you order these. I needed something that would fit in the container, but would not be so small that it would be tricky to grip and strike with cold hands.

The two-inch rod I found fit the bill. This particular model had a red plastic “winged” grip that made holding the rod very easy. The rod itself is also quite stout so there are lots of strikes before it is worn out. The metal striker was attached with a small bit of elastic cord and I knew I could do better.

Out came the paracord as a replacement. It is important that the rod and striker are not separated because one without the other is useless. I know you could use a knife edge, but that assumes you have a knife.

Lifeboat matches – Here I cheated a bit. I already had the matches so I didn’t need to buy them. I wrapped six matches in plastic cling wrap along with the striker pad cut from a matchbook. For those who don’t know, lifeboat matches are waterproof and can be ignited even when wet. Make sure that the matches can’t rub against the striker or each other while in storage to avoid accidental ignition.

Matches – Again, these I had from a previous camping trip. I took a small matchbox and replaced half of the stick matches with waterproof camp matches. My thinking was that having different types gives options.

Just make sure the striker on the box works with all of the matches in the kit. On one of the Alaska reality shows I watch, one gentleman said that he prefers paper matches in the freezing cold, so I included a book of plain, old paper matches.

TINDER

Cattail – Last Fall while out golfing, I came across some dried cattail at the end of the season. I broke a couple off and stuffed them in the golf bag; now I had a use for them. I cut a section long enough that it would fit snuggly in the lid of the container and stay there. Once I wrapped it in plastic wrap, it stayed in place nicely.

Char cloth – This type of tinder intrigued me. I’d seen it work in videos, but had never made any or started a fire personally utilizing char cloth. Now was a great time to acquire a new skill. Using an old, clean t-shirt, I made enough for three patches, each 2”x 3”. Once completed, the cloth was placed into a small brown paper envelope to minimize the mess.

Due to space restrictions, I can’t go into the actual process here. That could be a whole post on its own. It is simple to do though.

Cotton balls with petroleum jelly – This was a bit of a project. I cut large drinking straws into 1.5” sections and stuffed it with half a cotton ball slathered in petroleum jelly. The ends are then sealed using a lighter and needle nose pliers. This eliminates the mess and keeps the jelly from drying out or getting all over the rest of the contents.

Jute twine – This I use around the house to tie up plants or wrap packages. I cut an 18” piece and wound it tightly around two ten penny finish nails driven into a piece of scrap lumber. It snuggled next to the cattail in the lid.

There is just enough friction to keep both firmly in place. I realize that 18” is not a very long piece, but it should be enough for a fire or two in an emergency situation. More twine could be stuffed into the voids of the container when done.

Wet Fire – Individual tabs are sold at a big box hardware store nearby for $1 each. These things are great; they burn while wet. Better living through chemistry indeed.

MISCELLANEOUS

Aluminum foil – 18”x 24”piece folded neatly so that it could be slipped on the side of the container taking up virtually no room. The foil is very handy if you need to start a fire on a wet surface. Spread this on the ground and build up from there.

Candle – This is a 4” long cylindrical candle with the diameter slightly smaller than a dime. The family got these at a church function and it was a perfect fit. The candle can be used for multiple purposes including light, heat and melting snow to make water.

550 paracord – The usefulness of this item in any emergency kit goes without saying. Altogether the kit consumed about five feet of cord. I used what I had on hand, but there are fifty plus sheath cover colors including a really cool reflective variety. By the way, don’t buy the cheap stuff, you’ll regret it later.

All in, I spent $11. Drat, I missed by $1.00. That’s okay though because I had a blast putting this kit together. I combined many things I already had into a potentially lifesaving kit. There are many items that you could substitute in your kit. Maybe you can get birch bark in your area or prefer fatwood or dryer lint and a magnifying glass. Customize the kit to fit your needs.

Take the $10 Fire Kit Challenge, I dare you! Make mods to this kit like wrapping it in duct tape (itself a nice fire tinder) or connect items to the key ring.

Oh, I almost forgot, the stranded folks finally made it out a week later. Hungry and cold I would imagine, but wiser for the experience.

Cheap, Light Shelter Ideas for Your Bug Out Bag

setting up a bug out camp shelterAdded by Mike

I have the same mindset as M.D. – bugging out is your absolute last resort. You’ll never be able to carry as much as you can store in your house, and your house is (or very well should be) water tight.

That being said, there are going to be situations where you have to get out. If your city is under water. If Ebola is going around (stay away from people with blood coming out of all of their orifices, eh?), if martial law is called, if the power is out and you live in a big city – all these things are good cues for you to leave.

Everyone should have a bug out bag. Everyone. Disasters and situations can come very quickly where you need to leave and NOW – you won’t have time to pack a bag in all cases, so you must have one ready to go.  But if you’re like me, you don’t have all sorts of excess money to throw at high-end products for something you may (and hopefully never)  have to use.

Also if you’re like me, you’re healthy and in not too bad shape, but you’re also no Olympic athlete. There’s a saying when it comes to bags for camping, hiking, and especially bug out bags where you have to be mobile – “Ounces mean pounds and pounds mean pain”.

Your bug out bag should overall be small, light and portable. But that’s a whole topic for an entire another article of a type that’s already saturating the internet.  I’m here today to talk about cheap, light ideas for shelter to bring with you on your bug out.

What Is Shelter?

Shelter is the idea of keeping the elements at bay so you can stay warm and dry.  This is why you live in a house or apartment, and not out in the open. Humans, with our slow crappy metabolisms and our hairless skin, are probably one of the most susceptible creatures on the planet to the elements.

We need to stay out of the wind, we need to keep our temperatures at a decent level, and an excess of water tends to make our skin shrivel, then get infected, then rot and fall off.

No one wants their skin to fall off, I’m almost 100% sure of that.

Seeing that we can die of exposure almost as fast as we can die of thirst, a shelter is an absolute must in your bug out bag. I’m sure you’d all like to bring a 3,000 square foot holiday house with granite counter tops, but that’s not going to fit in your 45-liter bug out bag.

Your shelter will not be comfortable, but it will keep you alive, that’s the idea. It will not be heavy, and it will not be expensive, and here are some ideas for you.

Contractor Grade Garbage Bags.

They are thick, they are big, they are cheap, they are durable, they are light, they can fold up into a teeny space, and they have a million uses.

I have one in my bug out bag specifically to use as a ground sheet.  The ground can conduct cold and wet very quickly.  Using a big garbage bag will stop moisture from getting through the ground to you.

If you are in an area with some dry vegetation, stuff the garbage bag full of dry leaves, or soft pine branches or grass or straw or whatever is around. This will give you both some insulation from the grounds cold, as well as some padding for comfort.

You can also use a garbage bag as a makeshift bivvy sack (see below) or a makeshift rain poncho or tarp. Put a few in your bug out bag, you won’t regret it.

Bivvy Sacks

A bivvy sack, or bivouac sack, is a small, light and 100% waterproof sack that’s designed to slip over a sleeping bag. It’s an alternative to a tent and basically wraps you in a cocoon of waterproofing.

It’s incredibly small and light and very, very portable.  You can pick one up online very cheaply and store it in your bug out bag.  I have a bivvy in my bug out bag made by a company called SOL. They are thermal bivvy’s made from a mylar material that reflects your body heat back to you and they are completely waterproof.

You can get the original product for less than $20, and it’s actually about the same price for a two-person version if you’re bugging out with someone you don’t mind spooning within a giant plastic bag.

I actually have the SOL product with the breathable fabric that is still 100% waterproof but will not build up any condensation in. It’s a bit more expensive but at $40 it’s totally worth it to not be damp, in my opinion.

Tarps

Again, a small tarp is cheap, light and waterproof. It can be folded up to take no space in your bug out bag. If you have some rope, you can tie a tarp in such a way that it will keep most of the rain off of you. Even if your bivvy sack is waterproof, I’d still like not to get rained on if at all possible.  Tarps can also be used to help conceal you if you decide to buy say a green or brown tarp and not one of those bright orange ones.

Single Man Tent

I have a single man tent I purchased a couple of years ago. I absolutely hate it. Sure, it was cheap, and light, and small (rolled up its smaller around and shorter than my forearm). Sure it’s waterproof.  But the top of the stupid thing is inches away from my face and if it’s warm and even a bit humid out you get some serious condensation in the thing.  That’s why the bivvy is in my bug out bag and not the single man tent. That being said, to each their own, and I would a million times rather be claustrophobic and slightly damp than soaked and exposed.

Multi-Man Tent

Multi-Person tents are larger, harder to set up and heavy.  However, if you know for sure that you’re bugging out with several people and you don’t think you’ll get separated, having the stronger person carry this on their pack might work.  You’ll certainly get more space in your shelter but for the reasons I listed above, I don’t like or recommend this.

A Folding Shovel

You heard that right. A folding shovel. This can absolutely help with shelter.  If you live in a cold climate, and if you’re in the horrible situation of having to bug out in the winter, that totally completely sucks and should only be done if you have absolutely no other choice, a shovel makes sense.

That’s because if there’s snow on the ground, snow can be used as a shelter material. Take your shovel and make the snow into a wind block. If you’re really good, you can build an underground snow shelter, because snow actually is a good insulator. Only do this if you know what you’re doing though. No one wants a snow collapse to deal with.

Putting it all together

So, in my bug out bag, I have a tarp, a couple of contractor garbage bags, and a watertight, heat reflective bivvy sack.  I find some high ground in between a couple of trees. I tie my tarp up on an angle to form a sort of tarp lean-to.  I stuff my contractor garbage back full of dry grass and leaves and put it under the tarp lean-to.

I put my bivvy sack out on top of the stuffed garbage bag. All these items together weigh less than two pounds, cost a little over $40 ($20 if you get the cheaper bivvy) and if put together right, form a weather resistant, dry and (relatively) comfortable place to sleep.

There it is. If I’m very lucky, I’ll never have to use it…

A Combat Vet’s Perspective on Bug Out Bag Water Filtration

Added by David

hiking clean drinking water filters

There is no shortage of products or systems to choose from, but which ones are the best investments? I’ve been doing a lot of research into the packable water filtration systems currently on the market and I’d like to share my findings and opinions.

In this section, I’d like to try to cover which products successfully filter/purify water of toxic industrial chemicals, viruses, bacteria’s, protozoa, cysts, algae, spores, and sediments, and which do not. Also, some of the pro and cons of each variety. So, here we go.

Product Group 1A: Katadyn Hiker / Hiker Pro / Vario

These pump style filters have found their way into many bug out bags, and for good reason. They’re simple and effective. There are very few differences between the models listed above, but I’ll highlight the differences here.

Hiker and Hiker Pro $50 – $75 – Fact Sheet / Pro Fact Sheet

The Hiker and Hiker Pro are both decent backpacking filters and they are both fairly reasonably priced if you shop around. In fact, I own the Katadyn Hiker and I’ve successfully used it to pump my canteens and hydration pack full of pond water with no ill effects.

The products are compact, light weight, easy to use, and relatively effective, but you assume some risk because the filter media is only capable of capturing particles of 0.3 microns average size or larger. They do leave a slight tinge to the water and if the water is particularly nasty there can be some mild odors or taste left in the water.

It probably won’t kill you, but there are better options out there so that in the event you do have to drink water that is potentially contaminated with a virus you won’t contract it, especially post SHTF when treatment will be harder to come by.

  • •Filtration Quality: 0.3 Microns (bacteria, protozoa, cysts, algae, spores, sediments)
    •Filtration Volume: 200gal / 750L (Pro 300gal / 1150L) 1-3 people
    •Filtration Media: replaceable glass fiber media with activated carbon core
    •Filtration Flow: +/- 1 quart / liter per minute
    •Filtered Turbidity: Mildly Tinged / Mostly Clear
    •Filtered Aroma: Very Mild
    •Filtered Taste: Mostly Pure

Vario $75-100 – Fact Sheet

  • •Filtration Quality: 0.3 Microns (bacteria, protozoa, cysts, algae, spores, sediments)
    •Filtration Volume: 528gal / 2000L 1-4 people
    •Filtration Media: replaceable glass fiber media with activated carbon core
    •Filtration Flow: +/- 2 quart / liter per minute (1q/lpm in long life mode)
    •Filtered Turbidity: Slightly Tinged / Almost Clear
    •Filtered Aroma: Slight or None
    •Filtered Taste: Mostly Pure

With the exception of volume, these filters are almost all identical. If you are going to purchase one of these, purchase the most inexpensive version because no improvement in particle size is gained by purchasing the upgrades.

The replacement filters (Hiker / Vario) are reasonably priced to stock up on and easily replaceable simply by unscrewing the top discharge lid, disposing of it, and installing a new one (don’t throw it away though because you can drill a hole in the bottom, clean out the charcoal, and reinstall to use the filter system as an unfiltered pump unit as I’ll discuss later).

In the end, these are decent products, but make sure you stock up on the filter cartridges if you intend to use it for any extended period of time or buy a Sawyer (if you’re sold on Katadyn’s brand name then upgrade to one of their endurance series products for greater filtration volume).

Product Group 1B: Katadyn Pocket / Combi / Expedition

These pump style filters are designed to support multiple people (anywhere from 1 – 20 depending on variety) or for a longer period of time. They range from on the expensive side to outrageous, but if you have the money they’re awesome. There are some variations to discuss though.

Pocket +/- $270 – Fact Sheet

  • •Filtration Quality: 0.2 Microns (bacteria, protozoa, cysts, algae, spores, sediments, and some viruses)
    •Filtration Volume: 13,200gal / 50,000L
    •Filtration Media: Replaceable Ceramic
    •Filtration Flow: +/- 1 quart / liter per minute
    •Filtered Turbidity: None
    •Filtered Aroma: None
    •Filtered Taste: Pure

Combi +/- $225 – Fact Sheet

  • •Filtration Quality: 0.2 Microns (bacteria, protozoa, cysts, algae, spores, sediments, and some viruses)
    •Filtration Volume: Ceramic 13,200gal / 50,000L, Charcoal 105gal / 400L
    •Filtration Media: Replaceable Ceramic / Replaceable Activated Charcoal
    •Filtration Flow: +/- 1 quart / liter per minute
    •Filtered Turbidity: None
    •Filtered Aroma: None
    •Filtered Taste: Pure

Expedition +/- $1200 – Fact Sheet

  • •Filtration Quality: 0.2 Microns (bacteria, protozoa, cysts, algae, spores, sediments, and some viruses)
    •Filtration Volume: 26,400gal / 100,000L
    •Filtration Media: Replaceable Ceramic
    •Filtration Flow: +/- 4 quarts / 4 liters per minute
    •Filtered Turbidity: None
    •Filtered Aroma: None
    •Filtered Taste: Pure

There are some variations here, but with the exception of volume and flow, the pocket and Combi filters are almost identical, the expedition is more of a camp filter, but I suppose you could pack it.

The replacement filters (Pocket / Combi Cer – Car / Expedition) are fairly expensive, but the volume they’re capable of makes up for the cost if you plan to use the filter this much. These are really great products, but the initial cost will be prohibitive to people on tighter budgets.

Product Group 2A: Sawyer Point One Biological Filter Variations – Print Brochure

These filters are sold as a squeeze, gravity, and pump style with different adapters and configurations. The filters are Non replaceable sealed element hollow fiber membrane (kidney dialysis machine technology).

But they’re guaranteed for 1 million gallons (I’m not sure that the guarantee will work for you post collapse though) and are touted as an indefinite use filter by the use of periodic back flushing and maintenance. If the filter ever does happen to break on you though, they’re very affordable and stocking up on them won’t be too difficult. Let’s delve in.

Point Zero Series $20 – $220 (average $50) – flow rate report – microbiological test report

  • •Filtration Quality: 0.1 Microns (absolute) (bacteria, protozoa, cysts, algae, spores, sediments, and some viruses)
    •Filtration Volume: Indefinite (yes indefinite with maintenance back flush and care)
    •Filtration Media: Non Replaceable Hollow Fiber Membrane
    •Filtration Flow: 4 quarts / 4 liters per minute Squeezed or up to 5 gallons per minute at max inlet 40psi
    •Filtered Turbidity: None
    •Filtered Aroma: None
    •Filtered Taste: Pure

These filters are excellent. They’re lightweight, easy to use, filter down to an extremely small micron size, and are extremely inexpensive and reliable. They do not have replaceable media, but they are considered indefinite use as long as you regularly back flush the filter with the included back flush syringe and prevent it from freezing with water inside.

If you do happen to break it, they’re so affordable you can buy backups. These filters really only have 1 draw back in my opinion, and that is due to their hollow membrane pore construction they do not filter out and dissolved solids or solutions. That is to say that they cannot filter out anything that is completely dissolved into the water.

Product Group 2B: Sawyer Point Zero Two Biological Purifier Variations

These purifiers are sold as a squeeze, gravity, and pump style with different adapters and configurations. The purifiers are Non replaceable sealed element hollow fiber membrane (kidney dialysis machine tech).

But they guaranteed for 1 million gallons and are touted as an indefinite use filter by the use of periodic back flushing and maintenance. If the filter ever does happen to break on you though, they are fairly affordable and stocking up on a small supply is doable.

Point Zero Two Series $140 – flow rate report – microbiological test report

  • •Purification Quality: 0.02 Microns (bacteria, protozoa, cysts, algae, spores, sediments, and all of the most common viruses CDC: Scroll all the way down)
    •Purification Volume: Indefinite (yes indefinite with maintenance back flush and care)
    •Purification Media: Non Replaceable Hollow Fiber Membrane
    •Purification Flow: 4 quarts / 4 liters per minute Squeezed or up to 5 gallons per minute at max inlet 40psi
    •Purification Turbidity: None
    •Purification Aroma: None
    •Purification Taste: Pure

If you haven’t noticed the above facts, these are actually not considered filters anymore, but purifiers. These purifiers are capable of removing every harmful thing (that is not in dissolution) from the water.

Again, the only drawback is that due to the hollow fiber technology, these purifiers do NOT remove anything that is completely dissolved into the water. They pass everything that is smaller than .02 Microns in size without absorption.

Product Group 2A & 2B both function in exactly the same manner, but the Point Zero Two variation has smaller pore sizes. Both of them utilize an ABSOLUTE micron measurement which is much more stringent than the AVERAGE micron measurement. This basically means that absolutely NO particles, biology, or vectors of the specified micron size or larger will be found in the processed water.

The different variations of these products are the same core filter or purifier with different peripherals included in the package. For example, the SP129 package contains one Point One filter, one 1L collection pouch, and a mouthpiece valve for $45 while the SP131 contains one Point One filter, 3 collection pouches, a back flush syringe, and a mouthpiece valve for $45, and the SP181 All In

One packages contains 1 Point One filter, 2 mouth piece valves, 1 faucet adapter hose, 1 back flush syringe, 1 1L collection pouch, and a bucket adapter kit for $60. Here’s a view of their water products.

At the end of the day, in my opinion, the best investment would be to purchase both a Sawyer Zero Point Two purifier and the Katadyn Hiker Pro along with some extra filters for the Katy.

The reasoning is that while some chemicals can slip by all but the most advanced filtration and purification techniques, a glass fiber / activated charcoal filter pump unit used as a post-filter would help to capture some chemicals by absorption while the Sawyer purifier will function to eliminate all of the smaller non dissolute “badies” such as HEV/HAV/SARS.

The sawyer will benefit and accommodate the pressurization that the pump filter will add to the line and this will speed your collection up as the drop tube can be easily dropped into the water source, the pump outlet can be connected to the Sawyer very easily, and the Sawyer can be adapted to a hydration pack drink tube so you never really have to drop your kit to refill your bladder if you’re traveling with a buddy.

If you are trying to collect water in an environment that is potentially hostile you can just use the sawyer collection pouches to grab the water and take it with you to purify it in a safer environment. Just bear in mind that the Katy media would need replacement after about 200 gallons (you could probably get more since it’s used as a post filter).

Most filters cannot remove toxic chemicals due to the dwell time required to absorb them onto the charcoal media. In fact, even distillation does not remove all chemicals because of some exhibit the same properties of evaporation and boiling/condensation points.

Choose your water source more wisely, and/or use the old-fashioned method of digging a hole a few feet from your source water and collect from the water that has flowed into the hole. The Katy is mainly used as a pump, but the filter can help to improve taste that the Sawyer may not. You can refer to the CDC for further information on filtration properties and effectiveness here.

My personal configuration currently is a combination Katadyn Hiker Basic / Sawyer Point One filter connected in series so that the Sinker/Screen and Bobber are connected to the inlet of the Sawyer Point One filter, the Sawyer outlet is connected to the Hiker inlet, the Hiker outlet is connected to a quick disconnect Camelbak adapter and the QD connects to my Camelbak drinking tube after removing the bite valve.

Connected in this manner I am using the Katadyn prescreen and bobber to screen the water out going into the Sawyer. Since the Sawyer is back-flushable I use it to capture all sediment, bacteria, and protozoa prior to the Katadyn Glass Fiber / Charcoal unit to extend the life of the filter.

I am using the Glass Fiber / Charcoal filter to absorb any dissolved contaminants that the Sawyer passes through which can help to improve any taste issues that the Sawyer may miss, and I’m using the pump unit to speed the process by pressurizing the line.

An added benefit to using this system is that by slightly pressurizing my Camelbak’s bladder I can allow the filtered water to back flush the Sawyer filter automatically and lose only 1 liter of water from my 3 liter reservoir providing me with a freshly back flushed Sawyer filter and 2.5 liters of very clean water.

Bear in mind that while this system is excellent for most water sources in the US, it does not filter our viral contaminations. I plan to upgrade the Sawyer Point One to a Point Zero Two purifier in the not too distant future.

If viral contamination is a concern you can add 4 drops of unscented bleach per liter/quart or 12 drops to a full bladder directly into the drinking tube prior to connecting the filtration system and allow the bleach 10-15 minutes of contact time in the bladder before drinking.

Now, if you remember, I recommended saving your used Katadyn filter cartridges because they can be reused in a way. Allow your filter to thoroughly dry out by leaving it in the sun for a day or two. Take your used filter cartridge and turn it upside down to see a plastic circle in the center of the bottom plate.

Using a 1/4″ or similarly sized drill bit you can drill a hole through it. Now, just dump out any charcoal media that you may find inside. Now find a drill bit that just fits into the outlet hole in the top of the filter cartridge and drill down through the top to clear the silt barrier that holds the charcoal in.

Now, run some tap water through the inlet hole of the filter to wash out any residual charcoal or drill shavings that may still be inside.

Now reinstall the filter into your pump and cycle about a quart of fresh tap water through the filter to remove any more filtration media or shavings that may have survived your first two attempts. You now have a cartridge that can turn your Katadyn filter into a basic hand pump to use on your Sawyer indefinitely.

Warning: This is only recommended for filtration cartridges that have only ever been used as a post filter behind a Sawyer or other similar smaller micron filtration system.

If you’ve ever used a filter cartridge to directly filter contaminated water this is not recommended because bacteria and or cysts could be present on the dirty filtration media and could potentially make their way through the filter in the future.

If you want to convert a used filter of this type be sure to allow the filter to soak in a water/bleach solution of at least 1% for 24 hours, then allow the filter to thoroughly dry out in direct sunlight.

Take your bug out bag for a walk

test your bug out bagAdded by Georgia Boy

For any of you with a BOB or GHB, congratulations – it’s a big important step to being prepared. But…have you ever taken it for a walk? If not, I urge you to do so. A long walk. It’s the only way to know whether it’s heavier than it ought to be and to know how fast you can travel with it.

I’m in my 50s and have done a lot of backpacking. I’ve carried some heavy loads on some long trips, and one thing I can tell you is that it is no fun humping a heavy pack. In looking over many posts on what people include in their BOBs, I often think that people tend to way overload them, trying to be able to meet any contingency.

Taking your BOB out will give you an idea of just how heavy it will feel in a bug out situation.

I’d recommend at least a day’s hike, which will give you an idea of just how much ground you can cover. That should give you a much better sense of how long it will take you to reach your BOL than just guessing.

If your bag is too heavy, you’ll need to think hard about what to cut, but one thing I’d cut out of a lot of the loads I see is cooking gear – it may not be as pleasant, but you can certainly live on cold food (protein bars, energy bars) until you reach your BOL.

Even in a very cold environment, having enough calories and adequate clothing and sleeping bag are more important than eating hot food (I know, I know, I’m from Georgia, what do I know about cold weather?, but I have done a fair amount of cold weather camping). I have no cooking gear, not even a cup or bowl or fork or spoon in my BOB.

I’d keep some way to start a fire for a cold weather bugout, but keep in mind that a fire may compromise your security, as may cooking over a stove to a lesser degree. I love starting a fire with a magnesium fire starter, but with the weather here and a relatively short distance to my BOL I could forego it.

A lot of BOB gear lists include hunting/fishing / snaring equipment. While I’m a big believer in all these for the long term, they all take time to use – I’d forego them for a BOB unless your trip is so long you cannot pack enough food to make the trip. I want to get to my BOL as soon as possible rather than spend time along the way hunting or fishing.

Clothing choice is obviously dependent on where you will be traveling, but I would recommend wool and fleece garments. while you want to avoid overdressing while on the move, wool and synthetic fleece have the great advantage over cotton of remaining warm when wet, something cotton fails miserably at.

Again, try out your clothes on your walk-you don’t want to spend hours walking in pants that chafe or bind. A practice walk is also the time to find out if you have the right shoes, not after TSHTF.

For a warm weather or dry country bugout, water is critically important, but damn if it isn’t heavy. Unless you’re going to be in a desert, I’d take no more than 2 or 3-quart bottles and instead rely on a Lifestraw or something similar if you’ll be crossing streams or creeks. I do carry Gatorade powder. While I am both frugal (cheap?) and old school, if you’re doing a long walk in the heat,

Gatorade definitely beats water.

A tent is another thing to consider leaving out, in favor of a small lightweight tarp or shelter half or bevy sack (like a form-fitting tent for your sleeping bag), or just a sleeping bag alone. A down bag is worthless when wet, but a synthetic fiber bag will keep you warm even when wet. I don’t carry a tent but I darn sure carry bug spray to keep from being eaten up at night.

One thing I would absolutely, positively include in any BOB is Dr. Scholl’s moleskin. Blisters can be debilitating and completely screw up your timeline for reaching your BOL, and moleskin is incredibly effective at preventing and protecting blisters.

Take care of your feet-stop if you feel a hotspot developing and take care of it. One benefit of a lighter BOB is that depending on the terrain you’ll be crossing, it may allow you to hike in much lighter shoes than heavy hiking boots, which reduces the chance of blisters.

I have gotten to where I hike and backpack in sneakers on even the roughest terrain, and much prefer them to my heavy boots. Unless you’re used to walking, the practice hike should leave you sore. In a real bug out, expect to be quite sore the second and third days. Usually, by the fourth day, the soreness will begin fading and you’ll be getting into shape, and the hiking will get easier and maybe faster as well.

If after your practice hike you are still worried that your bag may be overloaded, you may want to add a plastic lawn bag to the BOB, so that you can cache non-essential items during your bug out.

Filed Under: Bugging Out

What Should I Put In My Child’s Bug Out Bag?

June 16, 2019 M.D. Creekmore

What Should I Put In My Child's Bug Out Bag?

by Beckie B

As many of us are working on our bug out location, stocking food and water, which we all know takes both time and money.  You might be working on living off the grid, solar, wind and water which again is time-consuming and costly, securing guns in case martial law goes into effect, and it seems the list of things grow each time you think about what you will need.

In our home, the food and water storage is the work of both of us, the off-grid falls on my husband as well as working on securing our safety with guns, gas, and wood.  My job is securing the future of our grandchildren.

So much has been posted on the above, but I have not read much on the children who will be impacted the most in the worst case scenario.   Our grandchildren range from the ages of entering the world in October 2012 to eleven and it is very important to me that life keeps some normalcy for them in changing times.  Since nobody knows how long life will be effective, preparing for them is my top priority.

Preparing both our local bug out location and our second, where we will end up and hopefully live out the major portion of our time, takes planning.  As some of our grandchildren are not of the age to walk far (a consideration that truly needs to be addressed by all) if the need arises, and ground needs to be covered to reach your location, have you considered how to move them if needed.  A bike with a cart in tow is one option if you have the means to get them or build them.

Wagons, sturdy big wheels to handle all terrain is a second option, as I figured it is easier to pull than push a child,  and both carts and wagons have the capacity to carry more than a child.  Remember weight also plays a big role in the walking scenario, and too much will wear a person out.

A child, two bug out bags, and blankets, and two adults per one child, as to have the ability to rotate this chore is how I am setting up our departure.  I do hope that the truck works and all of this prepping will not be needed, but I’d rather be prepared in case it is needed.

So now you are in your bug out location, is it child ready?  Have you considered how to occupy a child for long durations of time?  Some will be lucky enough to still have the ability to go outside and play, others will be homebound.  Games and toys are part of a child’s life, and while it is impossible to furnish them with all that most children have nowadays, I decided to stick to the basics of life.  Coloring books, and puzzle books.

Both locations have all of these as well as crayons and markers, which you can get rather cheaply at the locate dollar store.  Games like Yatzhee, Uno, Sorry, Life and Monopoly as well as decks of cards (which can provide endless hours of many games) are on hand.

These again can be picked up new or used but will provide hours of entertainment for children.  I have also stocked matchbox cars (gender friendly), small building sets, and have been raiding our grandchildren’s old toys each November and moving them to our bug out locations to provide them both normalcy (it was theirs and it is still here) and allowing them to be a child still.

Books to read and you need to remember expanding knowledge requires new books, workbooks to teach young ones the basics, reading, writing, and arithmetic are essential to both their development and a sense of normalcy, and again the dollar store is a great place to achieve this goal.  These items can be passed on if you use them as tools and provide paper and pencils instead of having them write in the book itself, which will save you in the long run.  Learning is part of being a child, as well as schooling, and this set time daily will again bring some secure back into their lives.

Now to the most important part of being prepared for children, clothing!  While most adults do not have to worry much about clothing, as belts will always work on pants that might become too big, or a couple of quick stitches work on darting them, children do have a tendency to grow and the need to have clothes to grow into is a must.  Pants and shirts can become short, and children will survive, but at one point it just will not fit them.

Stores and shopping will not be an option, and while some will be lucky enough to have the ability to sew, others will not.  Another consideration is the weather.  Will your weather be affected in your area?  Stockpiling clothing is something I began two years ago, and I am keeping it to the basics.

Underwear, socks, sweatpants, and sweatshirts, as well as shorts and t-shirts.  I decided that basically, I need 4 of each in sizes ranging from 2T to 16/18 (as at 18 they most likely will be wearing adult clothing).  Underwear and socks were a main stay for each group as these are essential to everyday living.  In our location, I have also added winter coats and snow pants to my stockpile list (and for those up North, now is the time to pick these items up at great savings) as well as hats and gloves.

PJ’s were not an option, as children are very happy to sleep in sweatpants in winter.  With this knowledge and the fact that children can be rough on clothing, and the need to be able to pass down to the next child, I have also stocked patches and material to mend the clothing if needed as well as buttons and snaps.

With the clothing covered I also had to consider the need for growing feet, so I have stockpiled both snow boots (again a Northern issue) as well as sneakers in each size.  In all the above I did not go gender specific, what works for boys usually works for girls, so I keep colors basic.

All of these items I bargained shop for and do not spend more than a dollar to three dollars on with the exception of winter clothing, but most of those I have picked up for under ten dollars each.

The last normalcy I wanted to provide for the younger children, was their belief in Christmas, so we have a bin at our bug out location that Santa can still come and leave a toy behind on Christmas, Again dollar stores and shopping right after the holidays allowed this to be accomplished and the bin filled for under $50.00 and Christmas will come for many years.

Since our children and grandchildren will hopefully be the ones to reestablish our world, giving them the fighting chance is very important, and allowing them the ability to be children thru the changes helps to ensure this.

Filed Under: Bugging Out

12 DIY Home Security Hacks for Under $20

June 14, 2019 M.D. Creekmore

DIY Home Security Hacksby Tomwat01

Being one of the responsible property owners out there, it’s your duty to keep your residence protected as well as safe. However, it is not the fact that you will be able to do so only by investing a considerable amount of cash.

There are many ways to get the job done without breaking the bank and sometimes you can do it free of cost as well. In the following paragraphs, we will be mentioning some surefire DIY home security hacks that will come of use to every homeowner out there.

But, first, we will talk about those things which are actually going on in the minds of the burglars.

Things Going On In the Minds of the Burglars:

  • In case alarm systems are installed in your residence, about 90% of the burglars will try to avoid entering your house.
  • The favorite time for the intruders to enter your home will be the daytime when none is present inside.
  • It will be possible for the burglars to understand whether your abode is vacant or not by looking at the recycling bins, trashcans, and a lawn that is overgrown.
  • Nearly 30% of the burglars are in the habit of entering residences without exerting any force by means of an unlocked window, door or any other opening.
  • On some occasions, these intruders may also knock the front door and in case someone answers from inside they will come up with some fake stories.
  • Instead of going to the bedroom of the kid, the housebreaker will go directly to the master bedroom.
  • Most of them will think that someone is within the house in case they hear television or radio going on.
  • The thieves dislike a couple of things, in particular, namely curious neighbors and barking canines.

Next, we are going to mention the top 12 DIY home security hacks below $20.

1. Fortify the door

Expenditure: Less than $15

The first and foremost thing to protect your residence against robbers will be to strengthen your door. For this, you can do several things that will make sure that intruders cannot enter into your house forcibly.

  • Make sure to swap the regular lock using long-throw deadbolts
  • Prevent entry by using reinforced strike plates
  • Make the door more secured by using long wooden screws drilled right into the doorframe
  • Use a metal frame to replace the regular wooden frame
  • Make use of more than 1 lock at various heights and a couple of them at the identical height
  • Make use of a steel core door rather than a regular wooden door
  • Make certain that the locking mechanisms are left exposed in the doors and windows

2. Make the sliding glass doors and the windows secure

Expenditure: Less than $10

The most common entry point of the intruders happens to be the front door. After the front door, the windows and the rest of the doors are the most common avenues of entering a house. Sliding doors, in particular, can be lifted from their tracks easily and this makes them vulnerable to the housebreakers. Windows are also targeted by these criminals.

However, it is feasible to keep something in the track of the windows and the sliding doors to prevent them from being forcibly opened. You may use a charlie bar in case of the sliding glass doors for this. Otherwise, using a wooden or metallic rod in the track will also not be a bad idea.

You can also secure the windows in the same manner. Screws can be placed in the tracks or additional locks can also be provided to the windows to make them secure.

Breaking into my own house – Sliding glass door is useless!

3. Contact the post office

Expenditure: Free

In case you are going to some distant place away from your residence, make sure to inform the local post office to place a hold on your mails. The same can be said of the daily newspaper delivery to your house.

In fact, a burglar can easily understand that your house is empty in case they see a pile of mails overflowing from your mailbox. A heap of newspapers at your doorstep will convey the same thing to them.

You might likewise request your friendly neighbors to collect the newspapers each morning while you are out of the station. This way you can avoid informing the burglars about the fact that your house is vacant.

4. False home security sign

Expenditure: Around $10

Criminals have plenty of targets in front of them and your house might also be one of them. Therefore, you ought to do something that will not encourage them to enter your house by force. You can make use of a false security system sign in the front yard. This will serve the purpose of protecting your house at a relatively inexpensive rate.

5. Affordable door and window alarms

Expenditure: Around $20

As mentioned earlier, robbers prefer to enter through the windows, and in case you do not remember to lock them you will be inviting your own danger. Try to get hold of several door as well as window alarms and install those on every window and door in your house. The alarm is going to sound once a window is opened by anyone within your residence.

6. Ensure that your house is taken care of while you away

Expenditure: Free

Suppose you are going to spend your vacation on foreign soil for a couple of months. In that case, make sure to request your helpful neighbors to mow the lawn at regular intervals during your absence. If the lawn isn’t mowed for a couple of months, the burglars can easily comprehend the fact that none is there in the house to take care of the lawn.

The same rule applies in case snow piles up in your backyard during the winter months. The absence of any footprint and snow shoveling will inform the thieves that your house is empty.

Consequently, always request or appoint someone to look after your home while you are away. This will aid you to protect your house from the burglars and you will also be able to avoid paying fines to the authorities that they can impose against your property.

7. Get a Dog

It is a fact that dog is man’s best friend, and this has been aptly demonstrated by the way in which the pooches protect their masters in times of need. Try to get hold of a dog for safeguarding your property while you are not there. The sound made by these animals will be adequate to drive any burglar away from your house. Even though your dog belongs to a small breed like a Chihuahua, the sound made by them will be enough to wake you up from your sleep in the middle of the night.

If there is ample time, you might likewise train your pet on how to safeguard your home. You will come across lots of dog-training classes out there, and one of them can impart the necessary training to your pooch.

8. Let everything be illuminated

Expenditure: Below $20

Robbers hate lights, particularly while they are about to enter your house in the wee hours. Lights will help to expose the hiding spots of these offenders and they will be in all sorts of trouble.

When it comes to outdoor lighting, it will be a smart idea to install motion-sensor or automatic lighting on the outskirts of the garage, the back patio, or any other entrance to your home. You will find different types of affordable options on the market to choose from.

For indoor lighting, you may make use of the outdated Christmas lights for lighting up your abode while you are away, and connect them to a lamp inside your house. You can switch on the lamp using a timer and switch it off as well from a remote distance. In this way, you will be able to make it appear that you are present in your abode.

9. Conceal the precious items

Expenditure: Free

It is the natural propensity of the offenders to enter your house stealthily and also leave it as soon as possible after stealing your valuable items as well as jewelry. Being a responsible property owner it is your duty to secure your home, and therefore, you should make every effort to protect these items in the best possible way.

For this, it will be a prudent step to purchase a safe which will help you to get the job done impeccably. You can hide the precious items within the safe in your abode. A safe that resembles an electrical outlet or a wall clock safe will serve you just fine.

10. Make the garage secure

Expenditure: Less than $10

It is not known to many folks out there that they ought to safeguard the garage from the intruders given that they are likely to store costly equipment right there, not to mention their cars as well. The garage can be secured in the following ways:

  • Locking the door which leads to your room from the garage
  • Closing the garage door such that it is impossible for any passerby to understand what’s going on inside
  • Purchasing a motion sensor light and installing it above the garage
  • Trying not to leave the garage door opener in your vehicle particularly while the automobile is parked in the parking lot.

11. Reconsider the “Hide-a-key”

Expenditure: Free

It is a fact that most of the individuals are aware of the “hide-a-key” trick. On some occasions, you would like to hide your key somewhere else apart from your residence which might include your porch, under a plant or a rock, the welcome mat, or any location similar to that.

However, the unfortunate thing is that the intruders are aware of this fact too, and it is rather simple for them to locate your hide-a-key and enter your house while you are outside. It is similar to leaving the keys on top of your vehicle’s sun visor. Burglars are experienced enough to detect them without much problem at all.

In case you plan to use a hide-a-key make it a point to find out a spot which is not in the close vicinity of the door which the key unlocks. Try to conceal the key somewhere which is at least 30 feet away from your residence. However, the most sensible thing will be to avoid using this option at all.

The reason for this is that in case you are being observed by any criminal that you are in the habit of checking a particular spot prior to unlocking the front door, they will be able to comprehend that it is the hiding place of your key. Thus, they won’t have any problem to force into your home.

12. Set up a video doorbell

Expenditure: Around $15

It will be possible to control who is permissible to enter your home with the aid of a smart lock while a video doorbell will enable you to observe who has arrived at your door. In case you own both of these helpful items, you won’t find it difficult to see who has come to your doorsteps and then it can be unlocked remotely in case you have no problems in letting them in.

The video doorbell will likewise allow you to monitor the porch in case you have any package delivered to you in your absence. You will come across lots of different types of doorbells on the market at present and you will never run out of choice till you find the one within your budget.

Conclusion:

All these DIY home security hacks are not only meant to provide your home with total security against any intruder, but these will also likewise aid in minimizing any possibility of your home to become the target of the criminals.

Apart from these above-mentioned home security tips and tricks, there are several more out there as well. Feel free to look out for these DIY home security solutions on the web where you will come across lots of video tutorials that will be available to you for free. Experiment with several of these hacks till you find some that are according to your preference.

Filed Under: Security

10 Ways to Dramatically Improve Your Front Door Security

June 14, 2019 M.D. Creekmore

Improve Your Front Door Security
Burglar, breaking into a home.

If you’re looking to save yourself from the possibilities of a potential home break-in, it is high time you consider upgrading your front-door security. But how exactly do you get your security a notch- above? What measures should you take? Let’s explore!

✅ Upgrade your Locks

Locks are one of the most essential aspects of your front door security. So, before anything else, you need to invest in a good set of locks. One of the best options here would be a deadbolt lock. These locks are solid, hardy and incredibly useful.

Once you get the lock, make sure the deadbolt of your door completely extends to the opening of the door jam. This should be further reinforced with a strong metal strike plate.

Also, while choosing a lock, do make sure that the bolt doesn’t have any exposed set of exterior screws. This will ensure an added layer of security.

Finally, you should also take the time to reinforce your existing key locks. Using cylinder guards is a good idea here. These guards around your locks will prevent from trying to wrench your locks loose.

✅ Get a Security Screen

Having two doors is always better than having a single one. And this is exactly why you need a security screen. For the uninitiated, security screens are the pierced metal barriers that have enough space for extra locks. They are usually installed in the open along with the point of the ingress. This, in turn, prevents the possibility of attacks that involve kicking your door wide open.

The extra locks in the security screen will also prevent the possibilities of covert entry. This is because you have an added deadbolt and knob as an add-on for the security of your front door. The best part: since these security screens have pierced openings, you can easily open the door and see everything that’s happening outside without involving in the risk of getting yourself outside. Security screens offer more vision than regular peepholes.

While choosing a security screen for your front door, make sure the product is durable enough here is a nice one on Amazon.com. A durable and high-quality product will go a long way in preventing destructive entry. In fact, the stronger the metal is, the better will be your defense.

✅ Lengthen the Set Screws

If you’re looking for quick, affordable DIY home security hack, this is one of the best ways to go about it. For this, all you must do is replace your existing set screws with longer, 3-inch screws. But how does this work in the first place? Well, the idea is simple.

Thief Kicking The Door - front door security tips

When your standard door is kicked, the pressure is exerted by the bolt of your deadbolt. Now, when you have smaller set screws, your strike plate will only be secured till the door trim. Since this trim isn’t usually strong, the strike plate will be easily destroyed.

Finally, your bolt won’t be able to extend anywhere. Luckily, with 3-inch set screws, you’d be biting along the stud of your door jam. This will further prevent your strike plate from being easily destroyed.

✅ Strengthen the Glass Surfaces

Most front doors are located at a proximity with windows. Some of them even feature glass windows on them. Either way, both the arrangements can cause major damage to your front door security, if not addressed the right way. There are three ways in which you can deal with the issue.

First, get rid of the glass so that if someone smashes it, they won’t be able to get their hands inside for manipulating the thumb turn on the other end.

Next, try installing bars on the glass. As you do this, make sure the bars are close enough, thereby preventing the possibility of anyone reaching them. Finally, place a security film on your windows to offer an extra notch of security.

This will keep your windows safe and prevent the possibility of sudden, unannounced disruptions. You can order a roll of security film from Amazon.com click here to check the current price.

✅ Get a Surveillance System

If you really want to protect your loved ones from potential danger, it is high time you invest in a good surveillance system. A good security system will help you deter burglars while also identifying intruders. But in order for this to happen, you need to place the camera the right way.

To start off, try to place the camera right above your front door. Make sure this is completely visible from your subsequent street. Now, get another camera and position it directly, pointing to your door. This will further ensure that you get the footage from different angles. Since this will also give you the footage of the intruder’s face, it is especially useful.

Here is the wireless camera system that I use. I bought this from Amazon a few months ago and so far it’s worked great and super easy to set up. You can click this link to see it at Amazon.com.

In addition to deterring burglars, the right security system will also play a major role in helping you monitor your deliveries and kids when they play outside. At the end of the day, you’ll be at complete peace of mind.

✅ Strengthen your Door Frame

If you’re really looking forward to proper home security, take adequate measures in strengthening your door frame. While most external doors are built quite sturdy, not all of them fall under this category. Also, if your door is hollow in the interior, it’ll be easy to break through even if its body is made from metal.

So, before anything else, check if your front door is completely solid. Double check to ensure that it isn’t hollow in the interior parts. Since solid wood doors are much better than their hollow core variants, it is always better to invest in a good, solid door frame.

Also, while you strengthen the front door, don’t ignore your back doors either. Ideally, your back door will need the same degree of security as your main door. So, add deadbolts, sophisticated locks, and strike plates to your back door as well.

If your door is sliding, try getting key locks both at the top and the bottom. Alternatively, you can also get a metal rod and fit it along your door’s track. This will prevent it from automatically sliding open, while you’ve locked the door.

✅ Use Sophisticated Tools

Another way to strengthen the security of your front doors is by using sophisticated tools. While there are many tools that can help you here, some of the top options include:

Door lock Reinforcer – These tools are positioned along with the existing lock of your door for offering extra security when someone picks or tries to break the lock for forcefully entering your house.

These reinforcers are extremely portable, and you can conveniently install them by snapping them in place along with the lock. However, before investing in a good reinforcer, check if the device works with your lock because certain products don’t work well with smart and horizontal locks.

Door Jammers- Made from plastic or steel, door jammers are yet another common measure for notching up your front door’s security. Ideally, a door jammer will be placed on the floor while having a distance of at least half an inch from your door.

These devices are pressure mounted for added portability and can be easily removed during emergencies. Click here to see an example of a door jammer.

Door Security Bars- These devices are kept right at the center of your door for preventing burglars from directly kicking your door. While some are hardware mounted variants, others can be easily installed with their pressure-mounting functionality.

Available in plenty of shapes and sizes, you can easily adjust these bars with the width of your door.

✅ Get Wide-Angled Peep Holes

woman looking at peephole - Improve Your Front Door SecurityOne of the most common ways criminals intrude your privacy is by knocking on your door or ringing the doorbell. Once you gullibly answer the door, they forcibly intrude in your property. Yes, this can even happen when your door is partially open.

A good way to avoid this issue is by getting wide-angled peepholes. Once you have this installed, you’d get to know if the person at the other end of the door is carrying any harmful tools.

✅ Metal Grills

If you have a glazed or semi-glazed door, you can always notch up its security by getting decorative metal grills in the interior of your door. Alternatively, you can also add a protective layer along the back of your door’s glass.

If you’re planning to replace the glass or purchase side panel or glazed door, make sure the glass is completely laminated. In this way, it’ll hold itself in place even when it is completely shattered. Also, when a laminated door is installed from the interior, it can’t be easily removed from outside, thanks to its solid beading.

✅ Strike Box

A strike box will strengthen your front door and prevent intruders from barging into your home. This is usually done by getting the existing strike plates replaced with a stronger structure that features metal pocket, big plates, and a strong connection to the wall studs. For accommodating this added feature, you’ll have to enlarge both the recesses of your cover plate as well as the hole in your jam.

Bottom Line

Once you adopt the given measures you will successfully end up securing your front door against burglars, strangers, and intruders. Since the given hacks are easily accessible and simple to follow, we are sure it won’t take you much time to get through.

Filed Under: Security

  • « Go to Previous Page
  • Page 1
  • Interim pages omitted …
  • Page 43
  • Page 44
  • Page 45
  • Page 46
  • Page 47
  • Interim pages omitted …
  • Page 87
  • Go to Next Page »

Primary Sidebar

Subscribe to Blog via Email

Enter your email address to subscribe to this blog and receive notifications of new posts by email.

Join 7,202 other subscribers
  • Amazon
  • Facebook
  • Substack
  • Twitter
  • YouTube

“Do more with less.”

– Minimalist proverb

Recent Posts

  • Just so you know
  • Weather Update for My Corner of Appalachia
  • Why I’m Ordering Ivermectin + Mebendazole Every Year
  • The Website’s Shutting Down (But Here’s the Plan)
  • You Are Hated! Start Training Like It!

Footer

Recent Posts

  • Just so you know
  • Weather Update for My Corner of Appalachia
  • Why I’m Ordering Ivermectin + Mebendazole Every Year
  • The Website’s Shutting Down (But Here’s the Plan)
  • You Are Hated! Start Training Like It!

More about me

Books I’ve written

Books I’ve read

Follow Me on YouTube

Follow Me on Facebook

Gear I Use and Recommend

Newsletter

Search this site

Follow me elsewhere

  • Amazon
  • Facebook
  • Substack
  • Twitter
  • YouTube

© 2008–2025 M.D. Creekmore · As an Amazon Associate, I earn from qualifying purchases.