• Skip to main content
  • Skip to secondary navigation
  • Skip to primary sidebar
  • Skip to footer

M.D. CREEKMORE

  • Blog
  • Books
  • Newsletter
  • Gear I Use
  • About
  • Contact
  • Facebook
  • YouTube
  • Blog
  • Books
  • Newsletter
  • Gear I Use
  • About
  • Contact
  • Privacy Policy

Blog

How to Make a Tripwire Trail or Camp Alarm

September 13, 2018 M.D. Creekmore

camp or trail alarmMany of you, have watched the old war movies where the approaching enemy trips an alarm made of tin cans, which in turn alerts the good-guys to their approach. The advancing troops trip the wire and the cans fly up into the air, making enough noise to alert the good guys to the approach, allowing them time to mount an effective counter.

In the real world there are better, more effective alarms that can be made to guard the entry points to your position, but since we love movie magic, I thought this infamous contraption would be a good place to start.

First, find the most likely area of approach and one offering enough cover to effectively hide the trap and wire. One of the best places is where the trail makes a sharp turn in another direction, this makes it more difficult for the target to spot the wire before tripping the trigger and sounding the alarm.

Try to make everything look natural, avoid breaking branches, turning over leaves or loose dirt, clean up all wood shavings etc. You want everything to look just like it did before you set the alarm.

It’s best to dig a slight depression to hide the cans, do this on the opposite side of the tree away from the approaching intruder. Add two or three rocks to inside each can then cover with natural cover to hide them from view.

This design and trigger can be used with other “noise makers” one of my favorites is a cowbell or goat-bell, a bell is louder and easier to hide. The main problem is that they may not be available when needed. But I’m sure you can come up with more ideas.

If you are interested in learning more about traps and path guards I recommend the Trapper’s Bible: Traps, Snares & Pathguardssurvival trapping by Dale Martin. This book includes pest snares, large animal snares, and transplant traps, plus camp alarms that alert you to intruders and deadly pathguards that could save your life.

Filed Under: Bushcraft

Archery Tips For Beginners

September 13, 2018 M.D. Creekmore

bow hunting tips for beginners

by Morgan

I’ve been an archer for around 14 years. I learned to shoot with a recurve when I was in college and I immediately fell in love. After that class ended, I ran to the nearest bow shop and picked up a compound bow. It was a Browning and it was beautiful. I shot a lot, but I never took it seriously and my accuracy was always way off, but I didn’t care as I was doing it for fun.

I moved to a new state and the movers lost my bow. I was so devastated, I loved that bow, I had had it for years and now it was suddenly gone. I didn’t pick archery back up for many years after that. It’s unfortunate that Browning doesn’t make bows anymore. A friend of mine was generous enough to gift me a Browning Recurve which I love and use as often as I can.

I digress; I love archery. Everything about it is so soothing. I am totally zen when I’m shooting my bow. The whole world just disappears and all that’s left is the target in front of me.

The primary bow that I shoot is a compound by Bowtech, the Eva Shockey Signature Series. It’s a light, fast, quiet bow. I practice with it at least once a week.

I love my compound, but I know in a true survival scenario that a compound may not be the best option for long term.

Here’s what we should consider about archery before choosing it as one of our main sources to hunt or for defense or whatever else.

Types of bows:

–Compound: The compound bow has a lot of moving parts that we must maintain to keep it running smoothly. Even if you keep extra pieces on hand, it would be difficult to maintain if you’re not at home with the necessary tools.

On that same note, it’s impossible to change the string of a compound bow without a press. So if you must change out the string (which you will have to do at some point, no matter how well you maintain your string), you need a bow press in order to get it off and get a new one back one. So even if you keep an extra string on hand, you’ll still need some way to get the new string on.

Some compounds are kind of heavy and bulky as well. Mine is lightweight and doesn’t feel bulky, but it could be a hindrance to some.

Deer at Cades Cove TN
Some nice deer at Cades Cove – Great Smoky Mountains TN.

The arrows are another concern. Unless you have a lot of arrows, they could get lost or break and you’d quickly run out of arrows. You can’t just make new arrows for a compound because of the sheer force that it would put on the wooden arrow, the arrow would simply shatter.

Lastly, you need a release to properly operate; if your release breaks, it’s gonna be difficult to macgyver a new release or to fix whatever happened to your existing release.

For the short term, as long as you wax your string and don’t dry fire it, it should last quite a while. But it wouldn’t be a super long-term solution. I haven’t changed my strings out in 2 years and they’re still perfectly fine, but they are getting to the point where it wouldn’t hurt to change them out.

–Crossbow: They have full-size crossbows and more ‘handheld’ crossbows. I’m personally not a fan of crossbows in general because they are heavy, bulky and it takes a lot of time to re-nock an arrow (bolt). Not only that, but it can be quite difficult to even nock a bolt depending on your strength. They do have crossbow assists that will help you nock your bolt, but even so, it can be difficult.

Many people may still choose this option because they’re kind of like a rifle, they come with a scope, you aim and pull a trigger and it’s a lot quieter than a rifle. So if you’re looking for something that it quiet but still want that point and shoot, a crossbow may be a good option.

However, just like with a compound, you have a lot of moving parts that you’ll need to maintain and/or fix.

Not only that, but it may not be possible to make bolts out of wood for your crossbow. The crossbow has so much power behind it that simply trying to make some wooden arrows for it probably wouldn’t work out too well.

Short term, a crossbow may be a good option, just make sure you have the appropriate tools and plenty of bolts. Those bolts have a habit of disappearing!

–Recurve/Longbow: I’m putting these into the same category because while they are difficult, they’re also kinda basically the same.

Whether it’s a takedown bow or all one piece, the recurve/longbow have very little downsides. They’re wood and string, that’s about it! It’s easy enough to make arrows out of wood and use them with basically any recurve or longbow, depending on the weight.

Make sure you can string and unstring the bow yourself. Also make sure that you can properly pull back the string, that it’s not too heavy. Unlike a compound, with a recurve/longbow you’re holding back all of the weight. If it’s a 35-pound bow, you’re pulling and holding back 35 pounds.

It’s also fairly easy to make a recurve/longbow and the arrows out in the field out of wood. I would highly suggest making a few before SHTF just so you know what you’re doing. There are a lot of tutorials online.

The recurve/longbow are definitely great options for short term and long term.

–Survival bow: I’ve heard mixed reviews about the foldable survival bows. Some people rave about them and others think they’re garbage.

In theory, a foldable, lightweight bow is ideal. In some cases, even the arrows fold.

Just be sure to do your research on this type of bow. I wouldn’t recommend getting this as your first bow, but more as a bow that you get after you’ve practiced a lot and feel confident in your archery abilities.

Even if you feel confident, if this bow is going to be your SHTF bow, you’ll need to practice with it regularly.

Considerations:

Bow Hunting Skills

Archery is a perishable skill. Don’t believe anyone who says that they can stop shooting for 13 years then suddenly pick it back up and still be able to shoot a dime 50 yards away. I’m sorry, that’s not how it works. It is a perishable skill and needs to be treated as such by practicing as often as you can.

Whether you plan to be using archery for just SHTF purposes or whether you want to get into bowhunting, bowfishing or 3D shoots; you need to practice. As I mentioned, I practice at least once a week, but you can choose to do more or less depending on your time. Just make the time. It takes only 10 or so minutes to sling a few arrows down range.

Learn how to properly shoot a bow. Take a lesson or two and gain the proper knowledge. A YouTube video is ok, but you’ll gain a lot more insight if you take a class in person.

Being good at archery isn’t just about accuracy. Of course, we all want to be amazing and hit the bullseye every time, but practicing will also help you get to know your bow; how to troubleshoot problems, what works, what doesn’t, your strengths and weaknesses, etc.

Archery also teaches you patience. Nobody is an expert right off the bat, so it’s going to require dedication and focus to be able to hit the target exactly where you were aiming.

This is especially true for recurve/longbow. They are a lot harder to master than a compound or crossbow. With a compound and crossbow, you have sights that you can adjust in order to make the right shots. You don’t have those devices on a recurve/longbow. All you have is practice and your intuition!

It’s not necessarily hard to learn how to shoot with a recurve/longbow, it just takes a bit more time and effort.

Learn how to maintain your bow and then properly maintain it. The better maintained it is, the longer it’ll last.

Never dry fire your bow. Dry firing means to pull back the string and let it go without an arrow. Without an arrow, instead of the energy pushing the arrow, all of the energy transfers to the bow and could damage your bow.

Make sure you wax your strings before and after each time you shoot.

Be sure to check the limbs for any cracks regularly, even if you don’t dry fire it, your bow could still become damaged over time.

Be sure to check your arrows for any cracks or damage. A damaged arrow can break before it’s even released and cause a lot of harm.

Make sure that you find a bow with the appropriate pull weight. You don’t want it to be too heavy or too light.

Relax and have fun! Even if you miss your intended spot, it’s ok! Not the end of the world. Just keep practicing and have fun. You’ll get better in time.

Aim small, miss small. As you get better with your archery, try to aim at smaller objects. It’s a fun challenge and the smaller the objects that you can hit from various distances, the better off you’ll be when you’re trying to hit your intended target. If you’re hunting rabbits, for instance, they are small and quick and require a lot of practice to accurately hit in an appropriate spot.

And it’s worth repeating: practice, practice, practice! Practicing consistently will help you to better use your bow in stressful situations, especially while hunting. Consider a mantra to help you relax and focus. My mantra is:

Aim – Focus on the target and where you want the arrow to go.
Breathe – Take a deep breath and as you’re letting it out…
Pull-Pull the trigger/release, this helps you to relax your shoulders and everything else.
Follow Through – Don’t yank the bow down so you can see your shot; let it drop naturally and hang there for a second. Then pull your bow down and look at your shot.

Dedication will be required if you choose archery for hunting, or survival purposes. But try not to take it too seriously, archery is a ton of fun and there are a lot of great archery events to participate in all across the country.

Filed Under: Archery

8 Things You Need To Know About Bushcraft

September 13, 2018 M.D. Creekmore

Bushcraft and survival skills to learn nowby Angela Williams

Civilization and advancements in technology have reduced to the minimum manmade disasters. Even some natural disasters can be foreseen and adequately planned for. However, Mother Nature sometimes has its way and, leaves a catastrophic aftermath. In such a case, your level of preparedness is the single most important determinant of your survival.

Such preparedness also comes in handy if you are in the wilderness.

To survive in the woods, you must possess some unique bushcraft skills, skills that the best preppers have perfected over the years. In this tutorial, we will provide you with 8 basic bushcraft survival skills that you ought to know to be a successful survivor.

1. Sourcing and Purifying Water

Over 70 percent of your body is water. For that reason, you cannot survive for more than three days without drinking water. In an extreme environment, it may not even be possible to survive that long. Perhaps the most important survival skill is locating and purifying water. It is always good to store sufficient water at all times and carry some prior to leaving for an exploration.

Mother Nature is another good source. You can actually extract clean drinking water from certain plants, especially those with large, green leaves. However, you have to learn to do it properly as some plants may be poisonous. Learn how to extract water from plants in time for adequate preparedness. If there is a ready source of water such as stream, river or pond, use the water only after filtering and boiling it.

2. Starting and Fueling Fire

The next basic but important skill is starting and fueling a fire. This skill is only second to sourcing and purifying water. Hypothermia, a medical emergency that occurs when your body is incapable of producing enough heat to cope up with heat loss, is a real threat if you do not find a way to start a fire to warm your body.

Fire is also essential for water purification, cooking of food, warding off deadly predators, cauterizing wounds following injury and in signaling help in case of an emergency. Ideally, it would be good to have matches or lighter in your person at all time. However, you must also equip yourself with skills so you can start a fire from scratch. Learning how to start a fire from scratch and tend to it is a vital survival tactic all survivors must undergo.

3. Building a Temporary Shelter

The basic needs for human survival are water, food, shelter, and clothing. If you leave to wander in the woods for a day and return to civilization in less than a day then building a temporary shelter should be the least of your worries. However, the story is different if you were to be lost in the wilderness for a couple of days. You would want to build a shelter to protect you from the elements and for peace of mind.

The risks and dangers of emergency are compounded by extreme weather including rain, snow, thick fog and cold. The manner of building shelter depends much on the surroundings and the environment where you are. Learn the best types of temporary shelter to build in emergency situations. Examples include Round Lodge (wickiup, teepee, or wigwam) and Lean-to.

4. Foraging and Hunting For Food

In a survival situation, the usual sources of food are no longer available. Once your food reserves are gone, you are left with the option of trusting Mother Nature to take care of your nutritional needs. You must learn to find and catch food to keep yourself and your loved one alive.

You can use various methods to forage and hunt for food. Such methods include hunting game using self-made weapons, trapping via small game survival snares, and fishing using a line and a hook and foraging for edible fruits, seeds, and herbs.

Concerning the latter, there are many helpful resources that can guide you on the particular plants to go for.

5. Proper Use of Survival Tools

Since most individuals cannot afford all the survival tools currently available in the market, the wise thing to do is pick the appropriate ones for your needs. Survival tools will help you in making a temporary shelter, fetching and preparing firewood, hunting, and cooking among other needs.

The most common survival tools to have in your possession include a flashlight, tactical folding knife, a backpack, scissors, hammer, splitting maul or ax, nails, pliers just but to mention a few. However, it is not enough just to have the tools; you must also know how to use them properly. This will not only make your work easier but also prevent accidents or nasty failures.

6. Psychological Preparedness

Survival means staying safe and functional by mitigating the effects of the disaster or emergency situation at hand. It takes a lot to manage your attitude and personality in an emergency situation. One of the most important survival skills is psychological preparedness. You must have confidence that you will survive despite the difficulties presented by the situation.

Think of what might happen to you if you were to lose hope along the way. It could prove fatal in the end if you cannot get your act together and approach the situation with confidence. It takes a lot of practice and soul searching to prepare psychologically for any eventuality in an emergency situation.

7. Predicting Weather

In most cases, we do not have to worry about the weather conditions of our immediate environment unless there is an impending natural calamity such as hurricane or floods. Nevertheless, being able to forecast weather is a vital skill every prepper should learn. The lessons will become handy in an emergency situation.

Any sudden change in weather conditions if you are in the wilderness can prove disastrous to you because you will not have the necessary skills to mitigate it. Among the weather predicting skills to learn include air pressure, cloud types, animal behavior and variations in temperature. While you can use weather prediction gadgets such as barometer, thermometer and so forth, you must also be able to make approximations from these natural phenomena.

8. First Aid Basics

First Aid is a fundamental skill everyone, especially preppers, must learn as part of disaster or emergency preparedness. In case of emergency, this skill can help you get out of a deadly situation. For instance, you might get a cut that leads to severe bleeding. In such a situation, you can use your First Aid skills to stop the bleeding before you access a medical facility for a more robust treatment. It also means you must have a small First Aid Kit.

Bottom Line

Acquiring the 8 bushcraft skills discussed is the first steps in learning outdoor survival bushcraft skills. Bushcraft skills are easy to learn with practice and incredibly helpful. If you do not possess these skills, chances are that you will fail if lost in the woods for an extended amount of time and I believe that’s something you do not want – so get to work.

Filed Under: Bushcraft

The Survivorman Zones of Assessment: The Key To Your Survival When The Situation Seems Hopeless

September 12, 2018 Guest Author

bushcraft skills for survivalBy Les Stroud aka Survivorman

You can imagine almost any survival situation. Dumping a canoe in a set of rapids. Falling off the edge of a cliff. Or simply, you’re lost. So what next? What exactly do you do now? In reality, your next move could be the most important thing you ever do. It will be perhaps the most important decision you ever make. That next step may ensure your survival or doom you to a tragic end. At the very least, this decision may make things much more difficult than they need to be.

First and foremost, when faced with a survival or traumatic situation of any kind, one must calm down. “Take a knee”. Calming down enables the person to start to use their brain power in a useful way for enabling salvation from the circumstances, whatever they may be. However, just calming down is never enough, for it only stops the action of the moment. What comes next is the most important aspect of survival: making a decision and taking action.

However, doing so without considering the options is foolhardy at best and likely to lead to disaster, more problems, or an exacerbation of the problems at hand. So decisions must be made on how to move forward.

So far all of this is not rocket science, yet how does one make decisions without knowledge? This is where the magic of survival skills, of all kinds, kicks in – with knowledge. Without ascertaining all kinds of details (knowledge) about your predicament you are liable to make decisions that are ill thought out and potentially dangerous. But how do you get the information you need? Enter the Survivorman Zones of Assessment ã

Zone 1- Your body and clothes

You start with yourself:

  • Are you hurt?
  • Are you tired or hungry?
  • What are you wearing?
  • What do you have in your pockets?

*I am wearing a backpack with extra clothes, one sandwich and a half a bottle of water inside of it. I have a power bar in my pocket, a small knife and I’m wearing good boots. I do NOT have a flashlight or any signaling devices. I have lots of energy and no one is injured, but my friend Brian is not physically fit and he lost all his gear.

If you are not alone, repeat this process so that everyone checks out their own Zone 1 and determines what the group has collectively. Even to the point of saying “everyone empty out their pockets – let’s take stock”.

Zone 2- Your Immediate Vicinity

This is simply the area immediate to you – the surrounding area of a few thousand square feet.

  • Do you have a tent?
  • A canoe?
  • Do you have any food or water or other items in packs?
  • What else is lying around you – firewood? a swamp full of edible cattail? an all-terrain vehicle with half a tank of gas?
  • What can you glean from your immediate surroundings? Can you rip or break something apart to aid you? For example, can you make protective insulated boots out of your car or boat seats?

*There are three of us. We have one tent and two sleeping bags, NO group food, a small first aid kit and one lighter.

Zone 3- Your Extended Area

This is further beyond – maybe a mile or a couple of miles away.

  • How far are you from safety?
  • Do you know of anything not too far away that can help you, like a cabin?
  • Which direction is safety and how difficult will to be to get there?
  • How difficult would it be to get to safety and is everyone up for the task?
  • If not, what are the challenges to getting to safety and can you overcome them easily?
  • Does anyone know you are in trouble and if so how long before they affect a rescue?
  • How soon can you move, IF you can move?
  • Do you know these answers FOR SURE? (not knowing something is as important to consider as is knowing something)

*I remember that there is a highway only one mile to the east if we walk straight but I don’t know what the terrain is like and no one at home is expecting to hear from us for at least 4 more days. I also remember we passed a cabin only a half a mile back and I know for sure we can get to it for the night. It is only about 12 pm.

Ok – so now you know:

I am wearing a backpack with extra clothes, one sandwich and a half a bottle of water inside of it. I have a power bar in my pocket, a small knife and I’m wearing good boots. I do NOT have a flashlight or any signaling devices and I have lots of energy.

There are three of us, no one is injured, but Brian is not physically fit and lost all his gear. We have one tent and two sleeping bags, NO group food, a small first aid kit and one lighter. I remember that there is a highway only one mile to the east if we walk straight but I don’t know what the terrain is like and no one at home is expecting to hear from us for at least 4 more days.

I also remember we passed a cabin only a half a mile back and I know for sure we can get to it for the night. It is only about 12 pm.

It likely only took 60 to 90 seconds to get all this knowledge! Yet now you have many details and are able to make a series of quality and concise decisions about how to effect proactive survival – the only kind of survival there is.

March is the beginning of the end of winter. February is our blah month. The term “bitterly cold” is tossed around a lot, and most folks just want to get it over with. Then comes March, with its tantalizingly warm days that hint at an early start to spring, but exit with nights that the cold simply refuses to ease its grip on.

So, February, the dead of winter, must be the most dangerous time of the year, right? Wrong. Without a doubt the most dangerous time of year comes after we’ve put away our big down coats, but just before the grass takes on its green hue. During the peak of winter, we’re expecting the bone-chilling cold.

We wear our Michelin-man coats making us all look like miniature Schwarzeneggers, hear the forecast for ‘minus-one-million’ and step outside, already braced for the frigid, clear, Canadian air. But we’re an excitable bunch when the sun begins warming our cheeks again mid-March. Coats are thrown back in the basement closet, and people start trying to get ready for swimsuit season and the summer months to come. But beware. Early spring is the time of year that’ll get ya!

There are more cases of hypothermia during the Spring (and Fall) months than during Winter. We’re not ready for the drop in temperature late in the day when we’ve had a balmy March afternoon. We’re not ready for the damp air that seems to cut through our clothing after two months of dry air that our fleece and down staved off. If being out in the wilderness is your thing, then beware of the lackadaisical approach of Spring.

SURVIVALMAN TV

Hypothermia is a killer. Plain and simple. Though strangely, after you get past the initial shivering it’s considered to be one of the most pleasant ways to die. Your body temperature begins to drop from 98.6˚ F (37° C) and as it drops, you become clumsy, forgetful and tend to walk around in a stupor, kind of like a lot of my friends now that I think of it.

Severely hypothermic people have been known to strip down from their protective clothing, stating that they are quite warm and comfortable, even though they are slowly chilling to death.

Over-exertion that leads to sweating during the warmth of a March day is deadly. By 6 p.m. your inner clothes are soaked with sweat and now the sun is going down. Within minutes the chills up your spine begin. From there, it’s a dangerous downward spiral, yet it’s all easily avoided with some simple preparation.

First, don’t become overconfident with the beautiful, warming sunshine of the day. March nights can dip well below zero quickly. Know that the cold is coming, and keep a day-pack with a down coat packed in it. Dress in layers and, though it’s a bit of a pain, constantly strip down or layer up if you are cold or hot.

Read that last sentence again.

It is one that can save your life. While trekking or heading out into the ides of March remember my favorite saying; ‘If you sweat, you die.’

That is the long and slow story of hypothermia. But there also exists the Coles Notes version. Immersion. Also known as plunging through the weak ice into frigid lake water, or for some people, a naked New Year’s Day tradition, the Polar Bear swim. It is possibly one of the scariest scenarios to occur in the waning winter months. After a few days of thawing, water will begin to wind its way along the path of least resistance, down to the lakes, creating sinkholes and weak ice everywhere. Now ice that thirty days prior was strong enough to drive a truck on has weaknesses and fault lines large enough for your poorly dressed body to break through.

The key to surviving a fall through the ice is, you guessed it, preparation. Simply put; don’t ever venture out onto frozen lakes without a pair of ice grippers around your neck, easily accessible. You don’t get a second chance at this.

I kick myself every-time I see a pair of ice grippers in the outdoor stores. You see, many years ago, my survival cronies and I made our own ice grippers and I always thought they should be mass marketed. Ah well, someone’s making a fortune now and I am confident lives are being saved because of this simple little device.

It’s hard to generalize the ‘look’ of ice and say it means one thing or another so as a general rule I would say watch out for the dark spots; areas on the surface of the lake where the slush and water has gathered and weakened the ice. Anywhere a river or creek flows into a lake will be weak for some distance, in a semi-circle, around the mouth of the tributary.

If you must travel on a frozen body of water and you already know the ice is weak, then it can help to have a long pole, perhaps even an ice chisel. You can test the ice in front of you as you gingerly walk, and also use the pole held horizontally to save you from falling all the way through a hole.

Once you’re in the drink, the only way out is pretty much the same as getting out of a swimming pool, only without having the side wall of the pool to push your feet against or the grip of the pool edge to push down on with your hands. The best method is a good scissor kick up from the water and then rolling yourself out on to the ice surface.

Any friend nearby that wants to rescue you must do so by finding something they can throw to you or reach out to you to give you something to grab hold of. They also need to lie flat if they are trying to get closer to you so that their weight is spread out on the weak ice around your hole. Falling through the ice is not a team sport.

Once you’re out, it’s time for a big fire. Scratch that. I mean a massive fire. Huge. We’re talking the kind of fire you could view from space. That’s the only thing that will knock the chill out of your now naked body. Sorry, but you have to strip down and get all the wet clothes off if you want to dry out.

Kinda gives a whole new meaning to the concept of shrinkage for the men! And it is absolutely vital that you do this out of the wind. Keep moving. Do jumping jacks. Get your blood flowing back through all your extremities. Did I mention to get out of the wind? The wind is a killer; you must be protected from it. You don’t want to add frostbite to your problems.

Now you want to be rescued, so I’d like to share a lesson in signaling I learned from first-hand experience. Ignore what you might have heard about making multiple smoke signals. Make one big signal tower fire. Concentrate your efforts on pooling all the resources for the big rescue moment.

Trying to run between multiple fires while the wind cuts through you is ridiculous and even dangerous. Make use of as much birch bark as possible so your fire flames up very fast. Above it put green spruce bows, which will give you lots of smoke.

And whatever you do, don’t go running out onto the ice to wave down your only chance of rescue…. and fall back into the same hole!

Les StroudLes Stroud aka Survivorman, is credited for single-handedly creating an entirely new genre of TV based on survival; Survival TV. He has recently launched www.survivormantv.com: his new online, subscription-based, web portal for all things survival/adventure and even Bigfoot. He is a multi-award winning TV producer/writer/director and host, a best selling author (his book Survive! Is considered the best new manual on survival today), and an accomplished adventurer and musician. He is a proud member of the Explorers Club, an ambassador for the Young Explorers and a Fellow of the Royal Canadian Geographic Society.

Filed Under: Bushcraft

Morakniv Companion Review – It’s A Great Knife For A Great Price!

September 11, 2018 Jesse Mathewson

Morakniv-Companion-knife-review
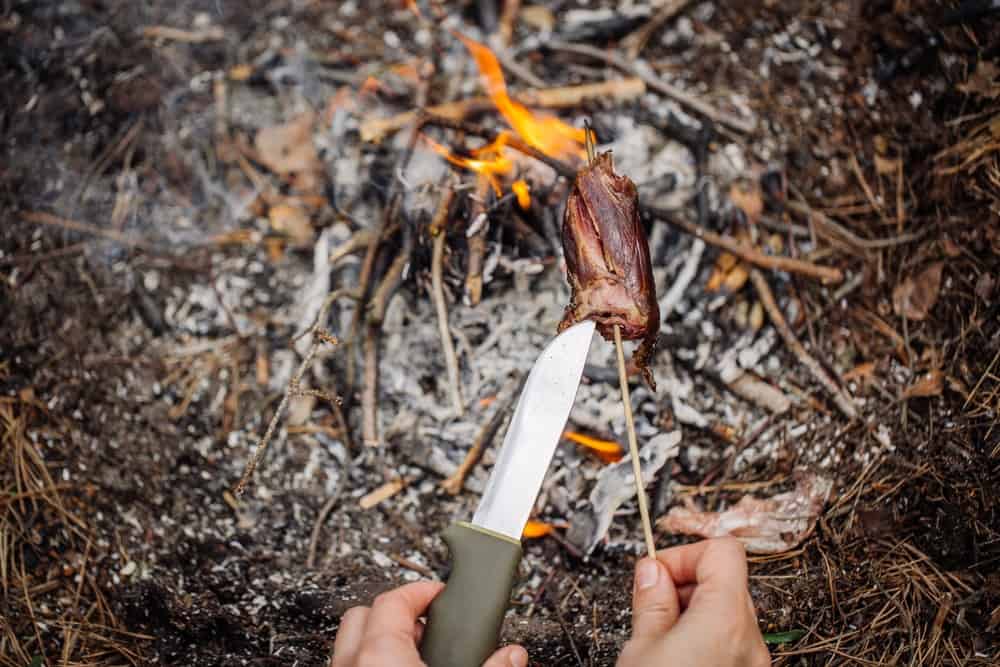
Choosing a knife for purposes of survival, bushcrafting or simple camping is a bit of a chore. The Morakniv Companion is an amazing choice regardless of your location on this ball of dirt and water which we live. It comes in stainless steel and carbon steel versions, this review and article are using the carbon steel version!

(Disclaimer, I do use the HD (heavy-duty) models as well, and the Craft-line models, this is simply one of a line of knives I find personally to be indispensable to my personal kits regardless your choice.)

Now one can easily say that the Morakniv Companion is too thin of a blade, or it is only a ¾ tang or how can you say it is a good survival knife? Honestly, I can say that if I had only one choice of a blade to carry with me for an extended length of time, it would be the Morakniv Companion. I can say this based on a wide variety of testing, and from several years of using it.

Others may have their $100 – $5000 survival blades specially designed by some Ex-Army Ranger who was UDT and a Navy Seal and also an Air Force Rescue while cross training with the CIA and NSA for operations deep in the Mossad and GSG9.

I prefer a blade design that has been around for over a thousand years, and folded steel that is rivaled only by Japanese folded steel in overall quality and strength. After all, this is not an article about specific uses, and blades designed for each of those uses. I have already written one or more articles dealing with this. Generally, blades, in my opinion, are very much designed with a specific reason in mind.

Morakniv-Companion-Fixed-Blade-Outdoor-KnifeSo for specific purposes, you will find better blades, after all, a 4” blade isn’t going to be a great weapon against a bear, but I can carve a dozen spears and fire harden them or use it to make punji pits to prevent the need for a close encounter with a bear.

Sure the ¾ tang isn’t a full tang, though in all honesty, most people, even modern blade designers (not blade smiths) but those guys with powdered super steel and solid programming skills and a lathe who churn out thousands of bulky, over-designed or in most cases poorly designed bu ever popular blades have no real idea what or even why certain tangs exist.

Do you? (If you would like to know comment and ask, I’ll gladly explain what the differences are and why the idea of a “full tang” being stronger is not exactly correct. Lastly, if slitting throats you wish to engage in, this will work, but not as nicely as that Ka-Bar or Khukri you may have. (I prefer the Khukri for many reasons)

Morakniv-Companion-Fixed-Blade-Outdoor-Knife-with-Carbon-Steel-Blade

This is a review of the Morakniv Companion in stainless or carbon steel with a lowly ¾ tang and an inexpensive yet very functional polymer sheath, a 4” blade with a scandi grind (shallow and long allowing for much easier cutting, food prepping and even bush work) lastly it has a handle that is made of TPE rubber, which allows gripping even when wet, sandy or cold! This is the single most inexpensive yet important addition you can make to your prepping regardless the reasons for doing so.

There are several benefits outside of the knife itself that give it that step up over other knives. For instance, it is marketed as a TOOL, not a weapon, it can be used quite easily for kitchen meal preps. I have a few different models that I enjoy using for this alone.

It is legal to carry in most places, though some may require you keep it in your pack, rarely will you find a country that does not allow the use of a small (4.1” blade) for making kindling, cleaning fish, game, and all around camping chores.

Across the United States, there are a plethora of ridiculous carry laws with regards to sizes and types of blades. However, this is a blade I have dropped in my checked baggage (usually two) and never seen it walk away, nor has it ever stopped my baggage from boarding the plane.

After flying through or into most major airports in the USA and a few outside, I have never had an issue with this blade itself. I use a bright orange or blue handled one for foreign nations and states, (like California and New York City) as these for some reason bear no threat while the far more realistic green model seems to evoke the idea that it is somehow dangerous and may leap up on its own.

So how does one go about creating a survival kit using JUST this knife and its sheath as the base? Its simple really, the Morakniv Companion MG alone is a great tool, however, if you add 20 feet of 550 cord or 50-100 feet of different strengths of bank-line* wrapped around it using any number of wrap types (I prefer a simple loop, and pull method as it allows easier use of the rope) This addition would be wonderful by itself, however, we are going to add two more items.

Duct Tape (my favorite brand is Gorilla brand, some things are worth the money spent) and a 5/16th by 3” fire-steel or ferrocium rod for starting fires are two more additions that are essential in my opinion.

So all I do is wrap the duct tape (around a yard of 2” wide tape) around the middle of the sheath, capturing the ferrocium rod inside of the tape, and then wrap over that with bank line (my preferred go to for survival line for numerous reasons) or with 550 cord, whichever you choose using the knot and or wrapping type you prefer.

Again in my opinion simple is best, as this is meant to be used, not set on a shelf to show the world how amazing you are. Now, these four items alone offer many valuable uses and are by themselves necessary in any bug out bag or the like, however, when put together with this knife, it becomes the ultimate basic prepper kit.

I am including a video showing some test results with this blade, please understand I own several dozen of these blades, they make great gifts and honestly I see them as an investment. I have tested in the extreme this particular model from standing on it while stuck in a tree to splitting cordwood with it, and yes it is mesquite that is in the video. I have yet to break a single one of these knives. I have bent them, but only after attempting to break it in half using a vice.

I had pulled it well past 90 degrees and when it returned it was only about 15-20 degrees off its center line. I have put nicks in the edge of it, it’s a blade, I have yet to see single blade get hammered through a solid piece of wood or rocks and concrete (as I did with this one) and NOT sustain some minor damage to the edge, however, within 5 minutes with my DMT diamond plates I had it back up to shaving sharp.

The Morakniv Companion certainly proved itself, now folks, the video was filmed by my wonderful 8-year-old daughter so apologies for some disruptions but you get the idea, this knife specifically the Morakniv Companion is insane in its abilities! And this was just the torture testing!

It is lightweight, as in honestly it feels toy-like, so chopping a tree down isn’t going to work well, unless you use a baton while doing so, and then it’s just a matter of time.

The lightweight nature is a plus for myself, being old and broken down weight is everything, I would rather carry two or three of these blades than one Becker (popular prepper blade for some) of any size, after all, you generally won’t find a Becker blade that weighs anywhere close to this one and honestly, I would be willing to put one of these up against a Becker.

Again, I feel it is necessary to have you understand that I tend to carry more than one blade at all times regardless. As I feel blades are purpose-built. However, this is an article that allows for the individual who may not have that overall benefit or ability. Not to mention, one of the blades I always carry when in the woods is a Morakniv Companion in green or any number of other colors.

Others will state their love of any number of knives, however, what can be agreed upon by many if not all bush crafters, hikers, campers and survivalist types is that this specific blade style the mora styled blade is among the most popular and best all-around blade type available regardless the manufacturer.

Personally, I have several variant blades all made of the amazing Scandinavian or Swedish folded steel, Karasuando Kniven only available from the linked site and extremely expensive it is my absolute favorite blade of all times. However, the kniven (knife) I have from Karasuando is identical in almost every way (shape, form and edge type) to the Morakniv Companion.

Now, if you are someone who prefers or wants a thicker blade, get the Morakniv Companion HD (Heavy Duty) or get the Craftline Heavy Duty by Morakniv or the Morakniv Light My Fire all of these blades are thicker, and feel much better if you need that reassurance. Cost is still at or under $20 regardless.

So what are the pros for carrying the Morakniv Companion?

  1. It is lightweight at just 4.5 ounces or 125 grams for what it provides, its hard to find lighter and if weight is an issue, eg., age or physical ability than this is a benefit.
  2. It is strong, as in under normal circumstances, you will never see it break or fail, and as you can see in the video, under abnormal and quite abusive circumstances you will rarely if ever have an issue.
  3. It is sharp and holds an edge well, the carbon steel holds a much better edge longer than the stainless steel. However, the carbon steel requires more cleaning and lubrication than the stainless steel blade version does. However, the stainless version does not work as a fire striker like the carbon version does.
  4. It is easy to clean and easier to sharpen properly, there is no exact science approach if you have a decent sharpening set the bevel of a Mora styled knife allows for a VERY easy experience in sharpening and maintaining that sharpness.
  5. These knives cost less than a fast-food burger in many places, currently, on Amazon, you can have a brand new one shipped to your door for less than $13 – find any other single knife that will do what this one can and do it for this price.

What are the cons?

  1. It’s small and lightweight – it is NOT a fighting knife or a pig sticker or even really meant for clearing brush though you can do so if needed.
  2. It’s not a specialty name and your friends who own the newest blade from Benchmade (I love Benchmade knives) or a custom Skelton knife (again I really like these blades) will look at you differently for carrying it. (this is actually not true, especially if they understand and know knives, but I thought it would be fun to throw in there.)
  3. The controversial Pathfinder school supports this brand and regularly does commercials and more for Morakniv Companion, so there is that as well. (If it matters to you, that and they are made in Sweden, NOT in the United States, and we all know if it isn’t made here it can’t be any good.)

Please comment below and share the article with others. Let’s remember information is knowledge is power and one can never have too much good knowledge. Also please feel free to comment and let me know how I am doing, what you would like to see more reviews of and remember, I generally buy these products myself and write based on my experiences so that you can benefit from them.

“In bush crafting and camping, then, let your great object be victory and living well, not lengthy and sometimes fruitless attempts.” Sun Tzu for the Bushcrafter

Free the mind and the body will follow…

Filed Under: Knives and Blades

Palmetto State Armory (PSA) AR-15 Review

September 11, 2018 Jesse Mathewson

Photo of rifles and ar-15's

Palmetto State Armory firearms are a “MADE entirely IN America” firearms manufacturer that has created a stand out product within an industry full of products. There have been dozens even hundreds of AR15 manufacturers within the United States, among these, there are few that hold up to the full expectations of what an AR15 can be.

Modern AR15s can be extremely reliable, accurate, and versatile firearms. Palmetto State Armory is one of the few manufacturers that has consistently turned out a product I am proud to own and use.

It should be noted that I have at NO point received compensation or product from Palmetto State Armory for writing this article, in fact, I have purchased out-of-pocket the large percentage of reviews I do.

Please remember this when commenting, I am disabled, 40 years old and write reviews because you all deserve to have honest reviews in your corner. Even when a product is received gratis (as is not the case with this article) I provide completely honest reviews. Lying only hurts the liar in the end!

Personally, I discovered Palmetto State Armory AR15s a few years ago when I purchased one from a friend. After using this one for quite a bit I quickly discovered that it was an amazing piece of hardware. I then decided to purchase from Palmetto State Armory myself, and did so, purchasing the following items over the course of two years.

  1. PSA 16″ 5.56 NATO 1/7 Mid Melonite 11″ Keymod Freedom Upper – w/BCG & CH
  2. PSA AR-15 Complete Blem Lower – Classic Edition
  3. PSA Freedom Complete 6 Position Mil-Spec Diameter Buffer Tube Assembly
  4. PSA 5.56 Premium HPT/MPI Full Auto BCG, No Logo & PSA Charging Handle with Tactical Release Latch
  5. PSA 5.56 HPT/MPI Bolt Carrier Group
  6. PSA 5.56 Premium HPT/MPI Full Auto Bolt Carrier Group
  7. PSA 10.5″ 5.56 NATO 1:7 M4 profile carbine length gas tube

Interestingly I have not yet had a negative experience and this is, to be honest rare. After all, everything man-made can and does eventually fail especially firearms. I own several Glock 19s, and have had maybe 4 failures to fire and or feed or eject, in almost all cases it was ammunition related, in two cases it was gun related, I had failed to perform the necessary replacement of springs/ parts that wear out first. Like changing the oil in your car, maintenance is essential in firearms.

photo of two ar-15 rifles a bolt action and glock handgun

For instance on my Glock’s I change barrels every 30,000 rounds, firing pins every 50-60,000 and pins and springs every 5-10,000 rounds, on the gun and in magazines. This ensures continued relatively flawless reliability. Additionally, I do not use sub-par ammunition.

Especially when practicing, I use Aguila, Speer Lawman or MEN German milsurp for practice purposes. And Speer gold dot for self-defense. With my rifles, the same is approximately true, with variations in some rifles depending on the amount of use.

This means that in a given year I could change barrels as many as 4 times if I run a gun hard enough, obviously for 22lr firearms this is not such a large issue, and I have easily gone well over 50,000 rounds before needing to change out springs etc., barrels, if maintained well, will outlast me.

photo of an AR-15 rifle and rifle parts

In my high-pressure carbines and rifles such as the AK and AR variants specifically from Palmetto State Armory, I have found I need to do less maintenance while still seeing exceptional performance overall. The only other brand firearm that even came close in longevity and quality was my Delton Sport model which had a little over 65,000 rounds through the barrel before I replaced gas rings, barrel (it had begun keyholing) and buffer assembly.

It is still running like a mule today, accurate, wonderfully reliable and an amazing firearm. Now, to date I have only been able to put around 28,000 rounds through my oldest Palmetto State Firearm, (prior to melonite/ barrel is chromium steel mix) however, it is still running hard, it is not my defensive tool, as to be honest I am running it specifically to see what fails first. The only issue I have seen is the gas stake on bolt loosening (I tightened and used loc-tite) but no failures overall.

ar-15 scope

I called Adam Ruonala the Chief Marketing Officer for Palmetto State Armory to ask some serious questions about their processes. (On a side note, he is like all of the individuals working with Palmetto State Armory approachable, and honest!)

  1. Do you make your barrels in-house?

Yes, we make our barrels in-house. Exception for the hammer forged barrels, all other barrels stainless, and nitride barrels –

  1. Are all major components (eg., stripped lowers/ barrels and bolts) machined in-house?

Bolt carrier groups currently are outsourced, however, we are in the process of bringing it in-house to keep all – they are made in the United States!

  1. Does the same apply to AR10s and your Ak47 line?

Yes, absolutely the same applies to all firearms made and or stamped Palmetto State Armory!

shooting 100-yard milk jug
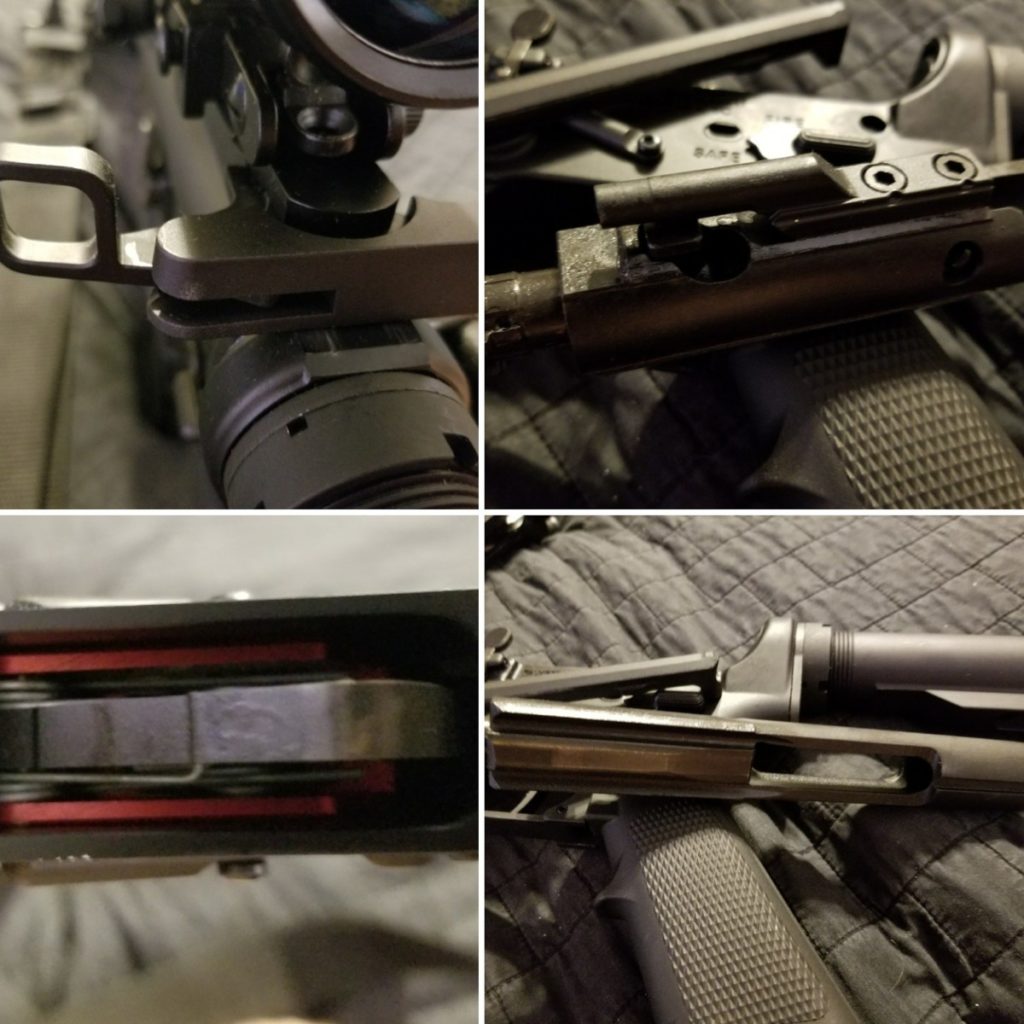
The reality is that AR and AK platforms are adult lego’s they are not difficult to put together, in fact, there are dozens of videos showing people building AK47s using shovels and AR’s using a plethora of parts from a dozen different manufacturers.

What is a not well-kept industry secret is that your name branded AR carbines like Spikes Tactical, BCM, and even COLT have many if not all of their parts outsourced and simply stamp their name on it and then raise the price 200-500% and make crazy claims of infinite reliability?

The reality is quite different, comparatively, I have run my Delton and Palmetto State Armory guns against all of the above and in almost every case have continued to run long after they began having failures, feeding, firing, and more.

A popular YouTube channel that destruction tests both AR and AK rifles called The AK Operators Union recently proved that Palmetto State Armory is, in fact, the ONLY all American made AK rifle to date, to pass their stringent 5000 round destruction testing.

*

They also destruction tested the AR15 Freedom model, currently going for under $450 through Palmetto State Armory – and guess what, it passed again!

*

And the AR’s I have tested, well, lets just say that as it stands today I have yet to be disappointed. In fact on August the 6th I will be doing the 1000 yard milk jug challenge with a Palmetto State Armory AR, specifically the PSA 16″ 5.56 NATO 1/7 Mid Melonite 11″ Keymod Freedom Upper – w/BCG & CH the only specialized adjustments I have made are adding a Bushnell 4.5-18x40mm BDC AR scope, P.O.F. trigger (made in Arizona) single stage 4.5lbs and a CVLife 9”-13” Bipod, everything else is exactly as it came from the factory – To make this an even better event, I am using 69 grain IMI MatchKing ammunition, each round being used will be weighed and measured to ensure continuity in load but they will be as loaded by the factory.

The 6th of August is my 40thbirthday and I plan on making a bit of a splash by completing this challenge from the Long Range Shooters of Utah Association with what amounts to a stock AR15 with a 16” barrel – something I think will be a first. And yes it may take a week, as my editing skills are atrocious, but after letting the officials review the video, and editing it, I will post for all to see!

Here is the thing folks, regardless what name brand you are currently in love with, from Ruger through Colt, the odds are the barrels are made by Palmetto State Armory or one of the other 2 or 3 actual builders of barrels in the country and re-branded. In some cases the parts are outsourced too Taiwan or Korea, while Palmetto State Armory keeps its parts entirely in house, or are in the process of bringing everything under one roof! AND THEY DO IT FOR LESS than anyone else on the market today!

What are the pros to owning a PSA (Palmetto State Armory) AR or AK over any other brand name –

  1. Pricing, they offer regular daily deals that are far lower than most manufacturers and do so while ensuring a product that functions well easily 97% of the time (all man-made-products can and do fail at times)
  2. They offer an in-house 1911, AK47, AR10 and AR15 – and do so with components made IN HOUSE!
  3. They have absolutely great customer service, I have never had a single member of their staff be rude, and in fact when I am down South again plan on stopping in and meeting them, I am that impressed with their services.
  4. Quality, overall their quality as has been proved by myself and many independent individuals is second to NONE, in fact, I would suggest to any new owner or older owner looking for a backup piece, go to their website, sign up for daily alerts and take advantage of their daily deals!

Cons –

  1. For the first time, I have none, absolutely NO cons to owning a Palmetto State Armory part of the entire firearm!

So do you have anything to add, what are your experiences, and by all means feel free to share FIRST hand experiences with me. Comment below and if you enjoyed this article and want to see others, share and thanks again!

Free the mind and the body will follow…

Filed Under: Uncategorized

  • « Go to Previous Page
  • Page 1
  • Interim pages omitted …
  • Page 70
  • Page 71
  • Page 72
  • Page 73
  • Page 74
  • Interim pages omitted …
  • Page 87
  • Go to Next Page »

Primary Sidebar

Subscribe to Blog via Email

Enter your email address to subscribe to this blog and receive notifications of new posts by email.

Join 7,202 other subscribers
  • Amazon
  • Facebook
  • Substack
  • Twitter
  • YouTube

“Do more with less.”

– Minimalist proverb

Recent Posts

  • Just so you know
  • Weather Update for My Corner of Appalachia
  • Why I’m Ordering Ivermectin + Mebendazole Every Year
  • The Website’s Shutting Down (But Here’s the Plan)
  • You Are Hated! Start Training Like It!

Footer

Recent Posts

  • Just so you know
  • Weather Update for My Corner of Appalachia
  • Why I’m Ordering Ivermectin + Mebendazole Every Year
  • The Website’s Shutting Down (But Here’s the Plan)
  • You Are Hated! Start Training Like It!

More about me

Books I’ve written

Books I’ve read

Follow Me on YouTube

Follow Me on Facebook

Gear I Use and Recommend

Newsletter

Search this site

Follow me elsewhere

  • Amazon
  • Facebook
  • Substack
  • Twitter
  • YouTube

© 2008–2025 M.D. Creekmore · As an Amazon Associate, I earn from qualifying purchases.