In this video, I talk about how to treat “HIGH” blood pressure naturally at home and without prescription medications…
Health and Fitness
Here you will find articles on health, wellness, alternative medicine, and related subjects. Without our health, nothing else matters. Get and stay healthy today naturally.
Is Medical Training Needed For Concealed Carry?

Medical knowledge and medical supplies are used far more frequently than defensive tools in the United States. When I was much younger I had several things occur that helped me understand the benefits of understanding trauma care and remaining current with my training.
After watching an individual bleed out in front of me and being able to do nothing, and intervening and saving the life of two people trapped in a bad car wreck, I made the decision to learn as much medical knowledge as I could. This led me to search for solid instruction from real medical professionals.
At first, I was limited to learning from my friends in local Emergency Rooms, between them and EMT friends I was able to learn quite a bit. Of course, with time that knowledge became outdated and as a result I have over the years taken training regularly.
It is important to note that I am not a medical professional, I simply have enough experience and training to stop some major bleeds, assess the bleed, perform CPR, assess- insert and use any one of the top three utilized tourniquets, use a Halo Chest Seal, nasopharyngeal airway, and even suture or staple depending on need.
Obviously, it is my intent to never have to use any of this again. However, I also understand that medical knowledge is much more necessary in daily life than most people understand. Additionally, I have taught and continue to work with others from very young through the elderly in this and other areas.
In 2015 27.6 million people were treated in an emergency department for injuries. 2.8 million were hospitalized due to injuries and 214,000 people died from injuries in the United States. (Injury prevention and control, 2017) These numbers are fact, they are compiled from raw data and regardless your feelings on the CDC they keep very detailed records.
Now, firearms are used between 200,000 and 3 million times every year in self-defense, with most legitimate studies showing that a firearm is used closer to 3 million times. (Leshner, 2013) (For the naysayers understand that this is based on several agencies who did not want to release this data because it showed that the benefits outweighed the negatives.) The book referenced costs $38 and is worth reading if you have the chance.
Here is an excerpt, “studies…have found consistently lower injury rates among gun-using crime victims compared with victims who used other self-protective strategies.” Another quote is as follows, “The estimate of 3 million defensive uses per year is based on an extrapolation from a small number of responses taken from more than 19 national surveys.
The former estimate of 108,000 is difficult to interpret because respondents were not asked specifically about defensive gun use.” It should be noted that the book/study does its best to discount any use of firearms in defense, however, at no point does data support their assertions. Rather, the data clearly support the use of firearms in defense.
There is a simple reason for including the data that is available, it is not meant to build sides in an endlessly pointless political battle. The reason is that without data and facts one cannot know for certain what works and what does not.
In this case training in medical knowledge, specifically EMT or Trauma Care basics at a minimum is necessary to be well rounded as a solid individual practicing their natural rights. To this end, there are several solid schools in the United States.
When it comes to self-defense and the surrounding needs that accompany this, it is essential to have as much solid education and hands-on experience as possible. I would suggest the following for their training and reputable approach. All of the listed have embedded links directing you to them.
- Gunsite Academy (founded by Jeff Cooper)
- The Firearms Academy of Seattle (Marty Hays)
- Active Response Training
- Your local community college likely offers EMT/Trauma medicine classes which can be applied!
There are other schools around the United States today, however, not all of them offer classes at the same level that you will get in the above-mentioned locations. Certainly, there is a surplus of experienced Army (and marine/navy and even air force) Medics as a result of the 17-year war we have been involved in.
What I suggest when it comes to medical and firearms training is getting training from individuals who can prove their abilities and have a legitimate background in the area. There are several large schools that offer basic/intermediate instruction for firearms using the timeshare approach to teaching.
This means that while you get some benefit, the reality is you are cycled in and out as quickly as feasible and then sent endless emails and phone calls to beg you to upgrade your membership or sell it to your friends. A solid school and approach does not need to be sold.
So far we have established that having modern, basic medical training is an essential life-saving component of being prepared and carrying a concealed firearm for self-defense. What is important now is understanding that trauma based medical care has advanced greatly in the last 20 years alone and what worked even a decade ago or what you learned in medical school or a first aid class 5 years ago may no longer apply.
For instance, just in the past few years using tourniquets and what and how they are made has changed drastically. Make sure you get up to date training from individuals who understand and use these approaches.
Once you receive solid training you will need to put together a simple easily carried trauma kit for your personal use. This kit should be small, and, should include the following items these are the most important.
- Tourniquet, there are several types the SOFTT-W, SWAT-T and the CAT style tourniquets. While I personally use and practice with a CAT tourniquet the others have their place based on need and intent. Stopping the bleed is a term you will hear a lot in modern classes. This tool is used for extremities.
- Israeli Bandage or similar product, again the intent is to stop the bleed. This is used for non-extremities, bleeds that are on the trunk of your body or head is where this one will be used most.
- Bandages, both gauze 4×4 and 2×2 and standard Band-Aid bandages for smaller issues. Infection is a serious possibility and to avoid this you want to wash the wound with clean water and bandage it.
- Sheers, medical-grade sheers are absolutely necessary.
- Sterile individually wrapped nitrile gloves. Make sure you get the non-allergenic ones.
- A small bottle of sterile water for wound washing.
- Hypo-Allergenic medical adhesive tape
- CPR mask, you can get small disposable versions that work very well for an EDC kit. It is essential to have CPR supplies and KNOW how to apply CPR properly. Again, what was taught even 10 years ago is NOT what is being taught now.
The above are the very basics that are necessary for a trauma kit. All of this can be easily stored in a small package that can be worn on the belt, tucked in a pocket or purse easily. Some individuals I know often carry just the tourniquet and Israeli bandage based on space available.
This works when needed. For myself personally, I have a full trauma kit with everything from antibiotics through surgical needs. In addition to the large kit I have vehicle kits and then personal kits for each member of our family.
When it comes to my family their safety is something I take very seriously. I know that we are the only ones who can prevent problems or solve them as they occur, and that responders are quite often too late which is why deaths from injuries are quite high.
For myself and my family, prevention is worth far more than a “cure”. I teach them what I know and we all test our knowledge regularly so as to prevent stagnation. Active involvement with our environment is the easiest way to prevent issues from happening.
As with the other articles, please let me know if you see something that is missed and if so comment below. I learn daily and cannot learn if I do not know where I am making mistakes. Additionally, it should be noted again I am not a medical professional, I am simply a dad who trains and trained and practices to prevent issues in my and my families lives!
Thank you for reading and make sure to check out the links in the article for some great products, by purchasing through the links you support this site and allow the owner and individuals writing like myself to continue to put out solid material for your educational benefit.
Free the mind and the body will follow
Injury prevention and control (2017). Key Data and Statistics|WISQARS|Injury Center|CDC. [online] Cdc.gov. Available at: https://www.cdc.gov/injury/wisqars/overview/key_data.html [Accessed 9 Aug. 2018].
Leshner, A. (2013). Priorities for research to reduce the threat of firearm-related violence. 1st ed. Washington DC: The National Academies Press.
Further Study on DVD
What Medical Training Should I Get For Concealed Carry?

This article is meant to show you what training you should get for concealed carry. What is included in the article are references, links for additional training and resources and lastly definitions and descriptions. Always remember, make sure you and your family are safe before attempting to offer assistance to anyone. Never do so if it means sacrificing your own safety.
To answer what medical training you should get, you have to know why medical training is essential. It is important to note that I am not a medical professional, I simply have enough experience and training to stop some major bleeds, assess the bleed, perform CPR, assess- insert and use any one of the top three utilized tourniquets, use a Halo Chest Seal, nasopharyngeal airway and even suture or staple depending on need. I firmly recommend getting any training you can, when it comes to caring for your self and family, make sure you find the best that you can afford.
In 2015 27.6 million people were treated in an emergency department for injuries. Over 2.8 million were hospitalized due to injuries and 214,000 people died from injuries in the United States. (Injury prevention and control, 2017) These numbers are fact, they are compiled from raw data and regardless of your feelings on the CDC they keep very detailed records.
Now, firearms are used between 200,000 and 3 million times every year in self-defense, with most legitimate studies showing that a firearm is used closer to 3 million times. (Leshner, 2013) The book referenced costs $38 and is worth reading if you have the chance.
Here is an excerpt, “studies…have found consistently lower injury rates among gun-using crime victims compared with victims who used other self-protective strategies.” Another quote is as follows, “ The estimate of 3 million defensive uses per year is based on an extrapolation from a small number of responses taken from more than 19 national surveys.
 The former estimate of 108,000 is difficult to interpret because respondents were not asked specifically about defensive gun use.” It should be noted that the book/study does its best to discount any use of firearms in defense, however, at no point does data support their assertions. Rather, the data clearly supports the use of firearms in defense.
Now that we understand why medical training is so essential to concealed carry, what medical training do we need to have? There is a phrase that has been popularized over the past few years, “stop the bleed.” What this phrase means is quite simple, train to stop bleeding. Medically there are other important items to consider, airway blockages, CPR and a few other important medical considerations.
For a concealed carrier, the plan should always be centered around what they may encounter most. In this case another individual with a knife, firearm or other deadly weapons. The damage that will occur from a wide variety of deadly weapons carried today regardless of location can range from penetrating or slash wounds causing rapid exsanguination (blood loss) and crushing injuries causing broken limbs coupled with exsanguination of the rapid or slow type both of which can result in death. Lastly, shock and or extreme trauma induced heart attacks and stress-related breathing issues can also result.
Interestingly the government has released a few little known publications in the public sphere regarding trauma care and the need for immediate action. For instance per the Department of Homeland Security, FEMA, these are the five “simple” steps that may save a life. Call 9-1-1, Stay Safe, Stop the Bleeding, Position the Injured, Provide Comfort. (FEMA, 2014) Follow the links and take the on-line training, while it is not the same as hands-on training, this will help you better understand what is needed.
Additional bleeding control training is made available by the American College of Surgeons through the website, bleedingcontrol.org, lastly, FirstCareProvider offers instructor courses and has been endorsed by a few organizations that offer it legitimacy.
Care is a term coined and used by DHS and FEMA that stands for the following. Control bleeding with direct pressure or tourniquet. Airway improvement with recovery position. Respirations improve by covering open chest wounds. Exposure to the elements causes loss of heat. This can help understand the added training needs everyone who carries concealed should have as a precaution.
Find a course that offers you training in CARE as well as carries specific trauma care. Call 9-1-1 first, do not panic, panic prevents care from occurring. Control bleeding, find the source of bleeding. Open or remove the clothing over the wounded area so that you can see the wound. Head wounds will always bleed profusely, they will always seem very bad.
 Pressure should be used on the head and trunk (body, not arm or leg) injuries. Using a clean cloth if possible, fold it and press firmly on the wound, hold a firm pressure and maintain that pressure until the paramedics arrive. Stopping the bleed is far more important at this stage than preventing infection.
Both should be attempted when possible, which is why I suggest wound cleaners and sterile gauze, homeostatic bandages and Israeli style bandages. However, this is not always the case, so stop the bleed first! If the wound is on the groin, trunk or close to the body and is deep and bleeding steadily, pack the wound using a clean cloth and if you have a trauma kit use your Israeli style bandage or a homeostatic bandage. I keep two of each in my vehicle-based trauma kits.
On extremities, legs and arms, unless close to the body, use a tourniquet. If you do not have a specialized modern tourniquet use a belt, long cloth rolled diagonally, 550 cord doubled or another similar device to stop the bleed. All pictures have been borrowed from the booklet stop the bleed (Pons & Jacobs, 2017)
Next is Airway improvement with recovery position. This is extremely important of the person is having difficulty breathing or has lost consciousness. Establish that the airway is not obstructed, the tongue is the most common obstruction. If you see a foreign object and it can be removed easily, remove it. Tilt the head back and lift the chin, this will straighten out the airway and make it easier for breathing to occur.
Using your CPR mask if you have one, place it over the victim’s mouth and nose, ensuring the head is tilted as can be seen in the attached picture, blow air into the mouth, two one-second breaths forcing the chest to rise and fall with each.

If the breaths do not cause the chest to rise and fall, engage in chest compressions. These are given differently for adults and children so make sure you take a course that teaches this! Chest compressions should be administered at a 30:2 ratio, meaning 30 chest compressions with two solid breaths in between.
Continue compressions until EMS arrives or the person begins to breathe on their own. If they begin to breathe on their own roll them into the recovery position, pictured here.
Respirations improve by covering open chest wounds. This part of care is more tricky and requires chest seals or again clean clothes applied directly to the wound area. Finding training in CARE will help you better understand what to do in this regard.
Not all wounds are the same, and all should be assessed and treated per the guidelines given in prior linked articles and through the application of learned materials from classes linked.

Lastly is Exposure to the elements causes loss of heat. This has a more simple solution, use a blanket or space blanket which should be carried in your trauma kit or vehicle. I keep two 90% or greater wool blankets inside of 9’ square tarps in my vehicles along with 2-4 small mylar space blankets in each trauma kit and in the vehicle.
Preventing exposure can increase the possibility of a beneficial outcome with someone who has been in a vehicle accident or other form of traumatic incident. If the person is unconscious, check for obstructions in the airway, check for bleeding and than place them in the recovery position inside of the blanket or space blanket.
For concealed carry the medical training you should get is the same as the medical training you should have for driving a vehicle, camping, hiking, bicycling and swimming activities. It is worth the time invested to ensure your training stays up to date as well.
New approaches are innovated quite often in the medical community and this means training does not end with your medical license 30 years ago or a course you took in the 80s for CPR. What is known and taught now is far different than what was taught in the 80s, 90s, and even in the early 2000s. Stay abreast of the new knowledge and utilize common sense.

 Free the mind and the body will follow…
FEMA (2014). You Are the Help Until Help Arrives. Retrieved October 26, 2018, from https://community.fema.gov/until-help-arrives
Injury prevention and control (2017). Key Data and Statistics|WISQARS|Injury Center|CDC. Cdc.gov. Available at: https://www.cdc.gov/injury/wisqars/overview/key_data.html
Leshner, A. (2013). Priorities for research to reduce the threat of firearm-related violence. 1st ed. Washington DC: The National Academies Press.
Pons, P., & Jacobs, L. (2017). How to Stop the Bleed. Retrieved from https://www.bleedingcontrol.org/~/media/bleedingcontrol/files/stop%20the%20bleed%20booklet.ashx
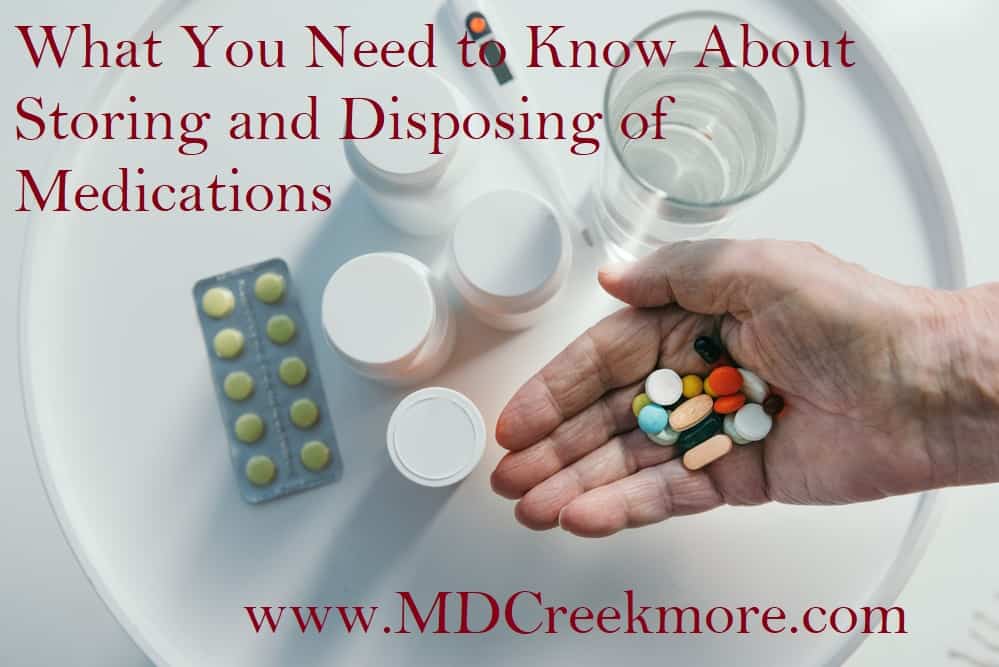
What You Need to Know About Storing and Disposing of Medications
by CB
There are some basic principles that need to be taken into consideration when saving medication, which includes the expiration date, storage conditions, and what type of medication you are attempting to store.
The easiest way to get extra medication would be to start refilling your medications five days early from the pharmacy. This will give you a small amount that will slowly increase over time. Alternatively, you could get samples from the doctor’s office (this will only apply to brand name products).
Make sure to keep the medications in the original containers, if possible, and, as with food storage, employ the FIFO (first-in-first-out) strategy to help ensure the best expiration dates possible.
Medications should be stored in a dry, cool space that is preferably in a darker place. Medication cabinets in the bathroom places next to heat (like stoves) and areas of high humidity should be avoided because they cause the medication to deteriorate faster and reduce shelf life.
Generally, the medication should be good for 1 year past the date on the prescription bottle. Occasionally, some pharmacies will print the expiration date on the medication bottle.
Medications that DON’T store well
Some medications that are for serious conditions, like myocardial infarctions (or heart attacks), some anticoagulants, or “blood thinners,” and other medications have shorter shelf lives. These should be followed closely since the amount of medication in these disease states is extremely important. A short list of medications that should be closely monitored for expiration dates and storage include:
- Pradaxa (dabigatran) – store in an original bottle; expires 4 months after opening
- Nitroglycerin (sublingual, spray, etc) – store in original container; expiration: sublingual – 6 months, spray – 3 years
- Insulins – all insulin should be stored in a refrigerator until ready to use. Insulin can be stored at room temperature away from direct sunlight after it has been used for the first time. Expiration dates for insulins vary (see table). The expiration date should be the date from 1st use or the expiration date on the vial or pen, whichever comes first.
| Drug Name | Expiration date – after 1st use |
| Lantus (insulin glargine) vials, cartridge, pens | 28 days |
| Apidra (insulin glulisine) vial, cartridge, pen | 28 days |
| Humalog (insulin lispro) vial, cartridge, pen | 28 days |
| Humalog mix 50/50, 75/25 | Pen – 10 daysVial – 28 days |
| Humulin R U-100, U-500 vials | 31 days |
| Humulin 70/30 vials, pens | Pen – 10 daysVial -28 days |
| Humulin N (insulin NPH) vials, pens | Pen – 14 daysVials – 31 days |
| Levemir (insulin detemir) vials, pens | Vials – 42 daysPens – 42 days |
| Novolog (insulin aspart) vials, pens, cartridge | 28 days |
| Novolog mix 70/30 vials, pens | Vials – 28 daysPens – 14 days |
| Novolin N vials | 42 days |
| Novolin R vials | 42 days |
| Novolin 70/30 vials | 42 days |
- Insulin Test strips – store in the original bottle away from direct sunlight at room temperature. Follow the expiration on the test strip bottle.
- Also, note that the meters themselves can go “bad” after several years and can give false readings if not replaced.
- Aggrenox (aspirin and dipyridamole) – store in the original container
Medication Disposal
Medication disposal is crucial to keep medications from contaminating the drinking water supply. Some medication does enter the water via human waste, which has shown up in fish that have been sampled. We can control, however, unused medications from entering the water supply.
Unused or expired medications, including medications that you can buy over-the-counter, such as Tylenol (acetaminophen) should all be disposed of properly. That can be accomplished a few different ways.
There are now yearly medication “take back” programs at local pharmacies and even law enforcement offices (for controlled substances such as pain killers) where patients can drop off unwanted or expired medications. If you choose to do this, black out your name, address, and the prescription # off of the bottle. If it is a controlled substance (such as Oxycontin®), make sure to leave the name of the drug on the bottle.
If you want to dispose of the medication at home, pour a little water in the pill bottle (after removing the label) to dissolve the pills. Then, add a substance such as coffee grinds or bleach that will make the pills unpalatable to anyone that may dig through your trash.
Recap the bottle and throw away. If the pills are in the “blister packs” that require you to pop them out individually, wrap them in several layers of duct tape and then dispose of. For patches, like Lidoderm® or nicotine patches, fold in half and wrap in duct tape or put unpalatable substances on them.
As a brief aside for nicotine products, especially the patches, make sure they are in something that dogs cannot or would not want. Dogs can easily develop nicotine poisoning by chewing on used nicotine patches.
There are also services available, like the TakeAway® program where you mail the unwanted medications (postage paid) to a disposal factory. For details on the TakeAway® program, ask your pharmacist if that program is available in your area. Note: this does not include controlled substances such as prescription pain killers, testosterone.
Note: This information is not intended as medical advice or to replace the advice of a physician – always seek the advice of your Doctor first. Also, medication information, including stability, is sometimes updated and listed dates and information presented here are an approximation only. For the most up-to-date information on expiration dates of any medication, check the package insert or information provided from the pharmacy. You can also ask your pharmacist or Doctor for more information.
Survival of The Fittest – Prepper Fitness Training

by Albert S
This month a relative of mine threw his back out very badly. He was bedridden and unable to function physically in any meaningful way. Cook his own meals? No. Get to the bathroom without assistance? No. Do survival tasks like chop firewood, plant a garden, or tend chickens? No, no, and no!
This 30-something man, husband, and father of two young girls was unable to work at his white-collar managerial office job. All this happened because he bent down to pick up a 20-pound object.
Nah, it happened long before that. Through idleness and putting the body in unnatural positions for long periods and eating edible food-like substances instead of food, he planted the seeds years ago and has just started to reap the whirlwind.
What happened brings me no pleasure and I do not write to gloat but to make you think. Are you on the same path? If TSHTF today, could you live a life dramatically harder and more physical than today? Or would your knees give out after a week of walking several miles every day?
If you’re ready to embrace the physical culture, mainstream fitness doesn’t have much to offer. Glossy magazine articles with steroid-fueled monsters look impressive but aren’t very useful. Stale medical articles based on faulty government science are at heart the cause, rather than the solution, to most of today’s maladies and conditions.
Nor does true, practical, functional, SURVIVAL strength require a fancy gym with a machine for every last muscle. Actually, the body works as a unit and isolation exercises are mostly counterproductive for practical strength.
I’m not going to be able to cover every last detail in a simple article, but here are a few key concepts to keep you out of bed and in fighting shape (without ever stepping foot into a commercial gym).
By the way, the usual disclaimer applies about checking with your doctor before taking on an exercise program.
How strong is your grip?
Your hands connect you to the world. They connect a pitcher to a ball, a laborer to their shovel, and a wrestler to their opponent. At one point, the world recognized this. When we hear the story of Beowulf, we do not hear about his bench press or his bicep curl prowess, but his grip strength: he had the strength of 30 men in his hands.
Our body invests a huge portion of the nervous system to our hands. If you drew the body in proportion to the number of nerves that each part has, it would be two giant hands.
So why doesn’t the personal trainer to the local gym ever include grip exercises? Well, because they don’t “peak your biceps” or “tone your butt!”
While grip can be training by itself with heavy-duty grippers for crush grip or putting your fist into a sandbag then splaying your fingers for extension strength, it doesn’t even have to be that complicated. Simply include exercises in your regimen that already tax your grip.
If you like barbells (and a 300-lb Olympic set can still be had well under $200), the deadlift fits the bill.
If you prefer bodyweight exercises, then pull-ups and hanging exercises do the job.
If you like eclectic work, then the farmer’s carry will do. You don’t need 500 pounds per hand like the world’s strongest man. If you can carry 70 pounds per hand for distance, then your grip will be stronger than the majority (not to mention your shoulders, back, core, and legs).
Just pick up two heavy objects, one in each hand at your side, and carry them for time or distance. Done for multiple rounds with limited rest between, it’s a brutally efficient and simple strength-builder.
At my survival retreat, I’ll take a guy with a grip of iron over a guy with a big bench press and pretty biceps any day. This is a great grip exerciser at Amazon.com.
Don’t Touch the Iron Until You Can Move Your Bodyweight!
When most people think of bodyweight exercise, they think of jumping jacks, light jogging, and endless pushups for muscular endurance. Well, I’m here to tell you that your bodyweight is plenty of resistance to develop bone-crushing strength as well! By changing the leverage, bodyweight exercises are appropriate for beginners or experience strength athletes.
Take pushups. Anyone minimally healthy can stand in front of a wall and push themselves away from it. This is the place to start. Once you can do many repetitions, it will be time to engage more of your body weight by pushing up from the edge of a desk, workbench, or something else waist high. As we increase the difficulty, we pushups from the knees, do half pushups, and finally full pushups. But the fun is not done there!
Rather than increase the numbers as most people will do, once you can do 20 slow, perfect pushups in good form, bring in your hands until the index fingers touch and do close pushups. Now, the elbow is at a very narrow-angle at the bottom. Keeping control and pushing yourself out of the bottom with strength rather than bounce can be a challenge.
Then, start working towards strict one-handed pushups. A square-shouldered, square-hipped one-handed pushup is a feat of strength and even most hardened gym rats will respect (albeit from afar).
Similar progressions are available for handstand pushups, pull-ups, leg raises, and bodyweight squats. And they won’t cost you a dime.
I don’t know about you, but I’ll trust a gymnast to cover my six in a fight over any bloated bodybuilder.
Wiry Strength Trumps Muscle Mass When TSHTF.
Conventional wisdom believes that bigger muscles are stronger muscles. Wrong again. Strength comes from muscular tension, and that tension is generated by motor units, not muscles. Motor units consist of a muscle and a nerve connection. A stronger nerve connection to a muscle fiber means more tension within that fiber. Therefore, you can increase strength without adding weight by training the nervous system to tense your muscles harder.
Huge thigh muscles will chafe when you are running from zombies, and giant drooping pectorals will weigh you down when you’re trying to climb over a fence or wall to avoid marauding looters. A hulking man might also arouse suspicion among starving neighbors. So, stay lean!
Keep the reps per set low and generate as much tension as possible every time. Use a “big” movement like the deadlift (again, there’s that less than $200 barbell set) and do three sets of three, or two sets of five. That’s it: your entire “workout.” Gradually increase the weight over time, and you’ll be amazed at your own strength.
Just make sure to learn to do it properly. Make friends with a powerlifter and have them check your form. Speaking of which, making friends with a powerlifter is always better than the alternative, even before TEOTWAWKI (Click here to find out how to survive the end of the world as we know it).
And, speaking of deadlifts, that brings me to my final point:
Don’t Baby Your Back!
If your back is weak, you need to challenge it to get stronger, not baby it with back supports so that it keeps getting weaker. Properly performed deadlifts, bridges, farmer’s carries, and other total-body movements that involve the back will keep it strong. And if you spend a lot of time sitting, look into McKenzie extension therapy to put it back into balance.
Your spine is a complex structure, and small injuries can accumulate over time without much pain until one day you are tying your shoe and BAM!
Please, don’t be stuck in bed when the MZBs come calling. It’s quite avoidable, actually. It takes a minimal emphasis on remedial strength and the discipline to spend an hour or two a week (not per day) maintaining it. It’ll be much easier to get the most out of your gear, training, and skills when you can stand upright.
Click here and scroll to the bottom of the page to see MD Creekmore’s favorite fitness machine.
Vintage Army Advice on the Importance of Staying Fit (Applies To Everyone… Even You!)
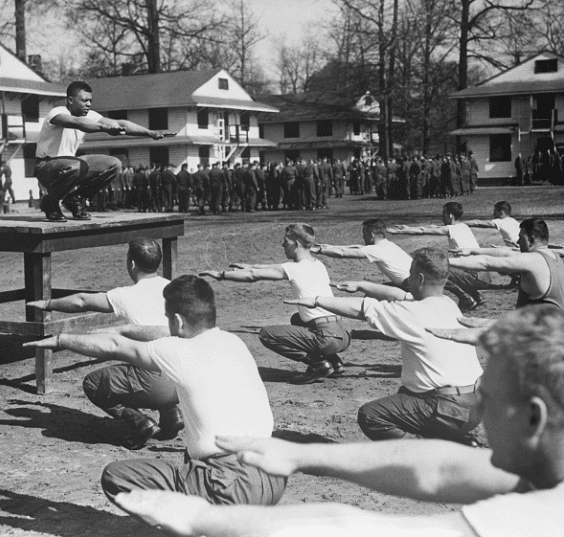
Editor’s note: The following excerpt was included in FM 21-13, an Army field manual published in 1952. Staying in as good of physical condition as possible is important for everyone (even you) and this article gives some good tips on why and how you can do that.
FM 21-13
THE SOLDIER’S GUIDE
Section VI. PHYSICAL TRAINING
Military leaders have always recognized that soldiers do a much better job if they are in good physical condition. This applies to a soldier pounding a typewriter in the communications zone as well as the rifleman fighting in the front lines. Warfare is a grueling ordeal and makes many severe physical demands on individuals in all types of jobs.
You may have to march long distances through rugged country with a full pack, weapons, and ammunition. You may be expected to fight upon arriving in the combat area at the conclusion of such a march. You may have to drive fast-moving tanks over rough terrain, to run and crawl long distances, to jump into and out of foxholes or trenches (some of which you may have dug), and to keep going for many hours without sleep or rest. All these activities and many others require superbly conditioned troops.
The importance of physical fitness has not decreased with the rise of mechanized warfare. Soldiers must still perform most of the arduous tasks which fighting men for thousands of years have had to do. The machines are no better than the men who operate them, and every improvement in our machines must be matched by an improvement in the quality and fitness of their operators.
A close relationship exists between physical fitness and mental and emotional fitness (morale). The rugged, tough, well-conditioned soldier has a feeling of fitness and self-confidence. He’s a hard man to beat.
You can become or remain physically fit only through physical training. Long experience has shown that few men enter the Army physically fit for the arduous duties ahead of them. The softening influences of our modern civilization make the problem of conditioning men more difficult than ever. For these reasons, a good plan of physical training is a part of the Army’s training program. It is the only way to prepare you for your strenuous duty in the Army and may actually be responsible some day for saving your life or the lives of your friends.
The old saying about “a sound mind in a sound body” is as true today as it ever was. Your mind works best if your body is healthy. As the condition of your body improves under physical training, you will find that you can work longer and still remain mentally alert.
You will feel more like doing things that require both mental and physical activity. You won’t mind the hard jobs because you won’t tire as easily. Your waistline will look trimmer; your chest expansion will be greater; and you will seldom be “out of wind.” Small problems will be easier to solve, and the big ones won’t look so big. Your self-confidence will increase, and you’ll feel ready to tackle anything or anybody.
The service benefits through having the maximum number of men ready and willing to do their jobs every day. Fewer and fewer men report for sick call as the health of the outfit improves. The over-all strength and fighting ability of the Army increases as each individual’s physical condition improves. Such an army is able to fight harder and to keep it up longer than a poorly conditioned enemy. Such an army has high morale, is vigorous, and takes pride in its accomplishment — it is an army that wins.
The Army has developed exercises to improve your physical fitness. Some of these are strenuous, but their value has been proved through use. Athletics also are excellent for improving your physical condition. Detailed information on physical training can be found in FM 21-20.
You’ve heard the old saying that “a chain is no stronger than its weakest link.” This is especially true in a military organization. In the offense the weakest section of an attacking company is stopped first. In the defense the enemy probes your position until he finds the weakest section; then he hits your weak spot with everything he has.
The only answer is to strengthen your whole outfit until it has no weak spots. Physical training is a means of strengthening and conditioning your body so that it will have no weak spots.
When you have strengthened your weak spots, the next thing is to get everyone working together. Everyone on the team must help his teammates toward the common goal. The combination of a group of well-conditioned men working with each other will produce victory whether on the playing field, in the office, or in battle.