• Skip to main content
  • Skip to secondary navigation
  • Skip to primary sidebar
  • Skip to footer

M.D. CREEKMORE

  • Blog
  • Books
  • Newsletter
  • Gear I Use
  • About
  • Contact
  • Facebook
  • YouTube
  • Blog
  • Books
  • Newsletter
  • Gear I Use
  • About
  • Contact
  • Privacy Policy
You are here: Home / Archives for Bushcraft

Bushcraft

Here you will find information on bushcraft, outdoor survival, and camping topics. If it happens in the woods then it will be found here.

How To Build A Live Animal Trap (An Easy Illustrated Guide)

October 21, 2018 M.D. Creekmore

homemade box trapNo doubt many of you have read about various improvised and homemade traps in one of the many outdoor survival books and thought, Wow, what a great idea—I could do that. Indeed, many of the ideas and diagrams shown are ingenious, and a few of them actually work to trap game—with practice.

After seeing all these trap designs in these books, you might think you need to learn how to make them all yourself, or that these homemade traps are somehow more proficient than commercially manufactured traps at putting food on the table or keeping pests out of your garden. You don’t, and they’re not.

The main (and possibly only) advantage homemade traps have over most of their store-bought counterparts is that they can be built from scrounged materials. That is a huge advantage and the reason you should learn how to make several different types of do-it-yourself traps.

But don’t go overboard here or discount a factory-made trap as somehow inferior for survival because you did not carve it out of three twigs that are held together by a strand of your own hair. Generally, factory-made traps are superior to most homemade designs, and you should take full advantage of their use.

When you are planning for survival, the last thing you want to do is limit yourself in any way. The best course of action is to blend primitive techniques and tools with modern advancements, therefore increasing your chances of survival.


small game trapping

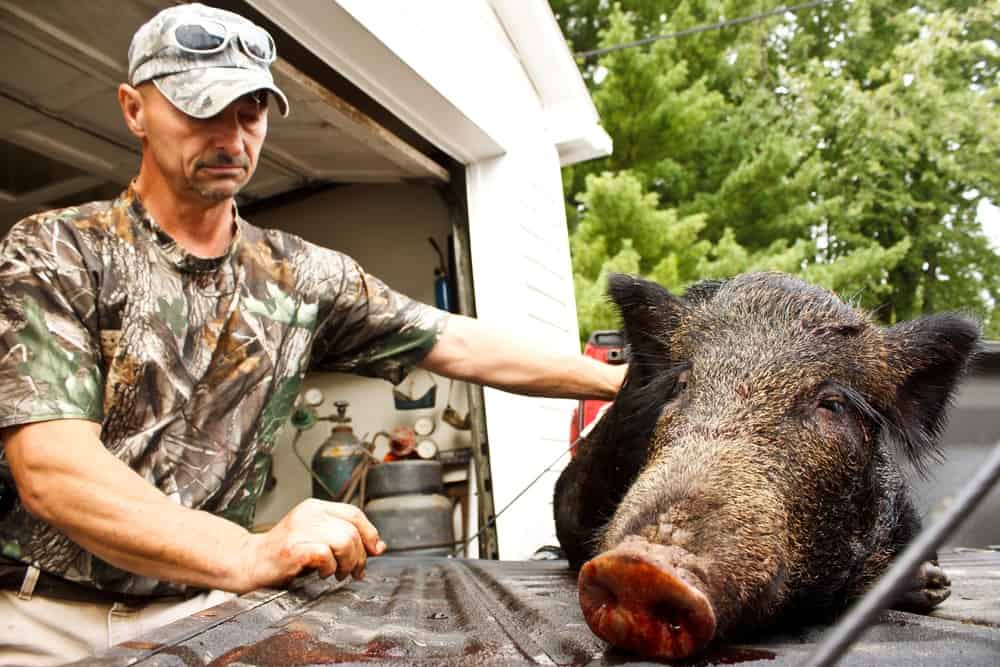
For best results when trapping small game, I recommend that you invest in a good supply (at least 10 traps, with 20 or more being ideal) of #110 Conibear body traps. They are easy to use for most people and are very effective for filling the stew pot.

Plus, they are quick-kill traps and are therefore more humane. With that said, the best homemade trap for the average survivor is the wooden box or cage trap, as they are commonly called. I am sure most of you have seen or heard about the live traps made by Havahart (www.havahart.com). These traps are lightweight (compared to the homemade version illustrated here) and work great, but they’re expensive, running upwards of $30 for the smallest trap.

Sizes for larger animals, such as raccoon, can cost $100 or more depending on the retailer. I didn’t have the money to purchase several of these traps, and it didn’t make good economic sense to do so anyway since I could make as many as I need for little or nothing. Box traps are cheap and easy to build using plywood or scrap lumber that can easily be found while scavenging through construction site Dumpsters or around abandoned structures or other locations in the country.

These traps are easy on the critters trapped inside, unlike other traps that rely on killing or maiming to secure the animal. An added plus is that game caught in a box trap is kept safe from hungry predators until the trapper returns to check the trap.

When I was growing up in the Appalachian Mountains of Tennessee, just about every boy knew how to build a homemade box trap out of scrap wood. Now kids are more interested in watching TV or playing video games than learning such useful skills.

This is sad because one day this type of skill could make the difference between going to bed hungry or on a full stomach. To construct this trap, begin by putting together a box using outdoor plywood, lumber, or other suitable material.

Each end is left open and should be approximately 6 or 12 inches square, depending on the intended game. The top piece should be 2 or 3 inches shorter on one end— or if you intend to build a trap with double doors, make the top piece 2 or 3 inches shorter at both ends—which will allow room for the sliding door(s).

homemade live animal trap

For larger animals, such as raccoon, opossum, and woodchuck, the box should be at least 36 inches long and have at least a 12-inch doorway. For smaller game, such as squirrels, rabbits, muskrat, and mink, a 24-inch box with a 6-inch opening works well. You have to construct a slideway for the doors to fall through and lock-in.

You can make the trigger system out of branches or other improvised materials. Explaining here in writing how the pieces go together is difficult, but it should all be clear when you look at the photos.

Use the heaviest wood you can find for the doors, as the weight will cause them to close faster and go all the way down and lock into place when the trigger is tripped.

trap trigger

close up of trigger
Close-up view of key trigger points that hold the door in the open position until dislodged by an animal, at which time they collapse, dropping the door and trapping the animal inside.

How To Use

Most traps of this type are set with bait. If you are baiting for raccoon, use peanut butter or fish guts; for opossums, use cut-up apples, peanut butter, or just about anything with a strong odor. Cats like fish guts; squirrels like acorns and corn; pheasants and quail like wheat or crushed dried corn.

When in doubt, use a spoonful of peanut butter, as most animals seem to be attracted to it. Many of us who keep chickens know how frustrating it is to watch our prized hens disappear one at a time to a seemingly invisible predator.

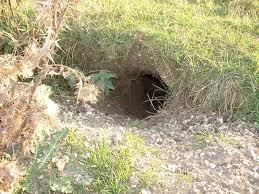
Catching the phantom culprit can be a bewildering problem since in many cases we don’t know exactly what we are trying to catch or when it will make its next foray into the henhouse. I keep two of these traps set and against the outside walls of my henhouse.

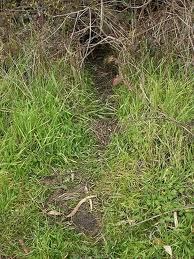
I conceal the traps with hay to look like a naturally occurring run or passage and usually catch several would-be chicken thieves (mostly raccoons) each month. They seem to just meander into the traps while searching for a way inside the coop. A dandy rabbit-producing method is to set out boxes in known rabbit country, with brush piled on top of the trap to make it look like a natural hiding place.

Make sure that the brush you use doesn’t interfere with the trigger assembly or keep the door from closing all the way. I like to funnel the rabbits into the trap by placing “wings” made from scrap lumber in a V pattern that lead from the entrance of the traps.

This seems to guide the animals naturally into the traps. These winged traps do not even have to be baited; the rabbits just wander into them while looking for a place to hide. Be patient: don’t expect to catch anything in the first couple of weeks.

The rabbits need to become accustomed to seeing the traps before they will start to come in. If you can find a copy, I suggest you buy Being Kind to Animal Pests: A No-Nonsense Guide to Humane Animal Control with Cage Traps by Steve Meyer (the book is out of print, but

Filed Under: Bushcraft

The Best Camouflage Pattern for Hunting By Season

October 10, 2018 M.D. Creekmore

Camouflage for hunting wild bore

by Brandon Cox

When shopping for camouflage, it’s hard to resist the bargain area where camos are sold for less than retail. Usually, the camos featured in the clearance section are out of season. However, some hunters will jump at the chance to save on camouflage and wear it in the woods – regardless of the season.

Some hunters will even go as far as mismatching their camos with many different seasons in one outfit. While they may have saved a few dollars, they might have ruined their chance to catch a buck, which can be a much bigger loss in the big scheme of things. Why you ask? Despite what people will try to tell you, camo patterns matter, especially when hunting whitetail deer.

Why Does Camo Pattern Matter so Much?

You don’t have to take our word for it, or anyone else’s just evaluated the science. Whitetail deer have one focus in life, and that is to survive. Scientists have told us that whitetail deer have 2 cone cell eyes. What this means is they don’t see the same way other animals or humans see.

Due to the way their eye is created, deer don’t see the colors yellow or red very well. Instead, they mostly see all colors in shades of yellow or blue with some shades of green. While their sight is somewhat limited, deer see the best in low light, which mostly includes sunrise and sunset.

Deer are also known to have great eyesight right after fresh snow hits the ground. While deer don’t usually see colors, they do have pretty clear vision. In fact, a deer’s eye can dilate anywhere from 7mm to 8mm. In comparison, a normal human eye can only dilate to a maximum of 8mm.

You’re probably catching on by now and realize that deer’s eyesight and changing foliage has a great deal to do with camo patterns. Basically, if you get caught wearing the wrong camo at the wrong time of day or season, your chances of killing a buck are based more on prayer than talent or planning. To avoid being caught unprepared, you need to know what camo patterns are best for which season.

Preferable Early Season Camo Patterns

In most states, early bow season for whitetail starts towards the end of September. Usually, the trees and grass are still pretty green at this time. This is a good thing for hunters because they can opt for their trusty green patterned camouflage.

Everything in the woods is pretty green, so a deer isn’t going to immediately notice you covered in a green pattern stalking him from the woods. However, as the trees begin to shed their leaves and the grass loses its bright green luster, you need to rethink the color of your camos if you want to go undetected.

Wear Broken Green Camos in Fall

Once the trees have changed color, you need to change the color of your camos. Since the area around you isn’t bright green anymore, you don’t want to appear that way to deer. Shades of green are easy for deer to see, especially when everything around you is changing.

You might think you can get away with wearing bright green camos if you’re sitting in a treestand, but that simply isn’t true. The only way a deer might not notice your green camo in a tree is if you’re sitting in an evergreen. Otherwise, if a deer catches a glimpse of you in the tree, you’ll look more like a blob sitting in a tree instead of a part of the tree.

Since deer are engineered to focus on survival, the simple presence of an odd blob in a tree might be enough to spook them. And once deer runs, they’re sure to spook all their friends.

Instead, fall deer hunters should opt for a broken pattern. A broken pattern has a duller brown and green color with hints of orange and rustic changes, which will help you stay hidden in the woods.

Late Fall – Stick with Fall Camos

Luckily, you don’t need camos for every season. As long as there isn’t any snow on the ground yet, you can wear the same camos in late fall as you did when the trees first began to change. The only exception to this rule is right after it snows.

Don’t Cloak Yourself in White After it Snows

Many hunters want to cloak themselves in white camo patterns after the first snow. We understand the logic, but you have to remember that deer see extremely well after fresh snow hits the ground.

Instead of opting for an all-white approach, hunters should try to wear camouflage with broken patterns. It’s important to avoid solid white or other solid dark clothing. By wearing broken patterns in the winter, you’ll be harder to see and won’t spook deer as you climb into and out of your treestand.

Now you know why there are so many hunting camo patterns on the market. Not all are created the same nor do they all deliver the same results. Instead, each is unique and it’s up to you to decide which color or pattern is right for your area. No matter what color, shade, or pattern you choose, it’s important to keep the following information in mind.

  • Make sure your hunting packs match your camo (so they won’t give you away)
  • Never wash camos in a laundry detergent that uses UV brightening agents (it will make any camo easier for deer to see)
  • If something isn’t working, don’t be afraid to change it

Now that you know why camo patterns are important to the success of your hunt, you’re ready to go shopping. You no longer have to fear the bargain section. Just remember if you’re buying out of season camos at a discounted price, it’s important to keep those in the closet to the following year.

It’s a bunch cheaper to buy new camos for every season then it will be to stock your freezer with meat for the winter if you lose out on a buck because you wore the wrong gear hunting.

Filed Under: Bushcraft

Can I Use an Emergency Space Blanket for Camping?

October 9, 2018 Jesse Mathewson

emergency blanket for camping
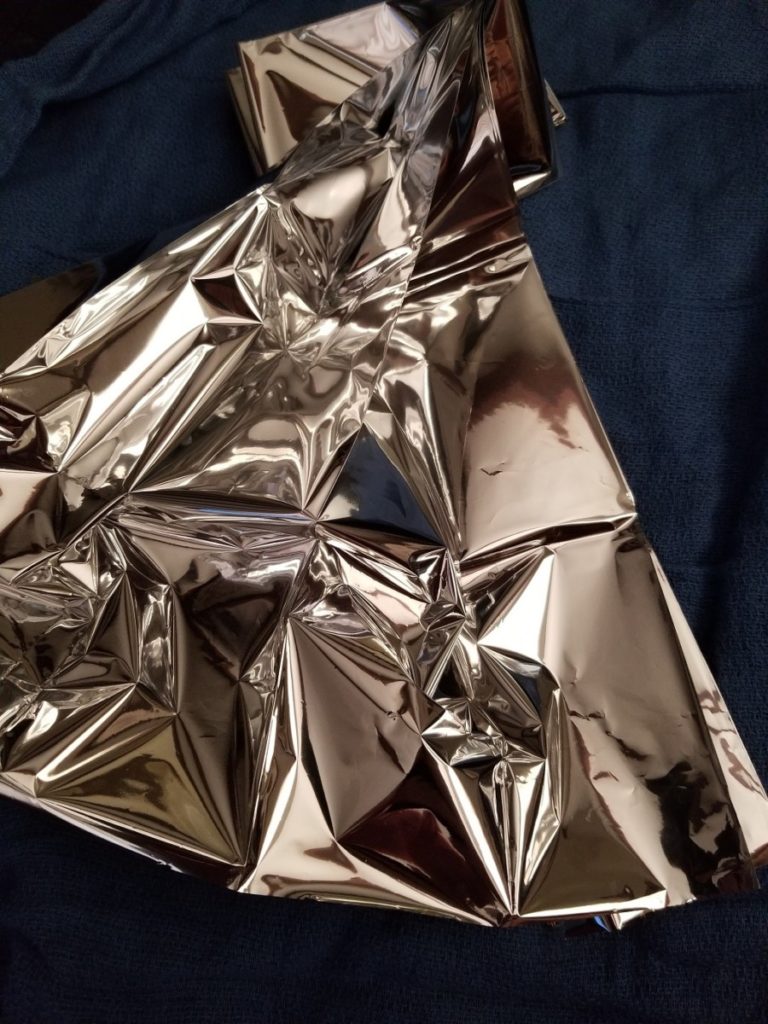
Invented in 1964 for the space program, and used to keep Skylab from overheating these are an amazing invention. Consisting of thin sheets of plastic coated with vaporized aluminum, this was done to ensure extremely low weight with a high net benefit/ reflective nature.
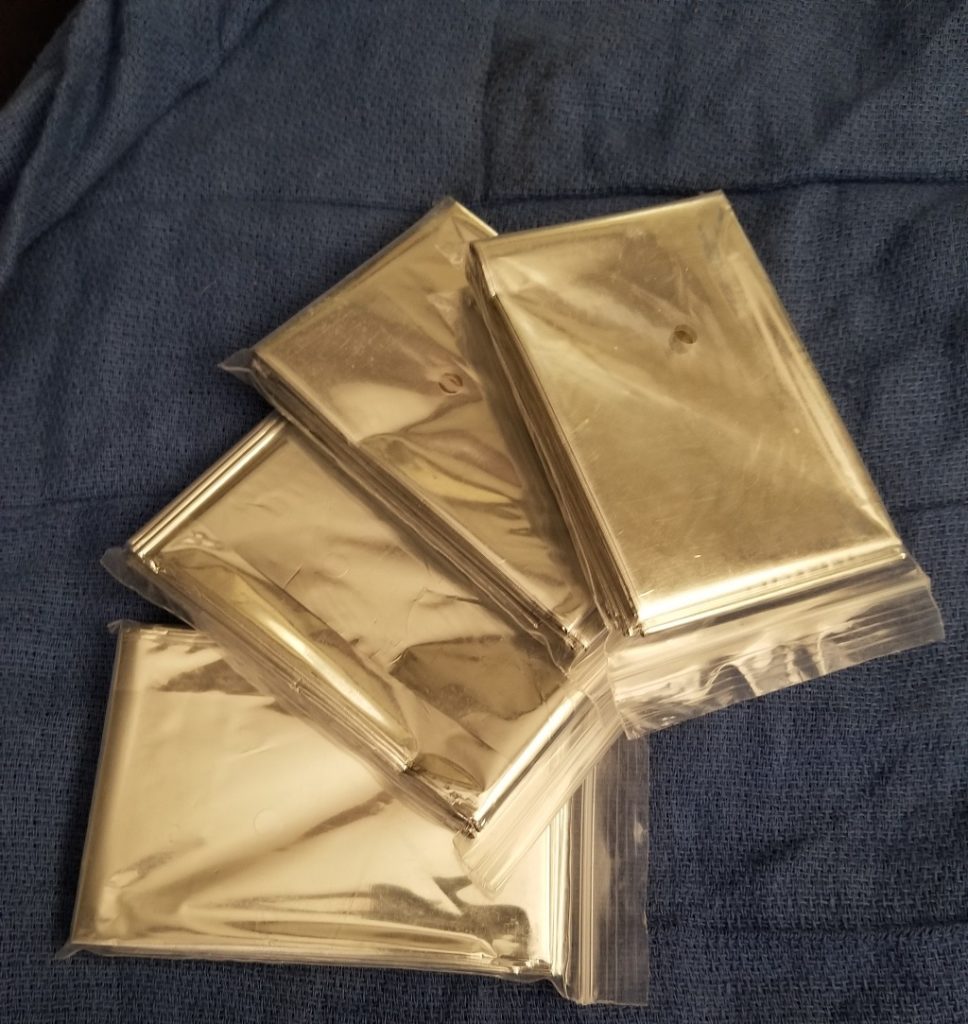
They are basically the same width as a human hair. Average weight between 0.5 and 5 ounces, they are truly indispensable.

So why review a space blanket? There are hundreds of manufactures of space blankets, why review any of them? It is an essential item of note that space blankets CANNOT create heat they merely reflect it, as well as light and even air depending on use.

Even with something so seemingly inconsequential as a space blanket understanding what they are, how they can be used and how they should be used is essential to understanding that you can indeed get space blankets that are really not a good quality. So what can space blankets be used for? This is the fun part, the easy part, and the essential knowledge part!

  1. Blanket to protect against the elements – carry a minimum of one per EACH member of the house and at least 2 extras in every vehicle and a minimum of two for each bag.
  2. Shelter/Shade – this is where the extra blankets come in handy, at a cost ranging between 0.23 and $6 apiece they like tourniquets are not something to scrimp on as far as amounts go, I suggest a minimum of two per bag and two spares in every vehicle kit (on top of one per family member) personally I purchase them by the case and have 3-4 per person in every kit!
  3. Fire Reflector – certainly some of us “can build a fire using two sticks and dead wood – shoot we don’t even need a knife!” however, the reality is much more difficult than the fantasy life we wish we lived. Using one of these to reflect a fire’s light and heat into the shelter (built out of another one) so that the blankets (also space blankets) will keep us from freezing or dying of exposure is both simple, inexpensive and DOES NOT use up valuable energy stores putting together!
  4. Water Purification by way of a solar still, exceedingly easy and fun to build this approach to water purification can work very well and provide much-needed water with overall weight being far less than bringing even a Sawyer Mini Filter with us. (And I always have one of those!)
  5. Solar Energy – expand your solar panels ability by reflecting more light into it!
  6. Solar Cooking – using a framework similar to the fire reflector you can harness the suns energy and warm or heat water allowing for some cooking, and believe me, a warm meal when things are down makes a HUGE difference!

There are many different uses that you can figure out as you go. I firmly suggest purchasing and using Shemaghs for head wraps, neck wraps and more. Instead of using a reflective space blanket use a shemagh for things like carrying additional items, hammocks, and wraps on the body.

emergency blanket for camping

However, this is up too you and I am certain you can find others uses for these amazing tools, though I would be quite careful with carrying or wrapping and tying things with space blankets simply because they are NOT designed for this type of thing and will break rather easily when used in this manner.

Over the years I have used multiple brand name space blankets and can honestly say that silver, gold expensive or not there is really not a huge difference in them. In fact these days most of them are manufactured in China and or manufactured using the same base components that are being made in China.

Unlike two decades ago, made in China does not hold the same stigma it once did. I am certain some of you may remember Nissan, Datsun, Honda, and Toyota in their initiation into the United States car market. T

hey went through the initial “not made in America” and quality issue problems, however, this has since been rectified and these days Toyota, Honda and even Nissan are made in the United States and far superior in most ways to “made in Mexico/ GM products”.

The reality is simple, production costs far less thanks to a lack of unions and entitled millennials in China and other manufacturing centers. Technologically China, Korea, and Japan have either surpassed or are equal to us in many areas. With the advent of global business linked through the internet, it is simply more cost-efficient to produce outside of the United States these days.

Someday we may see a return to American made and proud of it, however, even with firearms people are quickly learning made in America really isn’t the same anymore. To be competitive American companies cut corners instead of lower wages, this leads to bad products in many sectors from Automotive through Camping supplies.

Space Blankets are themselves a product that can be and is made outside of the United States and is made quite well. I suggest this 10 pack of Mylar Space Blankets cost averages out too $7 shipped, and I have never had any issues with them.

In fact, the pictures show these blankets being used and I have even reused them on several occasions for up too 4 days each, though you should understand this is not always possible, it does not take much to puncture a space blanket!

If you want to use the gold colored ones you will spend a bit more, and honestly will not get a larger return in value, this again comes from direct experience. However, the choice is yours, for myself saving a few bucks on things that have a definite use limit and or shelf life is smart prepping. You can do that with these and NOT sacrifice quality in any way.

emergency blanket for camping

Swiss Safe is a name brand blanket that costs several dollars more per blanket, however, they are green with a gold one included. $18 for 4 blankets, if you so desire these instead. The advertised thickness is 12-mils with the Swiss Safe blankets and the others are maybe 10 mils at most, honestly, this is not a huge deal as thickness is ONLY a pricing thing when you get into mils with space blankets, there is no significant difference in strength or overall usefulness.

Additionally, they crinkle quite loudly when you are taking them out regardless brand, sound carries much further than a reflection on a snowy, cold day!

So what uses do you have for a space blanket? Have you used one, or two? Do you use one as a ground cover and another as a blanket? How do you use them?

Thanks for reading and as always please let me know if you have anything you would like to review or see a review on!

Free the mind and the body will follow…

Filed Under: Bushcraft

How to Build a Small Game Survival Snare For Rabbit

October 3, 2018 M.D. Creekmore

trap-basic-power-snare-setby SurvivorDan

Before we begin with a discussion of the construction of the most basic primitive/minimal* tension trap; a quick look at the ethics of primitive trapping.

Modern trap use is legal as long as you obey the local laws, licensing, seasons, limits, etc.

Primitive trapping is illegal in most places and definitely in my neck of the woods…er…desert. Exigent circumstances may negate that illegality.

It is to be used in an extreme emergency survival situation only. It is only for keeping you and yours alive in an all-out emergency survival situation. Even practicing setting your traps may run you afoul of the law.

Last year I took Mrs. Survivordan into a national forest and taught her to make a variety of traps. I had her cut the pieces of stick we would need in advance from private property with permission. Any saplings we used in the National Forest for tension were not stripped of ancillary branches and leaves. In other words, we left everything the way we found it.

All traps were sprung after completion, then disassembled and re-bagged. Nothing in that riparian area was disturbed. Still could have ended up having to do some fast talking with the local game warden or ranger. So be careful where you practice these techniques.

And pre-cut whatever devices you need for your traps. Even simply chopping and/or slashing greenery in a state park, National Park or National Forest may land you in a more modern trap. The local hoosegow. The lock-up. Jail. So obey the law and when walking that fine line betwixt legal and illegal while practicing primitive trap building, be law abiding………….and discreet.

Pre-Trapping Strategy

First, I rig up a shelter and build a small fire and put on some water. I dig a little slit trench. Then I sit down and prepare a cup of coffee or tea or some chow. I listen and observe while I work. Usually, while my food or java is heating I walk around the area and reconnoiter a bit. Look for critters and sign. Then I go back to the campsite and eat and drink. Gives me a chance to think about the lay of the land. Did I spy any critters?

Where were the game trails? Did I see any scat? Rub marks and wallows and such? Tracks down by the water (if any water)? If I determined there are game and what kind, for instance, rabbits, then I decide what kind of traps I am going to make and where I might put them.

For rabbits, I usually make a giant crossbow thingy that fires a great big eight-foot spear capped by a massive trident with exploding tips made from .357 magnum shells……….

I’m just kiddin’! The rabbits will get fixed snares (if I have wire) and tension snares on the ground. In this article, I am mainly dealing with traps constructed with string, vines or paracord. Assuming primitive/at-hand materials – no wire. If you do have wire….wire is good. I go where I figure the rabbits ain’t and cut the pieces of stick I’ll be needing.

When I’ve got them whittled up and partially rigged with cord, I usually try to rinse them off with water or wipe some dirt and such on them to get some of my scent off. But I’m getting ahead of myself…..

Making The Trigger Stick

Cut a small simple cylinder of wood, about 5 – 6” long and 1 1/2” – 2” thick. This is the simple trigger for many traps. This is a fundamental piece that you need to learn to make. It is very simple to fabricate. As is the second part of our first trap, the anchor which looks and functions much like a tent stake. That and some cord and we can build our first spring or tension snare.

trap-basic-snare-trigger
Basic Snare Trigger

Back to the trigger…..cut a small 5 – 6” length of wood 1 ½” to 2” thick and about a third of the way from an end, score it about 1/8” deep all the way around with your camp saw or drywall saw. (You can do all this with a knife but why? Cruder but easier with the camp saw.

Either way, watch out that you keep all your fingers so you don’t have to practice one-handed first aid.) That will be a good place to anchor your paracord or another line that goes up to your tension pole. Tie it on good ‘cuz if anything pulls loose you have no dinner and something may smack you in the face while you are setting your trap. But first, let’s cut another notch.

At approximately a third of the way from the other end of the stick, you need to make a mark across it. Cut straight down at that center line mark and alternately shave from the middle of the stick towards the mark until you have a nice ½ to ¾” deep flat surfaced notch. That is where you will catch your trigger stick on its anchor stick. Sounds more complicated than it is. It’s easy.

The Anchor stick

The Anchor stick
The Anchor stick

Find a spot where a branch forks off and cut a stick roughly shaped like this longish stick pictured above. Twelve inches to the fork would be good. If your trap will be set in soft marshy ground in a riparian area, then make it a bit longer.

You want a long strong piece as it will be pounded into the ground. Leave a couple of inches above the forked area as that will be the head of your ‘nail’ when you pound it into position. The fork that you cut off has to be shaped to match up to your trigger so bear that in mind when you cut it originally as it can save you some sawing and filing.

Anyway, this ain’t about mil specs. When you set your trap you can make last-minute adjustments to the interlocking surfaces of the trigger and anchor sticks. Line up the trigger and anchor sticks. It is simpler than it sounds.

The Power Pole

 twitch-up rabbit snare.
How the two go together for a twitch-up rabbit snare.

The power pole should be very close to the actual noose placement. It can be a sapling or a large overhanging branch. If saplings and such are not located where you want to site a trap then you can cut a strong branch and place it vertically in a hole and brace it with rocks.

You could even throw a line over a big overhanging branch and tie it securely to a good size rock or log for your power source. Hoist the rock up and set your tension on your trigger. It’s a fairly simple concept so I will assume common sense will guide you to figure out what to use for a power source.

Once on site, find a good tension pole (rooted sapling or branch) that bends down to about a foot from your trap site with enough tension (power) to hoist your dinner aloft. Bend the tip of the power pole down to where you want to site the trap. Line it up. Pound your anchor stick in with a rock or small log.

Out of respect for the environment and fear of the law, I would not strip the ancillary branches and leaves but in exigent circumstances (ie: you are hopelessly lost and hungry) you can strip the sapling, reducing the weight, and thus increase its power. (For these photos I am using a fishing pole for a power source) You will tie a paracord (Use green, tan or camo cord.- I used this multi-color easy-to-see cord for illustration purposes) to the end of the sapling and allow a foot or so of free cord until you fasten it securely to your trigger stick.

If you can’t tie a basic knot then get on Google and learn as there are all kinds of knot loving sites. Climbers and sailors I reckon. I can only tie about 6 knots and they serve me well. I couldn’t tell you the difference between a reef knot and the Flemish eight. But I got my little arsenal of idiot proof knots and they work. Get yours.

The Noose

Basic power set noose

Assuming you only have the paracord or other strong line and no pre-made wire nooses then you must form a noose from your line. Pretty straightforward. Tie a little loop in the end of a 3-5 foot piece of cord and feed the end of the line thru it (Don’t make the loop too tight so, when sprung, the noose cinches up quickly without binding).

Now you have a nice snare loop (make it 6 – 8 inches across) you can position it horizontally atop of 3-4 small forked twigs, so your future dinner guest steps in it.

Or you can prop it up vertically so your bunny or what-have-you walks into the loop. For bunnies have the bottom of the loop about 3-4 inches off the ground. In my experience, vertical orientation tends to be more productive.

Note: I don’t like set (non-powered) snares with cordage as the critter is likely to chew off the line before expiring or may suffer for a prolonged period of time. There are examples of set snares (no power pole) that are reasonably efficient even with cordage and I may address them in the future.

Modern snares have a one-way device that continually constricts as the animal pulls to get loose and are more likely to effectuate a ‘clean’ kill. Herein I am only addressing primitive powered snares using cordage or vines.

Powering The Snare

DANGER! CAUTION! First, you need to tie the free end of the noose to the trigger stick and set it under power. Now you need to set your loop vertically or horizontally but very gingerly, very carefully so you don’t lose an eye or some teeth if you inadvertently trigger the trap while setting the noose.

Sounds a bit scary but I have never been hurt though I have experienced premature triggering (No jokes please. I’m sensitive.) of my traps while setting them. Keep your head back and your hands-free of the noose while setting. I was wearing safety goggles while setting this trap. You need to have a healthy respect for all traps you set.

The Trap site

Assuming you are a natural-born trap builder and can extrapolate the basic design into a dozen different sure-fire can’t miss critter-killer primitive traps, that doesn’t mean you are going to eat! You could put up 50 traps hither and thither and get nary a bunny for your efforts.

Down-the-rabbit-hole
Rabbit hole

The cardinal rule that applies to retail locations, restaurant sites, hotels, survivalist retreats, gas stations, hunting camps and just about everything else you could want to build or locate somewhere consists of three principles, “Location. Location. Location.” You have to place your traps along the routes between where the animals eat, sleep and drink.

Where do they sleep? Well, a lot of little critters sleep in dens. Holes in the ground (don’t reach in and feel around…ya might find claws, fangs and maybe even some venom), hollowed out logs and tree trunks, nests in the trees ( squirrels ), etc. Larger game like deer, elk, and horses tend to bed down in the grass when they can get it.

You will notice large flattened out areas in the bush. These are not your trapping sites. Wild pigs tend to bed down deep into a thicket and will have scraped away the ground cover down to the dirt, in fact, if you can stand and see their bedding area you are not looking at their bedding area.

You would usually have to crawl back into it and you do not want to meet a feral hog in that position. It would get ugly.

Of course, the type of trap in this article is not designed to take out a large animal. But by understanding the signs for large animals you will not waste your tension trap there. Your target critter is most likely going to be a bunny. Typically you can find bunnies in many environments.

They will den in holes, usually inter-connected to form warrens so watch out as there will be more than one way in and out. You can locate a few holes and place a snare at each one. You should look for runs which are the flattened out paths through the bush that the rabbits use to get from their dens to their feeding and watering areas.

The rabbit runs often exhibit sign like bits of grass clipped off and rabbit ‘pellets’ (scat/poop) scattered along the run.

rabbit-run
Rabbit run

If the run is very large and you see large hoof prints then you are probably looking at a pig run and need to build a bigger trap! I suggest that if you are a new survivor trapper, you should stick to bunnies, chipmunks, squirrels and such until you get a bit more confident and a bigger repertoire of traps.

Besides, you need snare wire and cable for the big critters like feral hogs. Back to the bunnies …. some species of rabbits sleep in the dense thickets and thorns rather than underground.

You will set traps for all types of rabbits on their runs and catch them coming and going. {By the way, if you’ve got a slingshot or smoke pole you might just lurk somewhere and pop off a bunny around sunset or dawn when they’re on the move along one the rabbit runs.

I’m just saying that two layers of critter harvesting is better than one.} Be aware that rabbits don’t stray to far from where they den up as they have many enemies.

If you have had little luck finding the rabbit’s runs for some reason and you have located a water source such as a small stream or a pond you will need to backtrack from there. Many critters doubtless come to that water to drink eventually.

If there is small game in the area you will find runs and bigger game trails leading to and from the water. Pick the ones that seem to have your target critter using them (meaning if there are huge hoofprints or paw prints and you can’t discern any little tracks, find another game trail or run) and set your traps.

Remember….look for tracks and scat (poop). Site your traps in the narrowest part of the runs. You may need to place some sticks or brambles in such a way as to funnel the rabbits to your noose. While you are doing that and when you are setting your traps try to avoid leaving too much human scent on everything.

At least don’t be wearing any deodorant, cologne, hairspray/gel, soap residue, hand lotion, bug spray…..well, you get the picture.

rabbit-pellets
Rabbit pellets

Try not to stink up the bunnies world cuz they will know something is not right. If setting your snare or noose vertically then you want the bottom end only 3-4 inches from the ground. We are aiming for the bunnies head.

Speaking of his head, bring a big stick when you go to check your traps. Cordage snares don’t always dispatch your critters. Make it quick. And on that note, check your traps often (every 5-6 hours). You don’t want the little critters to suffer and you want a coyote to steal ‘em neither.

Those of you more sensitive to killing and field dressing an animal, I want you to know that I am not a natural-born hunter. Some of my friends enjoy the kill. I really don’t. It’s for meat. To survive. It’s a necessary task in order to keep yourself and comrades fed. You don’t have to enjoy it. Just do what you have to do.

Get Your Hands Dirty

You think you’ve got all this down? You can do it when you need to? Photographic (eidetic) memory? Practice now when you don’t need this skill. When you need to do it for real it will seem so natural and you will build your traps easily and correctly so they are effective.

Lives may depend on it. You don’t want on-the-job training and have your dinner get loose from a defectively constructed tension trap.

So cut some sticks. Make a couple of basic traps until you are comfortable and confident in building them. Securely prop up a fishing pole in the backyard and use it for a power source (wear safety glasses) to practice your trap building skills. (In my backyard I buried a 14″ PVC pipe with a removable cap to put my power stick in for teaching purposes) You will come to realize that you could fashion a half-dozen such traps in an hour and set them in another hour or two.

Trigger your practice traps immediately so you don’t snare/kill Fluffy. Don’t run to get Momma to show her your neat-to new trap cuz, for sure and for certain, that’s when Fluffy will find it! Anyway, that’s 6 traps out there working for you 24/7. Think about that. Much more productive than chasing fast-moving rabbits with your tire iron in hand. Smarter too. Good trapping!

Practice your trapping skills. Be a survivor.

* As we are utilizing manufactured cordage one could argue these traps are not truly ‘primitive’ traps. For instructional purposes and simplicity here we will designate such traps as primitive as opposed to ‘humane’ modern manufactured traps.

Filed Under: Bushcraft

Identifying and Harvesting Wild Berries for the Homestead

September 16, 2018 M.D. Creekmore

Mulberries (early June)

by Bobcat-Prepper

“Warning – Positively identify any food in the wild as safe before collecting. Some berries that are dark purple (like pokeberry) or black (like nightshade) are TOXIC.”

I have been hiking and running around an abandoned 16 acre field near my home for the last year for exercise, and this spring I started paying attention to some familiar spouts popping up – raspberry and blackberry canes.

That got me thinking about how much my family likes fresh berries, and the high cost of them at the store, so I decided to go berry picking this year.

Wild Berries are great for preppers, homesteaders, bushcrafters, and fans of self-sufficiency because they are low/no maintenance plants that propagate themselves.  In addition, these berries are full of vitamin C, and can be stored in several ways for use in normal times, or for when SHTF.

Blackberry leaves were chewed by Roman soldiers in ancient times for their vitamin C and tannin content, and today blackberry leaf tea is helpful in reducing the symptoms of diarrhea, a dangerous condition when medical help may not be available.

I have also found a mulberry tree and elderberry bushes in public parks in my area, so I have been collecting their harvest as well.

Mulberry trees are easy to identify, and a large one can provide tens of gallons of dark purple ½” to 1” berries.  Here to how I have figured out the best way to harvest them:

  1. If the tree is in a public park, pick a time when few people are around. It’s probably legal to collect berries from it, but why take a chance, and why alert other people to free food?
  2. Dress in an old t-shirt and shorts, preferably dark or red-purple. Mulberries stain like crazy, so don’t go picking dressed in anything nice – boots included.
  3. Bring a 5-gallon pail, a 10’x10’ tarp or plastic sheeting, and a stick or scrap wood about 10’ long.
  4. Lay out the tarp or sheeting under the first large branch, and tap or strike the branch to make the berries fall.
  5. Have a friend help collect the tarp corners, and pour the berries into the pail.
  6. Move to the next branch, and repeat.
  7. When the tree has been thoroughly harvested of ripe berries, come back in a couple of days, and get a whole new harvest. They ripen over about 2 weeks, so you will be very busy if you want them all.
  8. Note: do not pick up berries off the ground, as deer love mulberries and will poop on them as they graze. Watch your step!
  9. When you get home, carefully wash and clean the berries, and keep cool until processed.

Raspberries in my area near the woods, so I dress in an old t-shirt, jeans, boots, and a wide-brim hat.  I apply bug spray to my pant cuffs, arms and neck to keep the ticks and chiggers off. Wash your hands after applying the spray, so the odor doesn’t get on the berries.

Raspberries (early-late June)

Keep your eyes peeled for these black beauties on thin green canes– black raspberries are smaller than blackberries and may be hidden by the leaves.  If raspberry canes have thorns, they are usually small enough I don’t worry about them.  Collect in a modified 1-gallon milk jug or two, strapped through your belt.  This method allows you to collect with two hands.

You probably won’t collect many, due to their small size and lesser frequency, but they are worth it, as they are sweeter, and the smaller seeds are much easier on the teeth than blackberries.

Jug for collecting wild berries

Blackberry canes are thicker, taller, and have sturdy thorns that tear the !@#$ out of your clothes and skin.  Prepare yourself the same as for raspberries, but if you can stand the heat, you may want to wear long sleeves to protect your forearms.  I just grin and bear it in a t-shirt, and stay cooler.

Blackberries [early-late July]
Try to pick strategically, standing in one spot, picking every black berry in reach 360-degree blackberry move to the next unpicked area. Yes, the thorns hurt, but you’ll get over that and I have yet to get an infection for a thorn scratch.

With luck and enough canes, you should be able to pick about three quarts an hour during the peak picking days.  I go back to the patch every two days to get the newly ripened berries.

Elderberries [early-mid August]Elderberry bushes don’t have thorns, and for that I am grateful.  The berries are cleaner to collect, as they tend not to burst when picked, which is another big benefit.   The downside – unripe elderberries contain the mildly toxic sambunigrine, so only eat the really ripe ones.

Elderberry flower tea is said to boost your immune system, and a daily tablespoon or two of elderberry syrup can shorten your flu or cold.  Dried elderberry leaves can be used to keep mosquitoes away too.

  1. Select only elderberries that are dark purple/black.
  2. Place the head into a plastic bag for collection, then cut the stem that holds it to the bush.
  3. When done collecting the heads, take home and wash.
  4. Use a fork to pull the berries off the head.

Now, What Do I Do?

Now that you have your berries, you need to decide what to do with them.  I like to diversify my berries, so that I can enjoy them in a variety of ways and times: either fresh, frozen, baked, canned, or dried.

Fresh – Fresh raspberries and real whipped cream are the best, while fresh blackberries tend to be too tart to enjoy.  The mulberry flavor is OK, but its biggest benefits are volume and sweetness (now that I think about it, mulberries used for wine would be a pretty good use, but that’s for another post). Elderberries should be heat-processed in some way, for safety’s sake.

Frozen – If you enjoy them fresh, but have too many, why not freeze them?  I just place clean dry berries in a quart Tupperware container, and when thawed they are passable as fresh, but better is then baked or otherwise heat-processed.

Baked – All of these berries are delicious in tarts, pies, and cobblers.  I used a blackberry pie recipe last night, but make it into tarts.  It’s cleaner to eat, and the kids loved it.

Canned – The canning method is probably the favorite of preppers and homesteaders alike for the durability of the resulting food.  It keeps for years, and the jelly/jam/preserves are full of sugar for preservation and calories when they are needed.

Berries tend not to jell without pectin, but pectin is pretty expensive – about 75 cents/canned pint.  For that reason, I’ve been experimenting with ways to have it jell without store-bought pectin.  Here is my recipe:

Raspberry Jam

  • 8 cups clean berries
  • 5 cups sugar
  • 10 small green (unripe) apples – I have a couple apple trees on my property, so it worked out well
  • ¼ cup lemon or lime juice (the acidity raises the ability to jell – if I didn’t have those in SHTF, I’d try vinegar)
  • 1) Mash the berries in a large saucepan. Add sugar and juice, place on medium heat.
  • 2) Core apples, slice thinly.  Tie up in a cheesecloth bag (or don’t – this adds more pectin), and place in same pan.
  • 3) Bring to a boil, watching carefully so it doesn’t boil over (happens easily).
  • 4) Cook for 15 minutes on low, then let cool while prepping and heating canning pot.
  • 5) If you bagged the apples, remove the bag from the pot.  If you didn’t, scoop the apple slices into a ricer, and rice the apple/raspberry glop back into the pot.  Dispose of the solids caught in the ricer.
  • 6) Fill the 6 to 8-pint jars with ½” headspace, close, and process for 15 minutes.

Your jam will not jell at first, but within 2 or 3 days the pectin will do its thing, and it should be firm enough for toast, sandwiches, or whatever.

Elderberry Syrup

Good for immune system reduces sick time.

  • 8 cups clean berries
  • ¼ cup water
  • 5 cups sugar
  • 1) Place the berries and water in a saucepan, bring to a boil, cook for 15 minutes.
  • 2) Rice the berries with the “fine” plate to remove the numerous seeds, into another saucepan. Dispose of the seeds in the ricer.
  • 3) Bring the elderberry juice back up to a boil, and add the sugar. Reduce to low heat. Prepare the canning pot.
  • 4) When the syrup starts to thicken, turn off and fill the pint jars with 1/2 “ headspace, close, and process for 15 minutes.

Dried

berries drying at the homestead
Berries drying at the homestead…

I have a second batch of blackberries in the dehydrator right now, as I write this. The first batch of 2 quarts fit onto 4 trays and took about 18 hours to dry.  Now they are about 2/3 of a quart of crunchy tart nuggets, ready for snacking, pemmican, or rehydration with boiling water at some later date.

You could also dry them by placing those 2 quarts on a lipped baking tray, and put it under a screen in the hot sun for a few days.    You could also plant them, I guess, if you were starting a post-SHTF garden, or trade them with someone else who wanted to start a garden.

Blackberries turn red as you dry them, so don’t be surprised.

Berries are a perennial source of fruit that keeps giving all summer, so keep your eyes open when you walking around empty lots and parks in your neighborhood, and get picking!


Filed Under: Bushcraft, Homesteading

Best Water Filters For Camping & Prepping

September 15, 2018 M.D. Creekmore

hiking clean drinking water filtersby Kirk S 

Everyone agrees that you should have an emergency supply of water. Most experts advise that you should have a minimum water supply for 72 hours and the CDC recommends that you have 1 gallon of water for each person in your family for each day.

If you have a family of 4 you will need 12 gallons of water for those 72 hours. This is pretty easy to do with bottled water. Bottled water is pre-packaged and has clear expiration dates so you know that the water is still safe to drink.

Acquiring safe drinking water becomes a little more difficult if you need to abandon your home or if the emergency lasts longer than 72 hours. Each case requires an understanding of water safety, contamination, and treatment.

Choose the right water source

Water from flowing streams and rivers is always preferable to the stagnant water in ponds or lakes. Always try to choose water as close to the water source as possible. In many cases, spring water coming out of the ground will be the safest for drinking.

As much as possible, try to avoid water that is down river from towns and industry. Waste and pollutants often find their way into the water systems. Likewise, water near to agricultural land can be a problem. Fertilisers and pesticides soak into the land, and through rainfall and runoff, will get into the streams and rivers.

Avoid water in marshes and swamps or where algae is growing. Trying to find the cleanest water will make your life much easier. With the being said, there are times when you do not have any choice about the water that is available to you.

This is where it is best that you understand the potential contaminants in the water and the technology needed to remove them.

Water Pollutants

To make water completely safe to drink, five types of contaminants need to be eliminated:

  • Turbidity: visible dirt – sand, silt or mud
  • Chemical pollutants: from heavy metals to pesticides – often associated with mining, agriculture, and forestry
  • Viruses: a biological agent that reproduces in the cells that they infect
  • Bacteria: single-cell organisms found everywhere. Some of them cause infectious diseases. These include E. Coli, cholera, typhoid, etc.)
  • Parasites: waterborne parasites are single-cell organisms (such as protozoa, Cryptosporidium and Giardia) or multi-cell organisms (such as worms) that live in or on other living organisms.

How Do We Make Water Safe To Drink?

Depending on the level of contamination that you are dealing with, there are a variety of methods you can choose. Water purification technology has advanced quite a bit over the last few years and there are numerous methods for getting rid of the nastiness in contaminated water.

Unfortunately, getting clean, safe, good tasting drinking water requires more than one filtration medium. Below are different filtration methods and what they remove.

Boiling Water

Boiling water for at least one minute will kill or deactivate all viruses, pathogens, bacteria, and protozoa. This is an easy way to filter water with no special equipment and you can treat a lot of water at one time so it is good for large groups or families. Boiling does not remove chemical pollutants or clarify turbidity in the water. Boiling also requires a fuel source to burn which is sometimes difficult to come by.

Water Filtration

A water filter is generally a device that blocks impurities or particles from passing through it. This works through size exclusion where the holes in the filter are so small that the bacteria cannot fit. Most filtration of this kind is called Hollow Fiber.

Adsorption

Adsorption normally refers to a product like activated carbon. There are a few forms of activated carbon (granular, powder, and fiber). The small pores in the carbon increases the surface area of adsorption. Activated carbon is ideal for removing chemicals, metals, and turbidity of water.

It also improves the taste of your water and has faster flow rates. Activated Carbon Fiber is a fibrous adsorbent that has 10x higher adsorption than traditional activated carbon and gives you faster flow rates.

UV light purifiers

This method uses UV rays to blast microbes and organisms in the water. This neutralizes them and renders them harmless to humans. UV purifiers require a power source (generally batteries) and are potentially fragile, leaving you without filtration.

Water Filtration Products

LifeStraw

One of the most popular filtration straws on the market. Originally designed as an emergency water treatment method, straws are also well suited for time in the backcountry and are cheap to throw in an emergency pack.

The LifeStraw has a hollow fiber membrane filter that cleanses the water as you sip it straight from the source. LifeStraw does not remove viruses and it can only be used directly from the water source.

Hand Pumps

Hand pump filters are common for backpackers and have the ability to filter large amounts of water. Hand pumps are generally reliable and easy to use. Hand pumps have small filter pore sizes so they can remove more particulate, but this reduces the flow rate of water.

Most hand pumps are heavy and have multiple pieces that can get lost. Also, very few hand pumps can remove viruses. There are a few lately that have been released on the market that gives you complete viruses protection.

Gravity Filters

Gravity filters are a three-step process that are great for groups of people at a campsite or have time to set up a semi-permanent installation. Most gravity filters have a large water reservoir that is filled with dirty water.

It will have a tube that is connected to the filter medium and another tube attached to the clean water receptacle. Most gravity filters are made of hollow-fiber which allows for fast flow rates. Gravity filters are hassle-free, light-weight and can collapse down to save space.

These systems do not protect against viruses and you need quite a bit of water to make the system work.

In-Line Filters

Another very common filter is an in-line filter and most people are aware of the Sawyer Mini. It is one of the lightest filters on the market. It is economical to use and can be used with a water reservoir, a collapsible canteen, as a straw and can be threaded onto a water bottle.

This type of filter will filter up to 100,000 gallons if you continue to backflush it and take care of the filter. The filter is great for a single user, but not very good for larger groups. This type of filter also does not remove viruses and does nothing to remove chemicals and metals.

Chemical Treatment

Chemical water treatment methods, most commonly contain iodine or chlorine dioxide. This is a lightweight option, is good for treating large amounts of water and kills viruses found in the water. The downside is it takes a few hours to treat the water and leaves a negative taste in the water. This treatment does not remove the turbidity of water.

safe drinking water
This Photo was taken by M.D. Creekmore…

MUV Water Filter

A small company out of Utah recently released an adaptable water filter that they believe fixes many of the problems with single-use water filters. The MUV Adaptable Water Filter is a multi-stage water filter that can be modified and used based on the water contamination that you are dealing with.

Not only does it remove all of the water pollutants covered above, including viruses, but it is also versatile in the way it can be used. You can easily modify the filter to work in a water bottle, as an in-line filter, as a gravity system, as a straw, threaded onto a 28mm soda bottle, and as a pump.

With the different MUV filter modules, you are able to completely control how your water filter works and what it removes. Using the chart above you are able to determine which module is right for you given your current water situation. You can easily combine one or more of the modules to get superior filtration.

MUV can adapt to your lifestyle or your needs. With a few simple adapters, you can go from using MUV in a water bottle to a hydration system to a pump. No longer do you need to buy a variety of separate water filters that are incompatible with each other. Now you can easily buy one system that covers 99.9% of all your water filtration needs.

Check out the MUV Adaptable Water Filter and get in on one of the most innovative products to hit the water filter industry in years.

Filed Under: Bushcraft

  • « Go to Previous Page
  • Page 1
  • Page 2
  • Page 3
  • Page 4
  • Page 5
  • Go to Next Page »

Primary Sidebar

Subscribe to Blog via Email

Enter your email address to subscribe to this blog and receive notifications of new posts by email.

Join 7,197 other subscribers
  • Amazon
  • Facebook
  • Substack
  • Twitter
  • YouTube

“Do more with less.”

– Minimalist proverb

Recent Posts

  • Just so you know
  • Weather Update for My Corner of Appalachia
  • Why I’m Ordering Ivermectin + Mebendazole Every Year
  • The Website’s Shutting Down (But Here’s the Plan)
  • You Are Hated! Start Training Like It!

Footer

Recent Posts

  • Just so you know
  • Weather Update for My Corner of Appalachia
  • Why I’m Ordering Ivermectin + Mebendazole Every Year
  • The Website’s Shutting Down (But Here’s the Plan)
  • You Are Hated! Start Training Like It!

More about me

Books I’ve written

Books I’ve read

Follow Me on YouTube

Follow Me on Facebook

Gear I Use and Recommend

Newsletter

Search this site

Follow me elsewhere

  • Amazon
  • Facebook
  • Substack
  • Twitter
  • YouTube

© 2008–2025 M.D. Creekmore · As an Amazon Associate, I earn from qualifying purchases.