 by Repair Mama
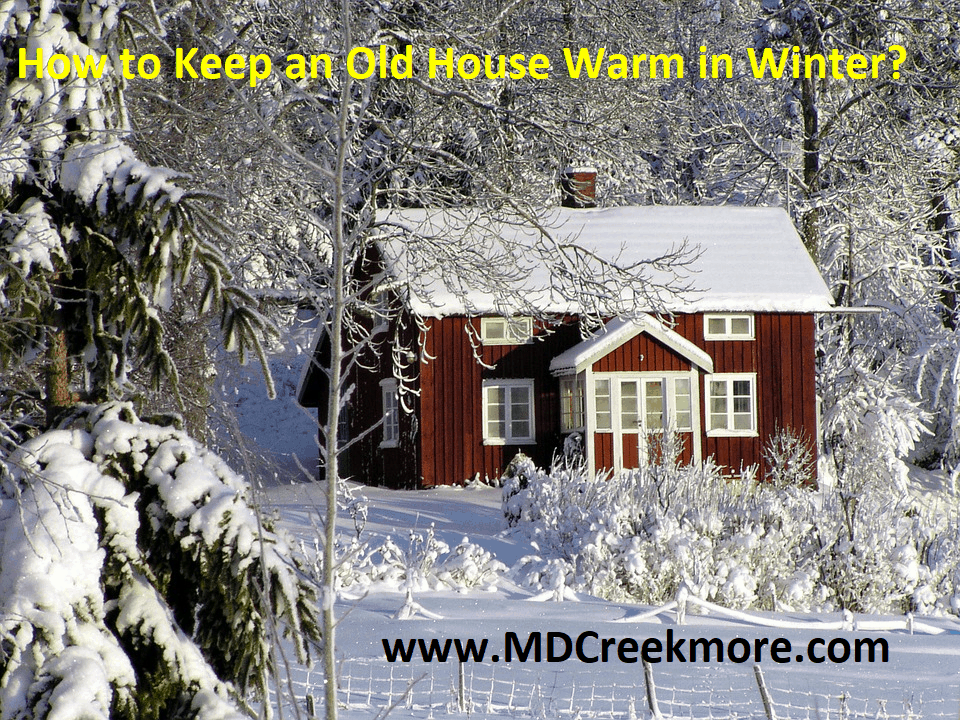
I just wanted to do a post on trying to save money by making your home cost you a little less. Why give your money to the utility when you can use it to prep. They get enough of our hard earned dollars as it is. I have used these methods for years, (my older home is a nightmare)
Doors and heat loss…
Your home has 2 ways to lose heat in the winter. Air infiltration, and heat loss. Doors and windows are usually the biggest loss factors in heat loss. Air can leak in causing cold spots and the heating system to run longer to make up for the cold coming into the home.
First, we will deal with the doors leading to the outside or unconditioned spaces of your home. Weather stripping is a must! To do a cheap test of the doors, use a lighter or if you smoke, a cigarette and place it close to the cracks where the door meets the door jam. If the flame flickers, or the smoke moves, you have air infiltration.
This is a place that needs weather stripping. The package of stripping purchased at the hardware store is not expensive (I have even used thin strips of cardboard or other materials staple-gunned into place when I could not afford the stripping). The package will have installation instructions so you can figure out how to use the product.
After you install the stripping, retest the door. Did you find a major leak at the bottom?
I do every year. This is usually the big problem spot. Even with a storm door, this area is a big problem. Here you can install a thing called a door skirt. It is a metal strip with a rubber strip at the bottom. You will have to measure the door and see what length of skirt you need.
Most commercially purchased exterior doors come in 32”, 34”, and 36” (wide). Cut the door skirt with a pair of metal snips, position the door skirt along the bottom of the door remembering to push down to make the rubber contact the door eliminating the air leak and screw that puppy into place.
You can seal the top of the door skirt to the door with silicone caulk but is not totally necessary. Now that should take care of the major leaks in the exterior doors.
Sometimes, I find it necessary to lay a large towel between the storm door and the exterior door to further cut down on air leaks, but this is annoying if done to a door that you frequently use. I do this on the doors that I don’t use much. (I have 3 doors leading to the outside, but we usually only use one of them).
Do you have an air leak at the door jam trim where it meets the wall? If the gaps at the trim are small, caulk is the answer here. They make a paintable latex caulk that comes in white that can be used here. I purchase mine at the Dollar General Store for about $2.00 per tube. The caulk will fill in the crack making it less likely to leak cold air.
If the cracks are large, you can fill them in with fiberglass insulation by pushing in small pieces with a butter knife and then filling with a spray foam product that will expand and dry, or caulk. Do you have a large window in this door? Is the glass single pane or multiple panes?
When you touch the glass, is it very cold? Can you feel cold radiating from the glass when you stand close to it? If so, the only thing I can suggest here is a very thick window covering or curtain. I have small windows on my doors and have them covered with quilted curtains. My little windows don’t radiate much cold, but I cover them anyway. The thick quilted curtain acts like a layer of insulation that holds the cold at bay just a little. Every little bit helps.
Now that the doors are airtight and the glass is taken care of, look at the storm door from the outside. Is there anything you see that can let air into the exterior door? Any air leakage stopped here will not make it to the main door or into your house especially on a windy day. Cracks can be caulked and stripping can be done to stop air leaks. Adjustments to the door latch can make the door close good and tight here is desirable.
If you have a screen door that is not metal and glass, the whole area of screen is like an open window. I have in the past covered the screen with thick clear plastic to stop the majority of air flow. It is not really attractive but will help with the cold blowing air.
Next, let’s look at the windows…
What kind do you have? Windows come in a variety of ways depending on the age of your home or if they were updated ever. My home used to have the wood frame, single pane windows that were very common in older homes. The panes of glass were placed in and “Glazed” or puttied into place. These are some of the most inefficient types of windows you may have next to say jalousie windows.
One pane of glass between you and the cold outside is a major source of heat loss in an older home. I hope that if you have this type of window that an external storm frame and window is in place on the outside of your home. They do help some.
Some of the storm windows had additional screens that could be put in to keep bugs and such out in the summer, and the glass pane that could be put in for winter or bad weather to keep air and heavy rain away from the outside of these wooden window frames. If this is the type you have, here is what we need to do.
Look at the individual panes of glass, are any broken or missing? If so, we need to replace the pane or at least tape over the cracks. Is the caulk, putty, or glazing missing where the glass meets the wood of the window frame? If so, re-caulk the cracks and make the seal airtight.
Keeping the air from coming into the house is what we need to do in this step. Is the storm window in place, or is the screen still there? If the screen is still there, place the glass pane to the bottom, or if the glass is missing, cover the screen with plastic to block the wind from blowing into the window.
Are there cracks or gaps around the outside frame of the storm window? If so, stuff the cracks with something, or caulk them into place. I use silicone caulk here, water doesn’t affect it much. Silicone cannot be painted but does come in clear or white. This will seal up another source of air leakage.
Can you open the wooden window? If so, you can place a small, thin piece of the same foam weather stripping that you bought for the doors along the bottom where the pane meets the window sill. Then close the window tightly down onto the stripping to seal up that air leak. Use the lighter or the cigarette and check the window and window trim for additional leaks. If air is leaking around the window trim, use the latex caulk and stop that air from coming in.
Now, let’s look at the blinds and curtains…
Winter is a good time to take down the light and airy ones that you may use in warmer weather. Vinyl backed drapes are good for the winter months, but you may want to go a step farther. Windows are not insulated like the walls of your home and are a large part of heating loss.
Think of the window as a thin place in the wall that the cold can come in. What do you have in the house or garage that can make the windowless cold. Insulation comes in many non-traditional forms.
You want to find material that does not conduct heat or cold well. Fiberglass insulation, Styrofoam panels or pieces, thick quilts, foam rubber like in couch cushions, or the like. These things can be measured or assembled to cover the entire inside of the window frame to keep the cold out. It will make for a darker house, but the savings on the heating bill might make it worth dealing with.
Here’s what I have done as an example…
I have used fiberglass insulation measured to fit the window and placed down inside of a large black contractor grade trash bag (to keep the fiberglass fibers from getting all over everything and making me itch) and place over the window. I fit it to the inside of the window trim so it does not stick out past the wall and use the spring-loaded café curtain rods to hold it into place. This cuts the air infiltration to almost nothing. The window does not exist.
This is also good for blackout situations. You can pull up a corner of the bag if you need to see out but will block out all light from being seen from the outside of the house. If the area is under a power outage, the people around you will not know that your lights are on. Cool HU?
Now you can top off with a layer of plastic to cover the entire window if you want to or just put the curtains back up. The room will be dark, but look normal. Normal is good.
This week I was dealing with my windows before the cold blast came in that was forecast for us. I did not have any fiberglass insulation handy, so I went to the garage to see what I had to use. I found Styrofoam panels stored there for just this type of thing. They were 15”x20” and my windows were larger than that. I laid the panels on the table in the kitchen and measured out what I needed to cover each window.
The panels were cut to fit, and taped together with clear packing tape. I looked around the house again for more materials to finish my project and found cases of disposable bed pads that were ordered for mother’s bed.
She is gone now, so I don’t need them for the purpose intended. I opened a pack of these (the backs are white) and placed them over the foam panels that I had made and stapled them into place onto the foam. Tape could also have been used, but I am deadly with a staple gun! Once the panels were completed, I placed them over the glass in my awful windows and pulled the mini blinds down over them to hold them into place.
White shows through the glass to the outside of the house like drapes, so it does not look strange and the rooms are warmer now. I finished off the inside of the window with heavy winter drapes, and that project is done except for the large window in the living room.
This window is too large for the amount of foam boards that I had left. So I went hunting and found some old ugly drapes sister in law gave me some years ago. I cut the pleated tops off and turned them over. I took down the drapes already over this window and matched the vinyl backs to touch each other and stitched them together along the top just below the pleated tops of the newer ones. If one set of drapes are good, 2 layers are better. They move together when opened and will hang on one rod with one set of hooks.
They look normal but are warmer. Under the drapes, I have another rod firmly mounted to the wall and have added a set of “S” hooks like you would find on the end of rubber bungee cords. I save the hooks after the bungee has broken. I have here a large, old bedspread that covers the entire window.
I make some holes in the bedspread and slipped the S hook through the holes to hand this under the drapes. Another layer of insulation to keep the cold out. Close the drapes and the living room looks normal from the inside and outside. Project complete!
I know there are many other things that will need to be addressed to keep from having to give the utility money, but this kinda takes care of windows and doors. I will follow with more posts to cover plumbing, water heater, attic, crawl spaces, and basements.
Insulation and air leaks are the majority of all of these posts. Every dime you spend on insulation will pay for itself over and over. Just remember it is all about comfort and saving money.
Plumbing and Pipes…
There is nothing worse than having the pipes freeze and bust in the extreme cold weather.
This could lead to a very expensive repair bill, or a wasted weekend having to re-plumb your home due to busted water lines.
There are many types of pipes that you may find in your home. Galvanized steel, copper, cpvc, pex, and such. I know more about the cpvc than the other types of pipes. Cpvc will freeze and bust at 19 degrees if not insulated and protected.
The first thing to address is pipe insulation. The most common type found here is a black foam style that comes in 6ft sections that are split down the middle lengthwise. Some types will have an adhesive along the split to stick it back together after it is placed on the pipe.
It comes in many different sizes line ½”, ¾”, and 1”. You will need to know what size your pipes are and purchase what sizes you need. You need to know about how many feet to purchase. You can return pieces that you don’t use if you purchase too much. The most common tools and materials that you will need for the insulation is a razor knife or carpet knife. A serrated butcher knife or scissors can also be used to cut the insulation pieces.
A cheap roll of black electrical tape, and tape measure. Most pipes in this area are in the crawl space, or in the basement. Look and find where the main water line comes into the house and start there. This is where the 200PSI black plastic pipe will come in from the meter in the yard. Find where the pipe enters the foundation.
Place the pipe into the slit and close the insulation around the pipe. Use the electrical tape around the insulation to hold it together. Wrap around 2-3 times and move on to the next piece. You do not have to tape up the entire piece of insulation.
Tape at ends and maybe in middle but that is all that is needed. If the pipe is shorter than the insulation and comes to a tee or elbow, cut the insulation in 45-degree elbow or whatever is needed to cover the fittings or terminations and seal up with the tape.
You will use quite a bit of tape, but it is cheap and goes a long way. Work your way and cover all of the pipes. Tape the insulation at the ends and around the fittings to keep the pipe from being exposed. This will protect you a little better from the pipes freezing and bursting due to the cold.
Another thing you can look into is a product called heat tape. Lowe’s or Home Depot will carry this product and can give you some instruction on how to install and use.
It will need electricity to work, so read the package to get an idea on how to install and the power requirements.
The insulation on the pipes will help protect from freezing, but another benefit of the insulation is not losing as much heat from the hot water line when you run the water to do dishes or take a shower. Any pipes ran in an unconditioned space is susceptible to heat loss. The cold pipe will take the heat from the water, causing you to use more on the hot water tap to get the desired temp at the faucet.
Insulation blankets for water heater tanks can be purchased at the hardware store. It is a fitted blanket to fit the outside of the water tank to keep the water from losing heat as fast. This will keep the elements from having to work as hard and keep the electric usage down a little bit more.
Another usage saving idea for the water heater is to adjust the tank temperature down a bit. I have had customers in the past that want to crank the temp up as high as it will go. Water heaters are now preset at 120 degrees to prevent scalds but can be adjusted up or down by the homeowner. The cooler the setting on the tank, the less fuel or power it will need to use to maintain the temperature. Thus saving money.
Water savings can be upgraded by using less water if you are on a meter and have to pay for what you use. Water saving aerators can be added to the bath and kitchen sinks to cut the gallon per minute rate back. Water saving shower heads can also be purchased inexpensively and installed as well.
As a water-saving measure in my home, I added a ½” ball valve to my shower arm before the shower head was put into place. This way, during a shower, I can leave the faucet settings where I like them and turn the flow of water down or off at the shower head when the water is not needed.
I don’t need the shower head running the water down the drain while I am shaving legs or shampooing my hair before rinsing. This cuts down the amount of wasted water and I still get clean.
A ½” brass ball valve costs around $5.00 and screws right onto the chrome shower arm with just a bit of Teflon tape. Use a short ½”xclose brass nipple on the other end and then reinstall the shower head with another bit of Teflon tape to prevent the thing from leaking. After your shower is over, just turn the water off at the faucet handles. This will keep the line to the shower head from being pressurized when not in use between showers.
Now, let’s look at the toilet. Is this toilet an older style with a large tank? Or a newer model? The newer models already have a smaller tank as a water saving feature. They will use less water per flush as compared to the older models. An older tank used more water per flush, so you can do 1 or 2 things here to make the toilet use less water per flush.
You can place a brick in the tank. The brick will take up some space where the water used to be and raise the level of water in the tank causing the fill valve to shut off sooner. Or you can adjust the fill valve to a lower position causing it to shut off the water flow at a lower tank level. This will make a little less water available to the toilet for flushing purposes.
Another thing to look for in a toilet is the flapper. This is the round rubber thing in the bottom of the toilet tank that raises up when you push the flush handle down. This device should have a good seal and not leak water into the bowl when the toilet is not flushing.
If the flapper is leaking water by when it should not, you need to replace it. They are usually less than $5.00 and will save you at least that much or more over the life of the item. They are easy to install and the instructions can be found on the back of the package or on a paper insert inside the package.
That takes care of the fixtures inside the house. I hope this did not bore the socks off of all of you. Home maintenance is something that has to be done all of the time and it will get away from you if you let just one little thing slip. Like not doing the dishes after every meal, the list of things that need to be done just pile up and get bigger the longer you wait, costing you money every second.
Heating and Air Maintenance…
Traditional home heating systems come in many different types and configurations.
Natural gas, propane gas, electric, and fuel oil. Some of these topics will work for all forced air systems and some for just gas and electric. We quit servicing fuel oil many years ago and my knowledge of them is extremely limited!
The first thing I will cover on a forced air heating system is the filter. Many types of filters are on the market for these systems and you will have to measure the return air grille to see what size of disposable filter to purchase. Types of disposable filters are the cheap economical fiber and cardboard ones are the ones I will tell you to purchase.
There is a reason for this that I will explain to you in a minute and then tell you why not to use them. The other types of disposable filters that you can find are the thicker materials that will be pleated and will be labeled as allergen type to catch smaller particles that are in the air like pet dander or pollen. Stay away from these!!!! They are system killers!
These types of filters restrict air flow into the heating system, reducing the air volume too much less than the forced air system is designed for. Unless the unit was installed by a licensed contractor and was specifically designed and installed to use these filters.
Restriction of airflow will cause several issues in a system in heating mode as well as issues in air conditioning mode. In heating mode of a natural gas or propane furnace or gaspak, these types of systems have a part inside called a “heat exchanger” These function much like a firebox to keep the flue gasses separate from the air you are heating and breathing.
Restriction of air flow will cause the heat exchanger to overheat because not enough air is passing through it to heat the home and will cause the heat exchanger to fail prematurely. Failure of the heat exchanger is a burn through, or crack causing the flue gasses to enter your home and your family will breathe these gasses.
Carbon monoxide poisoning and death will result from using a heating system with a cracked heat exchanger. If you have a heating system that uses combustion to make the heat, PLEASE purchased a carbon monoxide detector and install it in accordance with the instructions found with it. It could save your live and the lives of the family that you love!
Air restriction in air conditioning mode will cause the evaporator coil to freeze up, causing a reduction in cooling and makes the compressor work harder. The compressor can fail prematurely and cost you a bunch of money to have replaced. Even a dirty air filter will cause these things to happen, so be sure to check it often and vacuum off the filter or change it regularly.
Another thing that can be done to cause air restriction in a system is covering up or closing off vents. Even keep doors closed to bedrooms can starve the system for air. This can make all the things that I described above happen as well. Your system can not pull air in if it can’t push the air out.
Each system is designed to move a certain amount of air called CFM or cubic feet per minute. Mess with this and lots of things can happen from the unit costing you more to operate to failure of the system. Airflow is the biggest thing that you can control to protect yourself. Have the system serviced by a licensed technician with a good reputation once a year. Have the airflow checked, gas pressure measured, air temps done at each floor register, and have the furnace cleaned and serviced.
Also, have them do readings with a carbon monoxide meter. Purchase a carbon monoxide detector if you don’t have one. Have someone like yourself or the technician check to see if the ductwork is insulated. If it is not, you can be losing heating BTU’s (British Thermal Units) just by your hot air being transported through cold metal also costing you money and comfort.
If you live in a climate that is humid, the uninsulated ductwork will sweat in the summer time setting you up for wet ceilings if ductwork is in the attic or growing mold where there is an increase of moisture for it to thrive in. It will cost to insulate the ducts, but well worth taking care of.
Another thing that you can do to save a little bit is by installing a programmable thermostat on the wall. When purchasing this thermostat, you will need to know the type of system to purchase for. If you have a heat pump, you will need to purchase one that is for a heat pump. 2 stage heating and 1 stage cooling unless you have a high dollar system that calls for 3 stage heating and 2 stage cooling. If you have a gas furnace and air conditioner, you will need a 1 stage heating and 1 stage cooling.
These are usually a little cheaper than the thermostats for heat pumps. If you have an electric furnace and air conditioner (not a heat pump) you will also need 1 stage heating and 1 stage cooling. If you have heat only, you can use the same thermostat as a gas or electric furnace, but you will not have wires to hook up for the cooling stage and that is no big deal.
Now that you have the thermostat, you will need to read the instructions and make sure that you can install the thermostat. If you think this is a bit much, call the HVAC tech and they will install it for you, but I have no idea what they will charge you.
If you want to tackle this yourself, be sure to TURN OFF THE ENTIRE SYSTEM! Turn off the breakers that power the system. If you don’t and you touch some of the wires together with the power on, it will give a small spark and you will burn out either the transformer in the unit or the electronic control board. This could be a bit costly to have repaired.
Once the thermostat is installed and set up according to the instructions included with the thermostat, it is time to program it. You will be able to set it to operate at a colder temp when you are not home and raise the temp to warmer just before you arrive home.
This is accomplished nicely if you have the same schedule every day. Some thermostats will allow for different settings on the weekend and on the weekdays. Some others will allow you to program a separate time schedule for each day of the week.
Next thing I will tell you if you have gas heat. Natural gas does contain a bit of moisture in it, and if you are on a natural gas well, the moisture content is even more. This moisture will freeze small pieces of ice and restrict the flow of gas through either the meter or the gas pressure regulator.
It is a good idea to insulate the regulator or the meter to prevent a loss of gas pressure that may cause you to lose heat when it is bitter cold outside.
I have seen it cold enough here to cause the gas meter and regulator that sets outside to freeze enough to cut the heat off. I went out and wrapped insulation around the entire meter and covered it with a trash bag. After a little bit, the meter thawed out and I was able to turn the heat back on.
I hope this article will help some of you look over the system and maybe help save some money. Extending the life of the unit will save the money of untimely replacement as well as a lower operating cost. I am available to answer any questions that I can to help with the HVAC things you need.
I hate spending money that I don’t have to and hate to see other contractors rip people off just to make a buck. These type of people just give all contractors a bad name!

 Rabbits have been a Godsend to me. I am allergic to chicken but with rabbit and rabbit broth I can still have a lot of Chicken type dishes. Rabbit can even masquerade as burger and sausage. Hoppy Joes anyone? The DH makes a great Hoppy Joe. A little Worcestershire sauce and beef bouillon cubes mixed with browned ground rabbit in the basic tomato paste sauce with some spices and there you go!