• Skip to main content
  • Skip to secondary navigation
  • Skip to primary sidebar
  • Skip to footer

M.D. CREEKMORE

  • Blog
  • Books
  • Newsletter
  • Gear I Use
  • About
  • Contact
  • Facebook
  • YouTube
  • Blog
  • Books
  • Newsletter
  • Gear I Use
  • About
  • Contact
  • Privacy Policy
You are here: Home / 2018 / Archives for October 2018

Archives for October 2018

Inexpensive Bows for Hunting, Bushcraft, and Survival

October 10, 2018 Jesse Mathewson

Recurve BOW for hunting“Immerse yourself in the outdoor experience. It will cleanse your soul and make you a better person.” Fred Bear

“Nothing clears a troubled mind better than shooting a bow.” Fred Bear

For thousands of years, archery has been utilized as a tool for hunting, defense and waging war. It is the one tool that has seen the littlest real advancements and yet remains solidly on the forefront for sports-related sales and use around the world.

Sure, we now have mechanically driven bows, special wheels and different styles of shooting, however, the basics remain the same. A “stick” a “string” and another “stick” combined to create one of the most historically terrifying and relevant tools of all time.

Obviously, I am simplifying things to say the above, however, using pure reasoning, one can see this being a true statement in a general way.

I grew up shooting rifles, handguns, using knives and bows and arrows. It was part of the tradition of the rural American to have this knowledge when I was a child, these days people will call you negligent to teach your children these arts…and yet, I firmly believe the opposite is true.

For safeties sake alone, knowledge of these tools is essential. So let’s get on with the review of the Sammick Sage takedown bow as well as the Sososhoot Buffalo style horsebow.

Takedown bows are superbly beneficial for individuals with space restricted, my Sammick Sage bow in its taken down configuration with two dozen arrows can fit inside of a 30” by 18” package and is less than “4 inches thick. I can easily fit string wax, spare strings, spare fletches and materials for building or repairing arrows and bow as well inside this package and it will be under 10 lbs.

shooting a recurve bow more accurately

While I do not use a bow stringer, some recommend this and it is beneficial for most. In fact, I should get one, if simply to extend the life of my bows. The horsebows are under 48” unstrung and strung and are about 2lbs lighter than the Sammick Sage package, with other measurements remaining the same.

The horsebows cost between $120 and $165 dollars depending on draw weight, on Amazon, this is something you should make sure you get correct. (Buffalo Hunting Bow and Arrow Handmade Recurve Horsebow Longbow for Adults By Sososhoot) A bow with 30-65lb draw weight will work to take medium game (deer etc.,) 40-120lbs will easily take much larger game.

I have read stories of people with 45lb draw weights taking elephants so, don’t feel the need to be overly manly when choosing the bow you will use. You should be able to shoot 4-8 flights of arrows and not be sore afterward. These bows are shipped from China, I own two currently and have purchased several as gifts, the shipping time is within 2 weeks generally.

The Sammick Sage recurve take down bow runs between $126 and $200 on Amazon, these you can get within two days if you have Amazon Prime or a week without. They are absolutely worth every single penny and I have yet to have one fail or be a problem. Both companies are quite good about communicating and will work with you, yes, even and especially the Chinese company, Sososhoot.

The arrows I use range from Easton Aluminum through my cedar shafted wooden, turkey fletched favorites. (Huntingdoor Black Feather wooden arrows 30” length, tri tip bodkin style iron tip) Again, I have found the best pricing to be on Amazon and shipped from China by the same manufacturer. I use the 3 sided 150-grain bodkin style tips and truly love them, they puncture well, cause rapid exsanguination, (internal bleeding leading to death) and are reusable.

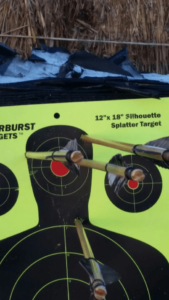
For practice, I use the 150-grain field points or have made my own stumping arrows, “stumping is shooting small grass clumps/ wood stumps with flat tipped, or cloth wrapped arrows for practice as you are walking about the woods.” I have had two pass through shots at 35 feet and one at approximately 70 feet on Javelina. Upon inspection after death, one of the arrows had pierced a shoulder bone and gone through it.

Understand that unless you have a serious set up with a dozen straw bales and styrofoam backstops, you will lose arrows during practice. Its the cost of archery, arrows are not cheap, HOWEVER, they are reusable and for myself at least I find that having 4 – 6 flights per bow is satisfactory and keeps the package weight under what I can carry with physical problems.

This being said, as the old saying goes, one can NEVER have too much ammunition…so remember that. Unlike firearms, high capacity magazines and the like archery should be available and or can be made from materials close at hand.

Now for the meat and potatoes of the review of these bows. It is essential to understand these are low cost, but NOT low-quality bows and arrows. They are worth every penny and then some. I have owned PSE bows, Bear bows and collectibles from several renowned boyers.

I prefer these bows simply because I am not afraid to bang them about a bit as they didn’t cost me $500+ as almost every major manufactures bow for adults will end up costing.

The pros of these bows.

Cost, they are quite simply the most cost-effective approach outside of making your own, which is a skill you would be better for learning.

Longevity, I have been using one of the horsebows and a Sammick Sage takedown for over three years and shoot 3-4 times a week in my backyard, 4 straw bales, a sheet of half inch plywood and a $60 Field Logic Classic Block black and white target has worked well for 4 years now, and this is in Arizona sun, rain and more.

You can easily purchase an inexpensive $15 or $20 foam and plastic block target from Walmart as well. Or, stuff a medium size box (24” by 24” cubed at a minimum) with crumpled up newspaper and this will also work.

Quality, again, after owning many different bows, I have not realized any real major loss in quality purchasing and using these versus the name brand ones that cost two or three times as much on average.

They work, are easy to take down and or are extremely lightweight, being made of wood laminated with fiberglass for the horsebows and coated with faux snakeskin for a fun look!
The cons, very few but there are cons!

They are inexpensive bows, you may have one that misses quality controls and need to return/ both companies allow for this and have solid customer service via email.
You will want to purchase spare strings, the strings that come with the bows are not the best.

girl-with-bow

They work fine for quite a while, but they are definitely a lower quality, thankfully you can purchase strings from Trad Gear on Amazon, B-50 Dacron 16 strand strings run around $7 apiece. Wait till you get the horsebows before purchasing new strings, this way you can measure the string that comes with it. These bows sometimes vary as much as an inch either way as they are handmade.

The Sammick Sage has proper measurements available when you purchase them.

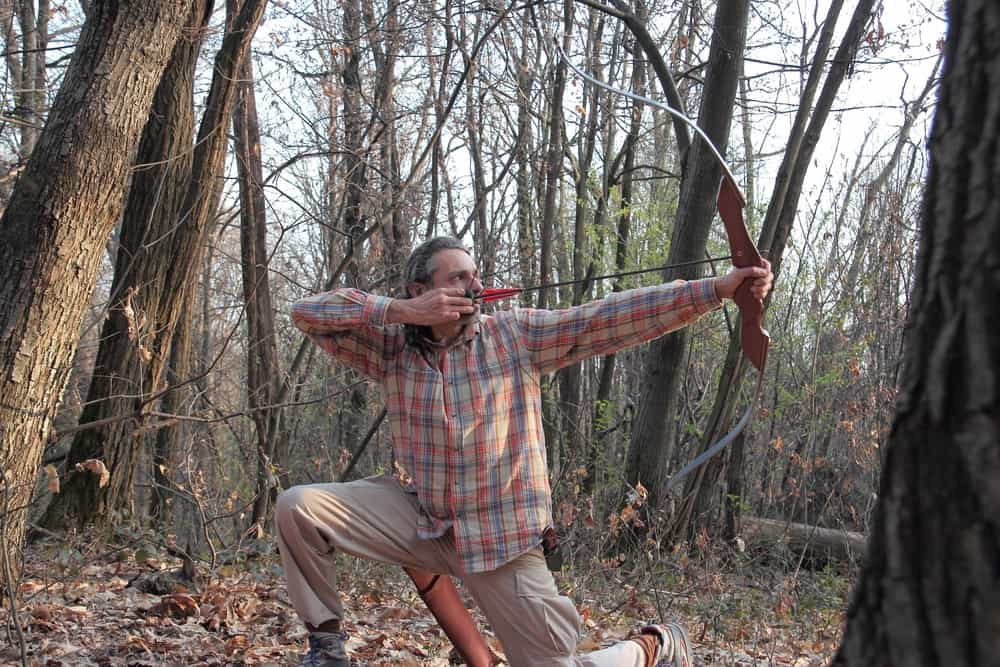
The horsebows do NOT have arrow rests on the bow or a place for one, the entire purpose of these bows is to shoot them from all angles, different sides and positions, literally shooting a horsebow is VERY different than shooting a standard recurve or longbow.

But, they are designed for strength and the ability to be shot from horseback without getting in the way of riding the horse, the Mongols, plains Indians and more used similar bows and did so with great, deadly efficiency.

That’s it, all I can say is, practice daily, it really is a great workout and has helped me strengthen my core which is essential with a bad back. Besides, it is also quiet, deadly and something discounted by governments around the world as a threat.

Understanding this places you ahead of them in the eternal battle for our individual freedom. While they may kick your doors in for your guns…they won’t look twice at the bows.

Comment, ask questions and please add knowledge. It is essential to our growth as a pack. Free the mind and the body will follow.

Filed Under: Archery

Why Are Compound Bows Better Than Traditional Bows?

October 10, 2018 M.D. Creekmore

Compound Bow vs Recurve Bow for Beginnersby Brandon Cox

If you’re in a survival situation or planning to live off the grid, you are probably interested in weapons. Specifically, what weapon should you take with you. Guns are a logical choice, but they’re hard to maintain over long periods of time because they require ammunition.

Once you run out of ammo, the gun will be useless. A better choice for survivalists is a bow. But, there are choices there as well. Here, we will compare a compound vs. recurve bow, which one is best for survival?

What’s the Difference between a Compound or Recurve Bow?

Many people have an opinion about which is better but don’t have any evidence to back it up. To help you make the best choice for you, we’ll go over the differences between a compound bow and recurve bow. Bows have some similarities. Both a recurve and a compound bow use leverage as a mechanical advantage.

Also, these weapons depend on stored energy to cast an arrow fast and far. In both situations, the arrow will travel much further than a person could throw it.

Recurve bows store energy as it is drawn. As more energy stores, it gets harder to pull the string. Compound bows are different because they use their mechanical advantage through cables and cams. Cables and cams let off some of the weight used to draw the string back.

A compound bow will through an arrow farther than a traditional bow. The differences between compound bows and traditional models like a recurve have several other differences including price, accuracy, weight, power, and speed.

Price Differences Between Recurve and Compound Bows

Just looking at a recurve and compound bow, you can tell there is a price difference. A top of the line recurve bow can cost as much as $1500. However, most traditional archers can get a great model for around $200. Any archer interested in a compound bow should expect to pay around $250 for an entry-level model.

But, most compound bows fall in the $500 to $600 range after they are all set-up. If you are trying to decide what type of bow would be ideal for a survival situation, the prices for each model are similar.

Which is more Accurate Compound or Recurve?

When set up right a compound bow is extremely accurate. A peep, release, and other shooting accessories help make an average archer a great shooter. With the help of cams and other mechanisms, a recurve bow is harder to draw and increases the possibility of the shooter shaking or quivering.

The movements can make shooting less accurate because of poor alignment. If you take an average shooter and give them both choices, they will likely be much more accurate with a compound bow. Since accuracy can be the difference between eating or starving in a survival situation, a compound bow makes a better choice.

Recurve Bows are Much Lighter than Compound Models

Another consideration to make for a survivalist is whether weight makes a difference. If you are going to carry your bow with you always, it might. A compound bow can be heavy. In comparison, a recurve bow is extremely light.

In fact, a recurve bow could weigh just a fraction of a compound bow. Even compound bows made of super light material weigh more than a rifle, which still makes it pretty heavy. If you have a ton of ground to cover, will be climbing, or running, a recurve bow is a better choice because it won’t slow you down.

Not convinced? Think about this as well. A bow isn’t the only thing you’ll be hauling on a daily or regular basis. Likely, you’ll also have a canteen, hunting light, knives, and much more. With so much to carry, it doesn’t make sense to weigh yourself down with a heavy weapon too.

Compound Bow vs Recurve Bow for Beginners
Ready for the hunt…

A Compound Bow has More Speed and Power than a Recurve Bow

We talked about it earlier, but it’s worth going over again. Not only is a compound bow more accurate than a recurve, but it also tosses arrows faster and further. Compound bows can do this because of their mechanical advantage. For even better results, archers can use a heavy arrow, which will go far fast and penetrate deep.

Does Shoot Ability Matter?

Now, it’s time to talk about shoot ability. It’s a controversial topic and those that favor either the traditional or compound bow may never agree completely. However, there are still a few topics to highlight for consideration.

When shooters aim and fire a recurve bow there it’s silky smooth. There’s no jerks or unexpected hand movements. For this reason, recurves are often considered more shooter friendly. But, it’s important to consider whether losing some accuracy is better than a smooth shot. Other factors to consider include noise.

Compound bows are noisier than a traditional bow. Some older bow models make sounds like rifles being shot when the string is released. There’s also a ton more hand vibrations when shooting, which makes it difficult to repeat repeatedly.

The Perfect Bow for Bushcraft and Survival

When it comes to survival situations, the best bow choice may be one that is made of raw materials. Arrows and fletchings can be made with natural materials. Broadheads can also be made or be made of stone. If you have a traditional compound bow and run out of arrows, it’s not easy to make arrows for this type of bow.

A wooden arrow in a compound bow could cause the arrow to explode and become dangerous. With all things considered, a traditional bow is a better choice for survival situations because the resources used to create are readily available in nature.

In conclusion, the best choice for survival situations are whatever you feel most comfortable using. If you are comfortable shooting a compound bow before you found yourself in a survival situation, you’ll still be most comfortable with that choice afterward. The same goes for a traditional recurve bow.

Both weapons have relatively the same costs associated with them. As far as accuracy goes, the best compound bow has some advantages. But, in terms of weight and the ability to move while carrying the weapon, a traditional bow has the compound bow beat.

What this means is that it’s really a personal choice as to what type of weapon you want to use in a survival situation. But, because of sustainability and the ability to reproduce arrows and even the entire bow if possible, we recommend relying on a recurve bow first with compound bows as a close second.

Filed Under: Archery

How to Make Your Rural Home Safe From Intruders

October 9, 2018 M.D. Creekmore

by Patrick F

Alarms are usually one of two types, audio, or visual, although some can be a combination of the two. Alarms are also a great resource if used effectively and acted upon when triggered. They allow an extra layer of protection/defense especially if one is short of personnel. Placed effectively alarms can enable a single person to monitor a much larger area than would normally be possible.

While there are many types of alarms and alarm systems available, many are expensive and often require a power source to run and operate. Some systems can even be custom designed and built for an individual’s specific situation and needs.

If you have the resources to obtain one of these systems that’s great. I, however, do not. So I have found and/or made other less expensive, yet still reliable setups. Now please don’t assume these less expensive or homemade setups are useless.

I have personally used these on my own property as well as using them in paintball and other more specific simulations, and I assure you they are reliable and effective.

So with that in mind let’s start off with some inexpensive alarms that can be easily purchased and then I will detail some homemade alarm systems. With both, I will begin with systems that can be used at a distance and then we can move to a shorter range setup. Also, I am going to make the assumption that you will be in a position to observe or hear the alarms when they are tripped.

One unit I particularly like is the wireless driveway alarm manufactured by Bunker Hill as well as others. These units run on batteries and usually cost around twenty dollars or less. The sensor unit takes a nine volt while the receiver unit takes three C Batteries.

The range for this unit is listed at 400 ft. with both of the units being weatherproof. The range is variable depending upon terrain although I have used these units at several hundred feet both insight and out of the line of sight.

Besides the advantages of the unit being wireless and weatherproof, they also work well at night and during the day. Also since the sensor and receiver are two separate units, anyone tripping or activating the sensor does not know that they have d0one so as the signal is sent to the receiver.

Although the sensor unit usually comes in white it can easily be spray painted to allow for better concealment. Although this next piece of advice is most likely unnecessary I add it just in case. When painting be sure to tape over the motion sensor before painting so that you don’t block the functionality of the sensor, and of course also remember to remove the tape afterward to let the unit function properly.

Additionally the box set, of one sensor unit and one receiver, function together on one channel which is often listed on the box and/or the units themselves. The advantage of this is that one is able to buy a different unit with different channels for use in covering separate approach routes.

For example, one unit (on channel 9) could be located on the driveway while another unit on another channel (on channel 17) could be placed on a walkway or trail. Depending on which alarm sounds, you would know which approach route the intruder was taking.

Another advantage I have often found useful is that the sensor unit is set off every time someone passes it. This allows anyone with the receiver unit to count how many intruders are approaching by that route.

I have only two drawbacks that I have experienced with these units. The first is when the receiver is first turned on it beeps to inform you that is on and active. This is normal and only happens when the unit is first turned on. So be sure to set up these units and have them on in advance of any needed situation.

The second is that one needs to understand that the sensor will pick up anything that passes within its range. This can be animals as well as humans depending on sensor placement.
On the positive side, these units are compact and can easily be deployed quickly as needed in almost any location or situation.

I have often used them when camping for a reliable early warning system. Also, I have had the units at my home run continually for a minimum of six months straight before a battery change was needed.

Another type of alarm that I have purchased and use regularly is the battery operated outdoor wireless motion sensor light. There are several companies that manufacture these although I have only used Mr. Beams brand. These units are almost all strictly visual alarms in which the light comes on when anything gets within range and triggers the motion sensor.

By being battery operated (usually three C Batteries) they can be placed anywhere, and the light they put out can be seen from a good distance away. Most also have a time setting for how long the light remains on usually as short as 30 seconds up to 10 minutes.

Some of the disadvantages of these units will be obvious. Such as requiring batteries, although how often they need replacing is dependent on often they are tripped and how long the light stays on. Another is although they light up once tripped allowing you to be alerted and possibly to also see the intruder, anyone who activated it will also know.

Finally, since it is a light that activates, the unit’s effectiveness is seriously reduced during daylight hours. Along with that is the fact that most of these units have a sensor that keeps them from operating during the day when the sun is out. Yet even with these disadvantages, I have found these units to be effective if properly placed.

Another type of alarm that I have purchased involves some type of motion sensor located in garden statuary. These could be visual in that they light up or audible in that they make various noises. They come in various styles and types; from flowers to animals. I have even seen some that were made to look like fake rocks. One of my favorites was a frog that croaked when someone passed within sensor range. Some, like said, were made to function during the day or at night, so if you’re considering purchasing one of these try to get one that will work during the day as well as at night.

Some advantages to these are that some are solar powered, so they need little maintenance and are almost always ready. Another is that they can be placed in more open locations, even inside homes, requiring little concealment. This is advantageous in the event that an intruder activates the unit it doesn’t necessarily mean that they are aware of its significance as an alarm.

The major disadvantage is that they need to be placed somewhat close for an observer to see or hear them clearly. Although some, like my frog croak, can be heard at a distance it is still closer than one would like, especially if one is hoping to be alerted in advance.

Wireless widow alarms are yet another inexpensive system available for purchase at most hardware or retail stores. While specifically designed for use on windows, with a little imagination they can be adapted for other locations. Constructed of two pieces, they are designed to alarm when the pieces are separated, like when a window is opened. Knowing this, with a little imagination, you can easily adapt the unit for use in other locations. Although small they do emit a loud alarm.

The major disadvantage of these small units is that once activated, or separated, the unit will continue to sound until manually turned off or the pieces placed together again. This, of course, requires that someone to physically do this task. Not the ideal situation if you are still dealing with intruders.

The other type of widow alarm operates by “hearing” glass break and emitting an alarm. I feel that this is a major drawback for two reasons: one most people would hear any glass breaking and two if an intruder is breaking the glass they are already breaking in. These are the major manufactured units that I have purchased and used effectively as early warning and alarm systems.

Now let me talk about some effective and often inexpensive homemade systems, again first discussing alarms that will work or be heard/seen at a distance and then moving closer. Once again I am going to make the assumption that you will be in a position to observe or hear the alarms when they are tripped.

Please note that the following alarms I will describe to you are single-use systems unlike most of the purchased alarms discussed above. This means that they will alarm once and then they need to be reset manually to be used again. Although this may seem a drawback at first, if they successfully alert you in advance of danger or intruders then they have fulfilled their purpose.

Also, most of these systems, when set off, will alert the intruder to the fact that they have set off some type of alarm or early warning system.

Let’s start with Rat Traps. Yes, you read that right Rat Traps.

With a little modification rat traps can be effectively used as an alarm system in a variety of ways. I must warn you though when using rat traps they are very sensitive as well as somewhat dangerous as they have the strength to easily break a finger or two. So use extra caution when setting. As a safety suggestion, attach the trip line to the trap trigger prior to arming the trap.

When using and setting rat traps I prefer to use thread as the trip or trigger line, rather than wire or fish line. Wire I find is too stiff, while fishing line is often hard to work with, especially when tying knots.

Thread is easy to use and easily strong enough to act as the trip line. If you feel you need to use something stronger you can also use upholstery thread. The thread has the advantage of being hard to see, or find before and after the trap has tripped, especially at night.

If you don’t believe that thread is strong enough to act as a trip line to trigger a Rat Trap, try it for yourself. I assure you that it doesn’t take much to trigger a Rat Trap. Also while you’re at it, set one and then trip it with a stick or something similar. You will see (hear) that when the trap goes off it is sufficiently loud enough to hear and distinctive, even at some distance, and especially on a quiet night.

There are many ways to set/secure the rat trap, limited only by your imagination. One of the best I have found is to attach the rat trap to a stick, or tent stake. Then you can stick the trap in the ground, which helps keep it secure while you run the trip/trigger line across the designated trail/path.

For use as a visual alarm, try attaching a light stick better known as a glow stick, to the trap. When triggered the rat trap is strong enough to break the internal capsule and activate the light stick. As an added benefit there are many types of light sticks in many different colors and sizes. Separate colors can be used to mark distances from the triggered traps to one’s position.

Also available are Infrared glow sticks, which cannot be seen by the naked eye but can be seen with Infrared or Night Vision devices. My personal favorite is the Ultra High Intensity orange five-minute glow stick. These are visible at a good distance and effectively light up a good area around the trap revealing any intruders.

Another easy to use alarm system makes use of pull string fireworks or pull string poppers. These are also sold under the name pull string perimeter alarms. They are relatively cheap and come twelve poppers to a box. Basically, these are small firecrackers but are not under restricted shipping, so they can be purchased and shipped by mail.

How these poppers work is when the string, which comes out of both ends, is pulled it creates friction inside the popper which sets off the small amount of gunpowder inside the popper itself. To use these effectively one will need to attach a longer string or better yet thread to the popper as the original strings are too short for most uses.

The best way to use these is to attach the thread to the string on one end and anchor this end to a secure location.

Then with thread attached to the other end string, run this as a trip line across the trail and secure it to an anchor. When setting these, the tighter or tenser the trip line/string is the better, although they will still work if somewhat slack, just not as well. They are set off when an intruder walks through the trip line pulling on the popper’s string and setting it off.

For added security, I would often place two or more of these popper alarms close to one another on the same trail. This is because due to the uncontrolled manufacture of the poppers they sometimes fail to go off or pop. By placing several on the same trail one increases the odds of the poppers working as designed.

Another nice place to locate these popper alarms is on a door. Simply attach one end of the popper to the doorknob and the other end to the doorframe. When someone opens the door the popper will go off alerting you.

The major drawback of these string poppers is that they are only made from cardboard and paper and so are easily affected by the weather. Wrapping the popper with a small amount of dark duct tape helps keep them somewhat dry. However be careful not to accidentally duct tape the strings, as this will render the popper useless. Also, the original strings that are attached to the poppers are white and will need a little camouflage help.

Now let’s discuss using trash as an alarm system. Yep, that’s right trash or more specifically empty soda, beer and/ or other aluminum cans. Don’t discount this system because of its simplicity. Empty cans, filled with small rocks or pebbles were often used and are sometimes still used in combat situations attached to concertina wire in defense situations. Enemy personnel would often end up rattling the cans as they tried to get through the wire, thereby alerting the defenders.

So the simplest system is placing some small rocks or pebbles inside the empty can, attaching thread to the pull tab. Secure the end of the trip line thread and then place the can on the other side of the trail. Preferably on something raised up, so that when the intruder hits the line the can will fall and rattle.

The can will still rattle if on the ground, but I find it better if on some type of raised surface. Placing the can in a small tree or bush with the line running down diagonally across the rail also works.

A great advantage to this “can” alarm system is that the intruder may assume they have accidentally kicked a can rather than tripping some type of alarm. Experiment in advance and see what works best for your specific application and terrain.

A nice one that I learned from some good friends is to connect two cans with thread and then hang them from tree branches. One can on one side of the trail and the other on the opposite side of the trail. This can be placed at any height with the trip line across the trail. When an intruder walks into the line the cans will rattle.

Read this article for details on how to set a tin can trail alarm…

Finally, one of my favorites which may seem silly but it has always worked for me when placed properly is the use of a whoopee cushion as an alarm. A dark-colored whoopee cushion works best, but the lighter colored ones can easily be spray painted.

Placement is the most important part of this alarm because in order to operate effectively the whoopee cushion needs to be on a hard surface or hard ground. Also, you need to study the area and determine approximately where someone walking along would put their foot.

If you’re inventive you can alter the terrain in a way to make someone place their foot where you want them to. This is where you would place the whoopee cushion and cover it with some debris. Then when stepped on the cushion will expel its contained air and alarm you to someone coming. I can assure you that the sound from this alarm is sufficiently loud as well as being distinctive.

Well, that’s it for now; there are some easily affordable alarm/early warning systems for you to experiment with if interested. If you can afford and maintain better systems please feel free to do so. I just wanted to offer everyone some alternative systems.

As with any alarm system redundancy often adds an extra layer of protection. I would recommend using several different types of alarms with backups to be sure that you have enough warning in advance, in the event one system fails.

Also, understand that if an intruder manages to detect or trip one alarm then they will be wary of the possibility of others in the area. This could be either good or bad depending on your intent.

Experiment and play with these alarms now while you have the time before they are needed. If you come up with more ideas on some inexpensive and easy alarms or early warning devices please write them up and send them in for all of us to try and have in our toolbox.

Filed Under: Security

What’s The Best Multi-Tool to Buy For EDC

October 9, 2018 Jesse Mathewson


When it comes to multi-tools there are dozens, hundreds of available choices. The best part is, they can all be very useful for a variety of reasons and in a variety of situations. However, for survival, prepping and or simply having, is there one that can work as the go-to, all-around best approach?

Rome had pocket multi-tools, however, modern times the trend really started with the Victorinox and Wenger tools as far back as 1884 and 1893. However the folding pliers included version was introduced by Tim Leatherman in 1983, the Leatherman Company called it a PST, Pocket Survival Tool.

Since this time, they have come up with dozens of iterations, amazing tools all of them. However, they are not generally inexpensive. In fact, most of the better Leatherman’s run $70 plus dollars, at least for the good ones.

The Leatherman Wingman is an amazing tool, small enough and light enough to keep in a go-bag without being too much. After all, ounces are lbs. An alternative to the Wingman is the Gerber Suspension. Head to head there is not much difference. Here are the specifics.

Leatherman Wingman – Handle: stainless steel

Blade: 420 stainless steel
Blade Edge
Blade Finish
Blade Length: 2.6-inch
Open Length:
Closed Length 3.8-inch
Screwdrivers: small screwdriver, medium screwdriver, Philips screwdriver
Pliers: yes, needle nose
File: yes
Scissors: no
Wire Cutter: yes
Wood Saw
Bottle Opener: yes
Can Opener: yes
Other Tools: wire stripper, ruler
Weight: 7 oz
Recommended Use: being prepared for anything
[Click here to check current price and availability at Amazon.com]

Gerber Suspension – Handle and tools are stainless steel

Bottle opener
Can opener
Scissors
Small flathead screwdriver
Large flathead screwdriver
Phillips screwdriver
Serrated knife blade
Fine edge knife blade
Saw blade
Wire cutter
Needle nose and standard pliers
Closed length 4 inches
Weight: 9 oz
[Click here to check availability and current price at Amazon.com]

Recommended use, preparedness

The Leatherman version is $40 and worth every penny, the Gerber version is $27 and also worth every penny. Dollar for dollar, I have and will continue to put the Suspension to the test and come out even or ahead. The grind that the screwdrivers have allows for easier work on firearms and larger items as well. Both are amazing tools, however, which one do you prefer?

In all fairness I have bags that have the Leatherman and bags with the Gerber version, this being said, I am really not a friend of Gerber, after all, most of their knives are made out of country these days. However, here is the thing, recent years have shown that China has learned that by outproducing us with QUALITY and quantity they can, in fact, bankrupt us as a nation.

So they do, if I was a fan of our government (which I am not) I may be apart of the crowd that refuses to buy anything not made in the United States, however, since I want the best equipment I can get for the least expense (I am not rich, taxed to death by the very government so many still support), I buy Chinese at times.

I love my country, I love the land I live on, but let’s face it, folks, our government, is way, way out of control. Anyhow, so what’s the best one?

I will leave that up too you, I have tested and used both and love them both. They work well when needed and I have never once regretted purchasing either. Here is my recommendation for the fiscally strapped as I am. Haunt your local pawn shops, you will find them, Leatherman / Gerber multitools, and Victorinox folders as well, and you can talk them down to a much less expensive approach.

I go in with $100 bucks and will line up a selection I know is worth more, but will lay that $100 bill on the counter or five $20 bills, this is more effective…and than start dealing. KNOW what you are going after, and what the prices generally are.

Then remember they offer less than a quarter of what these tools are worth, almost always they are well used, handle them, make sure they function, dirty is fine, after all, you can clean them up. I almost always walk out with around $300 retail for $100 cash. It’s called horse-trading and it works!

Free the mind and the body will follow…

Filed Under: Knives and Blades

Holosun Optic Sight [An Honest Review]

October 9, 2018 Jesse Mathewson

holosun-red-dot-site“If you know the enemy and know yourself, your victory will not stand in doubt; if you know Heaven and know Earth, you may make your victory complete.” Sun Tzu

Budget prepping is a difficult thing to do. After all, there is a difference between budget and cheap, inexpensive and cheap. Cheap by definition does not mean something is necessarily bad or of poor quality, however, with some things cheap is bad. Red dot technology has progressed light years beyond the first bulky Aimpoint, EOTech, and Trijicon.

Obviously, Aimpoint as a company has maintained a seriously good reputation and continued to progress with the times, as has Eotech and Trijicon, however, their pricing reflects no shifts for markets unable to afford to spend $600 – $2500 on a simple 1-4 power red dot styled optic.

My search for a less expensive optic commenced several years ago. I worked my way through Bushnell T series which functioned fine but were hit and miss at best. Eventually, I settled on the Bushnell AR scope series and decided to simply move on from the red dot phase.

After all, a solid scope with excellent glass and comparable abilities to other more expensive brands will work in most cases.

This didn’t mean I had no need for a red dot, after all, a solid red dot with a solid pair of backup irons is an amazing thing to have. Quick on target and easy to use, good red dots mean the difference between hits and misses in many arenas, especially combat-related training and combat itself.

Over the past year, I decided to do some research and look around again for a solid red dot under $500. I found several brand names, Vortex, AIM sports, and even Bushnell had new offerings on the market. However, I was drawn to a relatively new company, Holosun©, this optic had serious potential.

After dropping $170 on the HS403B found on Amazon, I received the well-wrapped package and mounting hardware. Two sets, a low riser, and high riser were included. The high riser fit my carbine exactly as needed. Co-witnessed with my irons I took it out to the range and started testing.

holosun-red-dot-siteAfter around 100 rounds I set the rifle to the side as there were other reviews that needed fulfilling and it held zero very well, so what more needed testing. As I leaned it against the carbine rack it smacked the crossbar on the way by and snap, the red dot came off. I leaned over and realized that the screw holding it too the gun had snapped off at the head.

I finished my testing for the rest of the products and called Holosun on the way home.

They assured me that they both knew about the problem and apologized for the inconvenience this had caused, I asked if this was going to be an ongoing issue or if it was a simple flaw in this particular part of the design.

The person I spoke with grabbed another individual who explained that the model I had received was the last in a first gen run and the new gen had the much stronger hardware.

Upon arrival 3 days after the call, I installed the part and decided to test it too its breaking point. After all, nothing to lose at this point as the people I had spoken with assured me they would replace the entire unit free of charge if it happened again.

I dropped tested it on dirt, grass, and concrete from approximately 5 feet. I also decided to “accidentally” smack the red dot housing into a few items during my next test run. Needless to say, it held firm and I have not had a breakage or issue since.

Though I doubt it will take a bullet to the casing as say an Aimpoint will, at 50,000 hours of battery life and with a VERY clear dot picture and glass as well as solid easy on when you pick the gun up, well I think this is my new best friend in the red dot world.

They have different variations, shotgun patterning dots, circle over a dot, plain jane red dot and all of the varieties can be had with a nifty solar-powered recharger put on the top if you want.

The company offers a limited lifetime warranty to the original owner, and their customer service is very expedient and quick to respond, a truly rare commodity in today’s age of somewhat lackadaisical service. They are located in the USA, Walnut California, to be exact.

They offer a 50,000-hour battery life, a variety of aiming products from lasers too red dots. In this case, my interest lying completely in their cost-effective, efficient and extremely solid red dots. The HS507A is compatible with the standard RMR mount and the other red dots have a variety of mountings available with some specifically designed for Aks and others for Ars.

Some options have a quick release mount and others a kill flash and other essential needs for red dots. The best part is their red dots run between $165 and $350 dollars and you can order from Amazon.

Now obviously I have not been able to test the veracity of the 50,000-hour battery life, however, the unit I have has been on and working clearly for well over 6 months without a hiccup. I have no doubt that the longevity is easily better than Bushnell’s offerings and Vortex. The price point allows budget preppers and shooters to have (as the company motto says) “A military-grade optic at under military prices” now personally, I have not tested it in combat yet. However, it has performed well through many tests it is NOT designed for. I do not recommend you treat your optics badly on purpose, that is my pleasure to do for you! Having family and friends still in the military this is the question I ask myself, “would I recommend this to them?”

YES!

It works very well, it will be ready for them when they need it, and will function with general abuse and function well. This being said, I am not the desk personnel from the Pentagon and it isn’t my job to accept money to pass along new products to our soldiers.

This being said, what are the pros and cons listed out?

Pros

  1. 50,000-hour battery life with an optional solar panel for charging and auto adjustment in all light conditions.
  2. Multiple reticle styles and mount styles available.
  3. Crisp clear dot, brightness easily adjustable or set for auto adjust.
  4. Movement activated the red dot when you pick up your firearm, the red dot comes on!
  5. Built for shotguns, rifles of many calibers and even handguns.
  6. Limited lifetime warranty.

Cons

  1. They are a relatively newer company, so not as much time to evaluate and test as other more established companies.
  2. They have had some issues with mounts, however, this is being addressed and is easily fixed, upgraded with a call to their customer service.

Overall, this is a product I definitely recommend and run on my carbines now. MD Creekmore also has one and here is what he says, “I bought this sight a couple of weeks ago and mounted it on my Colt M4 and so far I’ve been very impressed and agree with everything Jesse has said here in his review.

I have an Aimpoint and an EOTech on two other AR’s and the Holosun HS503GU (the model that I have) is just as good as either one of those for half the cost. ”

Free the mind and the body will follow…

Filed Under: Gear Reviews

Ferro Rod Review and Usage Guide

October 9, 2018 Jesse Mathewson

ferro rod review
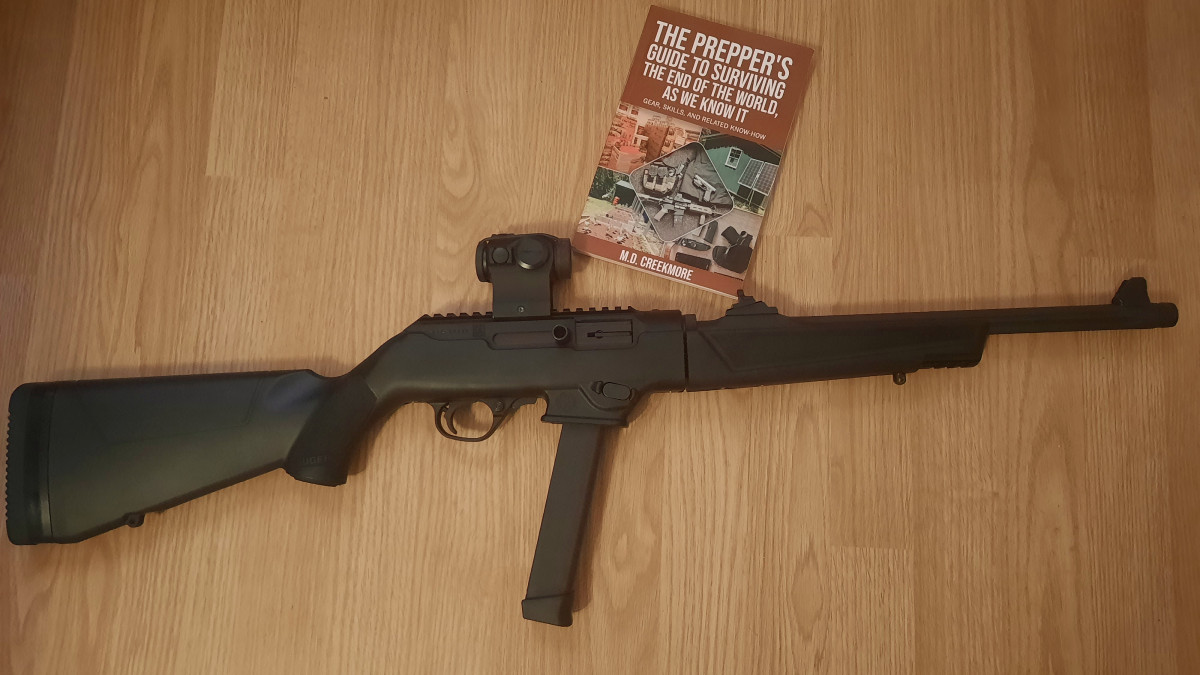
Fire is an essential element of survival, living, and warfare. It has been used for many millennia for heating, cooking, controlling growth, reducing wildfire damage, to promote grazing and conduct defensive and offensive campaigns against enemies.

Ferro Rod usage is popular with many people within the prepper community, and yet, from what I have seen personally, there are many who have never actually used the ferro rods they carry! It is my goal with this article to hopefully show you the benefits and necessity of owning and using one correctly.

Did you know that contrary to modern American conservationist thought the use of fire as a tool to prevent larger out of control fires was embraced by many American Indian tribes?

Native Americans of the Southwest often used fire as a means of clearing grazing land, driving game, reducing the build-up of excess detritus or fallen leaves and pine needles as well as dead and or diseased trees further preventing the wild exceedingly large conflagrations seen over the past 80 years of modern “conservationism”.

They realized that not only did smaller fires contribute to the faster growth of young, strong plants it also allowed animals to populate faster and in greater numbers as they did not have to fear the massive millions of acres of burned out land that actually causes a far greater toll in the end to both plant and animal life.

Such is the wisdom of those who lived with the land versus seeking to control it.

For modern preppers, all of us have seen or lived through instances where are daily prepping came into play and filled holes needed at the moment. Even if it is as simple as having extra aspirin or band-aids. With current nasty natural and some not so natural events occurring and our ability to see them being as fast as our current cell phone or internet service allows, things seem to be spiraling out of control.

The reality is, they are not. So do not panic! Mortgaging the house and selling off the kids will only serve to enrich others, stick to your current approach of getting a little here and there as you can. Make sure you have holes filled in areas that may have shown weaknesses upon the use of preps (vehicle kits and house alike)

This week I assisted an older lady who had her cell phone and nothing else when her car broke down on the highway thankfully close to a fueling station. In Arizona, we have stretches of road where people are rare and most humans traveling have no idea as to what is readily available.

From food through water, and yes in Arizona even on the Playa outside of Wilcox or around Yuma there is available food, water and more if you just know what to look for and when and where to look. The Playa is a massive dried lake bed that stretches easily 40 miles long and upwards of 15 or 20 miles in width.

Currently used by fun seekers for their sand rails and even local military testing, it is a desolate area. While I could have preached the benefits of being prepared to this lady, her concerns were more immediate and after getting her vehicle to the parking lot she became a bit more at ease. The moral of the story is, there is no such thing as too prepared!

So let’s get back to fire and why it is so very important, dangerous and necessary all in one. Having a fire starting implement is a good idea, I know many people who carry mini bic lighters, waterproof matches, flint, and steel kits and my favorite the ferrocerium rods eg., ferro rods!

What I have also found to be true is that many times these implements are purchased a book or article is read and then they are stashed away never to be practiced with. The assumption being made that like many firearms owners, we have it if we need it, it is there.

Sadly, without practice a person can easily go through 20 plus matches, a bic lighter, and never get their flint to strike a spark…I know from personal experience that this is very true and occurs quite frequently.

ferro rod reviewCamping about five years back approximately 30 miles from nearest other humans, we were hit with an unexpected deluge and spent 3 miserable days without a fire. This was my fault, and my fault alone, why did we go ahead and stay, because, the roads had become flooded and we couldn’t have crossed back if we wanted.

Now thankfully I layer my preps, meaning I had wool blankets and candles for cooking, but it still wasn’t the same as having a nice campfire going, after all, a good flame tends to cheer the soul when things are dreary outside. It is the camping/ survival equivalent of a television.

Add a bit of shine or mead to one’s tea or coffee and things can get downright cheerful! What have I done to fix this glaring hole in my preps, well, I learned how to use my tools all over again and what to do with wet wood and more.

How do we best use a ferro rod?

  1. First, it is essential to understand that a ferro rod is useless without steel, so make sure you have a striker or that your knives have at least an inch of 90-degree angle on their spine (do not use the sharpened side).
  2. Using the sharpened side leads to cuts and cuts lead to infections which easily lead to death in a grid down situation!
  3. I file the backs of all of my knives, 440c stainless will spark a ferro rod though not as well as a high carbon blade will. I only file about an inch to a 90-degree angle and I always file it at the base where the blade meets the handle.
  4. Tinder, most of us probably carry some type of fatwood or tinder mixture from Vaseline soaked cotton balls too charred cotton cloth, (easily made in a small enclosed metal container with a small pinhole sized air hole, stuff it tight with small pieces (an inch square) of cotton cloth or cotton balls cut in quarters for best overall use.) Fatwood is the sappy heartwood of trees, [preferably semi-aged or well-aged trees, pine really works best but I have mesquite and more that also works well!)
  5. Now here is where things get fun, just having some tinder materials DOES NOT MAKE A FIRE or ensure you can make a fire. You still need a semi-dry additional fuel to allow for damp or even wet wood to be capable of drying while burning. (bear in mind THIS CREATES A SMOKEY FIRE!) So how do you go about collecting more from around you?
  6. Grass, older grass eating animal dung, small dead twigs and bark tend to make the best next step for building a solid fire. This is where patience becomes essential, if things are wet, you will have to keep a pile in an area that stays dry and allow it to dry, make sure you get good air flow and you may be able to get a fire going within a few hours, in worse case a days time. My suggestion is to find large dead logs when possible, bring them into the sheltered area and split them down, the insides past about an inch tend to be relatively dry in many cases unless the area is flooded or a regular rainforest. In which case splitting them down simply allows for their drying easier.
  7. Once you have a 4 to the 6-inch square loose bundle of kindling (pick a type from above) you can try to get your fire started, I highly recommend working out kinks of your system when dry wood and kindling is available. However, am offering worse case scenario as a way to make the best case look much easier.
  8. Using a ferro rod specifically, as this article is about that, place the striking device in your strong hand, place your hand fist down beside with the striking device above the tinder. Make sure your kindling is close and that you have built a good teepee style fire setup, eg., tinder into kindling and this underneath smaller branches/ pieces with larger angled over top leaving a hole in the side of the fire to be about the size of two fists so you don’t have to battle with yourself to get the tinder into the kindling and the kindling into the fire structure. Others prefer different shapes, I have found the triangle shaped approach to work best for myself.
  9. Place the ferro rod UNDER the striking surface, with the end you are not holding facing the tinder.
  10. Draw vigorously but NOT quickly towards yourself (making sure you have already scraped the water-resistant coating off of the rod so you get even solid sparks) This will shower sparks into the tinder igniting embers allowing for you to transfer these embers into the kindling and getting a flame going, Breath gently with long regular exhales towards the kindling and tinder from about 4” to 6” away or the length of the blade you are using. Do so until you get a young bright flame going in the kindling than smoothly move this into the pre-built fire. Continue blowing into this until the flames take on a life of their own and become teenagers, raging to get out!
  11. Easy?
  12. No, this takes practice, I would suggest working with dry woods until you are confident and then use a water hose to wet some wood and work with that, do this until you have used up a ferro rod! By this point as with everything we humans learn, the repetitions of the movements and practice will make it relatively easy based on circumstances to get a fire going when needed.

Now you may ask what product am I reviewing, I can answer that, firstly there is the FireSpark by helicon-tex – it s a robust ferro rod that gives a great shower of hot sparks when needed, the handle allows for insertion of anything from necessary pills too a very small amount of tinder material! And I should note the handle has an O ring making it waterproof. The second product I am reviewing is my home brewed ferro rods, I learned long ago that in my world making my own tends to allow me to better adjust needed aspects such as a good gripping surface and having a case of ferro rods available. I prefer .30 caliber diameter by 3 inches long for my ferro rods. And I use old .308 casings as handles. (makes for a fun conversation piece) The helicon-tex FireSpark runs 21.99 on their website. The blanks I get run about $13 for a case of 10 or 12.

I can and do make ferro rods for my friends and neighbors and tend to give them away, (I really should launch a product line – arrgg – but my marketing skills have declined over the years.) if any of you want to get some let me know, I may start marketing if not, I would suggest the linked amazon approach from HOODDEAL – they are a solid manufacture/ retailer and I have never been done wrong, besides it will allow the proceeds to go to MD Creekmore for further site maintenance! Regardless, I hope you found this article educational and helpful and as always.

M.D. Creekmore adds: The Mora Bushcraft Survival Knife with built-in fire starter is something else that you might be interested in. It’s the official survival knife of The Wolf Pack.

Free the mind and the body will follow!

Filed Under: Gear Reviews

  • « Go to Previous Page
  • Page 1
  • Page 2
  • Page 3
  • Page 4
  • Page 5
  • Page 6
  • Go to Next Page »

Primary Sidebar

Subscribe to Blog via Email

Enter your email address to subscribe to this blog and receive notifications of new posts by email.

Join 7,202 other subscribers
  • Amazon
  • Facebook
  • Substack
  • Twitter
  • YouTube

“Do more with less.”

– Minimalist proverb

Recent Posts

  • Just so you know
  • Weather Update for My Corner of Appalachia
  • Why I’m Ordering Ivermectin + Mebendazole Every Year
  • The Website’s Shutting Down (But Here’s the Plan)
  • You Are Hated! Start Training Like It!

Footer

Recent Posts

  • Just so you know
  • Weather Update for My Corner of Appalachia
  • Why I’m Ordering Ivermectin + Mebendazole Every Year
  • The Website’s Shutting Down (But Here’s the Plan)
  • You Are Hated! Start Training Like It!

More about me

Books I’ve written

Books I’ve read

Follow Me on YouTube

Follow Me on Facebook

Gear I Use and Recommend

Newsletter

Search this site

Follow me elsewhere

  • Amazon
  • Facebook
  • Substack
  • Twitter
  • YouTube

© 2008–2025 M.D. Creekmore · As an Amazon Associate, I earn from qualifying purchases.