• Skip to main content
  • Skip to secondary navigation
  • Skip to primary sidebar
  • Skip to footer

M.D. CREEKMORE

  • Blog
  • Books
  • Newsletter
  • Gear I Use
  • About
  • Contact
  • Facebook
  • YouTube
  • Blog
  • Books
  • Newsletter
  • Gear I Use
  • About
  • Contact
  • Privacy Policy
You are here: Home / Archives for M.D. Creekmore

M.D. Creekmore

Hello, I’m M.D. Creekmore. I’ve been interested in self-reliance topics for over 25 years. I’m the author of four books that you can find at Amazon.com as well as Barnes and Noble. Over the years, I’ve learned a lot about prepping, homesteading, and self-reliance topics through first-hand experience and now I want to share what I’ve learned with you.

Cold Climate Gardening – Easiest Crops to Grow (even in small spaces)

December 13, 2018 M.D. Creekmore

cold-frame-cold-weather-gardening-tipsby Matilda

With limited space, time and money, I want an optimal, seasonal yield from my cool climate garden.  No matter where I live or how much room I have, the garden is a significant part of my daily life. It also provides an opportunity for appreciation of God’s provision.

Most vegetables are beyond comparison for taste if you grow them yourself.  However, some take up garden space for a very long time or, if the season is too short for heat-loving plants, you may end up being disappointed with the crop.

Everyone can grow something, even if it is only sprouts on the kitchen bench. Everything you grow yourself makes you more self-reliant and can reduce your potential chemical exposure.

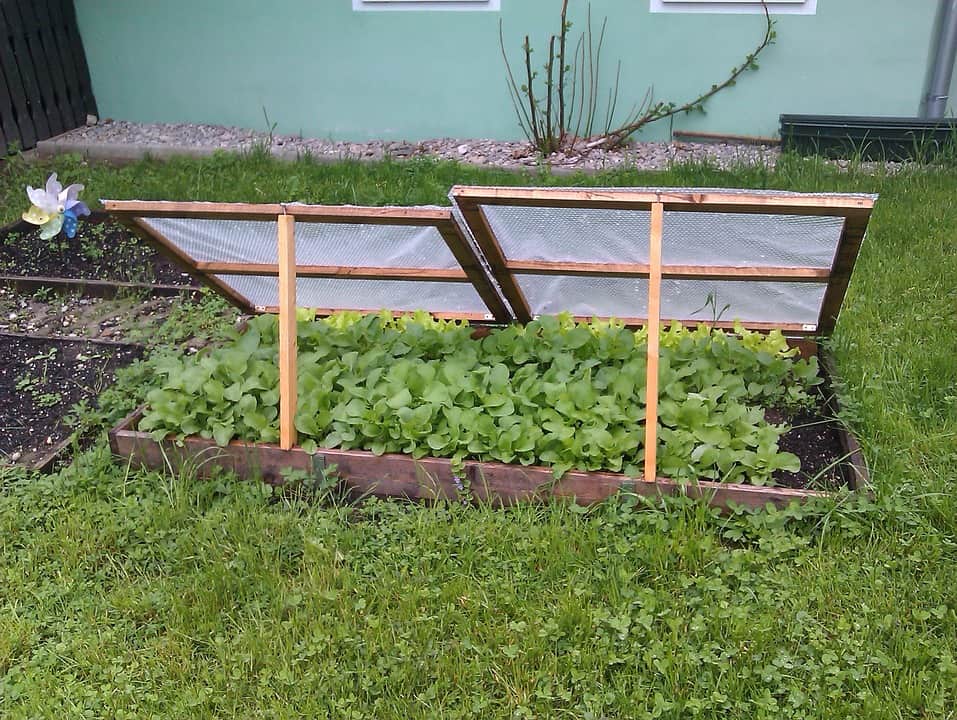
Those folk fortunate enough to have a greenhouse (especially one with some form of warmth) can extend their growing season considerably in some cases.

I don’t have a greenhouse so this is the criteria I use to determine what to plant in my garden. Ponder these considerations within your own context and growing zone.  I have included a few of my own examples.

    1. Does it grow well in my zone?
      Only fast crops of tomatoes, corn, pumpkins, melons etc ripen or mature for me. Even then, the cool humidity puts them at greater risk of disease.  I only put in a few plants for immediate blissful eating, not to store.  I just don’t have the space to potentially waste.  Of course, every now and then, you might get a bumper crop as a result of an extended period of lovely weather.  In that case, thank God for the crop and preserve what you can.
      For the most part, though, there seems little point trying and trying to grow something that just doesn’t thrive in your garden.
    2. What frozen, dried or tinned foods are cheaper to buy than grow?
      For me, dried beans, grains and legumes are way cheaper to buy as well as frozen cauliflower, peas, corn, brussels sprouts. Tinned tomatoes, pineapple, beans, legumes, and asparagus are better value for my time and space too.  I have a couple of olive trees but they are unlikely to provide all our needs.  Bottled olives are on my shopping list.
    3. It grows well here but how long does it take to grow?
      Cauliflowers, large cabbages, storage onions all grow well in my district.
      But I don’t give them priority because they take up space for a long time.
      So do other plants, but they are better value, which brings me to the next point:
    4. Can the whole plant be eaten or used?
      Of course, you can compost any of your spent vegetable plants. However, I give priority growing space to those with the most edible parts – even the ones that take up space for a long time such as:

Garlic
My favorite cool climate vegetable is garlic.  I plant it very close together in rows, thinning it out as it grows.  First I use the shoots, then the slightly swollen bulbs as green garlic when it just starts to bulb up.

By the time the bulbs really start to swell as the weather warms, the remaining garlic is spaced well to encourage large bulbs.  By that time we’ve been eating fresh garlic for months already!
Any garlic not eaten, dried or planted by the time it’s ready to sprout again in autumn, gets brined and hot smoked in a makeshift smoker – the wok.  I’ve only just started doing this and found that hot smoked garlic lasts a couple of months or so in the fridge.

Sprouting Broccoli:
It makes little flowering side shoots for a long time.  Additionally, you can eat the leaves as greens.  Has anyone tried making little savory rice rolls (similar to dolmades) out of broccoli or other brassica leaves?

Beetroot and Carrots:
Quite fast growing.  The tops are also useful as steamed or salad greens and in soups.  I make pesto out of carrot leaves and it’s not too bad.

Parsely:
Excellent value for space.  It produces lush leaves until it flowers and goes to seed.  The flowers are among the best beneficial insect attractors.  Then you can collect the seeds.  First green seeds to add to salads and soups, then after the seeds have dried on the plant, they can be used as a cooking spice.  When I eventually pull the plant out, the root is scrubbed and used to flavor stock.

Other “cut and come again” greens:
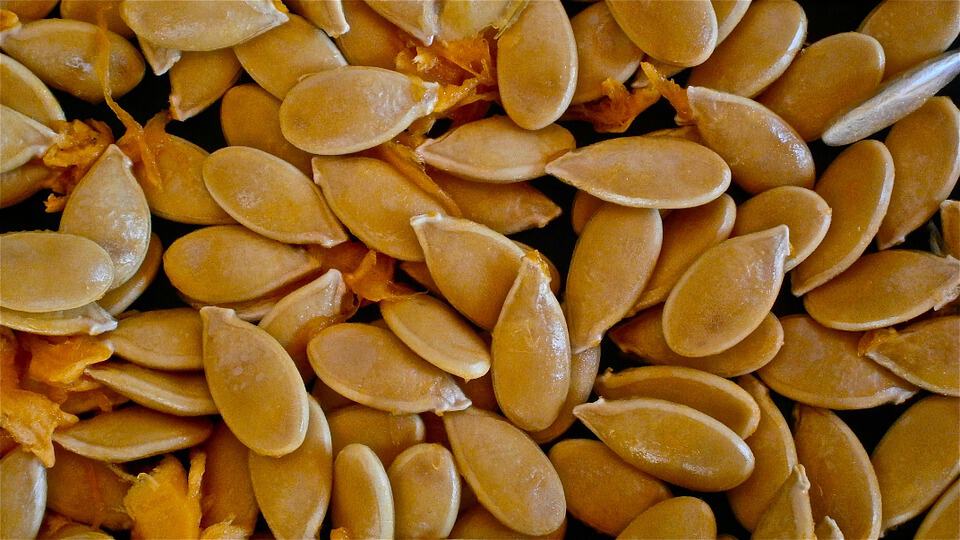
Lettuce, Asian vegetables, spinach, chard, rocket, celery, kale, and many others all keep producing leaves until they eventually go to seed.  As a bonus, some seed is suitable for saving and sprouting after you’ve eaten all that leaf produce.

Fast growing veggies:
Radish is a great value for everything vegetable.  It grows very fast and there are winter varieties, that if planted at the right time, will overwinter in your garden, to be used as you want until the warm weather arrives and they eventually bolt to seed.  Collect the seed for sprouting before adding the spent plant to the compost heap.  Young leaves are tasty in salads, as steamed greens, and
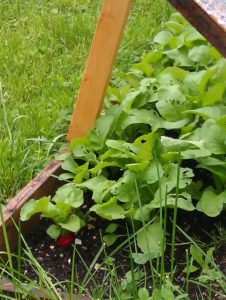
 cold-frame-cold-weather-gardening-tipsin soups.

Radish also has a surprisingly beneficial nutrient profile.
http://www.nutrition-and-you.com/radish.html
Asian greens and rocket are other examples of speedy vegetables.

Edible “weeds”
Truly a survival food.  Foraging is growing in popularity.  There are many edible “weeds” that we like to include in our diet.  There are also lots of books and websites to help identify edible and poisonous plants.  One good thing about edible “weeds” is that most of them self seed.  They will always be in your garden happily cohabitating with your fruit and vegetables.
Dandelion is my favorite “weed”.  The young, tender, slightly bitter leaves are excellent steamed with other greens and in salads.  They also have medicinal properties.
http://foodfacts.mercola.com/dandelion-greens.html

When the dandelion plant gets a bit old, especially after flowering, we chop off all the old bitter leaves and new tender ones emerge from the root again.
Eventually, the root can be dug up, scrubbed, roasted and ground as a coffee substitute.  Caffeine free and delicious! Other edible weeds in my garden are chickweed (for salads), sheep sorrel (adds a citrus tang to salads), milk or sow thistle, amaranth, nettle, fat hen, to name a few.  Here are some great ways to eat your weeds!
http://greekfood.about.com/od/discovergreekfood/a/wild_greens.htm

      1. Invest in perennials
        Can be slow to establish but generally low maintenance. Just keep them fed and mulched in their “permanent” bed…  They stay in the same spot for some years and can share a bed with a few fast annuals like radish and lettuce that won’t interfere with their growth..  Asparagus, globe artichoke, bramble berries, rhubarb, horseradish are all examples of edible perennials.
      2. Do I have any “Volunteers”?
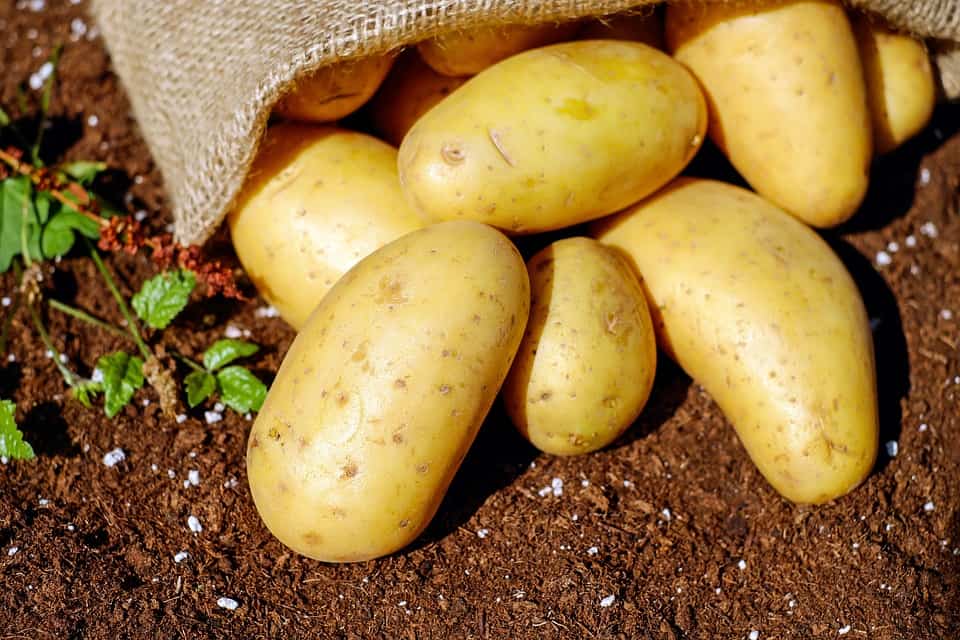
        Edible weeds are in this category but also a few others. Potatoes, Jerusalem artichokes, peas from pea straw, and anything that germinates from the compost bin.  Tomatoes are some of best examples.  They germinate from compost when they are ready, they usually grow very vigorously and yield a surprisingly good crop – especially the cherry and bush varieties.
        We purchase spent mushroom compost in autumn and spread it on the garden.  One year we had such a yield of volunteers that we had bottles and bottles of dried sliced and ground mushrooms for the pantry!  Be careful with field mushrooms though.  Make sure you can identify them and rule out any poisonous ones.
        So – don’t be too hasty to weed out volunteers.  Assess their potential worth first!

A few final points:

      • Most people can eat a varied diet of fruit, vegetable, and foraged foods without concern. Do your research about the nutrient profiles of the foods you eat in a balanced diet and plant to provide a variety of nutrients.  Check with your doctor if there are any foods that may interfere with the medications you take.
      • Ensure you have the resources and knowledge to identify edible wild foods. There are some that can kill you like certain mushrooms and others like this one: http://wildwoodsurvival.com/survival/food/poisonousplants/waterhemlock/index.html
      • Don’t forage for food in places contaminated with chemicals, exhaust fumes, peeling lead paint or dog/cat droppings. Be careful what you put in your compost.
      • You can make the most of any growing space you have from pots on a balcony or sunny window to a backyard patch by assessing the value for space, time and money of the edible plants you can grow.
      • Share your experiences with others. Teach the little ones especially where food comes from, how to grow it and how to find it.

God bless your gardening efforts!

Filed Under: Homesteading

How to Save Heirloom Vegetable Seeds From Your Garden

December 12, 2018 M.D. Creekmore

by Debbie S

I’ve been seeing a lot of people on forums and comments on other blogs asking about how to save vegetable seeds for next years planning, so I decided to write this article to share what I’ve learned through years of gardening and seed saving…

Hybrids are basically for commercial production and flavor is not necessarily what they are after.  Most of us know they are designed for good shipping ability or for ripening all at once for harvest.  Heirlooms are different.  They’re ripe when they’re ready.  Tomatoes have very thin skins and wouldn’t ship well.  But they have fabulous flavor.  If you’ve never had a Brandywine tomato you’re missing out!

Seed saving is a massive subject and I’m only going to be able to scratch the surface.  There are many books and organizations dedicated to this subject.

  • http://www.seedsavers.org/
  • http://www.seedsofchange.com/
  • Seed saving guidebook
  • Join this group (yes it costs money) and you’ll get the yearly catalog that lists other seed savers who’ll sell you their seed at a very nice price, plus you can sell yours.  http://www.seedsavers.org/Content.aspx?src=membership.htm

The first step to seed saving is pollination.  Your plants must be true to form and not cross-pollinated.  Some plants are self-pollinating, others via insects (bees, moths, butterflies) and yet others via wind.  To maintain varietal purity you need to watch how your plants are pollinated.  Isolation via distance is great if you’re on acreage.  If like me you’re gardening in a city there are other techniques available for you.

Time:  Time isolation works well for certain crops provided you’ve enough space.  If for instance, you’re growing two different types of corn you could plant corn one and then wait a couple of weeks and plant corn two.  That way the pollen from corn one will have done its job before corn two has pollen ready.

Mechanical Isolation:  This is pretty much what I do given the small garden I have.  Bagging is great on corn.  Cages wrapped with floating row cover or old sheer curtains from Goodwill work well for tomatoes.  Masking tape closes female flowers on squash, cucumbers, and melons.

It is important to have more than one fruit or veggie to save from.  You’ll want to have the choice of which is truest to the parent and grew well in your garden.  Don’t think one tomato or one corn is enough.  It’s not.  You want to have seed saved from several of the best.  Also be sure you are harvesting from fully ripened fruits and veggies.

I think the queen of the garden is the tomato, so let’s look at saving from this plant first.  Oddly enough there is quite the controversy among seed saver over the extent of cross-pollination.  Some believe that crossing is rampant, while others feel after many years of growing there is no problem.  I don’t want to risk mine so this is what I do.

I cage my tomatoes rather than steak them.  This makes it easy for me to isolate them for pollination.  I have floating row cover although you can use old sheer curtains, mosquito netting or something similar.  I quite literally wrap the entire tomato cage being sure the wrap is taller than my cage.  I then twist the top extra material and tie it off.  This encloses my tomato keeping any little bee out.  I leave this in place until I have fruit set (baby tomatoes) then I remove the wrap and tie a small piece of colorful yarn LOOSELY around the stem so I can locate those first few tomatoes.

Come harvest time I pick all the tomatoes with the yarn and head to the kitchen to start the seed saving process.  I’m sure we all know these little seeds are covered with a jelly-like substance.  It’s important to remove this gel before trying to save the seed.  It’s very easy to accomplish.  All you need is a container, a knife, and some water.

Cut the tomatoes in half and carefully squeeze the seeds into the container.  Careful removal here leaves you with a seedless tomato to eat!  Love not having to forfeit eating one of them.  Once you have all the seeds into the container add enough water to cover them with lots of room to spare.  I use an old water tumbler and half fill with water.  Let it sit on the counter for a long time as you’re going to be fermenting the gel sack off the seeds.  This process not only cleans the seed of the sack but also kills many of the seed-borne diseases.

During this process, your container will begin to stink and a grey/white layer of gunk will form on the top.  It’s pretty stinky so it’s best if you can do this outside; hopefully in an area where kids or pets won’t be able to dump it over.  You’ll want to pay close attention to the seeds as if left too long in the water they will begin to germinate.

You want to stir your seed/water mix a couple of times a day.  When you see bubbles rising in the mix or the grey gunk covers the surface then the process is complete.  Add enough water to double the liquid in the glass and stir vigorously.  The good seed will fall to the bottom of the glass and the bad seed will float.

Pour off the water being careful to keep the good seed.  Repeat this process of adding water, stirring and pouring off until only clean seed remains.  The final rinse should be poured into a fine mesh wire strainer and set on a towel to remove as much water as possible.  Then pour out seeds on a small plate and spread out evenly in a single layer.  Do not try to dry on a paper towel, a piece of cloth or flexible plastic (think plastic wrap).  It’s very, very hard to get the seed off of these things.

You want them to dry quickly and not bunch together so stir them twice a day.  Never dry then in the sun or oven.  If it’s hot and humid, a fan will help speed up the process.  Tomato seed should remain viable for 4-10 years depending of the variety.  Completely dried seed should be sealed in an airtight container and stored in a cool, dry area or frozen for long-term storage.

The next seed I like to save is my green beans.  Again, cross-pollination is an issue.  Bush type plants are easier to work with as you can cover just like you do the tomato plants.  If you’re growing pole beans you could cover one section or use special little bags and cover each flower you’ll be saving from.

They must remain covered until the last flower sets beans.  They are, however, very easy to save from as once the vine/bush is dry at the end of the season you just pull the vine/bush down and let it sit for a day or two.  Then you pull the bean pods off and open the pods.

Opening the pods can sometimes be frustrating.  If so, then place them in an old feed sack or pillowcase, close the top, lay it on the ground and then run in place.  You can also hang it from a tree and beat it with a stick or baseball bat.

Once you’ve opened all the pods you’ll need to clean the seed.  This can be done on a windy day by pouring from one bowl or basket to another.  Be sure to cover your work area with a tarp as sometimes the wind can gust and blow your seed into the grass.  I will sometimes use a box fan to assist if there’s no wind.

Weevil damage can occur so it’s a good idea to freeze them in your freezer for 5 days before storing them for next garden season.  You want to be sure they are dry before doing this so take a few and place on a hard surface like the driveway.  Hit them with a hammer.  If they shatter they are dry enough for storage if they just mash then you’ll need to dry them longer.

They should have about 50% germination for up to four years if stored in a cool, dry, dark spot.

Next, let’s look at corn:

All corn varieties are pollinated by the wind and will easily cross with each other.  Pollen is made by the tassels that form at the top of the stalk.  The silk that forms on the top of the corn cob is the female section.  As the wind blows grains of pollen from the tassel drifts to the silk.  An interesting fact is each silk that is pollinated results in a kernel of corn on that ear.  Corn pollen is light and can be carried a long way by the wind.  Isolation would require about 2 miles between corn patches.

You always want to grow your corn in large blocks or patches rather than long rows.  It’s best to grow at least 100 stalks although more is better.  This will help you avoid inbreeding.    Never work with the tassels and the ears on the same plants and when saving seed try to save from 20 to 50 different plants.  If you are growing more than one variety of corn than time isolation would be an option for pollination.  Plant corn ‘A’ and 2-3 weeks later plant corn ‘B’.

Hand pollination is time-consuming but not hard.  You’ll need a pocket knife, stapler, and bags.  This company has bags: http://www.seedtodayequipment.com/index.php?cat=1&industry_id=4&category=bags_and_packaging_supplies

It takes a few days to hand pollinate and in a drought even longer.  You start just before the silks begin to emerge from the tiny ears; if any silks have already emerged then that ear will be ruined for seed saving purposes.  So when you’re sure the silks are about to appear you want to bag as many ears as are ready.

Always bag the top ear (the plant feeds that one first and drops last in a drought).  To bag your ear you will tear off the ‘leaf’ that is covering the baby ear, cut the tip-off with the pocket knife, cutting enough off to expose the silks, this will look like a pea-sized circle in the center of the cut.  Use care when doing this too far down can damage the cob and cause smut.  You can tear off an ear or two from a plant you’re not going to save from and look to see about how far down to cut if you want.

Once that’s done you cover the ear with a ‘shoot bag’, it covers the whole ear and is wedged next to the stock.  The number you can bag the first day will depend on how many have silks ready to emerge.  You can bag more on the second day and third or fourth days if needed, particularly if the pollen is shedding yet.

The next trick is to staple a brown ‘tassel bag’ around each tassel just as it begins to shed pollen.  Bag too early and the pollen won’t develop.  Once you’re ready to bag your tassels give the stalk just below the tassel a good shake.  This will help dislodge any pollen that may have floated in.

Then pull the branches upward and put the ‘tassel bag’ over the tassel.  You’ll want stalk of the plant in the corner of the bag…  Fold the opening of the bag back towards the stalk and then staple closed.  The object, of course, is to fasten the bag tightly enough to keep the pollen from falling down and out of the bag.  You may notice some of the leaves just below the tassel have pollen in them.  You’ll want to remove those leaves as they have contaminated pollen there.

The pollen will fall in the morning and you’ll want to collect it before the high heat of the afternoon as the sun can kill the pollen inside the bag.  If you can’t collect until later in the day you’ll need to have more pollen to get good seed set as the sun will reduce the quality.  Your best bet is to bag in the evening and do your pollination is the late morning or early afternoon.

When ready to collect pollen bend each tassel bag over slightly downward, don’t break the tassel or the plant!  Give the bag a good shake to dislodge as much pollen as possible.  Unfasten the staple and still keeping the bag down gently shake the tassel as you pull it from the bag.  Once you’ve collected all the pollen bags carefully pour your pollen into one bag and mix well.

Keep the shoot bags on until time to sprinkle the pollen onto that ear.  If the silk has grown long you can trim it to about one inch in length.  Try to think about how many ears you’ll be pollinating and how much pollen you have so you can divide it evenly.

Shake the pollen from the bag along one of the ‘fold’ lines on the edge.  When you first shake it down the bag there will be some debris, just remove it.  Then gently shake the pollen onto the silk, maybe just less than ½ teaspoon per ear.  Try to be even and don’t just dump it in one spot.  Cover your pollinated ear with one of the used pollen bags and pull the bag around the ear and staple a couple of times.  You want it to be loose enough for the ear to grow but not so loose the wind can blow it off  The bag can be left in place until harvest and that way you’ll know to save seed from that ear.

To harvest the seed, leave ears on until the stalks are completely dry.  If animals or weather makes that impossible, you can harvest mature cobs, husk and dry them under shelter.  Drying should be done in less than 95 degrees F.  Do not remove seed until both cob and kernels are dry.

To remove seed just rub two cobs together.  Any silk or cob debris should be removed by pouring seed from one bowl to another on a windy day.  Any kernels not completely formed should be removed.  Always mix your seed from at least 25-50 plants for best results.  As always, seed should be completely dried before storing.  Sweet corn should maintain 50% germination for up to three years if stored in a cool, dry, dark spot.

Melons:  These are very difficult to save seed from as they need bees and flies for pollination, plus the plants will drop up to 80% of their female flowers.  It’s impossible to know which flowers will be dropped so you’re looking at maybe 10-15% of the hand pollinated ones developing into fruit.

Of course, the best isolation is with ½ mile distance between varieties and for those of you living in outer nowhere that may be possible.  For the rest of us, we’re looking at hand pollination.  It’s not hard but it is time-consuming.  You’ll need to know the difference between male and female flowers and you’ll need to know when they are ready to open.  Male flowers have straight stems clear to the flower while female flowers have a small bump/ball at the base of the flower where it attaches to the stem.

You’ll need a small piece of tape about ¼ inch wide and ½ inch long, tape flowers closed in the early evening.  When you tape the female flowers pinch the tape together beside the flower but leave the tape ends apart, that will make removing the tape easier the next morning.  If you break off the stem from the male flower you can use a piece of tape as a stand-in to help with holding the flower.

In the morning after the dew has dried carefully remove the tape from the female flower try not to damage the blossom.  Then take the male flower and remove the tape and its petals, gently rub/dab the pollen from the male flower onto the stigma (that’s the long slender stick thing) of the female blossom.  Once done carefully re-tape the blossom closed and then mark with a small piece of floss or yarn.  If after 3-4 days the stem attachment is still green and the tiny fruit has grown slightly, then your chances are good you were successful.

Melons seed are ready when the fruits are ready to eat, however, if you can let them slightly overripe you’ll have up to 10% more seeds although the melons aren’t as good to eat.  When you save the seed have a bowl ready and then slice the melon open and collect in the bowl.  Try to remove as much pulp and threads as you can.  Then add water to allow the bad seed and debris to float, pour off and repeat until only good clean seed remains.

Pour the seed into a strainer and rinse thoroughly to remove any of the natural sugar from the melon.  Dry in the strainer on a dish towel to remove as much water as you can.  Then pour onto a cookie sheet to dry.  Seed should remain good for up to 5 years if stored in a cool, dry and dark place.

Cucumbers:  The pollination for cuke’s is the same as for melons.  They don’t like high heat or drought conditions so don’t pollinate during those times.  For seed saving, you need to grow the cuke’s to maturity and allow them to ripen way past eating.  Depending on the type they should turn to a white, deep yellow or even orange.

Each cuke will have hundreds of seeds.  If you keep fully mature cucumbers for about two weeks after cutting from the plant, you should have a greater number of viable seed.  If you find you have few if any seed inside the cuke that generally means you didn’t get enough pollen or it could be a type that doesn’t require fertilization.

To clean the seed follow the same process as for tomato seed.  Use just enough water to cover the seed but not too much.  Set the bowl outside and out of direct light.  After about 3 days, follow the tomato water and drain information.  Pour clean seed into the strainer and dry as for melons.  Under super conditions seed should be good for up to 10 years.

Sorry for the lack of photos, as I said at the beginning; it’s been a long time between gardens due to the deer.  Thankfully the electric fence is keeping them out and I’m hopefully saving seed again.

Heirloom seed saving is a wonderful experience.  It’s easy to save your garden seed for next year and can help with not just prepping for disaster but also reduce the cost of a garden.  There are many books that will help you learn to save heirloom seed and they should be part of any preppers’ library.

Filed Under: Homesteading

Helping Those In Need After SHTF

December 12, 2018 M.D. Creekmore

Building Charity Packs

by Mama J

This is one of the hardest parts of prepping for me. I do not have many neighbors that would be dependant on us, though there are a few. Our rural neighborhood will come together to help them. Not just one family.

I don’t believe I would be able to turn away homeless hungry children. Not without great emotional cost. Actually, my family plans on keeping me away from stray children. We have adopted several.

If I have enough for my family and we have the means, I want to have some way to help as many people as I can, even if it is for a short time. One gift of a hot meal, a clean body, a kind gesture. To ease the suffering of a child is the greatest gift I can imagine. These packs are designed as a starter kit or a temporary kit for short-term assistance.

In a large disaster and all infrastructure collapses, I can imagine a lot of displaced folks wandering down the road with their children. Looking for sanctuary, or a meal. I feel I must do something. If this comes to pass and I run out, at least I know I did everything I could for as many as possible.

One of my favorite things to do is “Treasure Hunt”. Yard sales. Thrift stores, Salvation Army, Craigslist, Freecycle. On my journey, I have seen so many items that can be put to good use, so I started building Charity Packs.

Before I say anything else, I must stress that you MUST prep for yourselves first! We have been prepping for over a decade. When you feel like you have sufficient stores for yourself and have extra items, put them to use here. Even with a limited income, we all tend to have extra items laying about. Even one or two packs would be helpful.

I have $20.00-$30.00 budget per week to Treasure Hunt. Mostly I buy items for my family list on this budget. Some weeks I don’t find anything. Some weeks I hit the Mother Lode. Once in awhile, I find something so incredible I dip into the savings. If I have funds left I buy items at the Dollar Store.

Ask your friends to save items for you. Keep an eye out for you when they are shopping. I see the same people at yard sales every week. We talk and tell each other what we are looking for. We have exchanged numbers in our phones. I have purchased hundreds of canning jars and equipment by text messages from other salers. Not to mention the camping gear, pack supplies, med supplies, the list goes on and on.

One woman I see often is all over the place. Almost every day. The only thing she does is cruise around looking for sales. I think she may be a hoarder, but she has helped me find some amazing deals! She never asks silly questions either. Bless her heart!

Check store clearance items. managers specials. Using coupons on clearance items make them almost free or deeply discounted. I make a clearance circuit in a each store. Every store in my area has specific spots for clearance items. Especially if a store is remodeling. They will have crazy amounts of cheap stuff. Add a coupon and BAM! Happy Dance.

Talk to the store managers, they will let you know the best times to pick up on good sales. Tell them what you are doing. People generally want to help you to help people. The manager of the Salvation Army and one of the local supermarkets have been very generous with items for these packs.

The basic Hygiene Kit is something I put in all of the packs. Everything is hotel/travel size. Thrift stores often sell some these items 5 or 6 for a dollar. I have had a lot of these items donated.

  • Shampoo/conditioner
  • Soaps
  • Lotion
  • Deodorant
  • Q-tips
  • Cotton balls
  • Small emery board~ I found a case of these at a thrift store for 50 cents. Must be five hundred in the box.
  • Toothbrush/toothpaste
  • Comb
  • Tissue
  • Mouthwash
  • OTC pain relievers
  • Cough drops
  • Band-aids
  • Antibiotic ointment
  • Hand sanitizer
  • Wet Ones
  • A small container of laundry soap.
  • Dryer sheets~ Help with bugs.
  • One quart size ziplock bag to put it in.

A towel and washcloth. I often these in perfect condition used. This is enough to give someone a few showers or even creek baths. Being clean can make someone feel human again. We are not setting up a household.

Sometimes I find and add…

  • Nail clippers
  • Disposable razors
  • Sunscreen
  • Bug spray
  • Food/Water Packs~ These vary depending on what I have
  • Water bottles
  • Chlorine bleach in a small bottle~ Water purification. This has to be changed out yearly.
  • Cup~ Metal camping cups when I can find them.
  • Fork, butter knife, spoon. Super cheap at a thrift store.
  • Homemade dehydrated soup mixes. Dehydrated foods with gravy mix or bouillon. Or….
  • Cans of soup, beans, veggies, whatever I can find.
  • Crackers
  • Granola bars
  • Ramen
  • Small packs of condiments~ Salt, pepper, ketchup, sugar, sweetener, soy sauce. Friends save these for me, we rarely eat out.
  • Dried or canned fruit
  • Hard candy
  • Tea bags
  • Hotel coffee
  • Drink Mixes
  • Instant cocoa

If I can find mess kits I include them. Or a small lightweight pan to heat water.
Grocery store bags to put everything in.

Baby Packs

Hygiene kit~ Babies can’t use some of the items in the kit, but the parents can.

12 Cloth and or disposable diapers. 12 diapers don’t seem like much but cloth can be cleaned and reused. Once a disposable is used, it is gone. Cloth diapers are hard to find, but can be cut and sewn from flannel. It only takes a few minutes to whip up some diapers if you are already sewing.

Three pieces of flannel, some thin plastic sheeting in the middle, sew it around the edges. Plastic pants to cover are a rarity now. You can add velcro tabs instead of using pins. Store bought Nappies are too costly. I used cloth diapers for all of my children. People will use what they have and be grateful for them. When I reach my goal of 25 completed baby packs I will start adding more diapers.

  • A small pack of wipes or a small baggie with a washcloth
  • 2 Diaper pins
  • Ointment in a baby food jar. Or a small tube. Find someone that is using baby food and get their jars.
  • Infant Tylenol~ If I can find it cheap
  • 2 receiving blankets
  • 2 warm blankets
  • 2 Pajamas or Onezies
  • Grocery Store bags for dirty diapers.

You could add half of a twin sheet to use as a snuggie. Make a triangle and snug (tie) baby to your chest. Sometimes I find formula in the clearance bins. New moms should be nursing. Period. I save formula for orphaned babies. It is surprisingly inexpensive to make these baby kits. A few dollars. Except for the Tylenol and formula.

Toddler or Kids Packs

  • Hygiene kit
  • Small stuffed animal
  • Dollar store items like a story or coloring book, crayons, bubbles.
  • Small flashlight/AA battery~ Can be a big comfort
  • Large t-shirt
  • Bootie socks
  • Small blanket.
  • Children’s vitamins
  • Food Pack

Female pack

  • Hygiene kit
  • Feminine Hygiene products
  • Condoms~Clearance bin with coupons.
  • Hair ties/clips
  • Vitamins
  • Book
  • X Large t-shirt
  • Socks
  • Small Flashlight/AA battery
  • Small tool kit~ Tape, zip ties, wire, paracord, fishing hook & line. A zillion things could be added.
  • Matches/toilet paper tubes stuffed with dryer lint
  • Food pack

Pregnant Packs

  • The same as the Female pack, add…
  • Prenatal vitamins~ I found eight bottles of these in a clearance bin for $2.00/ $2.00 coupon each.

Baby kit

Small birthing kit~ Chuks pads, Sterile gloves, sterile plastic clamps, new sterile razor blade, for clean cord cutting. Bulb syringe. Small bottle of rubbing alcohol.These items I buy online. You can purchase an OB kit on Amazon for $6.00. I put these together from several sources for $3.00. Look around.

Babies born in austere conditions can easily die from tetanus or infection if the umbilical cord is not treated properly. Mothers are at risk of infection also.

  • Extra food
  • Extra feminine hygiene

Mens Pack

  • Hygiene kit
  • Condoms
  • X large t-shirt
  • Socks
  • Vitamins
  • Book
  • Toolkit
  • Small Flashlight/AA battery
  • Matches/toilet paper tubes stuffed with dryer lint
  • Food pack

We buy as many backpacks as we can for these kits. The most I will spend on a backpack is $1.00. Friends save their kids’ old school backpacks for us. The yearly ski swap will donate leftover backpacks. Otherwise, the packs go into shopping bags. Plastic, canvas, anything that is free or inexpensive and sturdy.

I store everything in large Rubbermaid containers or boxes out of the way. I have one container that I dump items in until I have enough to make bags. Organized and clean.

You might wonder why I included t-shirts and socks but no other clothing. Pants size vary so much that I could not even begin to delve into that. However, t-shirts are almost a one size fits all if they are big. I find nice almost new clean t-shirts at thrift stores.

A pair of new socks are one size and can change your life! New socks are almost better than chocolate. Almost.
So far, I have 40 nice used clean blankets stored in space bags. 20+ coats and heavy hoodies in varying sizes.

I have not included anything that can be used as a weapon, or anything that can used against us. I don’t think anyone will attempt to throw flaming sanitizer soaked cotton balls at us. The razor blade in the preg pack could hurt someone, but if anyone in my group is stupid enough to let themselves get cut with a razor blade or stabbed with a fork from the food kit……need I say more? We haven’t paid thousands of dollars in training for one of my kids to get stabbed with a fork.

I have stored some inexpensive good hunting knives with fire starters, but will only hand them out if the correct opportunity presents itself. Case by case basis. These packs will not be handed out anywhere near our property, so folks will not know where to find more. Most likely handed out at a roadblock. We may end up donating all of them to a church, camp, or anywhere they would be helpful. They could be used as barter items. We may end up using them ourselves.

Other items that would be useful to homeless folks are tarps, plastic sheeting, rain ponchos, garbage bags, shoes, duct tape, the list is endless. Whatever you are willing to share and store.

I have 92 of these packs made up right now. We are usually able to build 5-6 a month. We date them to rotate out anything over 12 months by donating or repacking with fresh products.

We have donated these packs to the homeless shelter, womens/childrens shelter, to families that have lost their home to fire and tornado victims.

They can be also be used as an extra Bug Out Bag. Or a project for Scout Troops and Church Youth Groups. Helping others doesn’t have to cost a lot or take away from your own supplies. I incorporate this activity into my regular preps. Do what you can, when you can. Have fun with it.

We are happily open to suggestions for other ideas and items to include. Happy Prepping!

Filed Under: Prepping

How Many Acres Do You Need for a Small Farm?

December 12, 2018 M.D. Creekmore

barn on the farmby Petermccue

Like me, I’m sure you’ve seen the numbers out on the internet – “You only need a quarter of an acre to support a family of four” or “Five acres for a family of four” or “20 acres for a family of four” – but what is the basis for these figures?

I originally started this article to debunk the “seed safety in a can” products. I’m sure everyone’s seen them, and I’ve always had the idea they were a crock of … err, horse-by-product, but I’d never seen anyone actually sit down and crunch numbers on why they aren’t. So I began looking at numbers – figuring out food you could get for a given amount of seed.

I knew that the numbers I’d seen in various gardening books for recommended numbers of plants to have were insane – mainly based on my own experience with gardening. Those numbers may be enough to supplement a family during the summer, but they aren’t enough to actually support a family for a whole year.

So, I started by looking for data on how much food a typical family consumes in a year. Weirdly, this was quite difficult to find. Oh, yeah, there’s plenty of lists out there for how much to store for a family/person, but not much on how much fresh food a family will consume in a year. While I could have tracked my family’s consumption for the year, this would have delayed this article a bit! Eventually, I tracked down some data from the USDA (hey, finally some use from my tax dollars!) where they gave stats for various ages of both genders.

While the information on meat and such like wasn’t that useful to me, the vegetable and fruit guidelines were quite helpful. Under their “thrifty” plan (and allowing for loss/wastage, and taking the highest possible number for the various age/sex breakdowns), I came up with needing 100 pounds of potatoes, 125 pounds of dark green veggies (broccoli, chard, spinach, etc), 100 pounds of orange veggies (carrots, sweet potatoes, winter squash, pumpkins), 120 pounds of legumes, 305 pounds of other veggies (this includes ALL others – tomatoes, radishes, onions, garlic, etc.), 425 pounds of fruit, and 240 pounds of grains.

The fruit, I’m leaving out of this (except in as far as melons and watermelons figure in), mainly because you mostly get that from bushes and trees. Because in a SHTF situation (or even in an off-grid homesteading situation) we will likely eat a lot fewer fruits and more veggies than the current American diet, I did increase the veggies a bit to account for fewer fruits (especially those from tropical sources – such as bananas or citrus).

I then looked at the various veggies/beans/fruits/grains in the categories and looked for ease of seed saving and ease of growing. I wanted to avoid “finicky” vegetables such as cauliflower or ones that aren’t really that nutritious such as celery (which is also picky on growing). I also wanted to avoid too many biennial vegetables, but that was more difficult – lots of very nutritious veggies are biennials, which makes saving seed a bit more difficult.

My assumption was that we were dealing with a family of four, who had never gardened before, and who would make LOTS of mistakes in the process of learning how to garden well. Also, I assumed they’d need to do other things than a garden, so we went with plain row cropping for the garden, rather than more intensive (and thus more productive) methods of gardening. Thus, I took the lowest yield assumptions for the various veggies I chose, as well as assuming a lot of wastage in seeds.

How many acres for a farm
You can raise goats on a small acreage homestead.

I then plugged a LOT of data into a spreadsheet (Which if you contact me, I’m happy to share – MD, if you want if for your next edition of the CD, I’ll get you a cleaned up version with the ability for folks to plug in their specifics and get data out… my spreadsheet doesn’t only include a “thrifty” plan, but also a stepped-up version for moderate needs and then a “lavish” plan for what I’m aiming at. It will give you approximate numbers of seed you need each year, etc as well as figure what sort of spacing requirements you’ll need.)

So, with those assumptions in mind – I looked over the choices and made some picks. Any biennials I figured I needed twice as many seeds, so I could plant the second year as well. (I’m not going to show the row feet or the square feet calculations I made, but they are in the spreadsheet).

In the dark green veggies, it’s very hard to avoid biennials. It’s also very hard to avoid vegetables that could potentially cross with each other, which makes seed saving even more difficult, as you must bag/isolate/etc the various plants you’re saving for seed. I ended up settling on broccoli, collard greens, mustard greens, and spinach.

Mustard and spinach are annuals, which makes them easier to deal with, and along with the collards, they can be canned for storage. Broccoli doesn’t can well, but it can be dehydrated and it is also cold hardy, so you can grow it in spring and fall as well as winter if you’re in a mild climate or have cold frames. Kale and chard, although falling in this category, are not only more unfamiliar with most Americans but also biennials.

For our mythical family of four, I was aiming for 280 pounds of broccoli, 60 pounds of collards, 60 pounds of mustard greens, and 100 pounds of spinach. Including plants raised for seeds, they would need 14,000 (2 ounces) broccoli seeds (remember, it’s a biennial, so we double the seeds to allow for two years before our seed saving bears fruit), 2800 (third of an ounce) collard seeds (also a biennial), 3200 (quarter of an ounce) mustard seeds, 3200 (1.5 ounces) spinach seeds.

Orange veggies only have one biennial, but it’s an important one – carrots. Carrots are tricky to save seed from because they can so easily cross with Queen Anne’s Lace. So having extra carrot seed is probably a good idea, so you can keep your seeds pure (and make lots of mistakes in the process of learning). The other tricky veggie here is sweet potatoes, which are very nutritious but do not reproduce from seed.

So you can’t store seed for them. Note that squash and pumpkins will cross with each other, but the procedure for saving their seeds is a bit easier than say … carrots. Although my spreadsheet plans on using sweet potatoes for my family (because we grow them already), I’ve replaced that for our phantom family with extra pumpkins and winter squash, to go along with the carrots. I’ve assumed that our family would need 160 pounds of carrots (they want good eyesight!), 80 pounds of pumpkins, and 160 pounds of winter squash.

Note that the carrots can be canned, but can also be stored long-term, so these are good choices. For this family’s need, they’d probably want 26,400 (1.5 ounces) carrot seeds, 150 (1 ounce) pumpkin seeds, and 1200 (4 ounces) squash seeds.

Beans and legumes are basic to nutrition and can help make up for lack of meat in our diet. Beans aren’t that difficult to save seeds from and the whole family is annuals, so they aren’t tricky for our family. (The main problem is learning when to start harvesting the dry pods!) For our family, I’ve figured on them wanting 280 pounds of dry bush beans, 120 pounds of dry pole beans, and 80 pounds of cowpeas (crowder peas/southern peas/black-eyed peas). For this, they’d need 14,000 (156 ounces or about 9.75 pounds) of bush dry beans, 2800 (43 ounces or 2.75 pounds) pole dry beans, and 5200 (20.8 ounces) of cowpeas. Luckily, you can mostly use storage beans for this, if you increase the amounts somewhat to allow for lower germination rates.

potatoes on a small farm
Potatoes are a problem. You need them but you can’t grow them from seeds.

Potatoes are a problem. You need them but you can’t grow them from seeds. And they don’t store past a year. You need about 10 pounds of seed potatoes to plant a 100′ row, which will usually yield about 100 pounds of potatoes. Our mythical family of four will need about 400 pounds of potatoes to eat, and about 40 pounds to seed for next year. What we’re doing here is always trying to keep at least 10 pounds of potatoes in the house, so we can grow them if need be. It’s not an ideal solution, but it’s the best we can do.

Other veggies include a LOT of things that American’s really want to eat. For our mythical family, I’ve culled the large list down to pole green beans, beets (good for both roots AND greens but a biennial), cabbage (biennial and will cross with our broccoli and collards!), sweet corn, cucumbers, garlic (doesn’t reproduce from seed – we’ll discuss later), leaf lettuce, onions (biennial), garden peas, peppers (both hot and sweet), radish, summer squash, and tomatoes.

Peppers and tomatoes don’t cross-pollinate easily, so you can choose a number of different varieties if needed. They are also easy to save seed from. Cucumbers will cross with themselves but can be hand-pollinated if more than one variety is desired to be grown. Garlic is a bit more difficult as it is not only best grown in the fall in most of the US, but it also doesn’t seed, so you need to have cloves to start from. Best bet is to keep some garlic cloves around at all times to have some to start.

Ideally, our family would need 100 pounds of pole green beans, 120 pounds of beetroots (and that would give them about 20 pounds of greens to eat fresh), 120 pounds of cabbage, 120 pounds of sweet corn, 60 pounds of cucumbers (although you’ll likely get a LOT more), 80 pounds of garlic, 80 pounds of leaf lettuce, 120 pounds of onions, 80 pounds of garden peas, 60 pounds of peppers, 20 pounds of radish, 80 pounds of summer squash (although since this is zucchini – it’ll likely be more), and 160 pounds of tomatoes (likely more, but …).

For this, you’ll need 560 (9 ounces) pole green bean seeds, 4400 (2 ounces) beet seeds, 5200 (three quarters of an ounce or so) cabbage seeds, 2400 (2 pounds) sweet corn seed, 320 (half an ounce or so) cucumber seeds, 4 pounds of garlic, 12,400 (half an ounce) leaf lettuce seeds, 21,200 (3 ounces) onion seeds, 9200 (84 ounces or 5.25 pounds) garden peas, 400 (tenth of an ounce) peppers, 1320 (half an ounce) radish seeds, 120 (half an ounce) summer squash seeds, and 240 (under a tenth of an ounce) tomato seeds.

Fruits mainly concern melons and watermelons – you don’t need much of these because they don’t store well and are hot weather growing plants. I’d be comfortable with 200 seeds of each type for our mythical family, which should give them plenty of fruit.

Grains are the last category. For our mythical family, I’ve chosen flint or dent corn, popcorn (which can do double duty but will have to be hand pollinated to keep it from cross-pollinating with each other and with the sweet corn), wheat and oats. The wheat can come from storage – like the beans, just increase what’s used for lower germination. The corn cannot come from storage, as it’s most likely hybrid.

And most folks store rolled oats, which won’t work for sprouting. Ideally, the family would grow 100 pounds of dent corn, 100 pounds of popcorn, 120 pounds of oats, and 600 pounds of wheat. To get that, they’ll need 2 pounds of dent corn, 2 pounds of popcorn, 32 pounds of oats, and 100 pounds of wheat. The corns would be planted in rows, but the oats and wheat would be broadcast as it’s unlikely they will have the equipment to drill plant the other grains.

Now, what amount of space would be needed for this? Assuming row cropping the garden vegetables, and broadcasting the oats and wheat, and NOT doing any double planting throughout the year, you’re looking at about 1.68 acres for our family of four – assuming normal soil conditions. If you have access to manure/compost, spacing requirements would probably be lower. If you’re in dry conditions or on poor soil, it’d be more. And this doesn’t allow for letting a field lie fallow for a while or something similar.

Looking at those numbers of seeds, it’s easy to see that most “survival seed banks” are not really worth it. They won’t be tailored to your climate, firstly. Also, they will include seeds that will not store well – onions for example. Sweet corn is another seed that doesn’t store long. They also get the numbers way wrong. For example – one seed vault has 65 green bean seeds. This isn’t going to be near enough to allow for any loss in germination or other catastrophes.

Another one out there (marketed as working for 1 acre of gardening) has 1700 tomato seeds! That’s about 1000 more than even *I* would store at my most paranoid. And they are all one variety too! But they don’t just get the numbers wrong – they also get the varieties wrong. Many many vaults include onions that don’t keep well – such as Walla Walla. Don’t get me wrong, WW’s are a great onion, but they don’t keep. You want a long keeper such as Stuttgarter or Yellow Flat Dutch.

I found one vault that included 700 jalapeno seeds – really? Does anyone need that many jalapenos?? I had 10 plants last summer and that made so many peppers we were drowning in them. (Lesson learned – next year – 4 plants!). They also include vegetables that are very difficult to grow for beginners – such as eggplant or celery. And celery is not exactly high in calories or nutrition, so it’s taking up space better used for other seeds. Even the ones that include grains, don’t include enough. Most include at most half a pound of grain seed – which isn’t going to be near enough.

When I started this project, I’d originally thought that having one of those seed vaults wouldn’t be a complete waste of space. I had hoped I’d find one that could serve as a useful backup to my own seeds. However, I’ve come to the conclusion that they are pretty much utterly useless.

And that’s without having seen the “instructions” that are included! I’ve come to the conclusion that they give a false sense of security to folks, who think that if they have one, they don’t need to bother with gardening or practicing – but they can just “grab the can” and start gardening and grow tons of food. You’re better off getting the supplies to store your own choices and tailor it to your own needs than buy one of the over the counter collections.

Filed Under: Homesteading

How to Build an Underground Bunker on a Budget

December 8, 2018 M.D. Creekmore

How to build a prepper bunker
Survival Shelter partially backfilled and complete

by Doc Wacholz

In April 2011, we saw one of the worst tornado outbreaks ever in the Southeast. On April 27th alone, there were 208 tornadoes with four being EF5’s tearing across hundreds of miles of the countryside, killing hundreds of people and destroying hundreds of millions of dollars in property across six states. This was the catalyst (amongst other things) to build a storm/ shelter/root cellar/bunker.

This is not the easiest way or maybe the best way to build a shelter, but it worked well for me and my budget. First I live in a region of the country where I have hills to dig into. So I choose a location near the house, not too far away, in close running distance.

I dug out (with my tractor) a twenty-foot wide swatch and twenty-foot back into the side of the mountain. I left the bottom of the hole about eighteen inches above the valley ground level, that is in front of the hole. This will help keep any water flowing into the valley, out of the structure area. To also help aid in water drainage, I cut a shovel wide trench above the structure area, so water coming from the ridge above is diverted away.

Digging around the perimeter of my newly dug hole, where the “survival shelter” was to be built, I added a French drain. A French drain is basically a shallow trench with 6” septic drainage pipe, with holes on the top that allows the water to flow down and out. A nylon sock encompassed the pipe to keep debris and dirt out of it. This trench was dug where with a downgraded outflow. This French drain will direct water away from the structure and down into the valley. I then added about 8 inches of rock over the drain and in the area where the shelter was to be placed. This again allows for better drainage of water from under and around the structure.

I contacted a local concrete septic tank builder and explained what I was doing. With a few pencil sketches of my shelter, he was able to add extra reinforcement steel where needed and vent holes for incoming and outgoing air. He placed a four-inch vent hole at the bottom the left front corner for incoming air and one at the top right front corner for outgoing air. He also took the time to Dam Tight the bottom of the tank for me at no extra charge.

The 10 foot by 6 foot by 6 foot high, 1500 gallon tank cost $750. delivered in place. The tank came in two pieces and weighed a total of twelve thousand pounds. The halves pieced together with a V groove and some thick rubber sticky material that acted as a seal all the way around. I added hydraulic cement on the seam to help waterproof it a bit more. Before I cut the doorway, I put two coats of Dam Tight and three coats of rubber roofing material on four sides and the rooftop.

I rented a concrete saw, and then cut a doorway into the structure, leaving the bottom of the door four inches above the shelter floor. Again helping keep any water from coming in. The thickness of the tank is four inches, with rebar and wire throughout the structure. “A car could drive over this structure with no problem”, according to the maker. Not that we are going to try it, but adding dirt to the roof does add weight so this was a bit reassuring.

Building the door took a little planning. I utilized four-foot by eight foot, 1/8” thick steel plates that would rise two feet above the roof line. The steel door hole cut would be 1 inch bigger all the way around than the hole cut into the concrete structure. This way when the door closes, it will have a tight rubber seal to close on. I considered using a ¼ inch steel plate, but the weight would have been twice the 1/8 inch steel which still weighs 300 pounds or better. The inside lock has not been welded but will be done near the end of the project. There is an outside door lock welded on already. The door will be Red Headed to the concrete structure.

Before backfilling, I added pink foam for a little insulation on the back and sides with Liquid Nails. Now the backfilling begins. At the point, I took the pictures, with the back and sides being filled in. Once the door is in place I will place 4-inch by 4 inch PT posts stacked upright behind the door, on the roof, so the dirt has a place to stop.

That is why the door is two feet higher than the roofline. The dirt on top of the roof will be approximately four foot deep on the back side and two foot on the front side to keep the slope of the ridge the way it was. Of course, these 4 x 4 posts will be nailed, screwed and glued together as this holding wall is built. By the deadline of this article, I really don’t know if this structure will be complete, due to rain, snow and the cold, but I will entail the rest of my plans like I just did.

How to build a prepper bunker
Welded door w/ door swung open

Before backfilling the roof, it will have insulation, plastic material plus roofing material that will help keep water off the roof and direct it one foot or better past the sides of the shelter. This will be in place before I backfill the roof area. Backfilling the space above the roof and behind the structure will take nearly 83 cubic yards of dirt. I guess I made the hole a bit bigger than I really needed. Small oversight I’m sure you can correct!

With the door in place and the 4 x 4 lumber on, and the roof backfilled, now comes the front of the structure. I will do the same type retaining wall (as on the roof) on the sides of the door. I choose the same wood, 4-inch by 4 inch PT posts that will stack upright and go six feet out from the structure. These wood retaining walls will be on each side of the door, attached to the door and will hold dirt that will be covering up the front of the structure.

Utilizing the septic manufacturer again, he pours these two foot by two foot by four-foot wide concrete reinforcement blocks that weigh one ton each. I plan on stacking this four-foot out away from the structure. These will be stacked three high, making a six-foot high wall in front of my structure. Sure this is overkill, but that is my middle name! After these blocks snug up against my 4 by 4 wood retaining walls alongside the doors, I will backfill that area with dirt. This will give me a 2-foot thick concrete barrier with 4 feet of dirt in front of my structure. Of course, I will paint the concrete blocks to match the surrounding foliage. When this is complete I will grow grass and ivy on the roof area to help keep the soil in place and blend and bushes in the front to hide it.

Now for the inside, I choose a thin layer of insulation for the ceiling and walls. This will keep the echoes down inside plus keep from getting a knot on the head when I stand up! For the floor, I like the industrial rubber floor mats, as the dirt falls below the mat through the holes. As for the ventilation, I am exploring several options with no decision made yet.

Of course, by now, I have all the necessary survival food, gear and tools in place and ready to move in. So we don’t get a tornado…we don’t have a mass extinction event…now I have a great root cellar and a fort for my 5-year-old to play in. All in all, it costs about $2000 and some diesel fuel for my tractor to build. Not bad…for an old country boy in the mountains!

Check out this video for more awesome underground bunker ideas!

Man builds $65 thousand doomsday bunker

Filed Under: Homesteading, Prepping

What’s The Best Extreme Cold Weather Clothing?

December 7, 2018 M.D. Creekmore

Cold weather clothing

by Andrew Skousen and Joel Skousen, authors, Strategic Relocation and The Secure Home

Threats of the Cold:

Every year people die during the cold and storms of winter because of lack of preparation. Motorists get stuck in blizzards and succumb to the cold when their fuel runs out and old people freeze when their furnace stops working during a power outage. These kinds of deaths will be much more prevalent if war and/or an EMP strike brings down the national power grid for a time (a few months if we’re lucky, a year if the establishment doesn’t get their act together).

For survival situations, you have to consider if your main or backup heating systems are going to operate when the utilities are down. Stored fuels like oil, propane, and coal are fine while they last, but these furnaces require some electricity to control and run the fan.  Renewable resources like wood are limited as well for those who don’t live near a dense, wooded forest. Fortunately, most wood stoves don’t need any electricity. But ultimately, everyone ought to be prepared to survive without external heat.

A Better Way to Stay Warm:

To survive in the cold focus on keeping your body warm—not the space around you. Modern long underwear is thin and comfortable and will keep you warm down to 40 or 50 degrees depending on your activity and other outer layers. Even cotton works if kept dry, but when it gets wet it loses loft and keeps the water close to your skin drawing out heat and making you clammy and cold (this is why survivalists say “cotton kills”). Long wool underwear is still the best of nature’s fabric—especially if you’re moving a lot and perspiring. Wool retains some loft and the new Merino blends aren’t itchy and are machine washable as well. If the daytime temperatures in your house drop below 40 degrees, however, you’ll need a better heat retention system. Fortunately, there is a modern solution to keeping warm even at extreme temperatures.

The 3 keys to staying warm are: retain heat, evacuate moisture and stop wind chill. Jim Phillips, a scientist, and experienced winter survivalist is the originator of cold weather clothing made with open cell foam which does the first two.  A suitable shell does the third. Foam retains heat in the air pockets throughout its structure and evacuates water by soaking excess moisture off your skin like a dry sponge.

Foam clothing does this best if worn close to your skin with a breathable (non-cotton) layer in-between like polyester or nylon. Open cell foam allows hot air near your body to slowly migrate through the breathable foam, absorbing and carrying moisture on its way out. Cold acts like a vacuum pulling some of the warmth (and the moisture in it) outward. The colder it is outside the better the moisture evacuation works. The density of the foam retains warmth even as the moisture is wicked away to the atmosphere.

Phillips wears a windproof outer shell to keep wind chill down and found that with 1” foam clothing he could stay comfortable for days on end in the Arctic. You can still order clothes from Jim’s site ($175 each for the coat and pants or $315 for both) or if you know how to sew, you can buy kit materials from them with instructions on how to do it yourself.

Fortress Clothing:

We have recently been able to test the latest improvements in severe weather clothing with a slightly better type of engineered polymer foam (EPF) from Fortress Clothing. Fortress has pioneered the latest advances in this technology and found an optimal foam for density (retaining heat) and breathe-ability (evacuating moisture) and the results are impressive. They sell a complete package of ½” foam clothes they stuff in a “bug out bag” and the total package weighs less than 5 lbs. They say the comfort zone for these clothes is a full 100 degrees of variation (-30 to 70 degrees F) with the caveat that this range depends on a person’s metabolism, exertion level, hydration, and health.

Fortress Clothing puts a rip-stop, windbreak fabric outside the foam and a polyester mesh on the inside so the foam clothes are comfortable and durable but they still recommend wearing an outer shell. They have found the shell can be waterproof as long as it isn’t tight fitting—you want enough air to circulate that the foam can do its job at evacuating moisture. That’s all you need for – 30-degree conditions you say—only two layers? -No down, fur, or Gore-Tex? I was skeptical too.

We have tried these clothes out in the Rocky Mountains during a snowstorm.  Andrew also ran two miles uphill in freezing temperatures until he had built up a sweat. Then he stopped and waited to get chilled.  It never happened. He even lay down in the snow for 15 minutes but was still comfortable. He then tried them indoors with the furnace off, sitting for long periods at his computer in 50-degree temps. These clothes tend to maintain an optimum temperature in a wide variety of activities.

Consider the worst winter survival scenario: You are cold and wet after getting soaked by rain, melting snow or (absolutely the worst case) falling into icy water in a lake or stream. In normal winter clothes, the sudden freezing temperatures can bring on hypothermia within minutes unless you get a fire started quickly and have access to dry clothes. But, not so with foam-based insulation.  As soon as you extract yourself from the water, the foam starts to drain and the air pockets start retaining warmth. Here’s a video of people who jumped into ice water with Fortress Clothing and documented how quickly they recovered. People reported feeling warm in less than a minute and actually dried out in about five hours—all without changing clothes or starting a fire, which normally spells death in any other clothing.

Other Fortress Improvements: Foam clothes are inherently bulky and tend to bunch up inside the elbows and under the knees, so Fortress designed some ergonomic advances into their outfits that increases comfort. They shape and sew the foam in these areas to be more comfortable. It still feels like a foam suit when you first put it on, but the foam is soft and pliable so it doesn’t restrict movement. You can even sleep in it comfortably.

Slits at the side keep the jacket from bunching up in your face when you sit down and the long tail keeps your back warm when bending over. The foam head covering is a balaclava—a hat and scarf in one. It’s not stylish, but you will love it when the wind is blowing. The wide, padded chin wrap does a good job of keeping your lower face warm too. A large Velcro attachment lets you adjust it over or under the chin at your preference (or wrap it behind the head, out of the way). But the feature we loved the most was the wide ring of double wind-stop material attached to the bottom of the headgear: it blocks all cold drafts and keeps snow from getting down the back of the neck—much better than any scarf.

The “hot socks” are great slippers around the house but you will want extra large boots to use them during work or outside play. I bought rubber boots three sizes larger than my feet in order to fit over the inserts. Even after walking a few miles my feet did not build up a sweat thanks to the foam.

The mittens are simple but well made with full foam all around the hand and a generous cuff. Fortress cuts and sews the foam to match the curve of the hand so the mittens are useful instead of just filling your grip with foam. Hands seem to stay much warmer in these mittens even when you wear a less effective conventional coat.  And, with the foam jacket on, you often don’t need gloves since your core is warm.

The Fortress outfit is all black, but that doesn’t matter because you cover it with an outer shell of your choice. We recommend that the uninsulated shell have a hood so it fits over the foam jacket and hat loosely. The pants shell should be loose fitting too.  Ski pant shells are ideal, but so are coveralls or baggy workout clothes depending on the kind of activities you are engaged in.

You can also buy this clothing in the 1″ thick version that protects you down to a whopping -68 deg. F., but unless you are planning arctic expeditions or live/work where it frequently gets below -30 F., I doubt you will need the extra bulk. What we really like about this high-performance half-inch clothing is that it provides warmth clear down to well below zero, but is light and flexible enough to be used for active outdoor work, hunting or recreation—horseback riding, skiing, snowmobiling, hiking and snowshoeing—without getting overheated. With no more bone-chilling rides on the lift, you will never have a more enjoyable ski experience than with this Fortress gear.

Cost and Discount Offer:

At over $700 for the complete bundle, these severe weather clothes aren’t cheap, but we consider them the ultimate in quality. We have no financial interest in any of the reviews we perform, but Fortress has offered a big discount for subscribers to Joel’s World Affairs Brief—a geopolitical newsletter, which alerts readers to all the current threats we face. Subscribers get a generous 25% discount when they order by December 10. Put another way, the coupon will repay the cost for the year’s subscription and still save you over $125 when you buy a Fortress outfit in the neat, compact compression bag that is ready to store in the back of your car or replace all your other coats and winter fuel supplies. (Create a login, pay and then click on “Latest Brief” to read Joel’s analysis of the Paris attacks with this coupon code in the Prep Tip at the end).

The Fortress website is (www.fortressclothing.com or toll free 855-487-9276). If you can’t afford the whole outfit, start with the jacket, and then the hat and pants. Everything is handmade in the USA with specially designed, high-quality foam (a big part of the cost).

Remember too that this is innerwear that will last for decades. The outer shells you wear over it will take most of the wear-and-tear. And while this lightweight clothing package is the easiest way to tackle winter cold, without gas, wood or batteries, it also serves all your outdoor work and recreation needs during the remaining good times. Highly recommended. [END]

Filed Under: Bushcraft

  • « Go to Previous Page
  • Page 1
  • Interim pages omitted …
  • Page 55
  • Page 56
  • Page 57
  • Page 58
  • Page 59
  • Interim pages omitted …
  • Page 79
  • Go to Next Page »

Primary Sidebar

Subscribe to Blog via Email

Enter your email address to subscribe to this blog and receive notifications of new posts by email.

Join 7,202 other subscribers
  • Amazon
  • Facebook
  • Substack
  • Twitter
  • YouTube

“Do more with less.”

– Minimalist proverb

Recent Posts

  • Just so you know
  • Weather Update for My Corner of Appalachia
  • Why I’m Ordering Ivermectin + Mebendazole Every Year
  • The Website’s Shutting Down (But Here’s the Plan)
  • You Are Hated! Start Training Like It!

Footer

Recent Posts

  • Just so you know
  • Weather Update for My Corner of Appalachia
  • Why I’m Ordering Ivermectin + Mebendazole Every Year
  • The Website’s Shutting Down (But Here’s the Plan)
  • You Are Hated! Start Training Like It!

More about me

Books I’ve written

Books I’ve read

Follow Me on YouTube

Follow Me on Facebook

Gear I Use and Recommend

Newsletter

Search this site

Follow me elsewhere

  • Amazon
  • Facebook
  • Substack
  • Twitter
  • YouTube

© 2008–2025 M.D. Creekmore · As an Amazon Associate, I earn from qualifying purchases.