• Skip to main content
  • Skip to secondary navigation
  • Skip to primary sidebar
  • Skip to footer

M.D. CREEKMORE

  • Blog
  • Books
  • Newsletter
  • Gear I Use
  • About
  • Contact
  • Facebook
  • YouTube
  • Blog
  • Books
  • Newsletter
  • Gear I Use
  • About
  • Contact
  • Privacy Policy

Blog

What to Look for in a Survival Retreat Property

January 11, 2019 M.D. Creekmore

prepper retreat locations

by Biff Brannon

There is some good literature out there regarding setting up a survival retreat location.  In fact, if you were not aware, MD Creekmore, the owner of this blog site has a book out called “Dirt-cheap Survival Retreat: One Man’s Solution” (click here to find out more about this awesome guide) that goes into some detail regarding setting up a survival retreat location for very little cost.

I do go into some of that in this particular blog post as well, but mostly this article is about the importance of having a retreat location to fall back to.  Especially for those who live near cities.

We should consider ourselves lucky that large scale disaster events are few and far between.  Most survival situations run for a short duration with many lasting less than ten days and are what I refer to as ‘green’ events (a disaster lasting 1-10 days). Most green events can be handled by hunkering down at home with an ample supply of survival food and water and some alternative cooking means such as a camp stove or even your back yard gas grill.

Throw in some other basic survival gear (here is a link to MD Creekmore’s favorite gear) that can be easily found at any outdoor camping store, some common sense thinking regarding prepping, and you will be set to face a green event.  However, larger disaster threats are out there, and such events that fall into the ‘yellow’ and ‘red’ event category (yellow event 10-90 days, red event 90+ days into years) typically spell bad news for entire regions and sometimes entire countries.

You can pretty much count on a yellow or red event having a complete breakdown of society at some point.  Water service might not be operating, electrical power may not be available, stores will not be getting resupplied from distribution centers, people will start to starve and panic, looting, and rioting will take place, people will die, people will get sick from poor hygiene, some will contract otherwise controlled diseases, the government will not be able to keep control…  it will be basically everybody fending for themselves.  And the worse place you will want to be is anywhere near a city or large town.

Hunkering down at your apartment or home is not always going to be a good idea in the case of yellow or red events, as bands of looters will eventually end up going from house to house or apartment to apartment.  This is where the survival retreat location comes into play for people who are serious about being preppers.

Some of us are lucky enough to already live far away from cities, however, most of us are not.  Those of us who are not that lucky will need and want to have a retreat location.

When it comes to survival retreat locations, like any other piece of real estate, the mantra is location, location, location.  A thirty-minute drive from the outskirts of a city to a friend’s farm is not going to be a good retreat location, but nor is it necessary to buy a place in rural Idaho where the population is as low as two people per square mile.

The Golden Horde Theory

When looking to set up a retreat site you want to try and be at least one full tank of gas plus a minimum of another fifty miles away from any major city/suburb center.

That comes out to about 300-350 or more miles.  And you certainly want to also be at least fifty miles away from any major highway or interstate.  The reason for this is because when things really start to go bad in the cities people are going to start to leave them in a massive exodus.

Once people notice other people loading up their cars to leave town there is going to be a domino effect.  When exactly that will happen is hard to say.  Some people will have enough smarts to see where things are headed and get out ahead of everybody else.

That is the kind of person you need to be.  Others will keep on thinking things will get better and try and ride it out, only deciding it may be better to leave the city once they are down to having hardly any food or water and no way to get more.  By then it may be too late to safely leave.

Those roads and various other travel routes such as railways and river-ways are called ‘channelized areas’.  You can expect these channelized areas to be jam-packed with people fleeing the cities.  The highway, in particular, will be a very bad situation as people stop to try and get supplies along their route.

Eventually, gas stations, other retail centers, and even small communities along the major roadways will run dry of gas and supplies.   Cars will run out of gas or just breakdown along these channelized areas.

This will clog the highways and bring travel to a stop.  People who fled the cities will get out of their cars at that point and load up as much of their belongings as they can carry and start walking on foot.

At that point, they may stop following the highway and just spread out from their location in all directions.  People are either going to have what they need to survive for a few days or they are not.  The people who don’t have what they need and do not have skills to find food and water in rural zones are going to prey on those that do have food and water.  It will be a very dangerous situation.

People leaving in the mass exodus will probably think to go as far away as possible hoping that things will be better in another part of their state or region in the country.  However, in a red level event that affects the entire country or the world, things are going to be bad everywhere, and probably for some time.

Some will try to head to a relative’s home far away.  Others may think they should head towards where there is lots of water.  Some will want to head to farm country.  Other may decide they will head to the wooded and forest regions to try to lay low by camping.

It is safe to assume that people spreading out from the cities will not get very far without food, water and survival gear, and skills.  That is the reason why you want your retreat location to be as far away from cities and their channelized areas as possible because the refugee situation will be devastating.

Anything within sight of a group of desperate refugees, be it a house, store, landmark, barn…anything, will be traveled to and searched for supplies.

The more desperate the refugees, the more dangerous they will become.  Starvation and thirst will make people do things they would not normally do, not only for themselves but especially for a loved one.  So you need to be far away from such threats as possible.

The further away you are from channelized locations the less interaction you will have with desperate people.  But still, count on having such interactions, and be prepared for when they do occur.

So when looking for a retreat location what kind of place do you want to search for?  Some people will look for real estate such as a cabin on a lake or a secluded hunting cabin in the woods, others will look to purchase property in farm country and perhaps buy a small hobby farm, others may think to load up their camping gear and head into the backwoods where they have gone camping before.

And there are others that will look for an in-town retreat, meaning a small community of less than a few thousand people. All are viable options, and some may be better suited for certain regions of the country.  Of course, it also depends on what you can afford.

Of the few options, I mentioned above let’s take a look at the two defining differences: Secluded survival retreats and in-town survival retreats. Both have their own pros and khans.

Survival Retreat – In Town:  Pros

  1. You will be part of a community, hopefully where people help people.
  2. You will benefit from having lots of community people you can barter with.
  3. You may benefit from the security precautions the community takes, especially if law enforcement remains intact.
  4. You may benefit from any local hospitals or clinics.
  5. You will benefit from a greater skill pool off all the people in the community

Cons

  1. Greater risk of being burglarized.
  2. Increased risk of communicable diseases.
  3. Greater risk of your prepping lifestyle being noticed and your supplies confiscated for the “good of the community”.
  4. Limited privacy.

Survival Retreat – Isolated:  Pros

  1. You will have better privacy.
  2. Easier to hunt from right outside your door.
  3. More room for gardening.
  4. More control over your own supplies.
  5. Better control of overall sanitation.
  6. Batter able to keep livestock close and easier to feed.
  7. Much lower risk of communicable disease.
  8. Lower land and house prices.

Cons

  1. The more isolated you are the fewer opportunities you will have to barter for needed items.
  2. Probably will require more than one family unit to provide adequate security.
  3. You should not depend on much help from neighbors or whatever law enforcement may be left if attached by looters.

Personally, for my own retreat planning I have two locations; a primary location and a secondary location that is about a 2-day walk from the first.  Both I would classify as isolated, though they are located less than a day’s walk from small communities of 400 or fewer people where I and my family are well known.

A few other things to think about when choosing a retreat location:

  1. It should be 350+ miles from major cities.
  2. It should be located 50+ miles from major interstate freeways and other channelized areas.
  3. Good local resources for wood, wild game, crop growing, and of course water.
  4. Good source of surface water (saying this again a different way because water is important) and year-round precipitation.
  5. No risk of flooding, major earthquakes, hurricanes, forest fires that would burn your retreat home, etc…
  6. Some natural defenses like hills or berms that make prepping for defenses would be preferable.
  7. Low population, as fewer people around will mean fewer problems.

Now that we have broken down the isolated retreat against the in-town retreat, lets take a look at the preppers who want to head off into the wilds all alone and survive on bugs, chipmunks, deer, and living in man-made stick shelters under a blown down tree versus a prepper who plans to hold up with family or friends.

As for the lone prepper, personally, I do not think that is a very good idea.  I have the utmost respect for people like Les Stroud (read this article written by Les Stroud for M.D. Creekmore.com).  The skills of the man are amazing, and while such skills will keep you alive for a few weeks and possibly a month, surviving in the wilds like that long term can have devastating effects on a person.

Trying to survive on such skills as demonstrated by the TV show survivalists for many months to a year or more is going to be very difficult.  Even if you know how to build a log cabin and sustain yourself with food and water and scrounging wild roots and veggies, you are taking a big risk just by being alone if you get hurt.

If you get hurt or even sick bad enough to keep you from maintaining your food and water stores you are going to die.  If you break your tools that you brought with you and have no way of fixing them or bartering for new tools you are going to die.

If your hunting rifle breaks or you run out of wire or thread suitable for snaring or hunting game, you are going to get very hungry and could die.  For me, going out alone into a survival situation for extended periods like a yellow or red event is just asking for trouble.

You need to know how to do everything for yourself, you need to know how to do it well, and you need to make sure you are always healthy enough to maintain camp and supplies to be able to keep alive.

Being part of a family unit or a group of like-minded friends, or a combination of the both is a safer way to prepare when planning a survival retreat location.  For example, I am part of a small group of like-minded family and friends.

Some of us have paramedic and nursing work experience, some of us are former military including military police, combat medic, and a force recon marine.  Some are avid outdoors-men who can hunt and are familiar with woodland survival techniques, others know how to plant and grow food and how to preserve food for storage…  the knowledge and skills spread out over ten different people are not only diverse but amazing.

Also, think about all the knowledge that can be cross-trained from members of your survival retreat group.  If somebody takes a class on soap making or maybe animal trapping and all you need to do is hold a class for the group and cross-train that new knowledge.

Another good thing about being part of a group of preppers is that it can really help bring costs down.  Think of a retreat location more like a vacation spot out of the hustle and bustle of city life, and maybe go a step further and look at the retreat as a timeshare property or a membership managed LLC that owns a lodge open to use by members only.

Of course, it may be easier if just one person owns the property and is open to work and tools contributions from the group.  Either way, if you set up a prepper group you need to know you can absolutely trust the people you are forming up with.  This may be less important when dealing with just family members.  Either way, there will be arguments over things.  Be prepared for that as well.  But remember the ultimate end goal you are trying to achieve.

The fact is that if you are facing a yellow or red event than you can almost certainly expect the power grids to be down and then eventually everything else that society provides is going to fail as well.  You retreat will need to be ready for the kind of living our forefathers experienced before electricity and motorized equipment.

You need to be ready to get back to the basics such as growing your food in a garden, using an outhouse, digging a well, patching threadbare clothing, making your own soap, tending to livestock, sharpening axes and saw blades, canning preserves, making candles, smoking and salting meat for storage, etc…

Not only does a retreat location require money for equipment and tools you may need, but it will also require to you to be prepared with a whole new set of skills to be able to live comfortably, or at least as comfortably as you can.  Depending on the climate your retreat is located in will largely depends on some of the tools and skills you will need to have, but mostly I think you will find that most skills and tools will apply in most regions.

Of course your retreat is going to need to be stocked with the usual items such as eating utensils, plates, glasses, furniture – it is a second home, after all, assuming you are not able to relocate and live at your retreat location year round, so you will want to make things as comfortable as possible and get enjoyment out of it even if it never needs to serve its purpose as a survival retreat.

But let’s take a look at some suggested things in the list below that you may want to consider having or planning for.

Survival Retreat Prepper List:  Above and Beyond the Usual

Water:  You will need to know how you will be able to get water for survival at your retreat.   There are many different ways to secure water.  Once you have it, you will need to be able to store it safely for short periods of time until consumed. (click here to read MD Creekmore’s detailed article on water).

Food:  Store more canned foods, MREs, bulk rice, bulk wheat, bulk beans, bulk salt.  Learn to can and preserve your own foods that you grow or harvest from wild plants.  Your canned and stored foods may not last as long as the disaster event does, so be prepared to learn some skills such as farming, hunting, fishing, and foraging for wild foods. (click here to read MD Creekmore’s detailed article on prepper food storage).

Fitness/health:  Before a major survival event strikes you should seriously think about getting done any elective surgery procedures you have been putting off.  Take care of any dentistry work.  Stay in shape.  If you are not in shape, get in shape or at least better shape. (click here to read MD Creekmore detailed article on medical preparedness for preppers).

Personal Items:  You should make a separate list for each member of your family or person who is expected to stay at your retreat during survival event.  Things to think about; spare glasses, prescription medications, birth control, and feminine products all come to mind right away.

Chemical and Nuke Defense:  Geiger counter, HEPA filters, potassium iodate, means to shower outside your retreat.

Pandemic Defense:  Hand sanitizer, disinfectants, antibiotics, and antiviral medications, N95 masks, expectorant.

First Aid:  It would be a good idea to get advanced first aid training, possibly EMT or Paramedic level if possible.  Have a first aid kit on hand equal to or greater than your level of medical aid ability, and have extra supplies of everything.

Hygiene: Soap – lots of it.  It would be a good idea to learn how to make it.  Suggest that you have bottles lye on hand to help you make soap.  Toothpaste or powder, floss, toilet paper, sunscreen, alternate toilet paper for when the good stuff runs out.

Gardening:  Learn to garden and look into buying and storing non-hybrid seeds.  There are so many numerous gardening tools out on the market that to list them all here would take up too much space.

Start out by keeping it simple and buy the basic rakes, hoes, shovels, tillers and hand garden tools.  If you don’t know a thing about gardening you better find out right away and start learning.

Being able to plant your own garden and raise your own crops could mean the difference between starvation and living.  Aside from learning how to grow food to eat, you should also look into growing your own medicinal herbs.

Livestock:  It wouldn’t hurt to have a dozen chickens, a couple of cows, and some goats.  Being able to have some fresh eggs, milk, and make your own butter would be a great benefit to any survival retreat.  Of course, having such animals will take some work and possible new skills.  How far you want to go with keeping livestock is up to you.

Hunting and Fishing:  Being able to hunt and fish could help greatly towards keeping you well fed.  Look into what wild game is located in your region and learn how to hunt and trap it.  Learning to smoke meat can help in long preservation in any large game animals you harvest.

Fuel:  Buy plenty of extra fuel.  Gasoline, kerosene, propane, diesel…whatever.  If you have something that runs on fuel, make sure you have extra of it and don’t let your primary tank fall below half full.

Gasoline does not keep for a long time, but diesel stores better than gasoline – either way, keep some additives such as STABIL that will help extend the life of gasoline and diesel fuels.  Rotate out any old fuel you have stored when you buy new fuel.

Security:  Fences, locking gates, locking road cables, reinforced doors, night vision gear, guns and ammunition, razor wire, black plastic to cover windows (keeps light from inside being seen outside at night), security patrols. (click here to read MD Creekmore’s detailed article on retreat security)

Firefighting:  In a green, yellow or red event the fire department may not be able to respond.  So be ready to fight your own fires as best as you can.  Keep fire extinguishers inside your retreat, replace your roof with a fireproof metal roof, keep trees, hedges and brush at least fifty yards away from your retreat house.

Maintain smoke and carbon monoxide detectors inside, and have fresh batteries on hand to make sure they are always working.

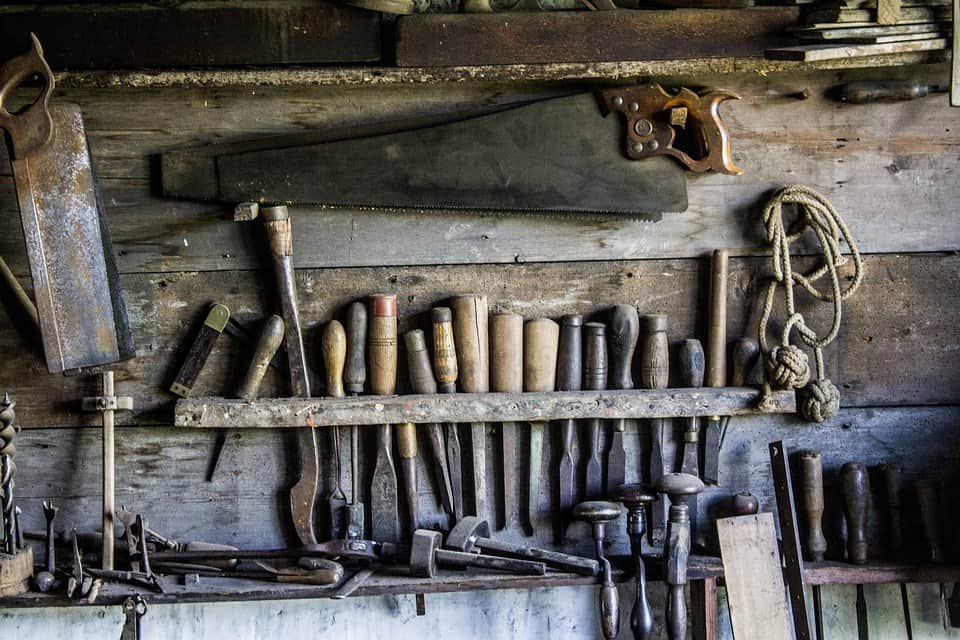
General Tools:  For gardening, gun-smithing, auto-mechanical, woodworking.

Communication:  Having a handful of two-way radios is a great way to stay in contact with people who are out working in the yard or field with those that stay behind at the retreat house.  Communication is actually a part of your security list as well.

Don’t have the means for a hardcore survival retreat location?

Now, not having a good retreat location can be a problem depending on the type of event you are facing.  A green event is probably not going to be a problem where you need a retreat location, but then again it may be easier on your life and that of your family to still leave home for a while.

Depending on the type of yellow event; perhaps a tornado, earthquake, massive flood, or thermal nuclear terrorist event to name a few possibilities that affect only your immediate area, you may be able to go live with extended family 500 miles away for a few months.

A red event is truly the worst-case scenario, and more than likely it is going to involve something on a grand scale that not only affects the country but could affect the world and certain to involve a total collapse of society.

As mentioned before cities are going to be something to avoid, and the suburbs would be overrun with looting and scavengers as people flee the cities.  Having a good retreat location is going to help any prepper survive that normally lives near or around a city.

So what can a prepper do if they do not have the means for a secluded hobby farm, hunting cabin, or even just a second piece of vacant property out in the middle of nowhere away from channelized areas?

My first suggestion is to possibly try and meet like-minded people with the prepper mentality.  There is certainly better security to be found with good people and forming a ‘prepper group’.  Perhaps somebody in the group has a retreat location that everybody can use.

It may mean helping out with chores around the property to help keep it at the ‘ready’.  It may mean helping secure provisions and cross-training skills with the rest of the group.  Maybe it even means helping pay taxes or insurance on the property.

The key thing to remember is to be very selective with any such group you may look to join or form on your own.  Make sure you are 100% comfortable with the people and your interactions before getting involved too fast.

Another suggestion is to find a remote campground run by private mom & pop owners.  These campgrounds tend to be off the beaten path, so to speak, and are more than likely used by ‘regulars’ throughout the year.  Avoid the larger campgrounds like State Parks and KOA campgrounds, as these are at the foremost of people’s minds and are more commonly known and thought of, and are more than likely to be flooded with refugees from nearby cities and suburbs.

Possibly get familiar with a couple smaller campgrounds and find one that is a good fit for you and the family by going there to camp a few times or more a year, preferably one that has good pit toilets already in place and has water sources close at hand.

Get to know the people in the community around the campground.  You can be sure that other people will show up at a campground during a yellow or red event.  But the odds that the people that do show up are going to be people who are regulars at the campground and there will possibly already be a sense of community at such a location.

Now, if deciding to use a small remote campground as a retreat, the key to survival will be learning a variety of camping skills, having extra camping gear that is made of good quality materials and possibly even having extra backups of things like tents and clothing.

You also want to be able to organize with the other people who show up at the campground.  Organization means getting the group of campers together to work towards the greater good of the larger group by forming a solid community.

That means taking care of sanitation requirements for a large group, managing water sources for a large group, finding food either by hunting, foraging or maybe battering with nearby farms, growing food, and generally the sharing of some resources.

As for growing food, it would be a good idea to have a wide variety of seed bank seeds available, not only to meet your family’s needs but also extra to help provide for the larger needs of an entire campground.

An extremely negative reason to retreat to a campground is if the event that is forcing you away from the city is a deadly pandemic.  In the case of a pandemic, you will want to try and limit the amount of contact you have with people until the pandemic burns itself out, which the CDC (Center for Disease Control) says could take 90 to 120 days during the first outbreak.

By limiting contact with people outside your family or prepping unit, you will also want to keep anybody you come across at least several yards away from you just in case they are carrying whatever pandemic bug is out there.  Of course, limiting yourself and your group from people would be hard to do if retreating to a campground.

Of course, don’t forget to read the book “Dirt-cheap survival retreat: One Man’s Solution” written by the host of this web blog page.

Filed Under: Prepping

Vegetable Garden Ideas for Small Spaces

January 11, 2019 M.D. Creekmore

vegetable garden ideas for small spaces

by Jason Smith

Living on the side of a mountain is nice, but it raises some interesting challenges to gardening. Since the land my house sits on was literally carved out of the mountain, the soil is blasted rocks and dirt, leaving much to be desired when trying to garden. My solution to this issue was to stay above ground, using pots and barrels as well as building a raised bed more than a foot off the ground.

Raised Beds

The construction of a raised bed requires some thought. Some considerations include the space you have to work with, the materials you will need, the number and type of plants you want to put in, and your ability to reach the plants once they are in the bed.

We don’t have much of a back yard, so we opted to make a smaller bed. The final dimensions for our bed are 7 feet long, 3 feet wide and 1 foot deep. The bed is raised over a foot off the ground on sturdy wooden legs. The dimensions for a raised bed can be altered any way you like to accommodate your space and needs.

Since we had some money saved up, we chose to purchase all new materials to construct the bed. The frame of the bed was created using four 8 foot long boards and four 4 foot long boards. To save money, these boards were not pressure treated. For the legs, I used a pressure treated 4 x 4 cut to 5 feet long for the front legs and 4 feet long for the back legs (the bed sits on a slight slope).

Using four 8 foot long boards and four 4 foot long boards the sides of the boxes come to life. To save money these boards were not pressure treated.

For the legs, I used a pressure treated 4×4 that was 8 feet long and cut it down to the desired lengths. The front legs are cut to 5 feet long and the rear legs cut to 4 feet long. One foot is used lost depth of the bed

I stapled chicken wire to the underside of the bed and reinforced it with slats of reclaimed wood on the short ends of the bed. For added support, I used leftover boards spaced about 1 foot apart across the bed. The best support was given by 5 boards cut 4 foot long.

We applied 3 coats of exterior latex paint to minimize moisture damage. Then, I lined the sides and bottom of the bed with a garden cloth. Garden cloth allows water to pass through the bottom of the bed and discourages root rot without the loss of precious dirt.

Before adding the dirt I leveled the whole bed on all four sides. Once the dirt was added, I checked again to make sure the bed was level. With a perfect level, you don’t have to worry about the dirt running off the plant roots or piling up on the low side of the bed. I also added an irrigation system to my raised bed that consisted of a pipe, a spigot, and a soaker hose.

When the bed was finished, we planted lettuce, 4 pepper plants, 4 cucumber plants, carrots, onions, and spinach. It turns out that there is plenty of extra room for more plants later in the season. You have to be careful with some plants as they want to run and can take over a bed. To get around this we planted the cucumbers in the back of the bed and added a web of hung twine for the plant to run on.

Reach is something important to keep in mind. You have to design bed so that you can reach at least the midway point for weeding and harvesting. However, if you have tall or running plants in the back of the bed you won’t be able to reach in from that direction. Another thing to consider is how much do you want to bend when tending your garden? Raised beds can be built as high or as low as you want.

Pros:

  • Flexible in design
  • Visually appealing
  • Keeps some critters out

Cons:

  • Can be costly
  • Limited space once it’s built
  • Requires some extra watering

Potato Barrels

Potatoes are wonderfully resilient root veggies. I have heard of people growing them in all sorts of conditions. The most interesting was a stack of tires. While I couldn’t get my fiancé on board with that, we compromised on the purchase of two plastic containers for our potato barrels.

Once we had our barrels, we added a layer of dirt followed by a layer of potato quarters with good eyes on them, repeating the process until the containers were full. A few months later, we have large potato plants and tiny potatoes growing. It was surprisingly easy and takes up a 5 foot by 10-foot space. If all goes well we will have a few pounds of potatoes with very little space cost.

Window Boxes

Personally, I love window boxes as they are flexible, well-shaped, and do not take up a lot of space. We currently have 3 24-inch window boxes set out. One with flowers (not food but it makes the lady of the house happy), one with green onions, and one with leafy lettuce.

My fiancé planted a bunch of marigolds in the first box. They are pretty but don’t taste good.

Since the leafy lettuce can be planted closely together and then thinned we loaded it down and now have a thick patch of lettuce for salads. The real benefit is that if you do this correctly you can cut the lettuce and it will re-grow.

Green onions need almost no space to grow and can be quickly and easily replanted. We eat a lot of these in salads and with pinto beans and cornbread, and the window box allows us to grow a crap ton (a very technical term) of them in a small amount of space. The trick is to replace a new bulb in the hole of each onion you pull to enjoy the yummy returns all season.

Final Thoughts

The most important thing I have taken away from figuring out how to garden in a limited space is that, with a little creativity, you can garden successfully no matter how small your space is. Of course, you have to pick the right plants and understand your limitations.

I know that I cannot grow corn in my limited space, but I can grow enough other plants to make that trade-off worthwhile. Fresh, homegrown fruits and vegetables taste better than anything you can get in the store. If you have limited gardening space, container gardening can help you experience this firsthand.

Filed Under: Homesteading

Homemade Solar Food Dehydrator That Works!

January 11, 2019 M.D. Creekmore

Homemade Solar Food Dehydrator That Works

by Carol B

You will be building three (3) different box-like units, all of which will fit together and work to dry your food in the sun.

The finished dimensions of your solar dryer will be two (2) feet by four (4) feet. You will not be building legs from these directions, but could do that very easily “whenever”. If you are going to build legs, we suggest using PVC pipe and setting them in 5-gallon buckets, with enough sand or concrete to hold them in place but allow for water in the bucket.

The water will keep ants and crawly things from crawling up the legs while your food dries. I do not do this; I simply check it from time-to-time and make sure there are no critters; so far, so good.

You can use virtually any wood you like; we used cheap pine because we’re cheap; but, it’s not well finished, and I have managed a couple of splinters in handling the pine, so, consider that when deciding what wood to use.

Homemade Solar Food Dehydrator That Works

You can spray paint your metal sheet on one side and let it be drying while you build your boxes (see box # 3, below).

Box # 1 (bottom): you will need 2-inch x 4-inch wood (untreated – you do not want chemical toxins in your food supply) and a 2’x4’ sheet of corrugated metal roofing-type material. The first box will be the bottom box which will hold the sheet metal “heater”. Build your two (2) foot by four (4) foot box – we did not center support this box, but, you can if you want.

Attach a sheet of corrugated steel to the top by whatever means you prefer (nails, bolts, screws), so long as it lies flat against the surface of the frame, and covers the entire frame, two feet wide by four feet long.

You will need food-grade polypropylene screen, and you can order it from the folks below. DO NOT try to use aluminum screening or recycled housing screening for a food project. You will also need screening spline and a sharp instrument for cutting.

Homemade Solar Food Dehydrator That Works

We purchased polyethylene screening from www.dryit.com email: orders@dryit.com 1-800-609-2160 MacManiman Inc. 3023 362nd Avenue S.E. Fall City, WA 98024

Box # 2 is not one, but two (2) separate boxes built of 2”x2” boards, each of them two (2) feet x two (2) feet square. Build your frames. Dado the top of them out to create a groove to receive your screening and spine.

Cut your screening to fit across the tops of each of the two boxes, allowing extra to hang beyond frame; place your spline and, using a spline tool, work the splining material into the groove. Trim any excess. Having two separate frames will allow you to dry more than one kind of food at a time, if you wish, without having them “blend”.

For # 3, you’ll need sheet metal (either one 2 ft. by 4 ft. sheet, or qty. two 2 ft. by 2 ft. sheets; black spray paint, and two ft by four ft (2’x4’)’ Lexan or Plexiglass (have it cut at any window glass store) sheet, washers and screws, and waterproof clear acrylic sealant). The Lexan we bought was about $40, so, expect to pay $$$.

Homemade Solar Food Dehydrator That Works

Box # 3 is a single 2’x4’ frame which is braced across the center; cut sheet metal to fit 2’x 4’ (we used qty. two 2’x2’ of sheet metal 1/16 inch thick, because, that’s all we could find). Spray paint both sides of the sheet metal; allow it to dry.

Use screws or nails to attach sheet metal to one side of 2’x4’ frame; this will become the bottom of this piece. Lay a bead of silicone for the Lexan, all around. Now attach the Lexan across the top; you can pre-drill it and attach with screws. Allow to dry.

We have old lawn chairs that we use as “legs”. It is important that the solar dryer be slightly angled for natural air circulation and turned toward the sun (duh!). We get a lot of sun in the Deep South, so solar drying is a natural choice.

Homemade Solar Food Dehydrator That Works

This unit does not utilize any kind of fan, or anything requiring power; you could run a fan under it, and, for some types of foods, it might help them dry faster. Most foods don’t require anything, other than checking from time-to-time until you learn how long that food takes to dry where you live.

Some foods, however, may do better if you turn the foods (move them around) every few hours – although I’ve used mine extensively and rarely turn the food.

Tip: All foods dry better if they are uniform in size; otherwise, smaller pieces will be overly dried while you wait on the larger pieces, or, you’ll have to pick the smaller pieces out in advance of the others, which makes this much more labor intensive – not necessary!

To use, the sheet metal box is the bottom; place food on drying screens (don’t pack it too tight) and place drying screens atop sheet metal heater box. Now place Lexan cover box on top, with black painted metal as the bottom of this box and Lexan facing the sun. Start cooking!

I hope you enjoy your homemade solar dryer; keep it out of the elements when not in use, and you should get years of service from it.

Filed Under: Power Generation

Hand Tools vs. Power Tools Which are Best for Preppers?

January 8, 2019 M.D. Creekmore

survival tools list

by John Herzig

I have read so many excellent and relevant articles on this site about prepping and survival that I am a little sheepish about submitting my own for your consideration.  I just would like to contribute some knowledge that might enhance someone’s life or help them develop a skill that they can barter or make life easier in the event of a collapse.  Here goes.

Having spent time (8 years) teaching woodworking (click here to get over 16,000 woodworking plans), drafting, metalwork, and leather work; I thought that I might have some advice on what tools one might gather in the event of the SHTF.  Perhaps the first question might be “electric vs. hand powered” tools.

The obvious answer is both as there is likely to be a few services available and what are will be able to charge “whatever’ the market will bear.  Being able to fix and construct projects makes you more valuable as a barterer or to a community of preppers.

In the event of a collapse, electricity will very likely be a luxury that many might not have so one may think that it would be much better to go heavy on the hand-powered tool side.  Granted, there are some obstacles to overcome with power tools.

Even if you have a solar/ battery system you will need some sort of conversion to AC current to allow the use of the corded tools.  A better solution might be the battery-powered tools that are very common these days.  These can be recharged at your home and taken out to the field or outbuilding for use.  Buy commercial grade if at all possible.  Some of the warehouse tools may be cheaper but the life of the batteries will fade over time and with repeated charges.

I recommend Milwaukee brand (click here to see what is available on Amazon.com) but that is just my preference.  I have a corded Milwaukee drill that I’ve used for over 25 years and it has performed flawlessly.  I’ve used it for everything from mixing paint to drilling concrete.  The cordless variety come in “kits” that contain multiple tools (more later) and batteries so one is always charged up.

Another advantage is weight.  If you have ever wrestled with 50 feet of extension cord while on a 12’ ladder with the drill over your head you’ll know what I mean. Be sure to think about accessories for the tools.  These can collect over time.

At any rate, regardless whether you have corded or cordless be sure you know how to properly use them.  Dealing with a nasty circular saw cut with no medical services could be life-threatening.  Any power tool can make short work of fingers or hands.  Steel Vs. Flesh – guess who wins?  Here is a list of the power tools I would recommend and I’m sure others will complete the list.

  • Commercial Grade 18V Lithium-Ion Battery Multi-pack –

These come in several configurations but should at least have:

  1. Drill- Impact or Standard – Don’t forget drill bits and screw driving bits (check garage sales).
  2. A “Saws-all” This is a tool that has a reciprocating blade from 4”-8”. It’s excellent for cutting pipe, pruning trees, drywall, demolition, and metal (if it’s not too thick) Blades for this tool are disposable and depending on what you’re cutting will determine their life.  Remember a dull blade is a dangerous blade.
  3. Circular Saw- Standard size is 7 1/4” but some come with smaller blades. These are used primarily for construction, framing, and cutting plywood.  Remember, blades, blades, blades.
  4. Other tools that may come in these kits are
    1. Radios
    2. spotlights
    3. angle grinders
  5. Small Contractors Table Saw – You can spend as much as you want on these. Sears makes them and there are some extremely expensive Swiss made saws that will exceed the capabilities of much larger saws.  This tool is used for making straight cuts from dimension lumber (2×4’s etc) and plywood.  They are almost mandatory for cabinet work (although some of the finest furniture ever made was done with hand tools)
  6. Angle Grinder – An angle grinder is used to smooth metal of any thickness or cutting large pipe. With a wire brush bit is can prepare rusted metal for painting or smooth metal cut with a cutting torch. I even recently used one to cut off the barrel of a .22 rifle to make a more “convenient” size weapon. Remember, blades, blades, blades.
  7. Palm Sander or belt-sander – Used to smooth wood and metal. Remember, paper, paper, paper.  Sandpaper comes in 8”x12” sheets.  Cut to fit on the palm sander.  In belts for the belt sander (think small treadmill).  They come in varying GRITS.  The larger the number, the finer the grit.  40 grit paper looks like it has sharp pebbles glued to the paper.  600 grit is almost smooth to the touch.  To get wood smooth you start with the low grit papers and work up successively to the larger numbered grits.  Belt sanders can also be clamped down and used to sharpen a variety of hand tools (good use for the angle grinder as well).

As I mentioned before, the really great furniture was made with hand tools.  Hand tools are IMHO absolutely mandatory in a SHTF scenario.  Personally, I almost always choose power tools over hand tools if power is available, but in skilled hands, man-powered tools are every bit as effective as power tools.  Two things need to be remembered about hand tools.

One, they need to be sharp (a dull tool is a dangerous tool), and two they are tiring! The first makes the second even truer. If you have ever tried to cut through a 12 “diameter tree trunk with a bow saw you’ll know what I mean.  Even cutting a 1×12 with a hand saw is a workout.  A properly sharpened plane saw, or chisel will be much easier and produce a better product with less effort when used properly.

Using hand tools takes skill and as with any survival, technique skill requires practice.  The more you use them the easier they become.  Start with small projects and work up to bigger ones.  Make a wall shelf (basically 3 boards) and concentrate on getting the edges square (90 degrees) and the board smooth.  Don’t be discouraged by your first efforts.  No one makes Queen Anne furniture on their first try.  These are some hand tools that I recommend but is by no means complete:

  1. Screwdriver set – both flat and Phillips’ head. You can add the star, square and other types of drivers as you go.  Try to collect as many different sizes as possible.
  2. Socket set- get a set that has metric as well as standard size sockets. I use S&K but I also have many Sears Craftsmen sockets as well.  The good thing about them is they will replace any broken items no questions asked (as long as there is still a store).
  3. Hand saws- Get a cross cut (for cutting across the grain) and a rip saw (for cutting with the grain or length of the board). Remember, you are powering the saw. Using the wrong saw for the job just makes it that much harder.
  4. Bow saw- Think of a very coarse blade where the string on a bow is. These are excellent for cutting firewood or demolition.
  5. Hand drill with an adjustable chuck- Yep, for making holes.
  6. Several crescent wrenches- get as many different sizes as possible. They fit every size nut and bolt.  The older the better.  The steel and fit of the moving parts are so much better than today’s tools.
  7. Hand planes- Get a small jack plane (4-6” long) for rounding off sharp edges and smoothing edges of lumber. If you can find one, get a jointer plane.  These are up to 2 feet long and are for planning the faces of lumber for say a table top.
  8. Axe & hatchet- for felling trees and making kindling. Again, keep them sharp.
  9. Clamps and vises- there are many different kinds. Bar, C-clamp, pressure, and tabletop.  Collect as many as possible as they have a multitude of uses.
  10. Squares- Get a framing square that has an etched table for cutting common and hip rafters. Small squares to carry in your tool belt.  They allow you to mark a line square (90 degrees) to an edge.
  11. Levels- Try to get a 4’, 2’, and pocket level. They have small glass vials embedded in them with a trapped air bubble.  When you lay the level on the project and the bubble is between the two lines on the vial you know its level.
  12. Plumb bob- This is a brass or steel cone-shaped tool (think of a top) with a string attached that when you need to mark a spot directly beneath a roof (for a column).
  13. Crowbar- The come in many sizes and lengths. Two of the handiest are a “Wonder bar” it is made of flat iron (2” wide) and has v-notches cut on both ends to help remove nails.  Handy for reclaiming dimensional lumber.  The other is made of an octagonal solid steel bar with a hook on the end.  They can also be used to remove stubborn nails and their shape makes them great for leveraging and lifting a great weight.
  14. Hammers – Again many sizes. Usually sold by weight of the head.  I recommend a 20 oz. framing hammer, a smaller cabinet hammer, and a tack hammer for small nails.

Obviously, these are just a few of the many different tools that you can collect (pack members will no doubt add some suggestions) and use.  Collecting double gives you barter material and replaces broken ones.  The great thing about tools is that you can pick up many of the hand tools for next to nothing at flea markets and garage sales.

Learn to sharpen and maintain your tools and they will provide many years of service.  I have tools my great-grandfather used.  Having skill in producing and maintaining your bugout location or just your current home is a skill that will make you a valuable team member in troubled times.

You can “sell” your skill for other necessities as well.  As with any craft, making or maintaining items is a rewarding and satisfying pastime that might just save your bacon (or buy you some) in the future.

Filed Under: Prepping

How to Grow a Moringa Tree (and why you should)

January 8, 2019 M.D. Creekmore

How to Grow a Moringa TreeBy TN Mommy

I grow vegetables and fruits in my container garden, plus I’m working on installing some built in garden boxes in the rear of my yard, but that’s about all I can do for now since I live in suburbia and the HOA will fine the shit out of me if I put chickens and goats in my backyard.

For those that don’t know me, I am a Christian and I believe that the good Lord, in his infinite wisdom, surely has created an alternative out there.  So I did my research and stumbled upon the miraculous Moringa tree.  Not only are these trees beautiful, but they also provide an abundant supply of multi-vitamins.

Moringa leaves contain:

  • 2 times the protein of yogurt
  • 7 times the vitamin C of oranges
  • 3 times the potassium of bananas
  • 4 times the vitamin A of carrots
  • 4 times the calcium of milk

In addition to that, Moringa leaves also contain vitamins B1, B2, and B3, as well as chromium, copper, fiber, iron, manganese, magnesium, phosphorous, and zinc.  There are allegedly medicinal uses of the Moringa tree as well.  Some uses include natural antibiotic, help for stomach illness, cold remedy, etc. 

I must include a disclaimer here because I have not tried using Moringa as a remedy for any common ailments.  There is plenty of information available online.

I’m sure by now all of you are thinking, “Wow, I gotta get one of these.”  Moringa trees are not indigenous to the United States, but there are places that grow them.  I purchased my seeds and a couple of seedlings from Moringa Farms in California (www.moringafarms.com).

Shipping is fast and their customer service is out of this world.

My first two saplings did not survive, so I contacted them for advice and was immediately shipped replacements.  The next two saplings grew just fine, but sadly one of them was brutally murdered by my 1-year old who saw me harvesting my cucumbers and tomatoes, and decided to “help.”  My remaining Moringa tree is thriving quite well in a large pot on my deck and it grows faster than most weeds.  You can see in the picture below just how big it has gotten.

Now your next question is probably “How do I grow one of these?”  Moringa Farms will include instructions when you receive your seeds or saplings.  These trees are very resilient and will grow fine in most places.

They will go dormant in winter if you live someplace that gets cold, which is why I potted mine.  I’m going to bring it into the house when it starts to get cold.  They will grow in your yard just fine and your neighbors will have no clue that it’s anything other than a very pretty tree.

Once you have a sizable Moringa tree you can start using the leaves.  You can eat them fresh or dry them and mix the powder with tea, smoothies, or whatever.  Any other information you need can easily be found online.  I have not eaten more than a few leaves just to try them and see how they taste since I have about 4 bottles of SpongeBob multivitamins in my pantry.

How to Best Grow, Harvest, Dry & Profit from Moringa in Your Backyard

Does anyone know anything else that can be grown as a natural multivitamin?  Please post below…

Filed Under: Homesteading

17 Prepper Tips I Wish I’d Known Before I Started Prepping

January 7, 2019 M.D. Creekmore

prepper tips and advice

by Dan W

Following is a mixture of philosophical comment and several practical tips that I hope will help you to fill in some of the blanks in your prepping.  It’s a bit long but I hope you find it all informative. No matter what advice you may be offered, the key to being prepared is diligent planning and follow-through.  Remember thought without action ……. and action without a plan ……. Well, that’s just wasted effort.

Getting Started & Making Your Plan

For you folks that are in the beginning stages of prepping ………… don’t get discouraged.  All of us were where you are at some point in our journey to be prepared!  You may be far from well prepared right now, but the fact that you have decided to begin prepping is a major step toward improving your odds for surviving.

But, what type of negative event will you prepare for?  I’ve heard countless people talk about a specific catastrophic event that they fear will turn their world upside down.

They then base their planning around that event.  There are too many things, manmade or natural, that could severely disrupt our/your way of life.  To be able to pick just the right one is a long shot.  Basing your preparations on only one or two of these occurrences will likely leave large gaps in your overall plan.

When we first began prepping and started to accumulate our cache of goods we did not focus on a specific type of event to determine what we would need.   Instead, our early stage prepping focused on the basics of survival: Water, Food, Self-defense, and a secure place to ride out the event.

These four basics formed the backbone of our prepping plan.  Of course, we knew that there would be a lot of other supplies to gather, but unless we were alive, those wouldn’t matter.  For example, it wouldn’t do us much good to have a complete armory without an adequate supply of water and food.

We then made a prioritized list of what we wanted to have on hand; those items we thought would most help us to ensure we survived the initial few months of off-grid survival topped the list.  We prioritized without regard to expense.

After we filled our cache with those initial high priority items we began to add other items to our list.

When the event happens do you plan to leave your current site (Bug out) for a different location? If so then you will need to have two plans:  One plan to cover your needs while in transit and one for when you are at your new location.

Obviously, this type of planning is more complex yet the same four basics apply.

Early stage prepping requires a lot of cerebral activity to produce your own custom plan.  Start planning using the four basic groups and expand your preparations and supplies as you can.  Once you’ve got the basics covered, you can begin to address those items needed to cover other contingencies.

Unless your budget allows a steep ramp-up of purchasing supplies, it will take you some time to obtain all of the items on your list.  Be patient and just keep plugging away at filling your list.  Don’t make the common mistake of overreaching ………… start with a simple list and then grow it as time allows and current events dictate.

Your plan is a dynamic thing.  Stick with it, but do not be afraid to modify it as time passes and conditions change.

Inventory List

If you don’t have one …………. Make one!  I have a tendency to harp on this issue to every person that is a member of our planning group.  I don’t think that this topic can be stressed enough! Everything you have, or still need, should be on your list.

If you try to depend on your memory to let you know what you have put away you’ll be sure to forget or miss something.  Categorize the list by item types, quantities, location, date purchased, and the price paid. For those items that have a limited viable lifetime (foods, medicines, etc.) be sure to add that information to your list.

Indicate if the item is on hand or needs to be purchased.  Save and update your list with each change (addition, deletion, quantity upgrade, etc.) and print it out after you update it.

Don’t depend on being able to go to your computer to find your list.  Manage your inventory list as you would if you were running a small business and you will be more effective in your prepping.

Planning to Survive

In military circles, it is well known that no battle plan survives intact once combat is engaged.  There are just too many unknowns throwing variables in the way!  This is also true for all of us as we try to prepare for the SHTF.

That being said, it would be wise if you thought through a few scenarios to establish how you will react and what you will do to handle the “what-ifs”.   Play yourself in these scenarios and be honest.  Few of us are Barney Fife, but even fewer are Rambo!

Don’t sugar coat situations but play them out using best/worst case examples.  Advance planning does not restrict you to a particular course of action, but it does allow you to address those things that are not a part of your normal life.

Confronting a variety of hypothetical scenarios now will give you an edge if you are actually faced with something similar later.  Mental role-playing will help you to identify the contingent options that may be available for each event.

This is especially true if what you must face is beyond your realm of experience.  Set up scenarios where you must react quickly to be able to survive; pre-play potential events whose impact would be modified by your particular situation, environment, and expertise.

Not all of these hypotheticals will necessarily be a life or death scenario.  But, by thinking them through, you will begin to see holes in your planning and prepping.

Could you, would you, kill another human if necessary?  When you find weaknesses in yourself that that might threaten your survival, or are insurmountable, work out a solution that you can accept ………. and live with.

Off The Grid

What does this mean to you?  I remember when the term “off the grid” referred to being disconnected from the local electrical, telephone, natural gas or other commonly available utilities.  For us, and I think most all Preppers, off the grid, now carries a different connotation.  I think the best Prepper definition for off the grid is “Self-Sufficient”.  Images of “the little house on the prairie” come to my mind.

A successful Prepper can go off the grid and survive …………. they are prepared for almost any contingency.

I mention this because I think that coming up with your own definition of what “Off the Grid” means to you will help you to more precisely define your planning.  If you are an apartment dweller living in a large city your prepping needs will be different than a person living in a small town off the beaten path.

Your plan to survive, will of necessity, be very different from anyone else’s …….. and it should be.  The blueprint for your preparations has to be yours and yours alone.  Grab all the tips, info, ideas, and knowledge you can from a multitude of sources and then adapt them to your circumstances.

Speaking for myself, I manage to find a wealth of new ideas and tips from other Preppers.  Not all of them are necessarily suitable for our situation, but each one starts me to thinking “what-if”.

Maps

Do you have good detailed maps of your home or base area?  Even though you might think you know your locale very well, navigating effectively during a time of crisis may force you into areas you are unfamiliar with.  Maps are a cheap and good investment.

Another very good source for navigational information is Google Earth.  This free online app will allow you to print out a detailed street, topographical and satellite images of virtually any area.  The images can be zoomed to show you the topography (including dwellings and roads) for your area of interest.

Once you’ve got an image you like, print it out and keep it for future reference.

Manuals

How many of the things that you’ve accumulated over the years or recently as a part of your prepping supply will eventually need some kind of service or repair?  Do you have maintenance and operator manuals for each one?  If the SHTF, and it’s a really big event, the likelihood of finding replacement parts will decrease.

Even if you can’t get the part, a manual could possibly help you to make one.  How about your weapons, generators, solar or wind charging systems, or other devices?  One of the things I’ve done is to print out the manual for each such item I have in my prepping supplies.

Don’t think that you will be able to go online to get this information later.  Find the manuals online now, print them out and store them in a binder for future reference.  Dig out the manuals you already have and keep them all together in one place.  You might never need them, but there is peace of mind in knowing you’ve got them nearby if you do.

Preppers Reference Library

Buy “How To“ books.  Your prepping library should contain books on the basics: Gardening, Animal Husbandry, Basic Electricity, Game Harvesting, Canning, Dehydrating and Food Preservation.  Water Treatment,  How to Make and Use a Still, Communications (CB, Short Wave, Antennas).  I have found that garage sales are a great source for these types of books.

M.D. Creekmore has a CD Rom called The Bullet Proof Survivor that has all of this and more… you can find out more about it by clicking this link…

More books are better than fewer.  Identify your skill set(s) and then supplement your weaknesses with written knowledge.  Pay heed to using the internet to find the information you need (see Manuals above).

Perimeter Warning for Defense

How do you establish an Intruder early warning system for your base? There is a product on the market named “Voice Alert” (click here to check price and availability on Amazon.com) that will allow you to set up a perimeter defense around your fortress.

It is sold by Amazon and Costco online and through many other retailers.  I believe that this product was originally designed to be used in a commercial environment, but it works just as well for what I’m doing with it.

You can read the specific details regarding its specifications and features online.  This wireless system has a base station with remote wireless sensors.  The base station has the capability to monitor six individual zones of detection.  Each zone is monitored by a battery operated wireless sensor (Zone Sensor) that sends an alarm signal to the base station when triggered.

The advertised range is 1000’ (300’ through walls). My home is log construction with 10” thick walls and it works fine.  When a Zone Sensor is triggered, the base station identifies the zone and plays an audio warning.  You can program what the alarm says in your own voice.

For example; Zone 1 could say “Alert, South side of house” while Zone 2 might say” Warning, Driveway Intrusion”.  I’m sure you get the idea.  While there are only 6 Zones, the number of sensors you can add to each zone is only limited by your budget (they are a bit expensive).

Two sensors come with the base station to get you started.  Each sensor operates by sensing either motion or temperature change, or both. Since the Zone Sensors are not waterproof, I have them mounted inside a small custom wood enclosure that keeps the rain and snow off them while providing an unobstructed sensing path.

I made the enclosures to match the cedar on my home so as to blend in and not be obvious at first glance.  The Zone Sensors use a 9 vdc battery and the base station has a 120 vac to 9 vdc transformer.

The current draw under idle situations (most of the time) is so small that a standard deep cycle 12 vdc battery (using a 12vdc to 9vdc converter) would power it for a very long time (weeks) without the need to be recharged.

Add a solar battery charger for the battery and you’re all set.  I have 12 exterior sensors (set to IR mode) surrounding my home, garden, and a detached garage.  While the initial installation requires a bit of work to get set up, the finished perimeter warning system works great!

Faraday Shield

There is a simple way to protect your more sensitive electronic devices from the adverse effects of an EMP or other electromagnetic pulse.  Consider purchasing a metal storage cabinet (any metal box will also work).  I chose a cabinet due to the size and quantity of items I have that need to be protected.

Cabinets are readily available at Office Supply stores and used office equipment dealers, etc.  The cabinet you choose should have metal screws or bolts holding the panels together, not plastic snaps.

The cost of a cabinet or box might be a factor when compared to other homegrown Faraday Shield devices but only you can decide if what you’re trying to protect is worth the additional expense!

Grounding the cabinet or box

Attach an insulated wire to the cabinet using a metal bolt or screw.  Connect the other end of the wire to a known ground source (metal water pipe, house ground rod, etc.  Your storage unit is now a Faraday Shield enclosure and will shunt electromagnetic induced current to ground.

An alternate method of grounding is possible:  I strongly suggest that your understanding of basic electrical theory is adequate before grounding the cabinet or container using the following method.

  • Buy or find a 120 vac power cord (be sure it is not defective and that the insulation is in good condition) with a standard three prong plug on one end.
  • Remove several inches of the outer insulation from the non-plug end of the cord.
  • Use a meter verify which of the three wires is connected to the ground pin of the plug (if they are color coded it should be the green one).
  • The other two wires (Neutral and Hot) will not be used.
  • Verify that the unused wires are not shorted to the ground wire.
  • These unused wires must be taped or otherwise shielded with heat shrink to prevent any potential for them to be shorted to the ground wire or cabinet.
  • Attach the green wire to the cabinet using a bolt.
  • Before proceeding use a meter to measure continuity, verify that the plug ground pin is a short to all of the cabinet’s component parts before proceeding.
  • Locate the cabinet near an outlet and plug it in.
  • Using your meter, verify that the cabinet is not HOT (voltage on the surface relative to ground). If HOT, do not proceed until this fault condition has been corrected!
  • Your GROUNDED cabinet or box is now a Faraday Shield enclosure.
  • Be sure that the devices stored in your cabinet or box is further protected by not allowing them to come into contact with the metal of the shelving, etc. Use cardboard, rubber sheeting, plastic boxes or some other non-conductor between the stored goods and the cabinet metal.

Click here for plans on How to Build Your Own Faraday Cage…

Water from a well without electricity

My well is 310 feet deep with a static water level of 280’ in an 8” casing.  I wanted a way to draw water from the well that didn’t require a large generator to power the deep well electric pump.  Using a “pipe bucket” was one method.

But for that to work, I would have to remove the existing electric pump and 310’ of metal pipe.  Finally, I found a solution.  It’s the “Simple Pump” https://www.simplepump.com .  As its name implies, it is a very simple manual water pump that can be installed and maintained without a lot of special dedicated tools.

The company was somewhat reluctant to specify how much water their pump would deliver from the 290-300 foot depth, but told me it should/would work.  I took a chance and had a system installed.  It is installed within the original 8” well casing alongside the existing electrical pump pipe and wires.

Now we have dual capabilities to produce potable water.  Once primed, the pump produces about a ½ quart of water for each pump of the handle.

Not exactly a gushing flow but it works!  The shallower the water source the more water you should get with each pump stroke.  Now we have the most important aspect of our prepping in place ready to go if needed!   No worrying about a source for potable water, hauling water from a distance, or any power other than a healthy set of arms to work the pump.

The pump supply tube is has a drain hole that allows water to drain back to 7’ (drilled when the last pipe is installed) from the surface preventing a frozen pipe.  In our area 7’ is below the frost line so it’ll produce water regardless of what the outside temperature happens to be.  No frozen pipe!

Water, Water Everywhere

Once you’ve solved the problem of having fresh water readily available from your well, consider creating a large volume reserve supply.  Our “root cellar (as we call our inside insulated storage room) has five 55 gallon water barrels.  Not only does this give us a substantial water reserve, but their thermal mass helps to keep the temperature of the room more constant.

We figure that the 275 gallons these barrels hold would last us about 137 days at 1 gallon/person/day. That’s roughly 4 ½ months if used only for drinking!  I have several more empty barrels stored away for future use if needed.  We add a little chlorine (Clorox) to each barrel to ensure it stays potable.  Before winter arrives we empty and refill the barrels for another year of standby.

We’ve also added gutters and water barrels on every possible roof line to take advantage of rainwater.  Five of these barrels are close to our garden and on stands that are high enough so that gravity flow can be used to water the garden.

In our northern climate, the outside barrels would freeze during winter so we empty them before cold weather begins.  Then, once signs of warmer early spring weather appear, we refill them using our electric well pump.  That way they are filled and in reserve if needed. 

Read M.D. Creekmore’s detailed article on water by clicking here…

Gardening with Medicine in Mind

Knowing that the availability of drugs will be nil after the SHTF, we decided to add medicinal herb seeds to our supplies.   We chose which ones to buy based on the meds I must take, and those we thought would be good to have.  These herbs correspond to manufactured drugs and have specific medicinal value beyond the realm of aloe or other common beneficial plants.

After verifying that they would grow in this far northwestern region of the US (our greenhouse allows us to grow plants that would otherwise not survive our northern climate extremes) we purchased the seeds.  An excellent online site is: https://www.horizonherbs.com/pilot.asp .

Our seeds are stored in sealed containers.  Using the internet we printed out instructions for the preparation and use of each herb (to complement our reference book in our Preppers library) and made sure we bought non-hybrid herbs.

Barter Better

If we are faced with a financial or societal collapse, all exchange of all goods will be by bartering.  We have made room in our storage area for barter goods.  After much consideration, we decided that grain alcohol (Ever Clear) and pints of Whisky (any cheap brand) were the two best things to have readily available as trade goods.

They are easy to store, don’t go bad over time, and may be used for things other than drinking.  If you have a reliable source of potable water (such as our well) you can always use drinking water for bartering if things get that bad.

Clean water will be very valuable and probably scarce.  Of course there are many other things that you can reserve specifically for bartering, but why spend a lot of your funds in anticipation that you will need a diversity of goods to trade?  After all, everything you have is potentially in your barter bag ……….. It’s all about “needs and wants” that makes a bartering economy work.

Click here to read M.D. Creekmore’s article on barter items for preppers…

Solar Lighting for Inside

There is a great source for very cheap solar lighting that can be used within your home.  Solar Powered Walkway lights make a great chandelier!  You’d be surprised at how much light a few small walkway lights will put out in a closed area.

Make a frame, drill holes that fit the base of the light (without the extension tube).  Install the lights with one set-screw through the side of the frame holding each light in place, and hang it where ever you want a light.  Typically these lights have rechargeable batteries that will last for more than a year before needing to be replaced.

When fully charged, these lights will run for 4 -6 hours.  Design your holder so you can easily disconnect it and take it outside each day to recharge the lights for that night’s use.

Batteries

Reduce the variety of batteries you need by using battery adapters.  These simple sleeves can be purchased and will allow you to use AA batteries in devices that normally require C or D cells.  The AA battery does not have the current output of a larger C or D cell but, if you are using rechargeable AA batteries (with a solar charger), this becomes a non-issue.  Check out “Battery Adapters” on Amazon.

Pressure Cooker Still

As I said in an earlier paragraph, buy a book about making and using a Still.  There are dozens of them available and will be a valuable addition to your library.  You can use a pressure cooker for the main pot to cook the mash.

Get some copper tubing and a compression fitting that will screw into the pressure valve on the lid of the pressure cooker.   Connect the tubing to the compression fitting.  Make several loops in the tubing to create the condenser and feed the outlet to a jar.

Without a lot of additional parts, you have a very simple basic Still.  Pressure cookers are perfect as they are stout, have a fixed overpressure relief valve, are readily adaptable to a condensation tube, and can be used on virtually any source of heat.

Garage sales are a good source for pressure cookers …… buy more than one if you have the chance!  Figure out what you need to make your Still operational and get those items while you can.

Cleaning your home & clothes

While cleanliness is always a good thing, it will become even more important in an off-grid situation.  Being able to clean yourself, and your clothing is not only a good idea from a psychological standpoint (you’ll feel better if you’re clean) but from a medical standpoint as well.  Infections from minor cuts, rashes from toxic natural and man-made substances are easier to manage if the body is clean.

Clean clothes, clean body, and a clean living environment are not only healthy but allow a person to maintain a positive outlook and a good self-image.  I have a double deep sink with an old-fashioned double roller all ready to be put into action to clean our clothes.

A manual agitator and old style scrub board are good additions and available from Lehman’s Store or elsewhere.  We’ve stored multiple large containers of liquid laundry detergent, bottles of hand cleaner with lanolin (the type used by mechanics to clean their hands of grease), shampoo, and a lot of bar soap.

This stuff keeps forever and doesn’t take up a lot of room.  We’ve also purchased several solar heated shower water bags.

Filed Under: Prepping

  • « Go to Previous Page
  • Page 1
  • Interim pages omitted …
  • Page 50
  • Page 51
  • Page 52
  • Page 53
  • Page 54
  • Interim pages omitted …
  • Page 87
  • Go to Next Page »

Primary Sidebar

Subscribe to Blog via Email

Enter your email address to subscribe to this blog and receive notifications of new posts by email.

Join 7,202 other subscribers
  • Amazon
  • Facebook
  • Substack
  • Twitter
  • YouTube

“Do more with less.”

– Minimalist proverb

Recent Posts

  • Just so you know
  • Weather Update for My Corner of Appalachia
  • Why I’m Ordering Ivermectin + Mebendazole Every Year
  • The Website’s Shutting Down (But Here’s the Plan)
  • You Are Hated! Start Training Like It!

Footer

Recent Posts

  • Just so you know
  • Weather Update for My Corner of Appalachia
  • Why I’m Ordering Ivermectin + Mebendazole Every Year
  • The Website’s Shutting Down (But Here’s the Plan)
  • You Are Hated! Start Training Like It!

More about me

Books I’ve written

Books I’ve read

Follow Me on YouTube

Follow Me on Facebook

Gear I Use and Recommend

Newsletter

Search this site

Follow me elsewhere

  • Amazon
  • Facebook
  • Substack
  • Twitter
  • YouTube

© 2008–2025 M.D. Creekmore · As an Amazon Associate, I earn from qualifying purchases.