• Skip to main content
  • Skip to secondary navigation
  • Skip to primary sidebar
  • Skip to footer

M.D. CREEKMORE

  • Blog
  • Books
  • Newsletter
  • Gear I Use
  • About
  • Contact
  • Facebook
  • YouTube
  • Blog
  • Books
  • Newsletter
  • Gear I Use
  • About
  • Contact
  • Privacy Policy

Blog

What’s The Best Multi-Tool to Buy For EDC

October 9, 2018 Jesse Mathewson


When it comes to multi-tools there are dozens, hundreds of available choices. The best part is, they can all be very useful for a variety of reasons and in a variety of situations. However, for survival, prepping and or simply having, is there one that can work as the go-to, all-around best approach?

Rome had pocket multi-tools, however, modern times the trend really started with the Victorinox and Wenger tools as far back as 1884 and 1893. However the folding pliers included version was introduced by Tim Leatherman in 1983, the Leatherman Company called it a PST, Pocket Survival Tool.

Since this time, they have come up with dozens of iterations, amazing tools all of them. However, they are not generally inexpensive. In fact, most of the better Leatherman’s run $70 plus dollars, at least for the good ones.

The Leatherman Wingman is an amazing tool, small enough and light enough to keep in a go-bag without being too much. After all, ounces are lbs. An alternative to the Wingman is the Gerber Suspension. Head to head there is not much difference. Here are the specifics.

Leatherman Wingman – Handle: stainless steel

Blade: 420 stainless steel
Blade Edge
Blade Finish
Blade Length: 2.6-inch
Open Length:
Closed Length 3.8-inch
Screwdrivers: small screwdriver, medium screwdriver, Philips screwdriver
Pliers: yes, needle nose
File: yes
Scissors: no
Wire Cutter: yes
Wood Saw
Bottle Opener: yes
Can Opener: yes
Other Tools: wire stripper, ruler
Weight: 7 oz
Recommended Use: being prepared for anything
[Click here to check current price and availability at Amazon.com]

Gerber Suspension – Handle and tools are stainless steel

Bottle opener
Can opener
Scissors
Small flathead screwdriver
Large flathead screwdriver
Phillips screwdriver
Serrated knife blade
Fine edge knife blade
Saw blade
Wire cutter
Needle nose and standard pliers
Closed length 4 inches
Weight: 9 oz
[Click here to check availability and current price at Amazon.com]

Recommended use, preparedness

The Leatherman version is $40 and worth every penny, the Gerber version is $27 and also worth every penny. Dollar for dollar, I have and will continue to put the Suspension to the test and come out even or ahead. The grind that the screwdrivers have allows for easier work on firearms and larger items as well. Both are amazing tools, however, which one do you prefer?

In all fairness I have bags that have the Leatherman and bags with the Gerber version, this being said, I am really not a friend of Gerber, after all, most of their knives are made out of country these days. However, here is the thing, recent years have shown that China has learned that by outproducing us with QUALITY and quantity they can, in fact, bankrupt us as a nation.

So they do, if I was a fan of our government (which I am not) I may be apart of the crowd that refuses to buy anything not made in the United States, however, since I want the best equipment I can get for the least expense (I am not rich, taxed to death by the very government so many still support), I buy Chinese at times.

I love my country, I love the land I live on, but let’s face it, folks, our government, is way, way out of control. Anyhow, so what’s the best one?

I will leave that up too you, I have tested and used both and love them both. They work well when needed and I have never once regretted purchasing either. Here is my recommendation for the fiscally strapped as I am. Haunt your local pawn shops, you will find them, Leatherman / Gerber multitools, and Victorinox folders as well, and you can talk them down to a much less expensive approach.

I go in with $100 bucks and will line up a selection I know is worth more, but will lay that $100 bill on the counter or five $20 bills, this is more effective…and than start dealing. KNOW what you are going after, and what the prices generally are.

Then remember they offer less than a quarter of what these tools are worth, almost always they are well used, handle them, make sure they function, dirty is fine, after all, you can clean them up. I almost always walk out with around $300 retail for $100 cash. It’s called horse-trading and it works!

Free the mind and the body will follow…

Filed Under: Knives and Blades

Holosun Optic Sight [An Honest Review]

October 9, 2018 Jesse Mathewson

holosun-red-dot-site“If you know the enemy and know yourself, your victory will not stand in doubt; if you know Heaven and know Earth, you may make your victory complete.” Sun Tzu

Budget prepping is a difficult thing to do. After all, there is a difference between budget and cheap, inexpensive and cheap. Cheap by definition does not mean something is necessarily bad or of poor quality, however, with some things cheap is bad. Red dot technology has progressed light years beyond the first bulky Aimpoint, EOTech, and Trijicon.

Obviously, Aimpoint as a company has maintained a seriously good reputation and continued to progress with the times, as has Eotech and Trijicon, however, their pricing reflects no shifts for markets unable to afford to spend $600 – $2500 on a simple 1-4 power red dot styled optic.

My search for a less expensive optic commenced several years ago. I worked my way through Bushnell T series which functioned fine but were hit and miss at best. Eventually, I settled on the Bushnell AR scope series and decided to simply move on from the red dot phase.

After all, a solid scope with excellent glass and comparable abilities to other more expensive brands will work in most cases.

This didn’t mean I had no need for a red dot, after all, a solid red dot with a solid pair of backup irons is an amazing thing to have. Quick on target and easy to use, good red dots mean the difference between hits and misses in many arenas, especially combat-related training and combat itself.

Over the past year, I decided to do some research and look around again for a solid red dot under $500. I found several brand names, Vortex, AIM sports, and even Bushnell had new offerings on the market. However, I was drawn to a relatively new company, Holosun©, this optic had serious potential.

After dropping $170 on the HS403B found on Amazon, I received the well-wrapped package and mounting hardware. Two sets, a low riser, and high riser were included. The high riser fit my carbine exactly as needed. Co-witnessed with my irons I took it out to the range and started testing.

holosun-red-dot-siteAfter around 100 rounds I set the rifle to the side as there were other reviews that needed fulfilling and it held zero very well, so what more needed testing. As I leaned it against the carbine rack it smacked the crossbar on the way by and snap, the red dot came off. I leaned over and realized that the screw holding it too the gun had snapped off at the head.

I finished my testing for the rest of the products and called Holosun on the way home.

They assured me that they both knew about the problem and apologized for the inconvenience this had caused, I asked if this was going to be an ongoing issue or if it was a simple flaw in this particular part of the design.

The person I spoke with grabbed another individual who explained that the model I had received was the last in a first gen run and the new gen had the much stronger hardware.

Upon arrival 3 days after the call, I installed the part and decided to test it too its breaking point. After all, nothing to lose at this point as the people I had spoken with assured me they would replace the entire unit free of charge if it happened again.

I dropped tested it on dirt, grass, and concrete from approximately 5 feet. I also decided to “accidentally” smack the red dot housing into a few items during my next test run. Needless to say, it held firm and I have not had a breakage or issue since.

Though I doubt it will take a bullet to the casing as say an Aimpoint will, at 50,000 hours of battery life and with a VERY clear dot picture and glass as well as solid easy on when you pick the gun up, well I think this is my new best friend in the red dot world.

They have different variations, shotgun patterning dots, circle over a dot, plain jane red dot and all of the varieties can be had with a nifty solar-powered recharger put on the top if you want.

The company offers a limited lifetime warranty to the original owner, and their customer service is very expedient and quick to respond, a truly rare commodity in today’s age of somewhat lackadaisical service. They are located in the USA, Walnut California, to be exact.

They offer a 50,000-hour battery life, a variety of aiming products from lasers too red dots. In this case, my interest lying completely in their cost-effective, efficient and extremely solid red dots. The HS507A is compatible with the standard RMR mount and the other red dots have a variety of mountings available with some specifically designed for Aks and others for Ars.

Some options have a quick release mount and others a kill flash and other essential needs for red dots. The best part is their red dots run between $165 and $350 dollars and you can order from Amazon.

Now obviously I have not been able to test the veracity of the 50,000-hour battery life, however, the unit I have has been on and working clearly for well over 6 months without a hiccup. I have no doubt that the longevity is easily better than Bushnell’s offerings and Vortex. The price point allows budget preppers and shooters to have (as the company motto says) “A military-grade optic at under military prices” now personally, I have not tested it in combat yet. However, it has performed well through many tests it is NOT designed for. I do not recommend you treat your optics badly on purpose, that is my pleasure to do for you! Having family and friends still in the military this is the question I ask myself, “would I recommend this to them?”

YES!

It works very well, it will be ready for them when they need it, and will function with general abuse and function well. This being said, I am not the desk personnel from the Pentagon and it isn’t my job to accept money to pass along new products to our soldiers.

This being said, what are the pros and cons listed out?

Pros

  1. 50,000-hour battery life with an optional solar panel for charging and auto adjustment in all light conditions.
  2. Multiple reticle styles and mount styles available.
  3. Crisp clear dot, brightness easily adjustable or set for auto adjust.
  4. Movement activated the red dot when you pick up your firearm, the red dot comes on!
  5. Built for shotguns, rifles of many calibers and even handguns.
  6. Limited lifetime warranty.

Cons

  1. They are a relatively newer company, so not as much time to evaluate and test as other more established companies.
  2. They have had some issues with mounts, however, this is being addressed and is easily fixed, upgraded with a call to their customer service.

Overall, this is a product I definitely recommend and run on my carbines now. MD Creekmore also has one and here is what he says, “I bought this sight a couple of weeks ago and mounted it on my Colt M4 and so far I’ve been very impressed and agree with everything Jesse has said here in his review.

I have an Aimpoint and an EOTech on two other AR’s and the Holosun HS503GU (the model that I have) is just as good as either one of those for half the cost. ”

Free the mind and the body will follow…

Filed Under: Gear Reviews

Ferro Rod Review and Usage Guide

October 9, 2018 Jesse Mathewson

ferro rod review
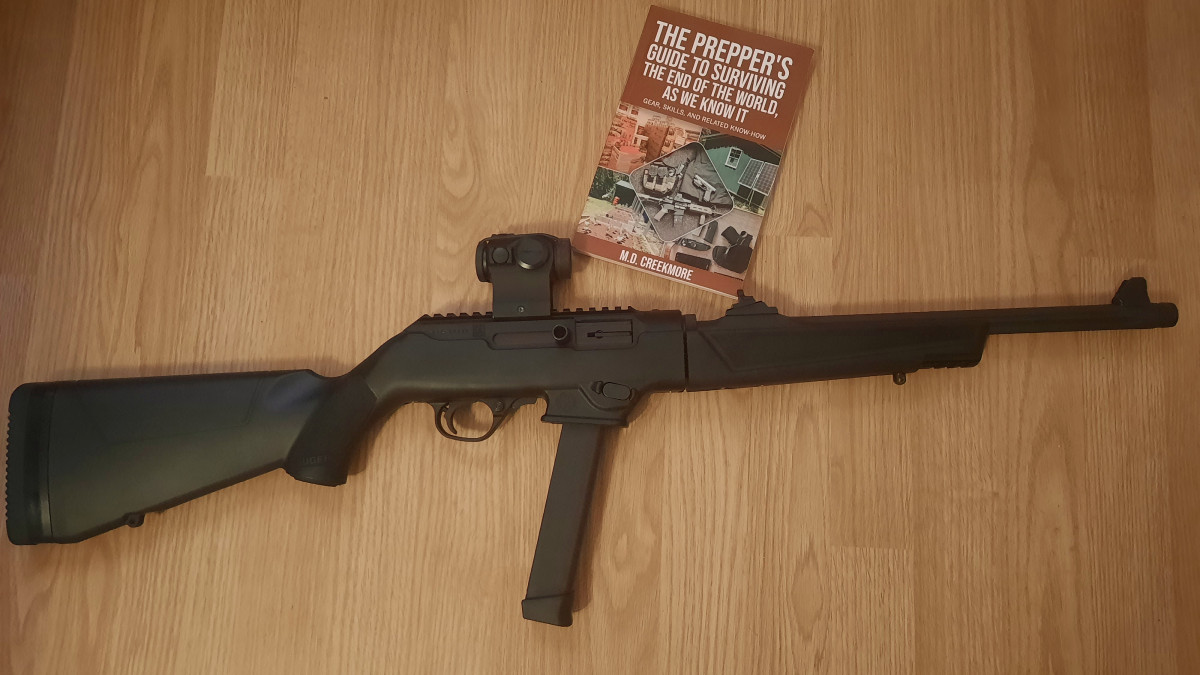
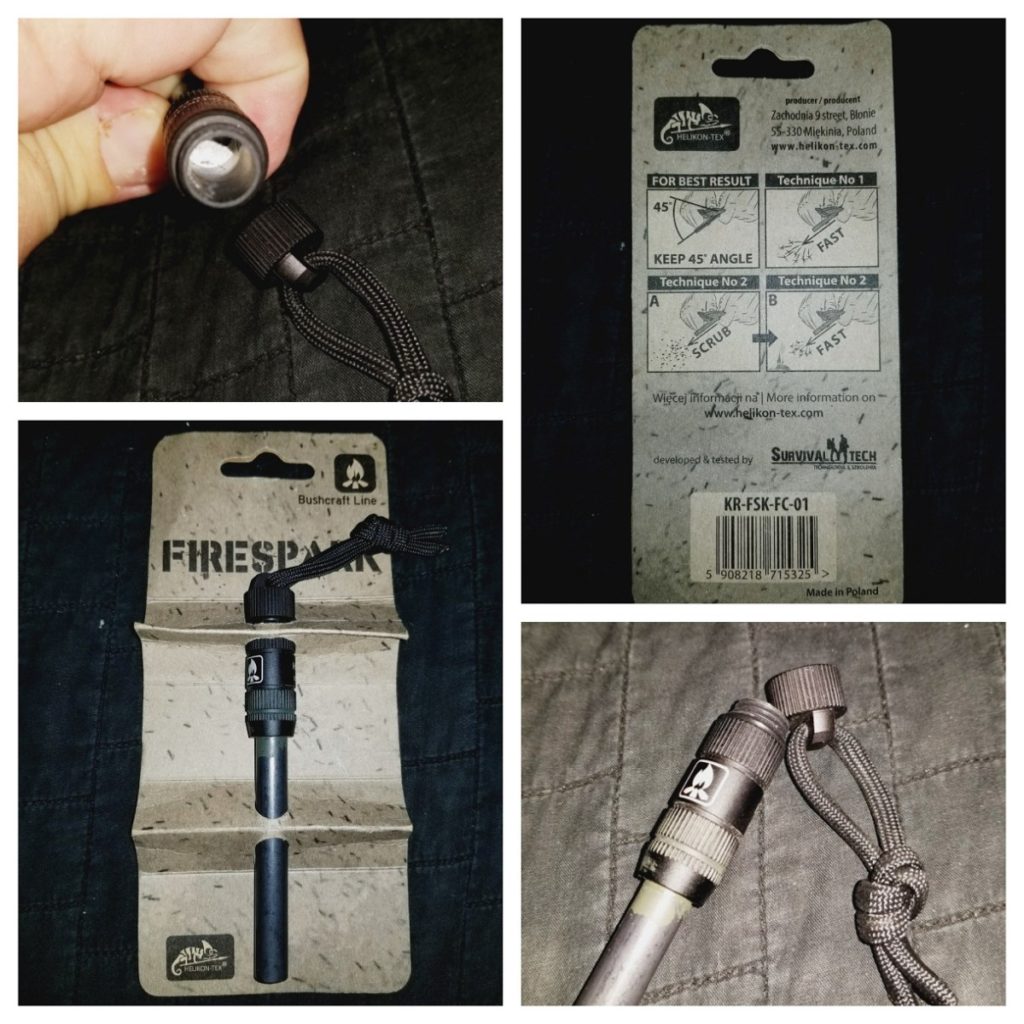
Fire is an essential element of survival, living, and warfare. It has been used for many millennia for heating, cooking, controlling growth, reducing wildfire damage, to promote grazing and conduct defensive and offensive campaigns against enemies.

Ferro Rod usage is popular with many people within the prepper community, and yet, from what I have seen personally, there are many who have never actually used the ferro rods they carry! It is my goal with this article to hopefully show you the benefits and necessity of owning and using one correctly.

Did you know that contrary to modern American conservationist thought the use of fire as a tool to prevent larger out of control fires was embraced by many American Indian tribes?

Native Americans of the Southwest often used fire as a means of clearing grazing land, driving game, reducing the build-up of excess detritus or fallen leaves and pine needles as well as dead and or diseased trees further preventing the wild exceedingly large conflagrations seen over the past 80 years of modern “conservationism”.

They realized that not only did smaller fires contribute to the faster growth of young, strong plants it also allowed animals to populate faster and in greater numbers as they did not have to fear the massive millions of acres of burned out land that actually causes a far greater toll in the end to both plant and animal life.

Such is the wisdom of those who lived with the land versus seeking to control it.

For modern preppers, all of us have seen or lived through instances where are daily prepping came into play and filled holes needed at the moment. Even if it is as simple as having extra aspirin or band-aids. With current nasty natural and some not so natural events occurring and our ability to see them being as fast as our current cell phone or internet service allows, things seem to be spiraling out of control.

The reality is, they are not. So do not panic! Mortgaging the house and selling off the kids will only serve to enrich others, stick to your current approach of getting a little here and there as you can. Make sure you have holes filled in areas that may have shown weaknesses upon the use of preps (vehicle kits and house alike)

This week I assisted an older lady who had her cell phone and nothing else when her car broke down on the highway thankfully close to a fueling station. In Arizona, we have stretches of road where people are rare and most humans traveling have no idea as to what is readily available.

From food through water, and yes in Arizona even on the Playa outside of Wilcox or around Yuma there is available food, water and more if you just know what to look for and when and where to look. The Playa is a massive dried lake bed that stretches easily 40 miles long and upwards of 15 or 20 miles in width.

Currently used by fun seekers for their sand rails and even local military testing, it is a desolate area. While I could have preached the benefits of being prepared to this lady, her concerns were more immediate and after getting her vehicle to the parking lot she became a bit more at ease. The moral of the story is, there is no such thing as too prepared!

So let’s get back to fire and why it is so very important, dangerous and necessary all in one. Having a fire starting implement is a good idea, I know many people who carry mini bic lighters, waterproof matches, flint, and steel kits and my favorite the ferrocerium rods eg., ferro rods!

What I have also found to be true is that many times these implements are purchased a book or article is read and then they are stashed away never to be practiced with. The assumption being made that like many firearms owners, we have it if we need it, it is there.

Sadly, without practice a person can easily go through 20 plus matches, a bic lighter, and never get their flint to strike a spark…I know from personal experience that this is very true and occurs quite frequently.

ferro rod reviewCamping about five years back approximately 30 miles from nearest other humans, we were hit with an unexpected deluge and spent 3 miserable days without a fire. This was my fault, and my fault alone, why did we go ahead and stay, because, the roads had become flooded and we couldn’t have crossed back if we wanted.

Now thankfully I layer my preps, meaning I had wool blankets and candles for cooking, but it still wasn’t the same as having a nice campfire going, after all, a good flame tends to cheer the soul when things are dreary outside. It is the camping/ survival equivalent of a television.

Add a bit of shine or mead to one’s tea or coffee and things can get downright cheerful! What have I done to fix this glaring hole in my preps, well, I learned how to use my tools all over again and what to do with wet wood and more.

How do we best use a ferro rod?

  1. First, it is essential to understand that a ferro rod is useless without steel, so make sure you have a striker or that your knives have at least an inch of 90-degree angle on their spine (do not use the sharpened side).
  2. Using the sharpened side leads to cuts and cuts lead to infections which easily lead to death in a grid down situation!
  3. I file the backs of all of my knives, 440c stainless will spark a ferro rod though not as well as a high carbon blade will. I only file about an inch to a 90-degree angle and I always file it at the base where the blade meets the handle.
  4. Tinder, most of us probably carry some type of fatwood or tinder mixture from Vaseline soaked cotton balls too charred cotton cloth, (easily made in a small enclosed metal container with a small pinhole sized air hole, stuff it tight with small pieces (an inch square) of cotton cloth or cotton balls cut in quarters for best overall use.) Fatwood is the sappy heartwood of trees, [preferably semi-aged or well-aged trees, pine really works best but I have mesquite and more that also works well!)
  5. Now here is where things get fun, just having some tinder materials DOES NOT MAKE A FIRE or ensure you can make a fire. You still need a semi-dry additional fuel to allow for damp or even wet wood to be capable of drying while burning. (bear in mind THIS CREATES A SMOKEY FIRE!) So how do you go about collecting more from around you?
  6. Grass, older grass eating animal dung, small dead twigs and bark tend to make the best next step for building a solid fire. This is where patience becomes essential, if things are wet, you will have to keep a pile in an area that stays dry and allow it to dry, make sure you get good air flow and you may be able to get a fire going within a few hours, in worse case a days time. My suggestion is to find large dead logs when possible, bring them into the sheltered area and split them down, the insides past about an inch tend to be relatively dry in many cases unless the area is flooded or a regular rainforest. In which case splitting them down simply allows for their drying easier.
  7. Once you have a 4 to the 6-inch square loose bundle of kindling (pick a type from above) you can try to get your fire started, I highly recommend working out kinks of your system when dry wood and kindling is available. However, am offering worse case scenario as a way to make the best case look much easier.
  8. Using a ferro rod specifically, as this article is about that, place the striking device in your strong hand, place your hand fist down beside with the striking device above the tinder. Make sure your kindling is close and that you have built a good teepee style fire setup, eg., tinder into kindling and this underneath smaller branches/ pieces with larger angled over top leaving a hole in the side of the fire to be about the size of two fists so you don’t have to battle with yourself to get the tinder into the kindling and the kindling into the fire structure. Others prefer different shapes, I have found the triangle shaped approach to work best for myself.
  9. Place the ferro rod UNDER the striking surface, with the end you are not holding facing the tinder.
  10. Draw vigorously but NOT quickly towards yourself (making sure you have already scraped the water-resistant coating off of the rod so you get even solid sparks) This will shower sparks into the tinder igniting embers allowing for you to transfer these embers into the kindling and getting a flame going, Breath gently with long regular exhales towards the kindling and tinder from about 4” to 6” away or the length of the blade you are using. Do so until you get a young bright flame going in the kindling than smoothly move this into the pre-built fire. Continue blowing into this until the flames take on a life of their own and become teenagers, raging to get out!
  11. Easy?
  12. No, this takes practice, I would suggest working with dry woods until you are confident and then use a water hose to wet some wood and work with that, do this until you have used up a ferro rod! By this point as with everything we humans learn, the repetitions of the movements and practice will make it relatively easy based on circumstances to get a fire going when needed.

Now you may ask what product am I reviewing, I can answer that, firstly there is the FireSpark by helicon-tex – it s a robust ferro rod that gives a great shower of hot sparks when needed, the handle allows for insertion of anything from necessary pills too a very small amount of tinder material! And I should note the handle has an O ring making it waterproof. The second product I am reviewing is my home brewed ferro rods, I learned long ago that in my world making my own tends to allow me to better adjust needed aspects such as a good gripping surface and having a case of ferro rods available. I prefer .30 caliber diameter by 3 inches long for my ferro rods. And I use old .308 casings as handles. (makes for a fun conversation piece) The helicon-tex FireSpark runs 21.99 on their website. The blanks I get run about $13 for a case of 10 or 12.

I can and do make ferro rods for my friends and neighbors and tend to give them away, (I really should launch a product line – arrgg – but my marketing skills have declined over the years.) if any of you want to get some let me know, I may start marketing if not, I would suggest the linked amazon approach from HOODDEAL – they are a solid manufacture/ retailer and I have never been done wrong, besides it will allow the proceeds to go to MD Creekmore for further site maintenance! Regardless, I hope you found this article educational and helpful and as always.

M.D. Creekmore adds: The Mora Bushcraft Survival Knife with built-in fire starter is something else that you might be interested in. It’s the official survival knife of The Wolf Pack.

Free the mind and the body will follow!

Filed Under: Gear Reviews

Can I Use an Emergency Space Blanket for Camping?

October 9, 2018 Jesse Mathewson

emergency blanket for camping
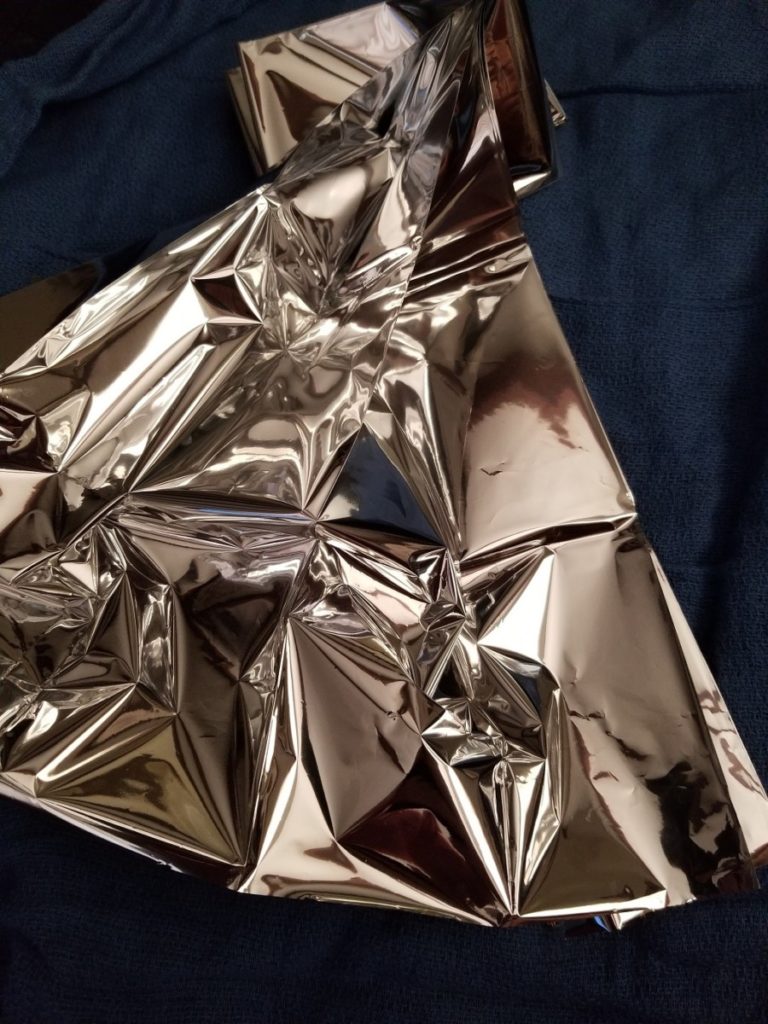
Invented in 1964 for the space program, and used to keep Skylab from overheating these are an amazing invention. Consisting of thin sheets of plastic coated with vaporized aluminum, this was done to ensure extremely low weight with a high net benefit/ reflective nature.
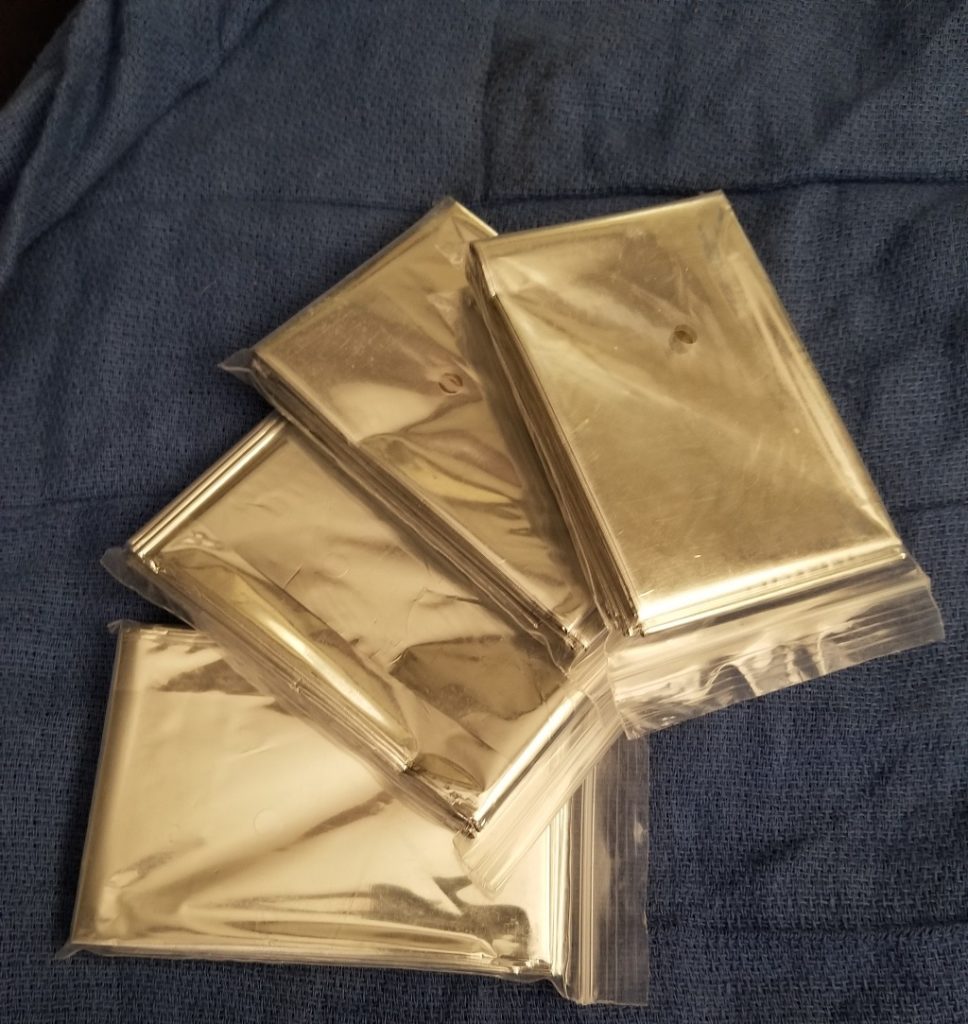
They are basically the same width as a human hair. Average weight between 0.5 and 5 ounces, they are truly indispensable.

So why review a space blanket? There are hundreds of manufactures of space blankets, why review any of them? It is an essential item of note that space blankets CANNOT create heat they merely reflect it, as well as light and even air depending on use.

Even with something so seemingly inconsequential as a space blanket understanding what they are, how they can be used and how they should be used is essential to understanding that you can indeed get space blankets that are really not a good quality. So what can space blankets be used for? This is the fun part, the easy part, and the essential knowledge part!

  1. Blanket to protect against the elements – carry a minimum of one per EACH member of the house and at least 2 extras in every vehicle and a minimum of two for each bag.
  2. Shelter/Shade – this is where the extra blankets come in handy, at a cost ranging between 0.23 and $6 apiece they like tourniquets are not something to scrimp on as far as amounts go, I suggest a minimum of two per bag and two spares in every vehicle kit (on top of one per family member) personally I purchase them by the case and have 3-4 per person in every kit!
  3. Fire Reflector – certainly some of us “can build a fire using two sticks and dead wood – shoot we don’t even need a knife!” however, the reality is much more difficult than the fantasy life we wish we lived. Using one of these to reflect a fire’s light and heat into the shelter (built out of another one) so that the blankets (also space blankets) will keep us from freezing or dying of exposure is both simple, inexpensive and DOES NOT use up valuable energy stores putting together!
  4. Water Purification by way of a solar still, exceedingly easy and fun to build this approach to water purification can work very well and provide much-needed water with overall weight being far less than bringing even a Sawyer Mini Filter with us. (And I always have one of those!)
  5. Solar Energy – expand your solar panels ability by reflecting more light into it!
  6. Solar Cooking – using a framework similar to the fire reflector you can harness the suns energy and warm or heat water allowing for some cooking, and believe me, a warm meal when things are down makes a HUGE difference!

There are many different uses that you can figure out as you go. I firmly suggest purchasing and using Shemaghs for head wraps, neck wraps and more. Instead of using a reflective space blanket use a shemagh for things like carrying additional items, hammocks, and wraps on the body.

emergency blanket for camping

However, this is up too you and I am certain you can find others uses for these amazing tools, though I would be quite careful with carrying or wrapping and tying things with space blankets simply because they are NOT designed for this type of thing and will break rather easily when used in this manner.

Over the years I have used multiple brand name space blankets and can honestly say that silver, gold expensive or not there is really not a huge difference in them. In fact these days most of them are manufactured in China and or manufactured using the same base components that are being made in China.

Unlike two decades ago, made in China does not hold the same stigma it once did. I am certain some of you may remember Nissan, Datsun, Honda, and Toyota in their initiation into the United States car market. T

hey went through the initial “not made in America” and quality issue problems, however, this has since been rectified and these days Toyota, Honda and even Nissan are made in the United States and far superior in most ways to “made in Mexico/ GM products”.

The reality is simple, production costs far less thanks to a lack of unions and entitled millennials in China and other manufacturing centers. Technologically China, Korea, and Japan have either surpassed or are equal to us in many areas. With the advent of global business linked through the internet, it is simply more cost-efficient to produce outside of the United States these days.

Someday we may see a return to American made and proud of it, however, even with firearms people are quickly learning made in America really isn’t the same anymore. To be competitive American companies cut corners instead of lower wages, this leads to bad products in many sectors from Automotive through Camping supplies.

Space Blankets are themselves a product that can be and is made outside of the United States and is made quite well. I suggest this 10 pack of Mylar Space Blankets cost averages out too $7 shipped, and I have never had any issues with them.

In fact, the pictures show these blankets being used and I have even reused them on several occasions for up too 4 days each, though you should understand this is not always possible, it does not take much to puncture a space blanket!

If you want to use the gold colored ones you will spend a bit more, and honestly will not get a larger return in value, this again comes from direct experience. However, the choice is yours, for myself saving a few bucks on things that have a definite use limit and or shelf life is smart prepping. You can do that with these and NOT sacrifice quality in any way.

emergency blanket for camping

Swiss Safe is a name brand blanket that costs several dollars more per blanket, however, they are green with a gold one included. $18 for 4 blankets, if you so desire these instead. The advertised thickness is 12-mils with the Swiss Safe blankets and the others are maybe 10 mils at most, honestly, this is not a huge deal as thickness is ONLY a pricing thing when you get into mils with space blankets, there is no significant difference in strength or overall usefulness.

Additionally, they crinkle quite loudly when you are taking them out regardless brand, sound carries much further than a reflection on a snowy, cold day!

So what uses do you have for a space blanket? Have you used one, or two? Do you use one as a ground cover and another as a blanket? How do you use them?

Thanks for reading and as always please let me know if you have anything you would like to review or see a review on!

Free the mind and the body will follow…

Filed Under: Bushcraft

How Much Food Should a Prepper Have?

October 8, 2018 M.D. Creekmore

How Much Food Should a Prepper Have?by SW

A prepper should have at least a three month supply of food in storage at all times. Keep in mind that a three-month food supply is a bare minimum, with a years supply or more being ideal. When striving for a years supply it’s best to build your food supply in smaller increments of one month at a time to avoid making mistakes and feeling overwhelmed.  

Here’s the deal

We all come to this journey our own way. For me, I started in gardening, then moved into homesteading, and on one of the homesteading sites, I got introduced into prepping. I will be the first to tell you that I’m not a prepper. I consider myself more of a homesteader with prepper tendencies. As such…, this article will probably reflect some of those thought processes.

When I started down this road I kept looking for blog posts or videos that would tell me I need to store XXX number of whatever item. No matter how hard I looked I could never find what I was actually looking for. Then it finally dawned on me. I’m looking for the answer in the wrong place and the wrong form.

If you have spent (or will spend) anytime on prepper/survivalist type websites you will see a phrase that comes up time and time again and that’s to store what you eat, and eat what you store!

I don’t know who coined the phrase but it is exactly true. Let’s, however, take it to the next level. Not only should you only store what you eat – but you should also only store what you use.

Don’t buy something just because it’s on sale… especially if you know you will never use it. Most things have to be rotated to maintain their freshness, or usefulness (like batteries). If you’re not using it, then it’s kinda hard to rotate it.

I could tell you that you need to store 600 pounds of rice, but I wouldn’t be doing you any good in saying that. So instead I’d like to use this article to help you figure out what you need to store and how much for your situation. Maybe you don’t like rice… so storing 600 pounds would be a waste.

What’s the bottom line?

I will say this… this article is not going to be the magic bullet all by itself. You will have to put in the work but I can promise you, it will be time well spent for your future peace of mind. I am also going to use this article to teach you how to figure out what you need for a years supply.

Let’s go back to the 600 pounds of rice. Do you like rice? Do you know how much rice you normally eat? Do you know how much rice it takes to make a serving? To further this rice discussion I’ll use myself and what I have found that works for me.

I have decided that for me a serving is a ¾ cup of rice and I can fit 5 servings inside a quart mason jar. There are about 2 1/2 cups of rice in a one pound bag. That would give me around 3.33 servings per 1 pound bag. Now.. I have a baseline to work from.

Let’s assume that if and/or when the SHTF you don’t really want to upset your culinary applecart. You want to hopefully have that aspect of your life somewhat intact. Currently, you eat rice three times a week. With that in mind, you’d need three servings a week (or one pound of rice). To continue that menu for a full year, you’d need 52 pounds of rice put back.

Granted.. this will give you a little extra because you can actually get 3.33 servings out of a pound of rice. Now that 52 pounds are just for one person. If you have a family of 4 then you’d need to store 208 pounds of rice to maintain your three meals a week routine.

I’d also be willing to wager that you don’t particularly like just plain rice. Me personally… I like to dress mine up with either chicken, beef, or ham. So with that in mind… I’d need 52-pint jars of each of those to go with my rice for the meal.

A pint jar can hold about a pound of meat. I can say this… with ¾ cup of rice and a pound of chicken, you could actually feed two people… they won’t be busting at the seams full, but they won’t be hungry anymore.

My best advice would be to make the meal and see how you and your family do on that ration. What about spices and salt? You need to figure out what you like and then how much you use per recipe.

Using the 3 meals of rice per week, we have figured out that we need 52 pounds of rice, 52 jars of chicken, 52 jars of beef, and 52 jars of ham. This will feed 1-2 people each day for that meal. What are you going to eat the other 4 days of the week, or the other meal or two in the day?

Look

What I am trying to show you is how to figure out what you need to store by making a menu of what you like to eat and that is easily stored. When I say easily stored, I don’t mean just rice and beans. There is very little that can’t be canned or dehydrated for easy storage.

Have you thought about canning up your own meals? It could either be a dehydrated meal in a jar, or something fresh like chili, soup, or something else. Just think… If there are only a couple of people you’re trying to feed, a quart jar of chili would fit the bill for a meal. If you’re doing chili one day a week, then 52 quarts of chili would last you a year.

The key is to figure out a menu that you can live with, and then figure out what it will take to create that menu for a year (or whatever time frame you decide on). Now that you have a menu, you have your goals for what you need to store, and you can work towards those goals. There is nothing that says you have to eat rice and beans the whole time.

Maybe you want to mix it up and have a two-week revolving menu. Basically, have something different every day for two weeks then start over again. The choice is yours and is up to you and your family on what you like to eat.

One of the websites I visited took the revolving menu to a new level. Instead of just staying with those 14 meals they had theirs set up for a 10 or 12 meal menu. Once or twice a week they had an open day to try new recipes. Sometimes it was completely new, and sometimes it was utilizing their stockpiles in a new way to create something different.

Those extra days will give you a chance to experiment and not become bored with the menu. If you trying new things with your stockpiles then you’re never really off course. That extra day also added some spice to the weekly meals.

Maybe in a SHTF scenario, you can’t have lamb chops or whatever else you really like, but why not indulge in them while you can.

As I mentioned above… another reason for creating a menu is to see what you need to have in your food preps. How many meals use salt? Do you know how much salt it will take to create just one meal for a year? What about using salt after the meal is cooked?

By having your recipes printed out and placed in a binder, not only will you be helping yourself, but you’ll be helping others that may be going thru the situation with you. With those recipes printed out (even if it’s something you came up with in your head) you will be able to sit down and calculate just how much of a single ingredient you need to prepare that meal for a year, or whatever time frame you’re shooting for.

It would also help someone else prepare the meal if you happen to be injured or engaged in another task when it came time to cook the meal. With the recipe printed out then no matter who cooks it, it will come out somewhat the same (providing they don’t burn it). This will most likely help with the overall morale of the folks in your group. It will be one less thing that changes when everything else around them is going to crap.

Now you can see why I stated at the beginning of the article that “this article is not going to be the magic bullet all by itself … you will have to put in the work but I can promise you it will be time well spent for your future peace of mind.” Hopefully, this will give you some idea on how to figure out what you need to store for your food preps. Each and everyone is different. What I store you may not like and vice versa.

It gets better

Let’s move from food to other home goods that we use. When I started doing this.. it was an eye-opener to me.

Do you actually know how long your bar of soap lasts? What about that stick of deodorant? How about that tube of toothpaste? Or that roll of toilet paper? Have you thought about how long it takes your cat or dog to go thru a bag of food? What about kitty litter, or flea collars?

All of these things will dictate how much you need to store. When I started trying to store extra of the things mentioned above I used a baseline of one item per month (not including the TP). Then I actually started tracking my usage and found some things that were off. Some for the good… some for the bad.

Here are some of the things that I found when I started tracking my usage. Of course, this is just a baseline for you because your mileage may vary.

Let’s start with our loveable pets first. I had figured I could manage a month on a 50-pound bag of food. I was wrong! I actually went thru that bag in about 25 days. That info is nice to have because now I know I don’t have as much stored up as I thought. As for my kitty… she’s still going strong on a 6.3-pound bag of food. It’s been a month and nine days and she might have about a week’s worth left. So I can figure about a month and a half on her food.

As for a bar of soap… that all depends on the variety of soap you use. I have found that a bar of Dove lasts longer than Irish Spring or Lever 2000. I can get around a month and a half out of a bar of Dove and IMO is a better soap than the other two.

My remaining Irish Spring & Lever 2000 will be set aside for barter if the need arises. I’ll fill up my stores with Dove. Keep in mind, if you have more than one person using that bar you’ll have to divide the time down according to the number of folks using it, or you could take the easy way out and say a bar of Dove per person per month.

Just like the soap… the size of your deodorant plays a factor in how long it will last. When I initially started, I made the assumption that a stick would last a month. Well… I was right, and I was wrong. If I am using the 2.7 oz stick of Degree I can make it just barely over a month. However, if I am using a 2.6 oz stick of Sure…

I am a little under a month. This just goes to show you that you really need to figure out how long whatever you use lasts. If I would have stayed with the assumption that 12 sticks of Sure would have lasted me a year then at some point before that year was up I’d be a little stinky.

While I currently don’t know how long a tube of toothpaste or shampoo will last, it won’t be long and I’ll be tracking them due to opening up a new one.

Put this thought process towards everything you use on a daily or weekly basis. Do you plan on washing dishes? How long does your bottle of dish soap last? What about that box of laundry detergent? How long does a bottle of toilet bowl cleaner last? Why am I harping on cleanliness?

Let’s think about this for a moment. There is a myriad of reasons we prep. Like most of us… I’m not concerned about just one event… I am thinking about multiples that could happen. IMO the most likely is a financial collapse which will eventually lead to a societal collapse.

Both of which will end up with martial law and a possible second civil war. In either case… uncleanliness leads to disease and sickness and we really don’t want to face that possibility when it might be hard or impossible to get to medical care.

If the S really does HTF then we will have enough to worry about. Why not plan for ways to help keep yourself from getting sick in the first place? An infected cut could be very dangerous when there is no medical care available. You are storing basic medical supplies, aren’t you?

At some point during this journey, your preps will grow to the point that you may not remember how much of a particular item you have compared to your goal for that item. This is where an inventory plan will come in handy. This is something I have been working on and I think I have it finally figured out. I utilize two different types of inventory methods.

To start off with… let’s assume that you have decided you need 96 cans of corn for your yearly meal plan. Considering that you should already be rotating your stockpiles, how do you keep track of the cans that are on the shelf without having to physically take the time to count each and every one… every time you do an inventory?

The simplest way I learned was from another site (I can’t take credit for this one). Take a piece of graph paper and make a column on the left-hand side.

Make it wide enough so you can list your supplies. Then for each and every can you have in stock make a “/” mark in the graph squares. You’ll want to leave several lines between the various suppliers. Then once you remove a can from the shelf converts the “/” on the far left to a “X”. Whenever you add to your supplies just add more “/” on down the line.

Now you can see at a glance (by a quick count of the “/”) how many of a particular item you have on hand. If you’ll keep these inventory forms hanging from a clipboard in your pantry or storeroom it won’t take long at all to keep it up to date.

If you’re storing home canned goods or vacuum-sealed jars, you really should check the seals once a month. I have had some jars that were sealed with oxygen absorbers lose their seal after a while. Thankfully I was able to catch them pretty quick and properly vacuum seal them with the food saver and jar attachment (these were done before I got that wonderful device).

As such I am physically pressing down on every lid, and I can count every jar of a particular item at that time. If I didn’t want to keep a running total on the graph paper I could always update the sheet once a month. You just have to figure out what works best for you and your situation.

The other inventory method I use is a custom sheet I made up in my spreadsheet program. It is used for those items that I don’t want (or it would be impossible) to track each and every item using the graph paper method. This sheet is still a work in progress, but I’ll give you basics behind it. Maybe you can give me ideas to finish it out and make it better.

The column on the left that has the item I am tracking, and along the top, I have the month and year as a header for each additional column. Then each month I just write down the quantity of the item on the left in the appropriate month/year column. So far I am using this type of inventory form for my ammo/reloading supplies. Can you imagine using the graph paper method to track each and every bullet in 3 bricks of 22LR. You’d be marking hash marks for a very long time.

This sheet works out pretty well, but I am trying to come up with a way to improve it. In any given month I may purchase more ammo, shoot some ammo, or reload some ammo. Or all of the above.

As of current… this takes another sheet to keep track of the amounts on hand in order to accurately update the main inventory form. I would love to figure out a way to merge the two. As it stands… my main inventory form will allow me to keep track of 10 months worth of numbers on a single page.

If I was just counting cans of stuff, or rolls of toilet paper this sheet would be great for a monthly inventory sheet. But when you’re counting loose rounds it’s best to only do a major count once they have a form to add and subtract as needed each month.

I have found that these two methods of inventorying my supplies work best for me (until of course, I find a better way LOL). They are easy to keep up with and for the most part, you can tell at a glance how much of an item you have on hand. I know that there will be some that say… I don’t need inventory forms, I have a good memory. All I can say is… must be nice. Seriously though. Think about this.

Let’s say you have five different calibers of weapons and your initial goal is 500 rounds for each weapon. You’ve got 320 rounds for your AR, 525 rounds for your 12ga, 480 rounds for your 45, 1575 rounds for your 22LR, and 489 rounds for your 30-06 thanks to a recent target practice round. Having the inventory forms would make it easy for you to see just how many boxes of what caliber you need to buy (with the funds available) to work your way back up to your goals.

There will be no guessing and your money will be best spent where it is needed. Maybe your ’06 is close enough and you’d rather spend your funds to help bring up the numbers for your AR? With the inventory form, you can make an informed decision about your purchases.

The same goes for any other item that you’re tracking. Let’s go back to some of what we have discussed so far in this article. I know I want to have a years supply on hand, so on the inventory form in the supplies column, I’ll have something that looks like this.

  • Deodorant (14 sticks)
  • Dove Soap (8 bars)
  • Dog Food (15 sacks)

You get the idea… so now when it comes time to make out my shopping list I can use my inventory form (instead of physically going and counting my supplies each time I want to go shopping) to help create my list. I can see from the “/” marks that I’m 2 bars shy of my goal for soap, or I’m actually over on the amount of deodorant I need thanks to a recent sale and extra being purchased last time.

With time… Inventorying your supplies will make your life and shopping list easier. There will be no more guesswork and spending money on things that you really didn’t need to complete your goals.

I know I’m getting long winded so I’ll try to cover this next section quickly. The last thing that I feel is crucial to how much you need to store is your resupply plan. I don’t mean to step on any toes, but with this next statement… I fear there is no way around it. Most preppers won’t survive a long-term event. Now quit hollering at the computer monitor… I can’t hear you.

Before you break out the rope to string me up… hear me out. From a lot of the video’s I have watched on YouTube and some of the websites I have visited, most think that if they have cases upon cases of whatever they will be good to go. Their plan is to ride out the event and then restock once it’s over. For most things… that’s a pretty good plan, and you’ll be better off than 90% of the population.

But what if the event turns out to be like Syria? Their civil war has been going on for over two and a half years now and there really doesn’t seem to be an end in sight. Your cases upon cases will only last for so long, and if we are in the middle of a civil war then do you really think you’ll be able to get more cases from your favorite freeze-dried or dehydrated food supplier?

IF this country ends up going to war with itself then there is no doubt in my mind that it will be a long drawn out ordeal. The feds aren’t gonna give up power easily, just like the Syrian govt isn’t giving up easily.

Besides… isn’t that what prepping is all about. Trying to prepare for the worst. Aside from nukes on our own soil or an EMP that puts us back in the stone age… the worst thing I can fathom is a civil war. It will ugly and drawn out.

Thus you need to have a resupply plan. I have had folks tell me… I have several seed vaults, and I’ll just plant a garden when the SHTF. Well… I hope you like being hungry! There is a definite learning curve to gardening successfully, especially if that gardening successfully entails having to completely feed you and your family. Yes, there are some that have a green thumb, but for the majority of us, it is a learned skill… just like anything else.

This is why I consider myself a homesteader with prepper tendencies. My main goals in life are not to amass cases upon cases of whatever product. My main goal is to become self-sufficient so I don’t have to rely on products from other locations to survive. Some will say… I live in the great white north, or in a subdivision so I can’t homestead. Horse hockey!

I’ll give you the knowledge you need to start your research and prove that you CAN do it.

For those that just have a small backyard and think they can’t make a difference in their self-sufficiency, I’d like you to do a little research on the Dervaes family in California. They have a 1/10 acres lot and they produce 7,000 pounds of organic produce annually (as of 2010). Some of the ways they achieve this is thru succession planting and square foot gardening.

They also utilize vertical gardening to reach the lot’s full potential. Here is a short 15 min video on YouTube showing their urban homestead. It’s an inspirational video and worth your time.

For those that live in the great white north that think they can’t raise a garden that will provide food all year long. I’ve got news for you… You can. Eliot Coleman lives up in Vermont and raises food year round in his gardens.

He is the pioneer of the Four Season garden and you can find his book Four-Season Harvest: Organic Vegetables from Your Home Garden All Year Long on Amazon (click here to check availability and current price). It is chocked full of good, practical information to help you become more self-sufficient by raising your own garden produce… even in the dead of winter.

Guess what I am trying to say is this. Formulate a resupply plan and then stock up in bulk on those things you can not grow or produce yourself. That will save you space and money, plus ensure that you have food when you really need it.

Even if you’re not able to completely feed yourself or your family on what you can grow… every little bit helps. If you’ll start gardening now or raising chickens & rabbits, you might be surprised at how much you can grow when the time comes.

One last thing to think about… and then I’ll hush. IF it goes south… here are a couple items you may have not thought about stocking up on.

Hiking boots & leather gloves. Considering the Syrian civil war is moving towards 3 years… I’d have at least 3 pairs in reserve. If you are staying home to either protect the fort or out doing manual labor trying to provide for your family then you’re gonna go thru some footwear.

You don’t want to be without when you really need them. If you’re not used to manual labor… gloves can save your hands. After 15 minutes of hoeing my corn this spring I had blisters, so they are worth the investment.

Ziploc bags. If you have a plan to share with others in need… you need to have a supply of Ziploc bags on hand. You don’t want to hand them a Mylar bag of goodies. This just screams.. I have a stockpile. Instead, have them wait outside and transfer the goodies into a Ziploc bag that way it looks like your sharing what little bit you do have.

Blank paper. Paper can be used for all sorts of things… but have you thought about using it as a safety signal. Let’s say half your group goes out to hunt or patrol. The half left at home is faced with a fight or flee situation and they decide it’s safer to flee and regroup to take the house back.

On your way out… grab a piece of paper and wad it up and throw on the ground. Then the returning party can scope out all entrances to the house upon returning. If they see paper then they know to meet at a predetermined area. This way they are not walking into a bad situation. If the raiding party picks up the paper they are most likely to toss it back down because there will be nothing on it to interest them.

In closing… I hope that I have given you some things to think about when it comes to figuring out what and how much you need to store. If you’ve got any tips on figuring out what & how much to store, or how you track your inventory… then please share down in the comments below. Thanks for taking the time to read my long-winded ramblings.

Authors Edit

I had written this then decided to mull it over for a couple of days to see if there was anything I wanted to add or change. During that time I came up with a new way to inventory my ammo and reloading supplies. I have included a graphic so maybe it will help others.

Instead of being able to log 10 months worth of data, I am able to log 6 months, but I get everything on one page. I used the numbers and calibers from this article for the graphic. (you didn’t think I’d actually show you what I have do ya?)

Article-Graphic

Resources:

  • Food Checklist – What Foods Should A Prepper Store?
  • 21 Point Prepper’s Checklist For Stocking Up at Walmart

Filed Under: Prepping

How to Make Trees Grow Faster [and healthier]

October 8, 2018 M.D. Creekmore

The Grandma White Method – From “The Complete Book of Composting” Copyright 1960 by J. I. Rodale

how-to-grow-trees-fast
Fruit trees will get off to the best start if fed a steady diet of compost. Humus is important if trees are to be productive, disease-free and fast-growing. Use your compost as a mulch as well as a steady source of nutrients to your growing trees.

Using Compost For Tree Growth

Start right from the very beginning. Use compost to start and nourish your tree. We cannot recommend commercial, chemical fertilizers which do not add humus to the soil. You must add organic matter to the soil if you want productive, disease-free trees. Soil that is well supplied with humus retains moisture and has good drainage and aeration.

As humus decomposes, it releases a continuous supply of plant food in contrast to the “flash” action produced by chemical fertilizers. It encourages the existence of beneficial bacteria and earthworms. It fights erosion and over-compactness of the soil.

Every tree grower must have a compost pile. Use your compost as a mulch around each tree. Your trees need nitrogen, phosphorus and potash and your compost pile should contain these nutrients in good proportion.

When organic expert Herbert Clarence White of Paradise, California, plants a tree, he doesn’t even glance at the little instruction sheet that the nursery sent with the stock. He proceeds to plant the tree using an unusual method handed down to him by his grandmother years ago.

Grandma White’s method has worked so well for Herbert over the years that he has used it to plant hundreds—possibly even thousands—of trees. He has seen fruit trees planted by Grandma White’s method show 3 or 4 feet of new growth in a year, and start bearing crops in only a couple of seasons.

You start out by digging a hole 3 feet wide and 3 feet deep in which to plant your young tree. That size hole is much bigger than is usually recommended, but a big hole is the heart of Herbert’s method and he insists on it.

Separate the topsoil from the subsoil that is dug from the planting hole. In the bottom of the hole place, a couple of pieces of 4-inch drain tile and plug up the ends with stones. Fill up the bottom foot of the hole with a mixture of equal parts of topsoil, peat moss and finished compost, plus about five pounds of phosphate rock or colloidal phosphate.

The top 12-inch layer—consisting of a mixture of compost, thoroughly soaked peat moss, leafmold, colloidal phosphate, and rich topsoil, is most important. This is the immediate “seedbed” where the tender young feeder roots will be working.

No raw manure or chemical fertilizer should ever contact this area. Such materials will seriously burn the roots, and perhaps even kill the tree outright. Even raw manure, used as a mulch at the top has often proved disastrous to newly planted trees. So go slow on the manure!

On top of that mixture place a layer of small rocks. The next one-foot layer consists of pure topsoil. Now put into the hole a large stone. Spread the roots of the tree over that stone, then fill the rest of the hole with the compost-topsoil-peat-phosphate-rock mixture.

As mulch over the planting, place one inch of compost, 3 inches of leaves, plus a layer of stones if desired. White also advises putting 250 to 500 earthworms in the top compost layer, and adds this postscript to the description of his method:

Does all this sound too weird and grotesque? Too utterly fantastic? If so, far be it from me to try and convince you. But if you are just a wee bit interested in watching a miracle, just try it out on one little tree—following the planting plan as indicated in the diagram carefully—and it will be hard for you to believe your own eyes when that baby tree starts growing.”

planting-trees-fast

Here is the “Grandma White” method for planting trees. Start out by digging a hole that is 3 feet wide and deep, separating topsoil from the subsoil. Place drain tile, stones at the bottom, filling the hole with topsoil, compost, peat moss, and mineral powders.

In treating a sick tree, or one which has failed year after year to produce a crop, use the same formula as used in planting a baby tree. In other words, make a “blend” or mixture consisting of ½ yard (12 bushels) topsoil; 2 bushels compost (completely decomposed); 2 bushels leaf mold (completely broken down); 20 pounds colloidal phosphate (or rock phosphate); and 20 pounds of rock potash.

The above formula will be sufficient for a young tree from 2 to 6 years of age that has shown little vitality and below average growth. This enriched earth will be used to fill the 20-inch holes that encircle the young tree. (Dig 8 holes, 8 inches in diameter and 20 inches deep, around the tree at the drip line.)

The next step in “treating” a sick tree is to level off the land around the trunk a little beyond the drip line of the branches and to build a sturdy dike just outside the ring of 20-inch holes. Ten pounds of each of the two above-mentioned minerals should then be spread from the trunk of the tree out to the rim of the basin and worked lightly into the soil with a rake.

One inch of compost and leaf mold (mixed) should then be added to the area within the basin and spread out evenly.

If domesticated earthworms are to be used in this “health-building” program, they should be spread over the compost (from 500 to 1,000) and covered with a 3-inch leaf mulch. A little cornmeal or coffee grounds spread on the compost before spreading the leaves would help to give the worms a good start in their new environment.

Filed Under: Homesteading

  • « Go to Previous Page
  • Page 1
  • Interim pages omitted …
  • Page 63
  • Page 64
  • Page 65
  • Page 66
  • Page 67
  • Interim pages omitted …
  • Page 87
  • Go to Next Page »

Primary Sidebar

Subscribe to Blog via Email

Enter your email address to subscribe to this blog and receive notifications of new posts by email.

Join 7,202 other subscribers
  • Amazon
  • Facebook
  • Substack
  • Twitter
  • YouTube

“Do more with less.”

– Minimalist proverb

Recent Posts

  • Just so you know
  • Weather Update for My Corner of Appalachia
  • Why I’m Ordering Ivermectin + Mebendazole Every Year
  • The Website’s Shutting Down (But Here’s the Plan)
  • You Are Hated! Start Training Like It!

Footer

Recent Posts

  • Just so you know
  • Weather Update for My Corner of Appalachia
  • Why I’m Ordering Ivermectin + Mebendazole Every Year
  • The Website’s Shutting Down (But Here’s the Plan)
  • You Are Hated! Start Training Like It!

More about me

Books I’ve written

Books I’ve read

Follow Me on YouTube

Follow Me on Facebook

Gear I Use and Recommend

Newsletter

Search this site

Follow me elsewhere

  • Amazon
  • Facebook
  • Substack
  • Twitter
  • YouTube

© 2008–2025 M.D. Creekmore · As an Amazon Associate, I earn from qualifying purchases.