• Skip to main content
  • Skip to secondary navigation
  • Skip to primary sidebar
  • Skip to footer

M.D. CREEKMORE

  • Blog
  • Books
  • Newsletter
  • Gear I Use
  • About
  • Contact
  • Facebook
  • YouTube
  • Blog
  • Books
  • Newsletter
  • Gear I Use
  • About
  • Contact
  • Privacy Policy
You are here: Home / Archives for M.D. Creekmore

M.D. Creekmore

Hello, I’m M.D. Creekmore. I’ve been interested in self-reliance topics for over 25 years. I’m the author of four books that you can find at Amazon.com as well as Barnes and Noble. Over the years, I’ve learned a lot about prepping, homesteading, and self-reliance topics through first-hand experience and now I want to share what I’ve learned with you.

Must Know Bushcraft Survival Skills for Living Off the Land

September 8, 2018 M.D. Creekmore

by Tony Nester

bushcraft skills field-dressing-a-rabit
Field-dressing a jackrabbit during a survival course.

Living off the land is a skill that can pay off in large dividends if you are stranded in the wilds long-term; want to add more variety into your daily diet at home and reduce food bills, or be prepared in the event of a grid-down situation where the grocery shelves empty.

Having taught extended bushcraft courses during the past 26 years, I’ve found the area of procuring food in the wilderness to be the most challenging skill in the field of wilderness living. Once learned and regularly applied, you will gain greater confidence in the back-country and know how to obtain food from a land that has much to offer, to those who know where to look.

The following material intends to convey practical methods that a person, with little experience in the outdoors, can use to get started obtaining food from Nature’s Kitchen. The emphasis of this article is on small game and not big game animals like elk, moose, and deer.

On any given day in the wilds, you are going to come across a greater concentration of rabbits, squirrels, woodchucks, marmots, raccoons, and other smaller critters. For the survivor, these animals will provide sustenance until you can procure the larger game.

Food procurement has a lot of myths and misconceptions surrounding it, however. The idea that one can simply grab their bug-out bag and head into the hills to live off nature’s kitchen for a few months has been perpetuated in the reality shows and can get you into trouble. It took a tribe to feed a tribe and our ancestors relied on sheer numbers to obtain wild food, not on a lone-wolf mentality.

I’ve had the opportunity to eat just about everything that crawls, flies, walks, or slithers- from snakes and coyotes to rats and grasshoppers. Under conditions where hunger is constantly gnawing away at the body (and mind), my food prejudices quickly fade after a few days and you will eat anything that runs in front of you. My success is also greatly increased by having a few key hunting and trapping tools with me at all times. Keep in mind that game laws vary tremendously from state to state so research your region of the country to determine what’s legal.

The Challenge of Living Off the Land

Procuring food in the wilderness can be a challenge because of some or all of the following reasons:

1) Few people subsistence hunt or trap like they did a generation ago and the skills and knowledge base in the community have been reduced or completely disappeared in some regions.

2) When many people hunt today, it is mostly for Big Game trophies which means sport first, and meat second. Plus, the sheer number of hunters taking to the woods each season is staggering. As a result, state game laws are becoming more restrictive and the pressure from often ill-informed animal rights groups have all but eliminated certain practices such as trapping from many states.

3) The geographic region (desert, mountains, etc…) may not support much life to begin with. It is far easier to make it as a hunter-gatherer in the lush, Pacific Northwest than in the desert lowlands of the parched Southwest.

4) It may have been a particularly tough year for your region. Perhaps the drought is severe or wildfires are wreaking havoc, and thus the animals and plants are suffering.

5) Modern game laws are much different than when our ancestors walked the planet and could harvest any species of animal in any season, day or night.

6) Subsistence hunting and gathering is best performed as a group (tribe) and not as a solo pursuit. The more eyes, ears, and hands out on the land the greater the odds of obtaining wild meat, fish, and plants. Many of us today have little choice but to go solo which reduces “caloric efficiency.”

7) Finally, one cannot discount the TBH Effect- “Trained By Hollywood Effect.” There is a constant barrage of romantic notions that we receive from movies and “reality” shows depicting how people are supposed to live in the wilds. If you trek into the wilderness like Jeremiah Johnson, then have realistic expectations of your own skills, what the land can provide, and what is reasonable (and legal) for your region. Even then, don’t expect it to be easy.

Four Areas of Study for the Modern Hunter-Gatherer

In today’s world, if you want to feed yourself reasonably well in the backcountry, you must focus on the following four areas of study:

  1. Proficiency with a .22 caliber rifle or pistol.
  2. Basic fishing methods such as angling.
  3. Knowledge of the ten common edible plants in your region.
  4. How to use traps and snares.

Granted, there are other methods of procuring wild game such as bowhunting, slings, bolas, etc… but the above four represent the core skills to set your sights on as a beginner, in my opinion. If you are a skilled archer then, by all means, work with what you know. The more skills you possess in this realm, the more options you have.

If you are new to firearms and hunting, then seek out an experienced family member or friend who can show you the basics of firearm safety and marksmanship. I highly recommend taking a Hunter Safety class. This will provide the foundation skills of safety and basic gun handling skills as well as covering game laws specific to your state.

Tools of the Trade

Traps-for-living-off-the-land-and-bushcraft-survival
Simple tools of the trade


Provided you are in good habitat, a quality rifle along with the proper training can tip the odds in your favor for procuring wild game. Having been on countless survival treks where we lived solely off the land using primitive skills (no modern gear), I can say that I will gladly take a small caliber firearm any day for filling the stew pot.

There are two approaches to living off the land: Passive and Active. 1) Passive is using traps, snares, deadfalls, trotlines, cast nets, etc…. You are setting out the device and letting it do the work for you while you are back at camp or home. 2) Active is where you are moving across the landscape or still hunting. This is more calorie intensive and not as productive as trapping. I find it is best to employ both methods which increases your food procurement capabilities.

Bushcraft Rifles

I use a Ruger 10-22 with a scope for small game. This is the most ubiquitous .22 on the market with plenty of products if you want to modify the stock, trigger, sights, etc…. CCI Minimag hollow points are my preferred ammo for hunting. I also have a Marlin Papoose collapsible .22 that I use on occasion.

Bushcraft Shotguns

I am a sucker for the old H & R single-shot 20 gauge for hunting small game. You can still find these for under $120 and many a youth has bagged his first squirrel with this simple but efficient shotgun. H & R also makes a hollow, synthetic stock called the Survivor. The stock has enough space to stow basic survival supplies.

Combination Rifles

I think the best of both worlds is getting an over and under rifle. I use either a Savage Model 24 which is a .222 caliber over a .20 gauge or a Savage Model 42 which is a .22LR over a .410 gauge. Both of these are excellent for taking large and small game. I have a penchant for the older rifles with a real wood stock and a nice heft.

Air Rifles

A former student of mine, who was involved in air gun competitions, introduced me to high-powered air-rifles for hunting small game. Until my vision changed recently, I was using a Benjamin 392 with iron sights but have switched to a Hatsan 125 with a scope. This shoots .25 caliber pellets and is excellent for dropping squirrels and rabbits easily within a 30-yard range not to mention that the ammo is cheap. The Pyramyd Air Company has a wide selection of air rifles and is a good place to start your research.

Recurve Bows

During archery season, I use a Bear Kodiak recurve or a handmade cherry bow both of which have a 45# draw weight. I like making my own cedar arrows and use blunt tips for small game and Zwickey Eskimo broadheads for large game. I fletch my own arrows with a Bitzenburger jig.

Slingshot

I like making my own high-powered slingshots using tubular bands and use these each Fall for squirrel hunting. The beauty of practicing with a slingshot is that the muscle-memory carries over to your archery skills. I use .50 caliber black powder balls for ammo.
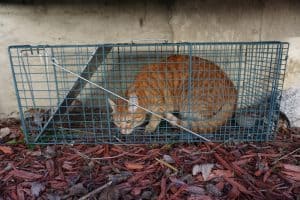
Conibears

When we teach trapping courses in Utah, we utilize conibears and snares. A #110 conibear is an excellent game-getter that we use for procuring small animals while we use the larger #330 conibears for beaver and raccoon.

These are extremely efficient traps that can easily fracture your fingers or limbs if you are unfamiliar with how to use them. Take a trapper’s education course, obtain a permit, and then spend time with an experienced trapper if you plan on using conibears.

There’s a reason that the archeological record, the world over, indicates that trapping was the prime means of sustenance for indigenous cultures.

Rat traps, obtained from big-box hardware stores, would be another option for procuring small game and don’t have the hazardous kickback that the Conibear possesses.

Fishing

fish-on-open-fire-bushcraft-survival-skills-fishing
Fish filets and trout baking over the coals. These are secured with split, green willow shoots.

Fishing isn’t something I do much in Arizona but when I head up to northern regions I bring a collapsible Shakespeare fishing pole, 6-pound test line, three-dozen assorted fish hooks and assorted artificial baits.

Obviously, if you live in a more productive state then your fishing tackle should be heartier than my kit and you may even want to add in crayfish traps. The latter can be found at Wal-Mart.

Cast & Gill Nets

Both cast and gill nets allow the fisherman to harvest a large quantity of fish while expending little effort. These are the time-tested methods used throughout the world by maritime cultures. If I were venturing into a remote waterway or wilderness region and weight wasn’t an issue, I would definitely pack along a cast or gill net for survival purposes. Cast nets range in size from three to eight feet while the standard survival gill net is 12’ by 4’ and packs down to the size of a softball.

A Menu of Small Game

Small game includes cottontail rabbit, squirrel, marmots, skunk, gopher, woodchuck, jackrabbit, chipmunk, ringtail, raccoon, and porcupine. Not all of these are legal to hunt and you will have to check out your state’s game laws.

One squirrel or rabbit will generally provide a single meal for one person. On the other hand, a fat raccoon or porcupine might last one person for four days. Raccoon tastes like roast-beef, if grilled over an open fire or the barbecue, and is an outstanding meat.

Most of us tend to have a romantic image of the native hunter relying on deer or buffalo as their sole means of sustenance, when in fact, it was the microfauna or small mammals that provided the consistent day to day food source in many parts of the world.

In terms of animal population density, you will be able to sustain yourself with small game far easier than larger animals like deer and elk (and obtaining hunting permits for small game is far easier!).

One wildlife biologist in Nevada found that the number of small mammals per square kilometer was around 4600! Another study in Manitoba, Canada revealed 10 squirrels per acre. The research also suggests that spring and early summer show the highest concentration of mammals.

Summary

If you are reading this article, then you had ancestors who hunted and gathered, fished and foraged. Our body and mind evolved from a much different lifestyle than the one we lead today in our largely urban world. You were born with the senses and abilities to be a hunter. They are already hardwired into your being. Spend some time focusing on one of the four key areas listed here and get started this weekend.

Learn about the top ten edible plants used in your region, acquire proficiency with a .22 rifle or air-rifle; get a small-game hunting permit and take to the field; spend time fishing with your family on the next camping trip. The time to learn how to feed yourself from nature’s kitchen is before a crisis hits and the grocery shelves empty.

Start out with a few of these activities and you will be, not only eating healthier but prepared to supplement your home pantry in the event of an emergency.

Recommended Reading

  • Camp Life & the Tricks of Trapping
  • The Modern Hunter-Gatherer
  • Subsistence: A Guide For The Modern Hunter-Gatherer: Hunting, Trapping, Fishing & Foraging for a Living in Texas
  • The Forager’s Harvest: A Guide to Identifying, Harvesting, and Preparing Edible Wild Plants

About the Author: Tony Nester is the author of numerous books and DVDs on survival. His school is the primary provider of survival training for the Military Special Operations community, and he has served as a consultant for the NTSB, Travel Channel, NY Times, Backpacker Magazine, and the film Into the Wild. Tony also writes post-apocalyptic fiction under the pen name JT Sawyer.

For more information, visit www.apathways.com or www.jtsawyer.com.

Filed Under: Bushcraft

Edible Wild Plants: 25 Wild Plants You Can Eat to Survive in the Wild

September 7, 2018 M.D. Creekmore

wild plants to eat
by Christine W

I once read a very interesting article from a survivor of the Bosnian Collapse in the late 90’s. This was a true end of the world as they knew it event, and it was fascinating and eye-opening to read. One of the things the man talked about in his extensive article was the most useful skills to posses.

Medical knowledge was the highest on his list. Lacking real world medical training, people with the knowledge of the uses of herbs and plants were able to trade and use that knowledge to survive.

Most people in America can’t identify even 1% of the plants that surround them. They don’t know useful from poisonous or nutritious from useless plants. And yet there are dozens of plants that grow even in urban settings that are not only edible but downright lifesaving if you only can identify them.

For 15 years I have been a gardener and outdoorswoman. Much of my knowledge has come from being a curious person interested in the world around me, and also from searching for natural ways to heal common ailments for myself and my children.

I have been amazed at the amount of plants growing near me that can be used for healing, and have compiled a small list of what I consider the important common plants that grow in the USA, things you can find right out your back door. I am sure there are thousands more!

Knowledge is power, so I recommend that you should start now when it comes to identifying wild and not so wild food and medicinal sources. Once you can recognize a plant start noting where you see them, what time of year they flower in your area and when they bear fruit. I go out for drives along country roads and memorize where plants, bushes, berries, and helpful trees are growing.

You can also look around your neighborhood. Rose Bushes will provide you with rose hips that are high in vitamin C and can save you from scurvy in the winter. Echinacea also known as Purple Coneflowers are popular in gardens can boost the immune system and also have a host of other uses.

Look up color photos of plants on the internet to help you identify them, or join a wild crafting group if one is available. Having a print out of each plant with multiple pictures and uses of them, along with how to use them and dosages, is very important in a SHTF event.

There are many books specifying every area of America for finding wild foods and they often have excellent color pictures and identification keys. I keep a few of them in my purse when I go up to the wild and try to identify as many helpful plants as possible. Often these books are inexpensive so picking them up is a good idea.

As a note I say where you can find the below plants. We live in the dry west so most plants only grow near water sources. However, I know that in other areas of the country rain is more plentiful so the growing habitat is much different.

If you are gathering post or during SHTF remember your personal safety and weigh the possible benefits vs. danger of running into other hungry people. Never go alone even now as accidents happen and wild animals many times enjoy wild foods as much as people do.

Meeting a hungry bear while picking berries is a highly unpleasant event! When you head to any wilderness take precautions and let people know where you are going and when you are coming back. Always take a first aid kit, water, a good map, and some food with you.

Caution! As with any wild foraging check and double check your identification before eating anything, do not take another person’s word on the safety of a plant. Some wild foods are debated on their safety as some people will have a reaction where others do not.

Also if you have food allergies be wary and careful when trying new things. Remember that when harvesting wild foods make sure they are not sprayed with poisons or chemicals. I am not a doctor and am not giving medical advice. If you want to try natural remedies do your research and also talk to your doctor.

Even though these plants are natural they can still be very strong medicines and even interact with other medication you are taking!

Alfalfa

Amazingly enough, this plant, a common feed for animals, is one of the most useful in a TEOTWAWKI collapse, or even just in a financial collapse where you suddenly become dirt poor. Alfalfa is highly nutritious and can be used to treat several conditions. The most important in my mind being bleeding, hemorrhaging, hemorrhaging after birth, and heavy menstrual bleeding.

Blood loss is a common problem where medical care is limited and people are exposed to hard physical work or dangerous situations.

Childbirth for women is the most fatal event during life in 3rd world countries, many of the deaths coming from hemorrhaging after birth. Drinking a tea made from alfalfa, or eating alfalfa in the last few weeks of pregnancy can help prevent hemorrhage or excessive bleeding due to several compounds it contains, this includes vitamin K which is essential to blood clotting.

I used this supplement under my midwife’s supervision during my last two pregnancies.

My first two births went off well except that I hemorrhaged after birth. After my second birth, I hemorrhaged so severely that I was only saved by my midwife administering emergency shots of anti-hemorrhaging drugs (which will not be available to most women in a SHTF event).

For two months after I was weaker than normal and under strict instructions to take it easy. My next two births went well and I barely bled at all, even compared to normal bleeding. Both times I was taking alfalfa at the end of my pregnancy. Pregnant women should not take it until the last three weeks of pregnancy due to the fact that as it has hormone properties that could cause labor and miscarriage.

Once a woman is considered full term at 37 weeks that is not such an issue. Taking too much alfalfa for longer than a month can have the opposite effect and cause bleeding to be worse! Newborns need Vitamin K for proper development and usually receive an injection soon after birth, but during or after a SHTF event those shots may not be available and doctors recommend mothers consume foods with high vitamin K so that it will be passed to the nursing child.

Dried or fresh alfalfa can be used in the human diet and also as a compress on wounds to help them stop bleeding. In application to a wound, it is essential to boil the water for 10 minutes to kill bacteria and then boil the alfalfa added for a few minutes thus killing any bacteria on the plant leaves. Alfalfa helps people who are nutritionally deficient.

It helps a great deal with vitamin C deficiency when used fresh, for it contains more vitamin C than some citrus fruits. Scurvy is caused by a vitamin C deficiency and is a common problem for people during famines, or when there is a lack of fresh fruits and vegetables.

It also has very high B vitamin levels and Vitamin D levels which help with problems such as rickets, a common disease especially affecting children who have poor diets or are not exposed to enough sunlight. This is a common problem when living in a war zone or an area where people must stay inside much of the time due to violence as Vitamin D cannot be manufactured by the body and is mainly created by the skin’s exposure to the sun.

Alfalfa is also easy to store when dried and is very cheap. It is a good item to keep on hand. Alfalfa is grown everywhere in the USA and can be found along ditch banks and country roads growing wild, in fields as well as in farmyards. It does not need to be reseeded every year so a field that had it last year will have it this year as well.

Raspberry Leaf

Raspberries (also known as redcaps, bramble berries, dewberry, and thimbleberry) grow wild in the USA and are even considered an invasive species. They come in red, black, purple, and golden fruit all of which is essentially the same plant, but these other fruit colors do not generally grow in the wild like the common red does. Obviously, the fruit is edible but the leaves and even roots can be used for highly effective remedies.

The most well known is for aid to painful menstruation, to regulate and normalize a woman’s cycle, and also to help shorten and lessen the pain of childbirth. I am all for shortening the length of childbirth; having had four children naturally! Caution must be used however, raspberry leaf can cause uterine contractions, so it should only be used once labor has begun or a week before birth is expected.

It can be used by non-pregnant women during and right before menstruation. Another equally important use of raspberry leaf is it’s use as a cure for diarrhea. More on that in the Blackberry Section. These plants are found near water, in boggy areas, besides stream banks, in gullies, on ditch banks, or growing anywhere that gets plentiful rainfall.

Blackberry Fruits, Leaves, and Roots

Diarrhea is one of the most common killers in third world countries due to contaminated water supplies and poor water treatment facilities. As a country collapses the infrastructure of water treatment always breaks down, and waterborne illness explodes. Preparation for such a disease is essential when we plan for a SHTF event.

Diarrhea is especially fatal to children and the elderly and is frightening at how fast it kills. Soldiers in battle frequently suffer from dysentery due to bad water as well. For centuries blackberries (and to a lesser extent any of the brambleberry varieties such a red caps, black caps, Marionberries, dewberries, and raspberries) have been used for treating diarrhea, dysentery, foodborne illness, and even the more deadly waterborne illnesses. This must be remembered to be a treatment, not a cure as diarrhea is a symptom of an infection in the body which must be treated as well.

Blackberry Root Bark is the most effective remedy for diarrhea, but if you can’t get to the roots the leaves are highly effective as well, even dried ones. Last is the fruit which can be eaten or a syrup or juice made from the fruit. A syrup or juice is especially useful when treating small children.

One teaspoon of root or leaves per boiling cup of water, steeped for 20 minutes, then sweetened with honey if possible due to its healing and soothing properties is a good dosage. It is the tannins in the blackberry plant that help with diarrhea.

Blackberries are even more invasive than red raspberries and grow profusely throughout the USA. If in a dry region look for them along streams or down in gullies and canyons. The leaves and root bark are easy to dry, and the leaves can be eaten and are high in nutrition.

Elderberries

I grew up eating wild elderberries, these are a round purple-ish blue fruit that grows in clusters on a bushy tree. The bush flowers in late spring depending on your area and the fruits are ripe in early fall.

They are very common growing wild and like water so they grow either near bodies of water or in areas that get plenty of water. I often see them growing in old farmyards or homesteads because the pioneers and old farmers used them not only for health but as a much-needed fruit.

They also can be found in gullies and draws. The fruit has a dusty powder on it, but care should be taken as the red elderberry, the stems of all elderberries that connect to the fruit, and also the unripe fruit, are poisonous.

The fruit and flowers have been proven in clinical trials to help with many ailments, but especially in respiratory infections such as bronchitis and also to help thin mucus. The fruit are very high in vitamin C and are used to treat the flu and to boost the immune system. Elderberries would be good for an insurance against scurvy. Harvesting is easy and making juice, syrups, or tinctures from them is the best way to use them for healing.

The flowers are used to make a tea or tincture for respiratory ailments and compress for wounds. They also are good in pies, jams, jellies, and to make wine and liquors. There is some evidence that they should be cooked before consuming as uncooked raw fruit can cause stomach upset. Elderberry syrup is safe for children.

Other Berries – Obviously there are many berries growing throughout the United States, many of them not only edible but beneficial as well. Getting a good book on berry identification for your area is an excellent idea.

Rosehips

Wild roses grow all over the USA along roads, up in the mountains, and in forests. They are usually found as just a single flower, meaning they are a single layer of petals in a ring around the central part of the flower, maybe five petals in a ring.

Roses are also grown in many yards and gardens, and there are even rose varieties grown specifically for large rosehips. Rosehips are the main and most helpful part of the plant for use. Wild roses have small hips compared to their cultivated cousins, but size doesn’t matter when it comes to food and medicinal value.

They can be eaten raw in a pinch, but the most common way is to chop the hips roughly and pour 1 cup boiling water over two teaspoons of the chopped hips. Allow them to steep for 20 minutes and sweeten with honey, or, if for a child under two years of age, sugar or syrup. Rose hips are higher in vitamin C than citrus fruit and not only prevent but also treat scurvy.

They are easy to identify and easy to harvest. Rose hips make a tea that is tart and pleasant to drink. They can help treat urinary tract infections and the flu, and rose hips also boost the immune system. When fresh veggies and fruit are unavailable, rosehips can be found even in winter and still be eaten as they do not rot easily and cling to the rosebush.

Rosehips are generally a reddish color, and it is wise to look for ones that are still firm, not black or with mold or rot on them. They can be used to make syrup, jelly, jam, wine, and juice. The flowers of roses are also edible but make sure you don’t eat them if they are been sprayed with pesticide.

Bachelor Buttons

Bachelor Buttons, also known as cornflowers, are a flower that grows wild and cultivated across the USA. They are popular in wildflower or cottage gardens and are also drought tolerant and reseed prolifically in the wild. The common color is a cobalt blue, but especially in gardens, they come in white, light pink, and purple.

The flower is the part used and is most commonly utilized as an eyewash for injured or infected eyes. This is usually done by steeping the flowers in freshly boiled water, cooled, and then applied over the eyes on a moistened rag.

A similar rinse for cuts and sores in the mouth aids healing. In this instance, it is best to spit out after swishing around the mouth. Furthermore, they can also be used in the same form to wash cuts, scrapes, and bruises.

Combine one teaspoon of dried cornflower petals, or five fresh blossoms with one cup of boiling water. Cover and steep for 15-20 minutes; after this you may strain and consume. If taking internally it is best for no longer than two weeks.

Cornflower tea has been used to calm diarrhea, treat urinary tract infections, and for anxiety or nervousness. This flower can be found along roadsides, in fields, and in clearings. They love full sun and they are very easy to grow. Women who are pregnant or breastfeeding should not use this internally. If you have allergies to daisies or ragweed you should not use this at all.

Lambs Quarters/Wild Spinach

Lambs Quarters, also known as wild spinach, goosefoot, pigweed, good king Henry, and fat hen, is considered by most gardeners as a weed, but is, in fact, is a highly nutritious and delicious plant that grows everywhere and is easy to identify. It is nicer than common spinach because it is slow to bolt in the heat of summer, and because while tasting like spinach, it is even more nutritious.

It can be cooked or eaten raw and the stems leaves and seeds are all edible. It can also be frozen, canned or dried for later eating. Lamb’s Quarters is a good survival food and can be found in yards, abandoned lots, fields, gardens, and along roads. You can cut it off almost to the root, yet it comes up and starts leafing out again.

Dandelion

Dandelion is another common yard weed that grows almost everywhere, including in the mountains. I never dig up the dandelions in my yard but use them and also feed them to our rabbits. We do not treat our yard with chemicals. It is highly nutritious, and all parts are edible- including the roots which can be dried and used as a coffee substitute. It has been used as a diuretic and to cleanse the blood of toxins.

The milk that comes when you cut the plant can be used on wounds and is highly effective to use on warts. I have used the milk on three of my children’s warts and all three times it made them disappear naturally without pain or scarring. It must be applied every day for a good month to the warts. A tea made from all parts of the dandelion is absurdly rich in nutrients and would be well utilized by those suffering from malnutrition.

Wild Onions

Wild onions are easy to identify because they smell like onions! They are considered a weed in many parts of the country, and they can be eaten like regular onions while being a healthy addition to the diet and are easy to dry for future use. They can be in yards or near places that have a constant water supply or a good rain.

Pine Trees/Spruce Trees

Pine trees are common all across the USA and several parts of the tree can be used both medicinally and nutritionally. The needles themselves are rich in vitamin C and can be steeped in boiling water to create a tea to fight scurvy (vitamin C deficiency), and they are also high in vitamin A and beta-carotene. Spruce tip tea or pine needle tea is useful to treat a sore throat, cough, colds, and chest congestion.

This is a very important survival food as it is so readily available and easy to find. The best tasting needles are young tender ones, but older needles work just the same nutritionally. Pine nuts that are found in pine cones are rich in calories, healthy fats, vitamins, and minerals and are high in vitamin K which helps stop bleeding. The inner bark of pine trees is even edible but should only be used in an emergency because to get at it you kill the tree.

Pine Sap has many uses and is highly effective for use on wounds when mixed as a salve to prevent and treat an infection. It is also used as the flu and cold treatment when mixed with honey or made into a tincture. It not only fights the infection inside but also soothes sore throats.

Chopped pine needles added to a hot bath can help with skin problems since they contain natural sulfur, they also soothe sore muscles and joints. Pine oil can be used by adding a few drops to boiling water and then breathing in the steam; there is evidence that it helps cure sinus infections, bronchitis, and breaks up mucus. Pine oil kills germs and can be used to clean surfaces during illnesses, although, it must always be diluted and never applied straight to skin.

However, pine oil is a distilled product and must go through special processing and may not be easy to replicate after SHTF (although what a skill to have!) Use roughly chopped pine needles, with boiling water poured over, then cover your head with a towel over the bowl and breath deeply. Pine needles are also a natural flea and bug repellent and can be used to stuff beds and cushions to deter them. The scent of pine is generally very calming. Caution – Pregnant women should not use pine needle tea as there is fear it could cause miscarriage. There are three varieties of toxic pine, and it is highly recommended to learn how to identify and avoid them. They are Norfolk Island Pine, Yew, and Ponderosa Pine.

Crabapples

These are a variety of apple that are often overlooked as an edible fruit because they are unpleasant for fresh eating. They are very good for cooking and if sweetened can be made into pies, jams, jellies, syrup, wine, pickled, and when mixed with other fruits dried in fruit leather. They were mainly used by our forefathers as an addition to cider making as they added depth of flavor and a bit of tartness to the finished product. There are many varieties of crabapple tree and the fruit can be quite large as they are grown for their pretty look. They are grown in many yards and businesses as a decorative tree and the fruit is most often left to rot. Most people I have asked are eager to let me pick off their trees since otherwise they eventually fall and have to be raked up. They also can be found growing wild and in old orchards or farms. Crabapples are high in vitamin C and make a pleasant tea when sweetened. They have been used to treat urinary infections and can also be juiced to make cider vinegar which is one of the most healthy things you can make. For the best flavor harvest after they have been frosted on.

Wild Plums

These are native to the USA and grow in all parts. They are small and are usually a yellowish red color. Wild Plums are a tasty fruit for fresh eating and are useful in making jam, jelly, syrup, pies, and pickles. They are very high in vitamin C and Iron. Dried or fresh they are a good laxative and treat anemia.

Cattails

A well known wild food that grows in marshy or wet areas these are easy to identify. All parts of the plant are edible in different seasons and have good food value. The root can be pounded and applied to cuts and scrapes as a poultice. As these always grown near or in water be careful of pollution.

Rhubarb

This is not necessarily a wild food but it is so common that noting where it grows is a good idea. This plant comes back year after year for practically ever and you see it often in abandoned lots, old farmsteads, abandoned homes, or in peoples gardens.

Most people never use it and are happy to give away to those who will. Harvesting in the spring is best when it is tender. Rhubarb can be made into jam, sauce, syrup, put into pies, cakes, and bread and canned.

Rhubarb is rich in B- complex vitamins such as folates, riboflavin, niacin, vitamin B-6, thiamin, and pantothenic acid and good levels of vitamin K. It has been used to treat stomach problems. The leaves are poisonous, only the stalks should be eaten.

Daylilies

These grow all over the US and in many places, they grow wild or have taken over lots of land and gardens as they are hardy and invasive. They are edible. The shoots when young in spring can be cooked like asparagus or eaten raw, the flowers should be harvested in summer and can be fried like squash flowers, chopped and added to salads, and immature buds cooked like green beans. The tubers can be gathered year round and cooked like corn. They have been used to treat arsenic poisoning.

Nuts

There are so many trees that produce edible nuts that all I can recommend is that you get a good identification book and start looking around you. Nuts are high in nutrition, healthy fats, and calories so they make an excellent survival food.

A couple of varieties that are overlooked by people are acorns and pine nuts found in pine cones. Acorns have good food value but are bitter so most people avoid them, meaning that you will have more opportunity to gather them. Learn how to process them to get out the bitterness.

Wild Strawberries

Also known as Alpine strawberry, Common Strawberry, Mountain Strawberry, Pineapple Strawberry, Wild Strawberries, Wood Strawberry, Woodland strawberry. These grow prolifically all over the USA and although the fruit is very nice to eat (but tiny) the leaves have great food value and have been used to treat diarrhea when made into a tea.

The leaves contain beneficial minerals and vitamins. The root is also used to treat diarrhea. These like shady places but also can grow in sunny clearings and fields..

Wild Violets

The leaves and the flowers are edible and can be found growing in many yards and gardens where they are considered a weed. They are purple-ish blue or white and can be found in the shade of forests or moist clearings. They can be added to salads or cooked. The medicinal uses are many and they make a lovely salve for irritated skin and rashes and also a tea can be made from the leaves and flowers to ease the pain of headaches and arthritis as well as to treat diarrhea. They appear early in spring and grow all summer long in the shade. They are loaded with vitamin A and C which makes them a good remedy for colds and flu. The flowers can be added to jellies during the cooking stage and turn the liquid a lovely violet color.

Ferns

Several fern varieties are edible and are often called fiddleheads, however, care must be taken as there are also several non-edible varieties that can cause mild to severe illness. Invest in a good identification book or print many pictures out of edible varieties off the internet for better identification. These must be harvested in early to late spring. They are fried, steamed sautéed, boiled, and pickled and are rich in vitamin A and C.

Wild Greens

There are so many kinds that it would take a good sized book to describe them all and I highly recommend buying a field guide and searching them out. Some that are common and worth investigating are mustard, watercress, stinging nettle, miners lettuce, sorrel, red clover, and sweet coltsfoot. Most greens are best harvested in the spring and early summer when they are tender and young.

Willow Tree

The willow tree has been used for thousands of years to treat pain. It grows in yards and woods across the United States. The bark of the tree, especially that of the White Willow tree is what as used and has the same actions of aspirin for treating pain and fever Use 1 to 2 teaspoons of willow bark to 8 oz of boiling water and boil for 5 to 10 minutes.

Then turn off heat and allow to steep for 20 to 30 minutes more.

Drinking 3 to 4 cups throughout the day is recommended to be effective. Gathering and drying the bark in spring summer and fall would be a good idea to have a store through winter.

This is a real medication similar in its side effects to aspirin, it interacts with several drugs and can cause the same stomach problems as aspirin so research it well before use. Pregnant and nursing women and children under two should never use willow bark.

Mints

Mints are not a really wild species but are so highly invasive once planted in a garden that they quickly spread and can take over vast tracts of land. There are many varieties and just as many uses both as a food as well as medicinally. Mints are high in vitamin A and spearmint, in particular, is high in minerals. It is often used internally to treat stomach upset, headaches, body aches, reduce fever, for sore throats and cough, anti-flatulence, and diarrhea. Externally mint is an excellent insect repellent and can be used to treat lice, muscle aches, soothe insect bites, hair care, and vaginitis. A simple tea is used internally and is quite pleasant, externally a similar tea can be made and cooled before application.

Mushrooms

Wild mushrooms can be very helpful both medicinally and nutritionally but great care must be taken as so many varieties are deadly. I won’t go into them here but invest in a good full-color photographic field guide, and even then be careful! The only mushroom I feel very safe harvesting is morels because they are so distinctive and only have one similar species to contend with. As my father said they look like a brain!

Tree Saps

There are several trees that produce edible saps that can be boiled down into sweet syrups. Most commonly we think of the maple tree, and all maples produce sap although the sugar maple is the most well known and produces the highest volume per tree. There are however several other trees that produce good sap for human use. Pine trees are one but the sap is more for medicinal use than for pleasurable eating. Birch, Walnut, and Sycamore all produce an edible sap for syrup making. Obviously, these are high in sugar content which equals calories. As a caution only stick to the above or other documented non-poisonous trees for sap. Tree sap syrup has many vitamins and minerals making them a good survival food.

Wild Leeks Or Ramps

These are a leek or onion-like bulb that are common throughout the United States in forested areas and grow often near streams or on hills. The leaves when torn or bruised smell of onion or garlic so they are easy to identify. The plant resembles lily of the valley. These are found and harvested in the spring. When harvesting only take half of what you find so they can continue to propagate.

Supplies For Harvesting – A good pair of boots and weather specific clothing, good identification books or literature, a small hand shovel, a good sturdy bucket/basket with a handle/or canvas bags, a knife for cutting, gardening gloves, a sidearm for meetings with predators of the four-legged to two-legged kind.

M.D. Creekmore recommends you get a copy of The Forager’s Harvest: A Guide to Identifying, Harvesting, and Preparing Edible Wild Plants.


Filed Under: Bushcraft

Small Homesteading Guide and Layout Plan

September 6, 2018 M.D. Creekmore

Face reality, unless you are super rich putting back more than six months to a one-year food supply, isn’t practical, and even if you have the cash to spend, finding room for storage and the constant dating and rotating become the next obstacle, and this can get quickly become unmanageable.

For most preppers the goal should be a one-year food storage reserve, this should see you through most disasters, but you should also plan and work toward becoming as self-reliant as possible where you are. If you can grow and forage for all or most of your own food then you can survive for decades if need be, and eat healthier too.

In this article, I will cover some key points learned from my experience running a small homestead and providing most of my own food for over a decade. This includes gardening, foraging, and raising domestic livestock as well as tips on preserving the bounty of your harvest.

Self-Sufficiency Starts with the Survival Workshop

Self-reliant prepper workshop

The ability to use tools has been a major contributing factor to our survival and growth as a species, but unfortunately, that ability has turned into a specialty skill set in our increasingly dumbed-down, in the call, “the guy” for everything that needs fixing in the world that we now live in. Unfortunately, for some calling “the guy” may not be an option during a long-term disaster. You will be “the guy” and if it breaks you will probably be the one who has to fix it, and aside from the obvious of needing to know what you are doing, you will also need the correct tools to do the job effectively.

Nothing beats hands-on learning and experience, and you can get that by signing up for any courses available in your area. Look into welding, woodworking, auto mechanics etc. learn all you can, because skills will be needed for your own use and well as being an excellent barter item that no one can steal from you.

You can often get free training, by offering your help to local businesses that specialize in the skills that you want to learn. Tell them that you would like to offer your help free in exchange for them helping you learn those skills. As long as they know that, you are not trying to learn, so that you can then set up as competition later, most will welcome the offer.

As for what tools you will need that really depends on your skills in using those tools, once you gain skills you will know also know what tools you need in your toolbox. But not matter what tool you buy always buy the very best quality that you can afford – low-quality tools often break during use and cause all kinds of cursing, disappointment, and unfinished work.

Another thing to keep in mind when selecting and buying tools is that power from the utility might not be available, therefore hand tools that run on muscle power and sweat should be given top priority, in the prepper’s toolbox, and then rechargeable tools that can be charged via solar or generator power. 

The Prepper’s Garden

the prepper garden
Soil tilled and ready for planting corn, pole beans, and squash.

When it comes to gardening everyone seems to have their own ideas as to what is “the best” method, and they all could be right because different methods are required for different situations and locations, but never the less the basics are still the same. You start with a seed, seedling, or cutting, plant it, nurture it, harvest it, and eventually eat it.

Generally, you will need a fertile soil with a pH-balanced level of between 6.5. – 7, well drained, with six or more hours of direct sunlight, and fresh water to grow a healthy, productive garden. If you can provide this type of growing environment, then the plants will do well without much else from you.

With the survival garden, your goal should be to grow as much produce as possible, on the least space as possible, while doing the least amount of work as possible. Remember minimum effort and the maximum reward is the goal because if you burn more calories planting and tending your garden than you get back from the harvest, you then have a negative return for your effort, which goes again the rules of human survival.

I have found a mix of close planting (sometimes called French intensive) and Ruth Stout’s method as detailed in her book gardening without work, works very well for me, producing an abundant harvest with little effort on my part.

With Ruth Stout’s gardening method you simply keep a thick layer of mulch (usually hay, straw or leaves) on the garden at all times, this keeps down weeds and automatically builds the soil and adds nutrients back as it decays. As it decays into the soil, you simply add more mulch, keeping it at a consistent level to keep smoother weed growth.

There is no need to build and turn a compost pile, or plow, sow a cover crop, weed, and seldom have to water, or do anything else besides adding mulch and plants to grow a productive garden.

The only fertilizers that I use are manure tea, cottonseed, or soybean meal, and then only need small amounts these, especially after the first couple of years once the soil has time to become fertile from constantly rotting mulch. To plant you simply pull back the mulch and plant the seeds, cutting or seedlings as you normally would in any garden.

And that’s all there is to it, mulch, plant, let grow, rest, harvest.

Guerrilla Gardening

Guerrilla gardening is a term used by local pot farmers, who have developed unique skills that allow them to raise the “illegal plants” in a secretive manner. However, before you get all excited with visions of easy money and smoke puffing from a freshly rolled marijuana cigarette, let me clear the smoke from the air, this article is not about growing the illegal weed; it is about growing secret food crops after a complete breakdown of the current system and WROL.

Having the traditional garden planted in rolls and in the open could make you the target of looters, scavengers, and thugs. Having your garden hidden and out of site could mean the difference between plenty and starvation after the balloon goes up.

Secret Grow Rooms

Secret grow rooms or greenhouses should be considered, all that is needed in most cases is to remove the roof from a garage or outbuilding and replace it with corrugated fiberglass. The walls can be painted white, or covered with aluminum foil, to help reflect light back onto the plants inside. From the outside, it just looks like any other outbuilding, while inside it hides an abundant garden.

Tables for plants can be made and rigged on pulleys, so the plants can be lifted closer to the roof providing more sunlight and lowered back down again for watering. Using this method, it would be difficult to grow enough to feed an entire family, but it could be done with proper planning and enough space. Most likely, the secret grow-room would be used to supplement other available food resources.

Order a copy of – Secret Greenhouse of Survival: How to Build the Ultimate Homestead & Prepper Greenhouse by Rick Austin for a full plan for setting up a secret greenhouse.

Forest Gardens

Many people have mentioned forest gardens; the idea has been around for a long time and could work well, for the survivor or a person bugging out to the forest. All you do is – find a suitable spot that is hidden, well drained, and open to sunlight. Dig up the soil, work in organic matter, or timed released fertilizers and plant.

If done right, such a garden can be largely self-maintaining requiring little effort by you after planting.

Avoid making trails to the garden area, people follow trails, and these will lead them directly to your garden, remember the harder it is for you to reach the gardens location the more likely no one else will even try.

Remove all signs of activity, like trash or freshly dug soil. Spread any loose dirt over the area covering any open spots with natural ground cover such as leaves. This also helps form mulch reducing the need for watering significantly. Try to make the garden area blend in with the surrounding forest as much as possible.

Step back and look at the possible approach points, and remove anything that catches the eye. Remember to avoid making trails to and from the site by never going in or out the same way and using alternating entry points. Try to walk on hard surfaces as much as possible to avoid leaving tracks.

Some plants are easier to hide than others are; potatoes, for instance, would be easier to hide than say tomatoes or corn. Most people would pass within three feet of a potato patch and not recognize what they were looking at. Choosing plants that blend in with the surrounding is an important consideration for the secret survival gardener.

The Gardening Nomad

I know a guy who lived in a truck camper for years – he would move from one hide to another every couple of weeks, he had gardens strategically located all over the countryside. I do not know if they were all legal crops (probably not), but know that some of what he grew what he grew were food crops and he seemed to do very well, while living a very simple life, all without a lot of stress and worry.

Three Sisters of the Cherokee

Another growing technique that I recommend is “the three sisters“. This system has been used for thousands of years with great success in both North and South America by many “Indian” tribes and native people.

The three sisters consist of corn, squash, and beans that are planted in a circle, with corn in the center, then pole beans are then planted around the corn and then squash are planted around the outside. The pole beans help to put nitrogen back into the soil, which is great for the corn and squash. The beans climb up the corn, which acts as a natural trellis. The squash with its wide leaves help shade out weeds and reduces the need for watering. It all works together in a sort of mini garden ecosystem.

Perennials

Perennials are my secret weapon against post-collapse hunger pains and starvation – planting perennials will allow you to have a continually replicating food supply, which will provide for you year after year with little effort on your part. Every prepper should establish a good variety of perennial edibles at their retreat.

I have established “gardens” of asparagus, Jerusalem artichokes, horseradish, garlic, perennial onions, and herbs scattered around my homestead. Once these perennials are planted, and established, they continue to grow and expand every year on their own with little or no help from you…

Choosing Seeds

At the beginning of the growing season most gardeners, simply head to their nearest garden center, and pick up whatever seed packets that are being displayed on the shelf that year, or they skip the seeds and their germination altogether by purchasing seedlings and transplanting those directly into their garden.

And why this works well (sometimes) during “good times” when you can still rely on going back and getting new seed for planting a new crop each year, if you’re thinking in terms of long-term survival or saving your own seed from year to year, then you need to consider buying and stockpiling Non-Hybrid (Heirloom) vegetable seeds.

According to the good folks at Heirloom Organics:

Non-Hybrid or Open-Pollinated seeds allow the gardener to collect seeds from a crop for future planting. Hybrid seeds do not. Heirloom Organics Seed Packs are 100% Non-Hybrid and Non-GMO (genetically modified) and specially sealed for long-term storage. Use now AND save for an emergency. All from the same hermetically sealed pack!

And while this is true in most cases, saving seed from year-to-year that grows true, without negative genetic changes is a little more complicated than that. Some plant species, such as corn, okra, and spinach, for example, must “cross-pollinate” each year to remain strong and to be productive.

Constant inbreeding of cross-pollinating plans, even if they are of the non-hybrid variety will result in weak, non-productive plans after the first couple of years. Therefore, even if you start with pure non-hybrid, heirloom seed you cannot save the seed of cross-pollinating species, indefinitely without a negative change in the resulting offspring at some point, due to inbreeding of the plants.

The solution to this problem is to simply, buy enough seed to last several years, and stored in optimal conditions to ensure germination, or buy several different Non-Hybrid, Non-GMO varieties and cross-pollinate each year.

Now the good news, self-pollinating plant species such as bean, pepper, tomato, eggplant, garlic, and pea can be grown and the seeds saved year-after-year with little or no genetic change in growth, health, or overall production, allowing you to continually feed your family, now and during hard times.

Over the years, I have seen many folks express concerns about the germination rate of seeds that have been packaged for long-term storage, such as the Non-Hybrid vegetable seeds that are packaged and sold by Heirloom Organics and other seed vendors.

The main concern seems to be that the process and conditions of storing the seed long-term will somehow cause the seed to not germinate (sprout) when planted. After having tested these seeds and their germination rates over the past several years, and others have done the same with similar results, I can assure you that germination rates remain just as good as or better than seeds stored in a traditional fashion.

Putting back a supply of non-hybrid vegetable seed should be on the to-do list of every, gardener and that applies ten-fold for the “prepper” because we do not know what will happen, the result or how long the duration.

We can only store so much food, and after it is gone, you will have to produce your own or starve….

Fruits, Nuts, and Berries

Fruits, nuts, and berries are one of my favorite hedges against starvation because they can be planted once and then mostly take care of themselves after. However, the biggest benefit is that after planted and established they will come back and provide for years after without you having to do much in the way of care…

Plant it and forget it… well almost.

If you have an empty space on your property, then fill that space by planting a food bearing tree, vine, or shrub. To fill larger areas plant fruit and nut trees, and for smaller areas consider planting strawberries, raspberries, rhubarb, blueberries etc. No space should be left empty especially around a small homestead…

Let us start with fruit trees since these tend to produce the most food for the least amount of work. When choosing fruit trees, look either dwarf or semi-dwarf varieties depending on the space you have available. Never plant a dwarf tree if you have room for a semi-dwarf variety, the semi-dwarf trees grow to a larger size and thus they will produce more fruit under the same growing conditions, they are also more winter hardy, and live longer.

It’s also a good idea to plant a variety of different trees, shrubs and vines that produce different types of fruit, nuts, and berries, i.e. apple, pear, peach, plum, cherry, blackberry, blueberry, raspberry etc. This will not only provide you with more variety at the table, it will also act as insurance against pest and disease that might attack one variety or plant but not another.

Also, when planting apple trees, I suggest that you plant both summer and winter varieties, as you might have assumed summer varieties mature and are ready for harvest before the winter varieties which makes it easier to harvest and preserve the fruit because it’s not all ready for harvest all at once.

As for planting instructions, I am not going to get into that here simply because the details can vary slightly depending on location and type. You will find that the planting instructions for your location will come with the trees, shrubs, and vines when you buy them at the nursery, if not ask.

When choosing varieties for cross-pollination, you can use the free tool at www.orangepippintrees.com/pollinationchecker.aspx to help you make the correct choices. Also, ask at the nursery when you buy your fruit trees for their advice on pollination and their recommendations.

I recommend that before planting your first tree, shrub or vine that you order a copy of The Fruit Gardener’s Bible: A Complete Guide to Growing Fruits and Nuts in the Home Garden by Lewis Hill this is a great book that is dedicated to the subject, and will cover everything that you need to know and then some.

Fruit Tree Pruning Instructions – dormant pruning is done in late fall or winter when the leaves have fallen off.

Practical Domestic Animals and Poultry

When choosing which domestic animals to keep for food, look for those that require the least time and effort to care for. As I explained in the gardening section above, when surviving, you do not want to put in more effort, and thus, burn more calories, then you are going to get back upon consumption.

Look for animals that can generally take care of themselves, like with anything else that you do when trying to survive look for the most reward for the least effort. For example, you do not want to exert 1000 calories, searching for an egg that you are only going to get 78 calories from. If you do this for consistently, then you are ensuring a slow withering death from malnutritions.

Chickens

chickens for self-reliance

No section on raising domestic animals for food would be complete without taking a closer look at raising chickens. Chickens are usually the first thought that pops into a person’s head when they think about farming or homesteading and for good reason.

Really the only downside to raising chickens is the initial startup costs of having to build a coop and feeders and watering containers, after that the cost per bird is extremely low, especially if your let them free-range so that they can forage for most of their own food.

Your main concern will be keeping them safe from predators because everything loves to eat chicken, including but not limited to foxes, raccoons, coyotes, bobcats, mountain lions, owls, hawks, domestic dogs, domestic cats and everything else that likes to eat meat. The best way to keep them safe is to keep

them inside a well-made coop with a securely fenced in outside run, but this means that you’ll have to feed them more because they generally won’t be able to forage for the bulk of their food when confined to such a limited space.

As a compromise, I keep my chickens inside the coop with access to the eight by twenty-five foot run most of the day and let them out to forage of the evenings about two hours before dark. They generally stay within seventy-five yards of the coop, and will go back in to roost before dark. After they are all in I’ll go lock the door to the coop, to keep any predators out and the chickens’ safe inside.

When building your coop seal any openings uptight, even a small hole can give a hungry predator a way in – some will even use a small opening as a starting point that they can enlarge by chewing until they can squeeze inside.

When building your run, you will want to use treated wood for longevity, and to dig a trench six or more inches deep to bury that length of the wire in the ground to prevent predators from digging in under the fencing. I also like to pile rocks all the way around the coop and run – so far, this has worked great and I have never had a predator that has gotten inside the coop or run by digging.

Another thing to keep in mind is that chicken wire by itself is weak, and will not keep a large determined predator out. When I built my first chicken coop and run, I had two stray dogs that managed to rip through the chicken wire and into the coop. Luckily, I was at home and stopped them before they were able to do any more damage.

After that incident, I have always re-enforced the bottom three feet of chicken wire around the run by covering it with welded-wire. This has been very effective at keeping larger predators out and the chickens’ safe inside. My coop is almost finished in the photo above.

Having an outside dog (one that will not kill chickens) is also a great help at keeping your flock safe and for security in general. A good dog will keep watch and run predators off when they wonder into the area before they have a chance to find their way into your coop.

When choosing a type of chicken for survival purposes, look for dual-purpose breeds that are both good egg layers and meat producers. You will also want to choose breeds that go broody and that are good mothers so that you can raise additional birds to replace those that are eaten.

Note: hens will continue to lay eggs, even without a rooster but those eggs will not be fertile and with not hatch producing offspring.

My five most recommended breeds for preppers are the Black Australorp, Rhode Island Red, Dominique, Plymouth Rock, and Wyandotte. These breeds meet all of the criteria listed above and are easy to find or order in most areas and easy to care for.

When you start raising chickens, you will find that it is easy to be carried away with the result being that you end up with more birds than you need. For most preppers, a flock consisting of ten hens and two roosters works out well. The extra rooster acts as a “backup” should something happen to the other, allowing your hens to keep producing offspring.

You can find a wealth of free information detailing everything that you could possibly want to know about raising chickens, breeding, medical issues, coop building etc. However, to be honest, it is not that hard and if it is then you are doing it wrong.

Remember look for a maximum reward for the least effort, once you get your coop built it should only take about ten minutes per day to take care of your flock.

Ducks

I used to keep a few ducks around, and plan to add ten or more back into my flock this coming spring when I can buy day-old ducklings from the local Tractor Supply or Farmers CO-OP, and eventually, I may completely replace my flock of chickens with ducks.

Ducks are smarter than chickens and are better foragers that can find most of their own food, and they are less disease prone and seem to attract fewer predators. Ducks lay just as many eggs as chickens, but the eggs taste better and are larger. They are also better mothers to their young.

Many preppers make the mistake of thinking that they must have a large pond or another body of water on their property to keep ducks, and while the ducks do enjoy that setting, it is not necessary. All that I ever used were several “kiddie pools” that I kept full of water around my property and the ducks thrived.

Since ducks like to poop in the water, you will need to pour it out every week or so and replace it with fresh water. The water from the pools makes an excellent fertilizer that can be poured around your fruit and nut trees.

Rabbits

If the goal is to put meat on the table then you should start building your rabbit hutches now. Rabbits meet or exceed all of the criteria that I previously mentioned about choosing animals that easy to keep and cheap to feed because they do well on nothing more than, fresh dry grass clippings, hay, unused produce from the garden, salt, and fresh water.

I also like to add a hand full of commercial feed pellets for each rabbit every couple of day to round out their diet. This becomes more important during the winter months when fresh grass clippings and hay are not as readily available.

Housing for rabbits is a simple matter; all they need is protection from predators and from harsh weather conditions. Do a web search and you will find a wealth of free hutch building plans, these range from basic but functional to major projects costing several hundred dollars. My preference is to keep it simple and cheap.

You will have to keep the male “buck” separate from the females until you are ready for them to breed. After the female has been breed, remove the male and put him back in his cage. Females are usually ready to breed at around ten months old and will usually bear from eight to fourteen young after a short thirty-day gestation period.

The offspring can be slaughtered after nine weeks and the doe then rebreed again. As you can see if you do the math, one buck and five does can produce a lot of meat quickly. Just don’t make the mistake of eating only rabbit meat – rabbit meat is too lean and humans need some fat to survive and a diet consisting of only rabbit meat by itself does not provide enough fat to keep a human body healthy over the long-term.

Larger Animals

If you have enough land to provide the bulk of food and space for larger domestic animals like hogs and cows, then these can prove a huge benefit and should be considered. These larger animals can provide hundreds of pounds of meat, or as is the case with the cow can also provide milk, cheese, and related products as well as meat when slaughtered.

Goats are a great alternative to the cows and are much easier to care for and will find most of the own food if left free to forage over a large enough area. However, keep in mind that they can kill trees, and native foliage, and will eat your garden, flowerbed or just about anything else that they are allowed to get into.

Since this is not a dedicated book on how to care for and harvest domestic animals, I am going to suggest that you order two books – Barnyard in Your Backyard: A Beginner’s Guide to Raising Chickens, Ducks, Geese, Rabbits, Goats, Sheep, and Cattle by Gail Damerow and Basic Butchering of Livestock & Game by John J. Mettler. These two books will cover everything that you need to know to successfully raise and butcher domestic livestock and poultry.

Bees and Honey

Honeybees have been vanishing at an alarming rate, with losses of upwards of 40% of bee colonies worldwide over the past few years. In addition, while no one seems to agree on the cause, we can all agree that the loss of our honeybees will throw our ecosystem out of balance, making it more difficult or impossible to grow enough food to support the earth’s current population.

Personally, I believe that the predominant cause of this hive die-off is due to the increased planting of GMO crops and especially the use of chemical pesticides that the bees carry back to the hive, causing death and eventual hive collapse.

Having one or two beehives can produce 25 to 50 pounds of honey per year if the hive is healthy and well managed. If you want to keep a hive or two at your homestead, the first thing that you should do is to go talk to a local beekeeper that already has established hives.

These experienced bee keeps can give you some great pointers on keeping bees in your area and the dangers to look out for, and possibly sell you everything that you need to get started.

Foraging For Wild Foods

I love waking up in the morning and seeing this guy in my front yard. He thinks he is a pet it seems but could be dinner if needed.

Foraging for wild foods via hunting, fishing, trapping, and gathering of edible plants and nuts can go a long way toward ensuring your survival after the balloon goes up if you are prepared and have the needed skills to do so.

You need to learn how to hunt, trap, and fish as well as how to recognize and prepare the edible plants and nuts that are abundant in your area.

Granted it’s impossible to teach someone to hunt by writing about it in a book, you need to get out and do it to learn, but you can pick up a few tips and some how-to-do-it knowledge from reading and watching other people hunt on the Outdoor channel.

Generally, trapping is more efficient than hunting especially for those just starting out; traps can be set and work without you having to be there. Set it, leave it, come back, and check it once a day to remove caught game, rebait the trap or both.

You can use the free time to do other needed chores like tending your garden or setting more traps. Harvesting wild game for the stewpot is an excellent long-term survival strategy as long as you do not plan to live off harvested wild game exclusively. Wild game should be considered as only one link, in your food resupply chain, and not as the whole chain.

You must have variable and independent sources of resupply, lined up and ready to go. I have seen too many preppers, who plan to rely 100% on their stored foods. They have no resupply chain, and if the crisis lasts longer than their food stockpile, then they are out of luck.

Plus your stockpile might be looted, burnt, blown away or destroyed a hundred other ways, so please don’t put all of your eggs in one basket, so to speak. Plan on losing your main food supply, and make plans that will allow you to keep on feeding your family, regardless of how empty your storage shelves become.

To start, you will need to learn the basics of setting both store-bought and homemade traps. To help you in both areas, I suggest that you order copies of The New Buckshot’s Complete Survival Trapping Guide by Bruce Hemming, Survival Poaching by Ragnar Benson and The Modern Hunter-Gatherer: A Practical Guide to Living off the Land by Tony Nester.

However you’ll still need to get up and off of your rear-end and actually go outside, and do it. You will need to practice, practice and then practice some more because most animals are smarter than the average human trying to trap them is.

There are other good how-to-do-it trapping books available, but the three are my top recommendations. Just do not think that you are an expert or proficient trapper just because you read a book, you are not.

You have to get outside and DO IT!

As for trap and gear recommendations, I suggest that you lay in a good supply of small game snares, you can make your own snares, but I’ve found that it’s just as cost effective to order them pre-made in bulk than to make your own, especially when you consider your time.

The Dakota line Rabbit Snares are a perfect size and weight for trapping small game like rabbit, squirrel, and pheasant. Larger game can also be taken (easily I might add) with snares, but you will have to make your own, heavyweight snares for this (disclaimer: check and follow game laws… yadda, yadda, yadda), full details on snaring large game are given in the pages of Survival Poaching, that I linked to above.

My next trap recommendation is the 110 Single Spring Body Trap, these are perfect for rabbit, and squirrel sized game, and can be set without a setting tool by most people. When setting these traps, it is a good idea to use a Safety Grip Tool, for your safety.

These traps work by snapping shut with enough force to kill the animal with a blow to the neck, and they have enough power to break your hand if the trap is accidentally tripped while setting it.

Fishing Gear

One of the easiest and often most productive places to forage for food are in lakes and streams. While everyone knows about fishing with a pole, line, and hook, most people never consider methods such as trapping, spearing, gigging, or shooting fish (check your state’s game and fish laws yadda, yadda, yadda) despite the fact that these methods are often far more effective.

First, let us talk about “fishing” after all this is the first thing that most people think of when “catching fish” is mentioned. It is easy to tie a line with hook and bait to a pole and toss the line into the water and wait for something to bite.

Alternatively, to make a “hobo fishing reel” which is really just a soda, soup can or stick with fishing line wrapped around it. While this simple setup will not win any contests for “showiness”, it can be put together in a couple of minutes and is effective enough to put food on the table if the fish are biting.

When riding an ATV or backpacking into the backcountry, I like to fish the abandoned farm ponds, and remote streams, that can be found in my area. I like to take a collapsible fishing rod or the voyager spinning travel kit with me, both work very well and don’t get in the way when riding or hiking in wooded areas like a traditionally fixed fishing rod would.

These types of rods will work great in a bug out kit and for foraging the waters away from your home or retreat after a disaster or TEOTWAWKI. Just be careful not to get so preoccupied with fishing that you become oblivious to your surroundings, and are taken by surprise by someone who may have bad intentions.

In this type of situation, after the stuff has hit the fan it is best not to go out alone if possible. When you’re alone it’s nearly impossible to do a task, such as fishing and stay 100% aware of your surroundings 100% of the time. Having an armed lookout, placed in a concealed location to watch your six is a good idea.

Ditto for other post-disaster, chores as well stay alert and if possible, post a lookout to watch your back.

For mobile fishing tackle, I keep it simple, a few assorted hooks, some split-shot sinkers, a few small artificial lures, and a couple small bobbers. This simple yet basic fishing gear is small and lightweight while still being effective for freshwater fish like bluegill and sunfish.

Another type of “fishing reel” that I have grown fond of using is the Yo-Yo Fishing Reels. Several of these can be set and left alone while you go take care of other chores, like setting up camp or building a fire, and let’s face it having several lines in the water at once can only increase your chances of catching something.

Edible Plants

Every prepper should be able to identify, harvest, and use the edible and medical plants that grow wild in their area. Luckily, there are a number of great books with color photos and detailed information on this subject, but like with most things you’ll still need to go out and actually find, harvest and use these plants because nothing beats getting out in the field and doing it to gain lasting knowledge…

Here are two books, a video, and deck of cards that I recommend:

  • The Forager’s Harvest: A Guide to Identifying, Harvesting, and Preparing Edible Wild Plants by Samuel Thayer
  • Backyard Foraging: 65 Familiar Plants You Didn’t Know You Could Eat by Ellen Zachos
  • Wild Cards: Edible Wild Foods
  • The Forager’s Harvest – Edible Wild Plants 2 DVD Set by Samuel Thayer

Filed Under: Homesteading

What Are The Best Medications to Stockpile

September 4, 2018 M.D. Creekmore

Disclaimer: I am not a doctor and cannot give medical advice, diagnosis or suggest treatment for any sickness or disease. All information in this article is for informational purposes only. Please seek out a competent medical care professional for any injury, sickness, or disease that you might have.

Now that the legal disclaimer is out-of-the-way, let us get started with some general info and advice on the types of injuries you can expect, and with a discussion of medical kits and contents, references and training recommendations.

Most preppers when stockpiling medical kits and medications often make the mistake of targeting the bulk of their preparations toward trauma care – i.e., treating gunshot wounds and other trauma caused by violence or accident. While having the medical skills and tools to treat such injuries, there must be a balance between those types supplies, and supplies needed for more likely medical conditions such as the common cold, flu, dehydration, diarrhea, food poisoning, arthritis, heat stroke, hypothermia, diabetes, childbirth and so forth.

Most of these types of illnesses are easy to deal with while the medical system is running smoothly. However, after just a short-term disaster the medical system is often overburdened and is hard-pressed to meet the increased demand causing treatment to become degraded or nonexistent.

If the medical system cannot efficiently deal with the demand for treatment after a short-term disaster, one can only imagine the lack of care that we will experience following a major event such as an EMP, a nuclear attack, or a cyber attack that shuts down the power grid for months or even a viral pandemic that affects millions nationwide.

After an economic collapse, the main hurdle to getting medical care might be the inability to pay the upfront admittance costs rather than a lack of available care. I also expect the quality of care to decline in the months after an economic collapse. In other words, you might be able to find an office or hospital that will accept you (if you have the admittance fee), but the care you get maybe far below current standards.

After Argentina’s economic collapse, it was common for hospitals to ask patients to bring their own medical supplies when they needed care. As a side note, medical supplies make great barter items. It is also a good idea to have a supply of silver coins to pay for admittance into a doctor’s office or emergency room. 

Prevention

Prevention involves regular exercise and proper diet. This is one of those things that some preppers seem to ignore, or perhaps they’re just too lazy and undisciplined to get into better shape. You know the ones – they buy all of the best gear and cool gadgets, and they pack their bug out bags thinking they are ready for the “big one”. Sadly, most of these folks cannot carry their gear 100 yards without stopping for a snack and thirty-minute nap.

Getting into decent shape (no you do not have to be a top contender in the next Iron-man triathlon) is one of the best things that you can do for yourself now, and it will benefit you greatly in any disaster.

At a minimum, strive to meet the fitness and agility level presented in the chart below, after consulting with your doctor first of course. We do not want anyone with any preexisting medical conditions to fall over with a heart attack, so please go get a check-up and ask your doctor if you are healthy enough for this type of physical activity.

Fitness Requirement
  • Walk / Run one Mile in 15 minutes – 20 minutes if 50+ years of age
  • Push-Ups 35 reps – 25 if you’re 50+ years of age
  • Sit-Ups 40 reps – 30 if you’re 50+ years of age
  • Bench Press 1+ reps 75% of body weight – 50% for those 50+

The key to success here is to start slowly, gradually working up to, and even beyond, the fitness level presented in the chart above. At the very least, these fitness event requirements will give you a starting point and some goals to strive toward achieving.

For those of you who are already in good physical condition and have no problem performing the exercises listed above, you should continue to stay on a maintenance program to maintain or even surpass what is listed in the chart above.

Okay, now let us look at the steps that necessary (for most people) to get in and stay in reasonable physical condition. Again, nothing here is to be taken or intended as medical advice. Go talk to your doctor and ask them about each step in this article and whether it is right for you considering your current physical condition.

Useful Article

What are The Benefits of Doing 50 Pushups Every Day?

Start with a Healthy Diet

A healthy diet should be at the very top of everyone’s to-do list, especially if you want to get into better physical condition and be better prepared to survive a disaster. However, where do you start? There is so much information on healthy eating continually filling the pages of books, magazine, and digital media that it is easy to become overwhelmed to the point of just giving up.

When it comes to a healthy diet, the most important consideration is to keep it as simple as possible, which is what I intend to do here. Forget about counting calories or portion size. You want to eat better, not waste away in hunger. There are three key rules for eating healthy:

(1) avoid refined sugar

(2) avoid prepackaged foods and

(3) avoid fast food.

The healthiest foods that you can eat are those that have been grown and harvested from your own garden. Commercially produced fruits and vegetables cannot compete with the goodness and health-boosting benefits that are provided from freshly harvested (preferably organically grown) vegetables and fruits that you have grown yourself in your home garden or orchard. A close second is to purchase produce at your local farmer’s market.

The bulk of your diet should consist of fresh fruits and vegetables, chicken, eggs, fish, grass-fed beef, venison or other wild game, grains, beans, and olive oil. Also, remember to chew your food slowly and completely. By chewing your food slowly, you will get full on less food, and it aids with your digestion. Eat until you feel full and then stop.

Vitamin and Mineral Supplements

Listed below are two books that I recommend you add to your bookshelf for further study:

  • Prescription for Nutritional Healing, Fifth Edition: A Practical A-to-Z Reference to Drug-Free Remedies Using Vitamins, Minerals, Herbs & Food Supplements by Phyllis A. Balch CNC
  • Over the Counter Natural Cures: Take Charge of Your Health in 30 Days with 10 Lifesaving Supplements for under $10 by Shane Ellison.

These books cover everything that you need to know about vitamins, natural healing, and health.

So what vitamins and supplements do I take? Every day I take a Centrum Silver® Adults 50+ multivitamin and mineral, 500 mg of vitamin C, Curcumin C3 Complex 500 mg, and 1200 mg of fish oil capsules. This is the combination that I have found that works best for me as a guy. However, each person has individual needs. I do recommend that women talk to their doctors about calcium and vitamin D. What is good for me might not be for you. As with diet, it is best to keep it simple. If you are taking more than five different supplements per day, then you are probably taking too many (unless, of course, you are talking them on the recommendation of your physician).

Get Enough Sleep

According to the National Sleep Foundation, an average adult needs 7-9 hours of sleep per calendar day for optimum health and alertness. Granted, this much sleep will probably be non-existent after a disaster. However, note that this chapter is about getting into better shape now before a disaster strikes. Getting in shape now will help you be more prepared and able to handle whatever might come your way.

The key to getting good night’s sleep is to set a regular schedule to go to bed and get up and stick to it. A regular schedule will help your body knows when it is time to go to sleep and when it is time to get up. Set a sleep schedule and stick to it.

Another key ingredient that I have found that works wonders when trying to get a good night’s sleep is Valerian root, specifically Spring Valley Natural Valerian Root sold by Walmart. Valerian root has several sedative compounds to help you relax and fall asleep faster, and it has been proven non-toxic with zero addictive properties.

It is also important to relax and take it easy. Relaxation will improve your sleep patterns as well as your overall health. It has been documented by countless studies and in a number of medical journals that stress has a detrimental effect on our overall health. Stressed for long periods can affect blood pressure, blood sugar levels, the immune system, and can cause premature aging, heart disease, and even cancer.

I know it can be difficult to relax after you have opened your eyes to the true state of the world and understand what is at stake. The pressure to do something and to do more to prepare can be overwhelming at times, but it is important to take a step back every now and then to relax.

I take two days per week that I do not (or try not to) think about the sad shape of the world, politics, or prepping. I take those two days to just relax and spend time with family, go fishing, sit in the swing, watch a movie, or go for a long drive and pray. I just take the time to relax no matter what is going on in the world around me.

Get Physical

First, before you start any type of physical activity, you should schedule an appointment with your doctor for a complete health check-up, and get permission to proceed from there before you start working out or even getting out of bed.

So what types of exercises should you be doing that will help you to better defend your retreat? Well, to be honest, that depends on your current level of physical conditioning and how physically fit that you want to be. No one can be too physically fit and most of us will have to continually work at it to see improvement and to even retain the gains that we make.

Any fitness program should start with flexibility. Stretch before and after every workout. Stretch your legs, back, arms, shoulders, and neck. The most important thing to remember is to take it slow. Do not over-stretch. Always stretch with solid, non-bouncy movements. This will help you avoid injury and setbacks.

Strength Training

While you could join a gym and train three or more times per week, most preppers will find that working out at home can have just as much benefit as joining a gym plus working out at home will save money on membership fees and the expense of travel to and from the work-out facility. This money can be used to buy other survival preps or even to take the family out for a night on the town.

In fact, you do not even need free weights or any other exercise equipment to build strength and muscle endurance. Calisthenics (body-weight exercises) if performed correctly and regularly will help you get stronger by building muscle mass. So what types of calisthenic exercises and routines should you do? The answer to this question will depend on your current physical condition and what you want to achieve. Again, as with building flexibility, start slowly to avoid injury and build upon your continued progress each day.

Listed below is a short list of calisthenic exercises to consider when building your routine:

  • Push-ups
  • Sit-ups
  • Jumping Jacks
  • Squats
  • Pull-ups
  • Lunges
  • Heel Raises
  • Reverse Push-Ups

I have found it best not to set a number or limit to an individual exercise or movement, but instead do each to exhaustion. For example, I’ll do one set of push-ups until my muscles are exhausted and can no longer perform the exercise properly, rest for two minutes, and repeat two more times. Below is my current calisthenics workout. I call it “the prepper’s muscle blast” because, well, it is a blast.

  • Push-ups – three sets to exhaustion
  • Pull-ups – three sets to exhaustion
  • Set-ups – three sets to exhaustion
  • Squats – three sets to exhaustion
  • Jumping Jacks – 50 reputations

Cardiovascular Endurance Training

Obviously, cardiovascular endurance training is the act of exercising to increase endurance. Greater cardiovascular endurance will allow you to work longer and harder. It will allow you to walk and run farther and faster. Building your cardiovascular endurance one of the most important things that you can do to be better prepared to survive a disaster and defend your retreat.

Some folks prefer to run, while others prefer to walk at a brisk pace when working to build their cardiovascular endurance. Both will work; however, I prefer to combine both into my cardiovascular endurance training. I also enjoy bicycling. Three days per week, I will walk approximately 200 yards followed by a 100-yard sprint, then walk again for approximately 200 yards followed by a 100-yard sprint, and repeat until I have a distance of 1-3 miles, depending on how I feel and how much time I have that day.

In addition, to mix it up a little to prevent boredom, one day per week I ride my mountain bike for 4-5 miles non-stop. Usually, I’ll ride out to the nearest little country store (a little over 4 miles away) and pick up a couple of things on my shopping list and then ride back home. By riding out to that marketplace, I get exercise for that day, save gas and get some minor shopping done.

The key to building cardiovascular endurance is to make a plan then get off the couch and put that plan into motion. In addition, you have to stick with it… well, what are you waiting for… hop to it!

Get Medical Training

I have said it before, but I will say it again, get as much medical training as possible. Everyone in your family or prepper group should at a minimum, complete a basic CPR and first aid class, and completing paramedic training and or wilderness first aid course would be a great leap forward in your medical preparedness.

If possible, recruit a medical doctor or registered nurse into your group. I know it probably will not be possible for many groups but it will be well worth the effort if you are successful. I know a single guy, who is also a prepper and his number one criteria in choosing a wife is that she be a registered nurse or have other medical training like previous or current work as a paramedic.

Sex Happens

During hard times like those following an economic collapse or any grid-down situation, men and women are going to seek comfort together, and we all know where that leads. That is right, folks. I am talking about intercourse and lots of it.

Keeping that part of human nature in mind, you will see the need for lots and lots of birth control. If you are a man who has no plans for children, then getting a vasectomy is a great idea – problem solved. Condoms work okay but are not full proof. Consider also that condoms lose their effectiveness as they age. I recommend keeping a year’s supply. The number of condoms that you keep in your “years supply” would, of course, depend on how much sex you plan on having.

Both of the birth control methods mentioned above rely on the male taking the initiative, and in my opinion, the vasectomy is by far the best option available for the male. It is permanent and you do not have to keep worrying about having condoms or other types of birth control.

However, a vasectomy does nothing to prevent STDs. If you are married or in a long-term committed relationship and both of you are STD free, then you are good to go.

Women have a much wider selection of birth control methods available to them and I’m not going to get into those here because that would take a full chapter and I’m sure that the ladies reading this already know plenty about the different types of birth control that are available and what works best for them.

The main questions women should ask when looking at post-SHTF birth control methods is what is sustainable? In other words, can you keep it working for months or even a year or more if you could not go back to the doctor to get your prescription refilled. One long-term birth control method that woman should consider is the IUD, which can be effective for up to 12 years for the non-hormonal type.

But as is always the case with any medical issues, the best option is to discuss it with your doctor. Ask your doctor what long-term birth control methods are available to you before making a decision.

Basic Prepper First-Aid Kit Recommendations

Having a well-stocked medical kit could mean the difference between life and death. As you assemble the list of medical items listed below, keep in mind that it is a basic list of suggestions only. Your kit should be tailored to your individual needs. However, the items listed should give you some ideas and get you started in the right direction when putting together your prepper first aid kit.

  • Hand soap
  • Anti-diarrhea medications
  • Bandages and wound dressings (large)
  • Basic surgical kit
  • Bed liners or plastic sheeting
  • Blood pressure monitor
  • CPR shields
  • Crutches, adjustable
  • Epson salts
  • Examination gloves
  • Antihistamine oral and injectable
  • Injectable epinephrine
  • IV electrolytes
  • Laxatives
  • Needles and silk thread for stitching wounds
  • Ophthalmic salve
  • Oral and injectable antibiotics/sulfas
  • Pain medications
  • Quikclot clotting agent (or if you prefer Israeli battle dressings)
  • Scalpel set if not in the surgical kit
  • Rubbing alcohol, peroxide, iodine, betadine, (copious amounts)
  • SAM splint
  • Scissors
  • Sterile IV kit
  • Sterile needles and syringes
  • Stethoscope
  • Thermometer (several)
  • Tweezers

Personal Items

When putting together your medical kit, do not forget to include personal items such as extra eyeglasses, hearing aids and batteries, dentures, and prescription medications.

Over The Counter Medications

Having a stockpile of over the counter medications could literally mean the difference between life and death for the prepper in a long-term grid-down situation where re-supply might not be available or as simple as taking a trip to the pharmacy.

Keep in mind that because many over the counter medications have a limited shelf life you will need to date and rotate just as you do with your food stores to ensure a fresh and viable supply. Remember first in, first out to ensure an always-fresh stockpile of perishable items.

When you decide to start stockpiling over the counter medications, the first question that arises is, “What do I need?” This is a good question because some of this stuff can get rather confusing, but it is not at all complicated.

When shopping for over the counter medications, keep in mind that the most common illnesses that we currently face will also be the most common after TSHTF, conditions like diarrhea, vomiting, fever, allergy, and pain. These are the main issues that we should prep for and stockpile medications to treat.

Herbs and Supplements

For some medical issues, herbal supplements can work better than prescription pharmaceuticals. But for disclaimer purposes, I must tell you to please go check with your doctor or other medical professionals before going off of any prescription medications or starting any herbal or other supplement program.

Stopping some types of prescription medications “cold turkey” can be deadly. Be smart; talk to your doctor and do your own research before making major decisions pertaining to your health.

What types of herbal medications should you stockpile? Well that depends on your health issues, but a few common ones include:

  • Hawthorn to lower high blood pressure.
  • Garlic, red yeast rice, folic acid, and soluble fiber to lower cholesterol.
  • Cinnamon to control blood sugar levels.
  • Peppermint oil and ginger for stomach issues like IBS.
  • Milk thistle for acute hepatitis, liver disease, jaundice, and gallstones.
  • Valerian root extract and melanin for a restful sleep.
  • St. John’s wort for depression.

The list could easily expand into another book, but it should be enough to get you started. Do your own research and talk to your healthcare provider. An excellent book that is loaded with pertinent information is The Herbal Drugstore by Linda B. White.

Dental Health

Dental health is just as important to your general overall health as is exercise and eating right. It should not be overlooked or downplayed. Take care of your teeth and get regular dental checkups.

I will admit that I am afraid of the dentist. The thought of him grinding, filling and pulling teeth is scary. And let us not forget those horrible shots, bleeding gums and that sucking thing. However, dental emergencies seldom solve themselves. Without medical attention, dental issues usually to get worse over time, possibly resulting in dire consequences to your health. Therefore, it is best to get any issues taken care of now.

One thing that is certain is that dental services will always be in demand. However, like other medical services, they may not be available. Even if dental services are available, you need to ask yourself whether will be able to afford competent care.

This is another instance where I think having a small gold or silver reserve is a good idea. After an economic collapse, the dollar may be worthless or significantly devalued. But gold and silver will retain value and that value that can be traded for dental and medical services in an emergency.

Unfortunately, no matter how prepared we are some dental and medical emergencies cannot be dealt with without proper and professional care. Nevertheless, there are steps that can be taken to better deal with minor problems or to provide care until a real solution can be found.

As previously mentioned, preventive maintenance cannot be stressed enough. Take care of your teeth. If possible, visit a dentist at least once a year to find and take care of any problems. Brush, floss, and rinse. Stock up on oral hygiene supplies. This can be done cheaply compared to the alternative of paying for treatment of major problems brought on by poor oral hygiene. Toothpaste, toothbrushes, and floss will also make excellent barter items, especially in the months following a long-term disaster.

Note: It is easy to make your own toothpaste. Simply mix equal parts baking soda and sea salt. The result tastes awful (you can add peppermint extract to improve taste) until you get used to it but it does a decent job of cleaning your teeth and gums. Simply moisten a toothbrush and dip it in the mixture and brush as usual.

It is a good idea to have a dental first aid kit to complement your other first aid supplies. A basic kit should consist of:

  • Temporary filling material Temparin or Cavit
  • Tweezers
  • Gauze
  • Toothbrush
  • Soft dental floss
  • Toothpaste
  • Orajel or another dental pain reliever
  • Advil, or Motrin
  • Clove Oil (pain relief)
  • Rubber gloves (some people are allergic to latex)
  • Dental wax
  • Toothpicks
  • Cotton
  • Dental Mirror
  • Hand Sanitizer
  • A copy of Where There Is No Dentist by Murray Dickson. This is a “must have” book. If you do not have a hard copy of this book, then your survival library is not complete. Get it now.

Alternatively, if you prefer you can purchase a ready-made kit survival emergency dental care kit and then expand it into a more comprehensive dental care package. How bad was your last toothache? Now imagine that you have the same pain but no dental care is available.

Shelf Life of Medications

What is the shelf life of medications? This is a tricky subject because there are so many variables to consider such as the type of medication, how old it is when you get it and previous storage conditions. When everything is considered, it becomes impossible to give a specific date as to when a medication will “go bad”. However, most will remain viable well past the listed expiration date. According to Joseph Alton MD in an article published at TheSurvivalistBlog.net, FEMA has seen massive stores of medication expire, and so a study was commissioned to find out how effective these expired medications still were. This study is known as the Shelf Life Extension Program (SLEP). This program has evaluated at least 100 medications that were expired for at least 2 to 10 years at the time they were evaluated. This includes many commonly-used antibiotics and other medications that could mean the difference between life and death in a collapse situation.

My recommendation is to do your own research and to talk to your doctor about your prescriptions and the shelf life and extended long-term potency of those medications to determine the estimated real-world shelf life of each.

The Use of “Fish Antibiotics” in Humans Post Collapse

The use of fish antibiotics in humans post collapse is another issue that comes up anytime two preppers talk to each other, and for good reason. Without antibiotics, a minor cut or infection can turn deadly. However, it is often difficult to get a medical doctor to write out a prescription for larger than normal amounts of antibiotics.

Fortunately putting back a large stockpile of fish antibiotics is not difficult or costly. According to Joseph Alton MD, fish antibiotics are essentially the exact same medications as those prescribed by a doctor at a clinic; you just have to know what to look for when you buy.

Setting Up the SHTF Medical Clinic

If you have the medical expertise and feel that it’s your duty to help your community or you simply have a large family and or prepper group, then you will need to have supplies on hand that will allow you to set up an SHTF medical clinic.

This need not be elaborate or expensive, but you do need to go beyond the items recommend above which are only suitable for a small group or family. You will need the same supplies when setting up an SHTF medical clinic as those for a smaller group; you will just need more of everything to meet the demand.

You will also need a few other items that will be specific to setting up and running a SHTF medical clinic, items such as a large tent, a building or a room inside a building, a number of beds or military cots, stretchers, large amounts of PPE (personal protection equipment), like gloves, face shields, etc. You could even have a pull trailer or panel truck set up as a mobile SHTF medical clinic that you could drive or pull to wherever you’re needed and provide medical care to those in need.

You Medical Library

Below are ten must have medical books for preppers; there are many more that could be included, but these are the top ten to start your library with:

  1. Where There Is No Doctor: A Village Health Care Handbook, Revised Edition by David Werner and Carol Thuman
  2. Where There Is No Dentist by Murray Dickson
  3. The Survival Medicine Handbook: A Guide for When Help is not on the Way by Joseph Alton
  4. Emergency War Surgery: The Survivalist’s Medical Desk Reference by U.S. Army
  5. Wilderness Medicine: Beyond First Aid by William W. Forgey M.D.
  6. The Survival Nurse: Running an Emergency Nursing Station Under Adverse Conditions by Ragnar Benson
  7. Prescription for Herbal Healing, 2nd Edition: An Easy-to-Use A-to-Z Reference to Hundreds of Common Disorders and Their Herbal Remedies by Phyllis A. Balch CNC
  8. Prescription for Drug Alternatives: All-Natural Options for Better Health without the Side Effects by James F. Balch
  9. Medical Diagnosis and Treatment by Maxine Papadakis
  10. Where There Is No Psychiatrist: A Mental Health Care Manual by Vikram Patel

The End.

Filed Under: Featured Articles

How To Be A Prepper In The City

September 1, 2018 M.D. Creekmore

how to be a prepper in the city

Even if you’re an urban prepper are fortunate enough to have a retreat out in the country getting to your safe-haven may be impossible during an urban upheaval. Roads blocked by wrecked and fuel-less vehicles will stop most people who are bugging out in their tracks. Maybe you were born lucky and can make it out safely before the balloon bursts, then what?

People in rural areas will start shooting if threatened by mobs of refugees fleeing the city. Don’t expect to be welcomed with arms outstretched. Most country folks don’t trust outsiders; you will likely be greeted with a load of buckshot and not the cup of fresh coffee and meaningful conversation you had hoped for.

After the cities are in ruins, criminal gangs will start to migrate into surrounding rural areas (especially known farming areas) where they will continue their business of stealing, raping and terrorizing in a more fruitful territory (when selecting a rural retreat location get as far away from urban areas and main roads as possible).

If you can’t or won’t get out of your urban location NOW at least start making plans to survive the best that you can where you are. It won’t be easy, but it can be done.

Start By Putting Together Your Urban Survival Kit

Most of you probably have a bug out bag by now. If not, go back and re-read the chapter on bug out bags and put one together. Having a bug out bag is good insurance in the event you are forced to evacuate your home or retreat for some unforeseen reason. It seems most preppers have planned to bug out but few of have even considered the need to find their way back home if caught away during an emergency. You not only need a bug out bag, you also need a get back home back.

No doubt, many of you spend a lot of time away from home – with work, school, and business sometimes taking you hundreds of miles away from home. Most of the time this is not an issue for me, but recently I have had to make several trips with my girlfriend to take her father to the cancer specialist on the other side of the state. What would we do if disaster struck while we were several hundred miles from home?

What would we do in the event of a terrorist attack, riot, earthquake, or similar disaster? Could we get back home? What would we do if forced to stay in the area for several days or even weeks? With any luck, I will be able to drive out but you never know; the roads could be blocked or impassable because of damage, the area could be quarantined or it could be too dangerous to move for several days.

As with anything related to survival, there are no guarantees, and I doubt her father could make it under anything but the best of conditions considering his health. I just hope nothing bad happens with him in tow.

To increase our odds of making it back or surviving in the city, I have put together a “Get Home Kit” that I take on extended trips. Sure, I could have just taken my bug out bag, but it really is not the best solution and the gear for the most part. It is not what I would need in an urban setting. The basic needs of water, shelter, food and medical are the same in the wilderness or city, but the means of attainment are different in most cases.

My bug out bag was put together for an extended trip to the woods where I can make most of what I need from what Mother Nature has to offer. However, if trapped in the city, I may have to scrounge or steal most of what we need to survive, especially if we are forced to stay and survive for an extended period. No, I am not advocating theft or looting, but I am not above it if the other alternative is starvation or death.

My get home kit is smaller than my bug out bag and weighs considerably less. Everything fits snugly inside a small dark gray and green backpack that I bought at the local flea market for five dollars. I intentionally averted from camo or military type packs to avoid attracting attention. Now that we know why we need a get home pack, the question remains what do we pack in our urban survival kit.

Urban Survival Kit Contents

  • A fixed blade knife (Glock Knife)
  • Multi-tool (Gerber Recoil Auto-Plier)
  • Two small Bic® lighters
  • One box water-proof wooden matches
  • Two Berkey water bottles
  • Small LED flashlight (Maglite XL100)
  • Cell phone
  • Prepaid calling card
  • Lockpick (Dyno Kwik Pick)
  • First aid tactical trauma kit
  • Antibacterial hand wipes
  • Space blanket
  • Bag of trail mix, box of power bars (15), electrolyte packets
  • A detailed map of area and compass
  • Garmin handheld GPS navigator
  • OC spray
  • One-hundred dollars in small bills ($1s, $5s, and $10s)
  • Glock 19 and 200 + rounds of ammunition, and 2 or more ammo magazines.

Aside from, and in addition to the get home kit, I pack a large cooler with food and drinks for the trip, partly for emergencies but mainly because I am cheap and do not want to waste money buying fast food along the way. I also carry sleeping bags in my vehicle during winter along with my winter emergency car kit and a full toolbox.

Food For City Preppers

mountain house foods reviewYou should store enough food to last at least six months – more than one year would be ideal, but probably impossible for most urbanites because of limited storage space. This means enough food to live on without leaving home. Food staples include rice, beans, honey, wheat, sugar, tea, coffee, salt, pepper, baking soda, cooking oil etc. Also canned soups, meats, fruits, and vegetables should be included. A food storage calculator is an excellent tool for approximating needed qualities of foods and is a great help here.

Also, see my recent article – The Ultimate Preppers Checklist of Recommended Supplies and Gear for a full list of supplies and gear.

Sprouting seeds for fresh greens is a very important urban survival skill that will keep you supplied with fresh greens even in the winter. Sprouts are germinated seeds of vegetables, nuts, grains, and legumes. Sprouts are nutritious, inexpensive and high in protein. Sprouts should be included in your survival food plans. All that is needed is a couple of quart mason jars, a square of nylon window screen, rubber bands and viable seed stock.

If you decide to include whole grains in your diet, you will need a grain mill. All chosen grain mills should have changeable heads so you can use both steel and stone heads for grinding depending on the product being milled. Some people suggest that steel burred grinders cause heat that could damage the nutrient content of the grain. Don’t buy into that. Hand grinding doesn’t cause enough heat to cause damage.

Next, you will need something to cook on. I recommend one of the Coleman multi-fuel camp stoves. I have a Coleman Exponent Multi-Fuel Stove which burns both unleaded gasoline or kerosene. These stoves are small, lightweight and very energy-efficient.

Remember, when using stoves like the Coleman camp stoves indoors the fumes must be vented to the outside, if not carbon monoxide can build up and kill you, especially in a small or confined area. In most cases, an open window near the cooking area will suffice for ventilation – read and follow the instructions in the provided owners manual.

My top recommendation for outdoor cooking (cooking outdoors my attract unwanted attention) is the EcoZoom rocket stove – click on the link to read my full review.

If you don’t have one already go by your local shopping center and pick up a Stanley Aladdin narrow-mouth thermos bottle. You will use the thermos as an energy-efficient appliance for cooking. Don’t get a wide-mouthed thermos; if you intend to use it for cooking, these are less efficient at holding heat.

It is best to use a different bottle for cooking then your everyday thermos. Coffee smell, for instance, tends to leach into whatever you are cooking, even if the bottle has been cleaned.

Thermos cooking is in no way difficult or complicated, all you need is some simple directions.

Water for City Preppers

berkey filterWithout a source of clean drinking water, most of us will die within three to seven days, depending on personal health, weather, and workload. The problem with water is it’s difficult to store enough to last through an extended emergency and living in an urban apartment makes it nearly impossible.

Collecting rainwater on the roofs of buildings could be a solution in areas that receive an ample amount of rainfall. Use plastic sheeting, tarps etc, to funnel water into clean trash cans, buckets, “kiddie pools” or other suitable containers.

When I lived in an apartment building years ago, I bought several “kiddie pools” just for this purpose. They can be stored neatly stacked one inside the other and slid under the bed out-of-the-way until needed.

Some urban areas have lakes or streams nearby but these will be polluted and contaminated – a running water source is better but still no guarantee of cleanliness. Never drink directly from the source; there is no way of knowing if the water is contaminated (it mostly will be) without proper testing. Don’t take chances; invest in a good water filter to be sure. The best filters filter out Bacteria, Organic Chemicals, and Protozoa (Giardia) Viruses.

Shelter for City Preppers

I hated living in an apartment. I felt like I had no privacy what-so-ever, I could hear every word, whimper, moan or scream through the walls, ceiling, and floor. I am sure everyone in the building felt the same way. If you are stuck in a large city an apartment is likely the situation you will need to deal with despite its limitations.

There are a few things you can do to make your place more secure. The first thing I did was replace the front door with a steel security door with deadbolt and peephole ( the same color and look of the old door). I hid the old door in the closet and replaced it when I moved. I also replaced the door leading into the bedroom with the same type door, lock and peephole set up for an instant safe-room (safer) inside the apartment.

Don’t forget smoke and carbon monoxide. Keep at least two fully charged fire extinguishers on hand. Also, the magnetic break door and window alarms work well when used to guard the windows and doors leading into the apartment.

If you are above the second floor an escape ladder or rope should be put back in case of fire. A proper mask should also be considered.

When we pay rent we are always faced with the possibility of eviction. If possible keep the rent paid up at least six months. If you have no other way of paying in advance, borrowing the money from the bank will keep you sheltered during hard times. I hate debt but this is an area where it could be to your advantage depending on your personal circumstances and how you work the situation.

Going mobile could be an option for the city survivor, but fuel will likely become a problem post-collapse. Like everything else in life, we must weigh the good against the bad and make our choices based on that knowledge. If you’re interested in this, some great information can be found here.

Firearms for City Preppers

Defense in the city will likely be a short-range engagement. For urban areas, I recommend a good pump-action 12 gauge shotgun and a handgun. The Mossberg 500/590 or Remington 870 are both excellent choices. For versatility put back a variety of shot-shell loads as well as buckshot and rifled slugs.

Handguns should be at least .38 caliber or above. I like both revolvers and semi-automatic handguns, in skilled hands both can be effective. Stay with what you know and practice. If you have had little or no training in this area seek out a competent instructor and become qualified. If you are fortunate enough to live in a state that issues concealed carry permits, you should apply for yours as soon as possible.

My favorite foraging tool in urban areas is the Savage Model 42.

Wild Game for City Preppers

In an urban area you’ll mostly have a choice of small game such as rabbit and squirrel but what most people fail to realize is that the outskirts of most urban areas harbor a good number of whitetail deer. The trouble is that everyone will be hunting, so the numbers of wild game might be depleted quickly and let’s not overlook the danger of going out to hunt those areas…

Small game can be taken with traps, air rifles, slingshots or ever killed with a club or rock. When I lived on a lot in a small city, I shoot squirrels that found their way into my back lot with a .22 caliber rifle loaded with CB caps, (down-loaded .22 rimfire ammo) the little rounds are very quiet and can take most small animals out to about ten yards.

Deer can easily be snared or shot.

Most cities have an abundant pigeon population. It is a simple matter to follow the flock to their roost at dusk. Shining a light into their eyes they tend to sit still where they can be caught or killed with little trouble. Air guns and slingshots work well.

Without a doubt, the most abundant source of meat in an urban environment is the common rat. They have thrived under even the most challenging circumstances. It is almost a certainty if there are human survivors after any catastrophe rats will be in abundance but likely infested with parasites and other things that could make you sick and therefore should be used only as a last resort to avoid death from starvation. Like most small animals they can be trapped in homemade box traps or shot.

Gardening for City Preppers

garden city preppersDon’t expect to support yourself entirely from a city garden, at least not at first. I have raised tomatoes in a window box and hanging baskets on the terrace. Perhaps in time, large community gardens would spring up that could be worked by groups of urban survivors.

During the first months preceding a total collapse, gardens will need to be hidden and out of sight. A lot of vegetables (especially among most city dwellers who think vegetables come from the supermarket) are easily mistaken for weeds and are not all that difficult to keep hidden from passers-by.

The first rule of avoiding detection is to never plant your crops using the traditional roll method. The three sisters gardening method comes to mind, some North American Indian tribes used this technique to grow corn, beans, and squash to great effect and it acts as a natural camouflage.

When it comes to survival gardening, obviously we must start with seed – it is a necessity to have a source of viable seed on hand. Look for non-hybrid (“heirloom”) varieties, you want to be sure the seed saved from year to year will breed true and continue to do so. Hybrid varieties, for the most part, are unpredictable and seem to only do well during the first year of planting.

Most garden varieties should be included in your stock. Include such vegetables as: artichoke, asparagus, beans, beets, broccoli, cabbage, carrots, cauliflower, celery, chives, corn, cucumber, eggplant, garlic, gourds, kale, leeks, lettuce, mustard green, onions, parsley, parsnips, peanuts, peas, peppers, pumpkin, radishes, soybeans, spinach, squash, sunflowers, Swiss chard, tomatoes, turnip, watermelon, zucchini etc; In general put back seeds that grow well in your area and of foods you like to eat.

Conclusion

Even in the most populated areas after the rioting, burning, and looting subsides there will be survivors. The most difficult part is surviving the first few months after the crash, and then the rebuilding can begin.

Also, see: U.S. Nuclear Target Map (Do You Live In a Death Zone?

Please share your thoughts and urban survival tips for city preppers in the comments section below…

Filed Under: Prepping

Home Defense and Fortification For SHTF

August 31, 2018 M.D. Creekmore

The Top 50 Things to Disappear from Store Shelves during an EmergencyKnowing how to defend your home from home invasion and attack is an important survival skill and one that you should master so you can protect yourself, your family and perhaps, your community from the roving bands of the unprepared after TSHTF (the shit hits the fan).

This his article is meant to be a crash course in home defense tips for preppers however the information is also vital for anyone living in rural areas where help from police maybe 30-minutes or more away or even non-existent because of a lack of phone service where you and your family will be the frontline of defense for your home and property.

Well, let’s get started…

OCOKA is a military term that stands for – Observation and fields of fire, Cover, and Concealment, Obstacles, Key Terrain, Avenues of Approach. When setting up retreat and home defenses OCOKA should always be kept in mind and each principle addressed when considering ideas for DIY home security for preppers.

Following these five key principles, you will greatly improve your home security and survivability. Let’s take a quick look at each in more detail.

Observation and Fields of Fire

You need to be able to see a potential threat at the earliest opportunity if you can see the threat early, and hopefully, before that threat see’s you, then you can make the correct decisions to either make contact, hide, or prepare to defend your area with force.

Can you observe all avenues of approach from your retreat? Do you have a full 360 degrees of view around your property? Are there areas that intruders could exploit to get close and possibly steal from, loot or attack you without being seen?

If forced could you fire upon an attacker from all angles without them being able to hide from view or without you possibly accidentally, shooting your neighbors or damaging key resources? If not then you need to get to work clearing obstacles that limit your view and ability to fire upon an attacker if you’re forced to do so.

Cover and Concealment

Cover is protection from bullets and concealment is something you can hide behind where an attacker cannot see you, but concealment offers no protection from gunfire. No matter what you’ve seen in the movies, car doors, kitchen tables, typical home entry doors, or the bed mattress isn’t cover and will not reliably protect you from being struck by bullets as they pass through.

If there isn’t any natural cover at your retreat, then you’ll need to get to work now constructing something that will protect you from bullets. You could build some decorative concrete or rock walls, tall raised flower or garden beds. These could provide effective cover and still allow your home to bend in with other homes around you and not look like a fortification.

It’s also a good idea to have a supply of sandbags on hand that can be filled with sand and/or dirt to provide an effective way to put up cover quickly in needed areas. Even unused trash cans that are filled with sand or dirt can work well if you have several to work with. Just remember that the area between the cans doesn’t provide effective cover, only concealment, no matter how close that you push them together.

Obstacles

Home Defense TipsObstacles are meant to slow or stop an attacker or to force him to go in a different direction either away from you or into a position where he is more vulnerable to you; preferably, into an area that offers him no means of cover or concealment.

One of the simplest and effective obstacles that you can put up is a fence. Don’t wait until a disaster; get to work putting up a fence now. It will increase your security and probably, your property value. The key, to success here, is to take a look around at the other houses in your area and note what types of fencing is already in use and put up a similar type around your property. The key is to blend in with everyone else; this will help you to avoid becoming a target.

Obstacles can also be used to stop vehicles from entering your property or neighborhood. For example, falling several trees close together in an interwoven pattern can be a very effective obstacle that can even stop tracked vehicles, if done correctly.

No matter how strong the obstacles that you put in place are given enough time an attacker can work through and remove that obstacle if given enough time by being unchallenged, meaning that key areas and avenues of approach should be blocked by obstacles and covered by observation – this will give you and your group early warning and time to escape or mount an offensive attack against the trespassers.

Key Terrain

Key Terrain is any piece of terrain that offers an advantage to whoever controls it. Think the high-ground. If you can take the high-ground it can drastically increase your observation and offer an advantage if your area comes under attack. Take control of and retain that key terrain, you don’t want a potential attacker to gain control of that area and be able to use it to watch you, or worse use it to attack you or your area. One lone sniper could use the advantage given by such key terrain to wipe-out your entire family, group or community, with a few well-placed rifle shots.

Even if you’re in an urban area or the ground for miles under your feel is flat any taller than normal buildings can be viewed as key terrain or the high-ground. Control these and use to your advantage.

Avenues of Approach

This goes hand-in-hand with observation and fields of fire – look around and note the most likely avenues of approach that an intruder or attacker would take to reach you. Watch roads, pathways, waterways and open areas that lead up to your property, key terrain as mentioned above will offer a huge advantage here. And remember the father you can see the threat the better, the distance will give you more time to decide what needs to be done and how to do it, depending on the threat presented.

OKOKA: Observation and fields of fire, Cover, and Concealment, Obstacles, Key Terrain, Avenues of Approach. Memorize it and use it when setting up your retreat defenses. Now let’s look at a few more key defensive strategies and points.

Staying Hidden

No doubt about it; the surest way to survive a fight is to avoid getting into one in the first place. Too many preppers have an offensive mindset when it comes to retreat defense. Sadly, many will suffer for it. Forget about the macho BS, there is no shame in hiding until a threat passes by, in fact, it’s the smart thing to do.

As a family, or small survival group you cannot afford to risk injuries or worse casualties because you let your ego driven Rambo fantasies to guide you into taking offensive action when it could have been avoided it. However, you should be ready to violently, defend your area and retreat if a confrontation cannot be avoided.

Combat Multipliers

A combat multiplier is anything that makes you and your group more effective or more difficult for an attacker to defeat. You should amass as many combat multiplies as possible now, before the time of need. You don’t want to wait until the marauders are coming through the window to start thinking about it, then it will be too late – don’t put off until tomorrow what should be done today, your life depends on it.

Things like knowing your terrain, improvised alarms and boobie traps, holding key terrain, having long-range weapons, night vision equipment, body armor, two-way radios, semi-automatic weapons, putting in obstacles or reinforcing natural ones, camouflage, mobility, trained guard dogs etc. are all combat multipliers and should be considered in your retreat defensive plans.

Funneling the Attack

Funneling the attack in the simplest terms means using roadblocks (both natural and man-made) to “guide the attacker(s) into a place of your choosing and where you have a definitive tactical advantage.

Ambush and the Element of Surprise

An ambush can be used as both an offensive and defensive tactical maneuver, for example, an ambush could be used to attack a convoy in an offensive maneuver outside of your perimeter, and also to defend against an attacker or attackers, that have entered your property or home. Hide and wait until the attackers have reached a predetermined position where they are most vulnerable, then spring the ambush.

An effective ambush doesn’t always mean shooting and killing those being ambushed, while gunfire is an option depending on the circumstances, you can also us an ambush to capture potential attackers and then make a decision on what to do with them after you’ve gained more knowledge through questioning or interrogation.

Early Warning is a Must

home defense tips
This is the last thing that you want to wake up to a 3:00 AM – effective early warning systems are a must!

The sooner you know an intrusion is going to happen the better, time will allow you and your group to make a decision to stay and fight or make a speedy get-away. If you decide to stay and fight, early warning will hopefully allow you the time to get into the best possible defendable positions, or to plan an effective ambush.

Early warning for trespassers or attackers can come from a number of different options. For example; informants, lookouts placed in key locations that lead up to your retreat, dogs, motion activated lights, improved alarms, spotlights, security cameras etc.

It’s best not to rely on just one type of early warning device because it might be bypassed or could fail. For example, you could have a lookout a mile or two away with a two-way radio overlooking a road or trail that leads into your location, and then improvised alarm devices a little further in, and then guard dogs on the outskirts and perimeter of your property or retreat location.

Layered Defense

You should divide your area into three layers of defense – the outer layer, intermediate layer and the inner layer. The outer layer could be the area as far as you can see out past your property line, the intermediate layer could be anywhere inside your property-line and the inner layer would be your home. With each layer providing increasing levels of security and protection.

You will have a plan of action for each layer of defense. For example your outer layer could be a watch and report area only with no action being taken against anyone that wonders inside that layer – unless, of course, you know that they are planning to attack and loot you at your location, then defensive action could be taken to prevent them from ever reaching your second or third layer of defense.

Your second layer would probably be your property line; this would preferably be marked by a chained link or barbed wire fence. Anyone crossing into this area is probably up to no good and should be dealt with aggressively; the extent of your aggression will depend on the depth and length of the disaster.

Your third layer would be inside your home and in most cases, deadly force can and should be used here.

The key to an effective layered defense is for you and your group to know where each layer begins and ends and to have a predetermined plan of action for each layer when that layer has been breached, and to practice each scenario until it can be done effectively, even when you’re tired and hungry.

Misinformation

Misinformation is simply, leading anyone your group to believe something that you want them to believe that isn’t true. Let’s say for example that you know or suspect that someone or a group is listening in on your two-way-radio communications, to gain Intel before they loot or steal from you. You can use this fact to your advantage, by feeding them false information via your two-way communications or through know informants.

For example; you could make them believe that your group is larger or better armed than you are or lead them to think you’re going to be in one place but in reality, you’re setting an ambush, or planning your escape. The key is to make it believable and have a workable plan where you can use their response to your false information to your tactical advantage.

False or misleading information could also be used to make your neighbors think that you are worse off than they are. For example; you could show up at their door begging for food, when in fact you have a well-stocked pantry.  Just don’t be too aggressive by demanding that they share whatever they have with you because you might get shot if they mistake you as a threat.

Official looking signs can also be used to good effect when planting seeds of false information, for example; you could post official looking “Food and Water 5 Miles” with an arrow pointing down the road and away from your location. Use your imagination and I’m sure that you can come up with other ideas for signs that will mislead and confuse strangers that wander into your town or onto your property.

Defensive Positions

defending your home

Most homes were not built to defeat gunfire and bullets will pass right through the walls and riddle anyone caught in between. It is best to defend your home from the outside where you have more visibility and mobility. This is where your early warning devices come into play, by knowing when someone is approaching your location but before they get there, you and your group have time to get into a defensive or ambush position.

Sandbags are very useful and effective when setting up defensive poisons that offer ballistic cover. They are cheap enough (or can be improvised) that you can stock up on hundreds of bags for under $100 and can be filled with sand or dirt that you dig up from your property.

Although; you don’t want to defend your home from the inside it’s still a good idea to build up the area around and near the windows with filled sandbags. This will offer cover if for some unfortunate reason you were surprised and trapped inside the structure.

Lining the area inside your pouch up to the railing with filled sandbags is also a good idea. This will offer a protected shooting position that can be occupied quickly if an attacker or trespasser were to get inside your second layer of defense before you have time to man your main defensive positions away from your main living structure.

Your main defensive positions should be set up in key locations around your property and can range from hardened pillbox type structures with thick reinforced concrete or rammed earth walls to simple spider holes, or a mixture of both.

Don’t Look Like an Easy Target

Don’t be an easy target, and even if you are, you can use misinformation to make would be looters or attackers think that you’re far stronger and better armed than you really are. If they think you are a hard target hopefully they will think that going up against you is not worth the risk and move on in search of an easier target.

OPSEC – Operational Security

We hear this all of the time in prepper and survivalist circles, OPSEC aka operational security and it is very important now and will be a major factor toward keeping you and your group secure after the balloon goes up. The number one rule of OPSEC is to keep your mouth shut – everything should be done on a need-to-know basis and most people don’t need to know anything about what you and your group are doing.

A Plan of Retreat

No matter how well prepared or strong our defenses, we could be faced with a superior force that greatly outnumbers and outgun us, where staying and fighting would be suicidal. You need a plan of retreat, preferably, a way to retreat without being seen or confronted by the superior force. An escape tunnel from your home that leads to a hidden and safe evacuation point would be ideal. But most preppers don’t have the room or the resources to put such a plan and tunnels into place.

Again; this is where early warning by lookouts with two-way-radios and alarms can save your life. If you know a threat is approaching you have time to evaluate the threat and make a decision of whether to stay and fight or retreat. You should have a predetermined destination where everyone in your group knows to meet up if you’re forced from your retreat area.

Also having caches of first-aid, water, food and ammo along the way and at the safe location is a good idea. Get those into place now, before the time of need. Also, each member of your group should have an escape or “bug out bag” that can be quickly grabbed as the escape plan is being put into action.

I know many survivalists/preppers will resist the thought of retreating from their retreat, preferring to stay and fight even if defeat and death are certain. You know; take out as many of those SOB’s as possible before they take your location and while this is admirable, it isn’t the best decision.

The escape can be used to buy you time to get better organized and plan for a counterattack where you can ultimately, take your property back from the aggressors. I’ve talked to several preppers who have their main food caches hidden on their property while having a separate smaller cache out in the open for looters to find if they make it that far.

But the surprise is that those preppers have poisoned their “decoy cache” of food items ( I don’t advocate doing this but it is what some preppers are doing). So they plan to retreat, wait, then come back and remove the looters/attackers after they have died of the poison.

Well, folks, there you have it… my best ideas for DIY home defense tips for preppers when the shit really hits the fan…

Filed Under: Security

  • « Go to Previous Page
  • Page 1
  • Interim pages omitted …
  • Page 67
  • Page 68
  • Page 69
  • Page 70
  • Page 71
  • Interim pages omitted …
  • Page 79
  • Go to Next Page »

Primary Sidebar

Subscribe to Blog via Email

Enter your email address to subscribe to this blog and receive notifications of new posts by email.

Join 7,202 other subscribers
  • Amazon
  • Facebook
  • Substack
  • Twitter
  • YouTube

“Do more with less.”

– Minimalist proverb

Recent Posts

  • Just so you know
  • Weather Update for My Corner of Appalachia
  • Why I’m Ordering Ivermectin + Mebendazole Every Year
  • The Website’s Shutting Down (But Here’s the Plan)
  • You Are Hated! Start Training Like It!

Footer

Recent Posts

  • Just so you know
  • Weather Update for My Corner of Appalachia
  • Why I’m Ordering Ivermectin + Mebendazole Every Year
  • The Website’s Shutting Down (But Here’s the Plan)
  • You Are Hated! Start Training Like It!

More about me

Books I’ve written

Books I’ve read

Follow Me on YouTube

Follow Me on Facebook

Gear I Use and Recommend

Newsletter

Search this site

Follow me elsewhere

  • Amazon
  • Facebook
  • Substack
  • Twitter
  • YouTube

© 2008–2025 M.D. Creekmore · As an Amazon Associate, I earn from qualifying purchases.