• Skip to main content
  • Skip to secondary navigation
  • Skip to primary sidebar
  • Skip to footer

M.D. CREEKMORE

  • Blog
  • Books
  • Newsletter
  • Gear I Use
  • About
  • Contact
  • Facebook
  • YouTube
  • Blog
  • Books
  • Newsletter
  • Gear I Use
  • About
  • Contact
  • Privacy Policy

Blog

Vintage Army Advice on the Importance of Staying Fit (Applies To Everyone… Even You!)

September 14, 2018 M.D. Creekmore

PHYSICAL TRAINING

Editor’s note: The following excerpt was included in FM 21-13, an Army field manual published in 1952. Staying in as good of physical condition as possible is important for everyone (even you) and this article gives some good tips on why and how you can do that.

FM 21-13
THE SOLDIER’S GUIDE

Section VI. PHYSICAL TRAINING

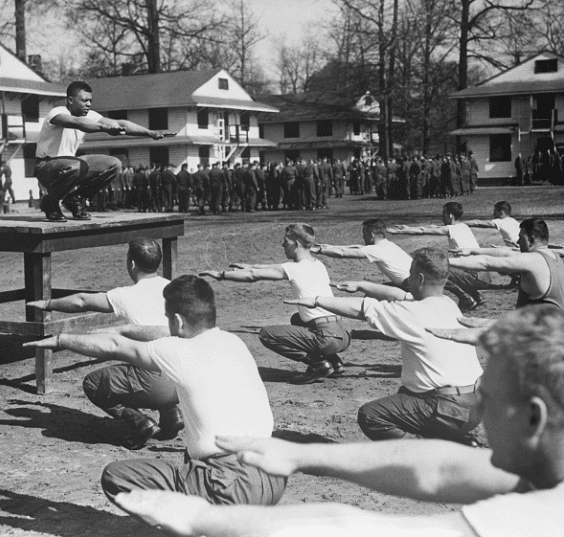
Military leaders have always recognized that soldiers do a much better job if they are in good physical condition. This applies to a soldier pounding a typewriter in the communications zone as well as the rifleman fighting in the front lines. Warfare is a grueling ordeal and makes many severe physical demands on individuals in all types of jobs.

You may have to march long distances through rugged country with a full pack, weapons, and ammunition. You may be expected to fight upon arriving in the combat area at the conclusion of such a march. You may have to drive fast-moving tanks over rough terrain, to run and crawl long distances, to jump into and out of foxholes or trenches (some of which you may have dug), and to keep going for many hours without sleep or rest. All these activities and many others require superbly conditioned troops.

The importance of physical fitness has not decreased with the rise of mechanized warfare. Soldiers must still perform most of the arduous tasks which fighting men for thousands of years have had to do. The machines are no better than the men who operate them, and every improvement in our machines must be matched by an improvement in the quality and fitness of their operators.

A close relationship exists between physical fitness and mental and emotional fitness (morale). The rugged, tough, well-conditioned soldier has a feeling of fitness and self-confidence. He’s a hard man to beat.

You can become or remain physically fit only through physical training. Long experience has shown that few men enter the Army physically fit for the arduous duties ahead of them. The softening influences of our modern civilization make the problem of conditioning men more difficult than ever. For these reasons, a good plan of physical training is a part of the Army’s training program. It is the only way to prepare you for your strenuous duty in the Army and may actually be responsible some day for saving your life or the lives of your friends.

The old saying about “a sound mind in a sound body” is as true today as it ever was. Your mind works best if your body is healthy. As the condition of your body improves under physical training, you will find that you can work longer and still remain mentally alert.

You will feel more like doing things that require both mental and physical activity. You won’t mind the hard jobs because you won’t tire as easily. Your waistline will look trimmer; your chest expansion will be greater; and you will seldom be “out of wind.” Small problems will be easier to solve, and the big ones won’t look so big. Your self-confidence will increase, and you’ll feel ready to tackle anything or anybody.

The service benefits through having the maximum number of men ready and willing to do their jobs every day. Fewer and fewer men report for sick call as the health of the outfit improves. The over-all strength and fighting ability of the Army increases as each individual’s physical condition improves. Such an army is able to fight harder and to keep it up longer than a poorly conditioned enemy. Such an army has high morale, is vigorous, and takes pride in its accomplishment — it is an army that wins.

The Army has developed exercises to improve your physical fitness. Some of these are strenuous, but their value has been proved through use. Athletics also are excellent for improving your physical condition. Detailed information on physical training can be found in FM 21-20.

You’ve heard the old saying that “a chain is no stronger than its weakest link.” This is especially true in a military organization. In the offense the weakest section of an attacking company is stopped first. In the defense the enemy probes your position until he finds the weakest section; then he hits your weak spot with everything he has.

The only answer is to strengthen your whole outfit until it has no weak spots. Physical training is a means of strengthening and conditioning your body so that it will have no weak spots.

When you have strengthened your weak spots, the next thing is to get everyone working together. Everyone on the team must help his teammates toward the common goal. The combination of a group of well-conditioned men working with each other will produce victory whether on the playing field, in the office, or in battle.

Filed Under: Health and Fitness

Home Security and Safety Tips for Single Women Living Alone

September 13, 2018 M.D. Creekmore

by Susan B

The security at home essay reminded of something that happened to me a few years back. I was having another sleepless night a few months after my husband had passed away, I fell asleep around 3 AM, I woke up 20 or 30 minutes later to my back door being kicked in, a man screaming to let him in.

I was certain he could not gain entry as I’d replaced the door when I first bought the place with a metal door and I had every type of bar and safety feature on this door to make sure it could never be rammed in.

I told him I called 911, my dog was very old and he had hit her hard enough she was hiding from him but still barking. After the longest 15 minutes of yelling and pounding on my door the cops finally arrived and as they were hauling him away he reiterated I should have let him in, he was at a party gone bad and some guys were chasing him, so he said.

I certain as were the officers he was very drugged up. I told him if he’d been able to gain entry I would have had to shoot him with the 12 gauge shotgun I was holding and I certainly would have blown his F&^%ing head off.

My husband always said to keep the shotgun loaded where you can get to it fast, also a handgun, I tried to load the chamber of one of his .45 handguns but I was shaking so bad I couldn’t do it, not that I relished the idea of using it anyway, thankfully there was a shotgun ready to go and I have used one often enough before to be comfortable with.

I lived at the time in a low crime area in the suburbs, I/we were there 12 years and nothing had ever happened before.

Soon after I went and got my concealed carry and bought a new handgun I was comfortable using, a Glock 19. I have it next to me on my nightstand right now. I put it up if anyone is coming over. I have several hidden in other parts of the house as well. It did get me thinking about home safety. No matter how safe you think your area is you should be prepared.

It is a good idea to take a close look at your home from a viewpoint of how easy it would be for someone to gain entry. I think it is a good idea to make it so people have no way of knowing when your home, cover garage windows.

Don’t answer the door if you don’t know who is standing there, have a way to see who is there without them seeing you. Make sure to have an extra layer of protection at all doors and windows, I had alarms on everything and storm shutters on all windows.

The front door entry was gated. I now live out in the country and am working toward the same level of security here. Sometimes it isn’t someone from outside your area that is your biggest threat but someone living not very far away.

I have a yapper dog that keeps me aware of people pulling down my driveway. I have a gate and I intend to add another further down the driveway, it is a very long driveway.

You’d be surprised how easy the average door is to kick open, get some safety bars or other such gizmos to make it nearly impossible without a ramming bar from a swat team. They don’t cost all that much and are easy to install. Use long screws and make sure you’re attaching to the framing studs and not just the trim.

I have several driveway alarms as well, one for each side of the house; I have the beams set at different angles from the window and a few outside as well at a height that keeps them from going off from small animals. I find the dogs are the better bets as alarms.

The driveway alarms are always on sale at harbor freight and they are very user-friendly. I bought the other items online or at local hardware stores. Even a simple hasp for a back door with a sturdy padlock can help slow down an intruder. I also have door stop alarms.

There are new types of sensor alarms that will call 911 and tell them you have an intruder, these are stand-alone alarms not connected to an alarm company that charges you a monthly fee. They do need a phone line though. There are alarms that go off if someone outside puts their hand on your doorknob or handle. These are but a few of the multitude available these days.

Not many of us will have a well-trained law enforcement man in the house, maybe not even close by, so we need to eliminate as best we can the possibility of an intruder/robber etc by using the means we have available to make our homes less of a target.

There are all kinds of home security products one can utilize and install without the help of professionals these days that can add to our home security. Just as now is the time to prepare with food, water, energy, etc it is also the time to heighten security in our homes.

Learn what guns may be best for your home or person. I gravitated to what I was comfortable and familiar with; it may not be a right fit for others.

To have things in order enough to eliminate concerns over a home intrusion to a significant degree gives me peace of mind.

Make sure to have a neighbor you trust most number on your speed dial in case you need their help. Often just a drive or walk by can cause a potential intruder to change their plans and leave. Fake or real cameras posted signs of security systems, and neighborhood watch signs all help. But most of all make it one of the most difficult homes to gain entry, without looking like you have much of anything worth stealing or being too obvious.

Here in the south it just looks like I’m more prepared for a hurricane or tornado, even still it makes my home less of an easy target than many of the other homes in the area. I don’t put out adornments to keep up with the Jones that would give anyone a clue to there being anything worth stealing behind my doors. I believe this to be a prudent future trend we’ll all see more of. You want to be as invisible as you can be. No expensive new cars or toys to draw attention to you will be the order of the day. Why advertise you have anything worth taking you down for?

I love this blog and I really enjoy reading what you all have to say about everything, many of you have an enormous amount of horse sense in a time when it is rarely found.

I’m looking forward to reading all your thoughts and ideas on home security for us women living alone and lay people…

Filed Under: Security

How To Prepare For and Survive a Nuclear Attack

September 13, 2018 M.D. Creekmore

Radioactive nuke attack survival

by Joel Skousen (first published on November 28, 2017)

With this week’s claimed test of a hydrogen nuclear device, North Korea is one step closer to making good on its threat to nuke some portion of the USA or its territories.

It is still not an imminent threat since North Korea apparently lacks the technology to build a warhead can withstand the extreme heat of high-speed reentry into the atmosphere—the last two missile warheads burned up on reentry.

Even more disturbing is that North Korea has long been suspected of being the “trigger event” for a third world war between Russia, China, and the United States.  So, with President Trump threatening a military response, it’s time to take nuclear preparations seriously.

That said, I do not think Russia and China are ready yet to take on the US in a full-blown war (until into the next decade) so it is still possible that another Korean war may not cause Chinese and Russian intervention—though you should count on that as an absolute.

First, let’s be clear about one thing:  nuclear war is very survivable, even with minimal preparations, so don’t believe the “everyone is going to die” claims about nuclear winter and total destruction.  50% of Hiroshima survived without any preparations, though many were very sick.

Keep in mind too that even Russian and Chinese war doctrine doesn’t include nuking American cities on a first strike, despite the verbal threats.  In reality, they intend to nuke US and NATO military facilities first and blackmail the West into submission.

There are 3 phases of nuclear war that you must be prepared to confront:

1) Initial blast and radiation.  The blast area of destruction is only 5-7 miles from any nuclear target, so don’t prepare against blast effects, which is very expensive—relocate instead.  Avert your eyes immediately from even a distant explosion and duck behind anything that will shield you from the instantaneous line of sight radiation and intense heat and light.

Most will never see any blast effects, but almost everyone will have to deal with residual radiation from anywhere from 2 weeks to a month, which is not that difficult if you prepare in advance.

2)  Immediate panic and cut off of electricity and supplies.  Because both Russian and Chinese nuclear doctrine dictates the use of high attitude Nuclear Electromagnetic Pulse weapons (EMP)  just before a physical nuclear strike, the electric grid will go down—which guarantees a lot of panic as people are plunged into darkness, lack of communication, and the cessation of all government services, like sewer and water.

Don’t believe the hype about Iran or North Korea doing an EMP strike.  It takes six simultaneous high altitude nuclear weapons exploding to blanket the entire US grid, not one.  So, only Russia and China have that capacity.

Remember too, that a total loss of electricity, including all TV and Radio may be your best immediate warning that a physical nuclear strike is about to fall within 15 or 20 minutes.  That’s not a lot of time, but it may allow you to get a head start out of town or make a quick call to warn the family.

This threat requires preparation to get to your secured home or retreat very quickly without getting caught in major traffic snarls.  Don’t get on a freeway that is already packed.  Use secondary roads, and map out routes that allow you to cross any freeways at an over or underpass NOT associated with an on-ramp or an exit.  Those will be the only ones not blocked with traffic.

3) Long-term famine and Social Unrest:   This gets into full swing within 3 days of an attack and may last more than a year depending on how quickly parts of the grid can come back up and how well industry can re-establish supplies lines.  While it’s hard to predict how these things will play out, this is where your long-term food and water storage supplies come in.

Don’t expect to be able to grow a garden that first year in a suburban area during high levels of social unrest without lots of theft. That will only be possible in rural and secluded areas.   That’s where having a rural retreat is a good long-term solution.

This article will deal mainly with the first threat—surviving the radiation.   It takes a heavy mass of materials to shield from gamma radiation, which is much more potent than X-rays, so forget about using medical grade X-ray shielding materials. Your wooden house and roofing materials are like paper to gamma rays, so not much shielding there either.

Nuclear protection purists would demand a reduction in radiation that is almost total requiring  13.8 feet of water, 10 feet of earth, 6 feet of concrete, or about 1.3 feet of lead—a Protection Factor (PF) of a billion, all of which are very costly to achieve.  This Survival Blog article discusses the relative protection factors for various materials.

As a practical matter, we have to arrive at a compromise between the cost of construction and shielding.  You need less shielding the farther you are away from an explosion since radioactive dust starts to fall out from the sky closest to the detonation and only the finer high altitude particles travel longer distances, depending on the wind direction.

In short, you get less radiation the farther from blast zones you are located.

For example, Immediately to the West of Seattle, which has multiple nuclear targets around Puget Sound including the Trident submarine base, you would probably need a PF of 1000 to shield against several inches of radioactive dust on your roof.

That amounts to 22 inches of concrete or 3 feet of dirt. But, further to the West in Idaho, the radioactive dust from Seattle would be a fraction of that, requiring much less shielding.

Many experts demand a “one size fits all” PF of 1000, but that means that very few could afford to build a shelter or safe room—and they don’t.

Because most areas of the country, not directly downwind and within 50 miles of a blast one, are not subject to those high levels, most people can survive with a protection factor of only 32, meaning that that radiation level is reduced to 1/32 of normal.  That involves 12” of concrete over your basement shelter—not 22”, which is doable, and not too costly.

Because of the much higher costs of protection close into target areas,  in my book Strategic Relocation, I recommend that your money is better spent relocating, even within the same general area, to avoid being directly downwind or close to a nuclear target.

In the book, I have maps of all the nuclear target areas for guidance, but also indicate the one or two prevailing wind directions in your area necessary to mapping out an avoidance strategy.

Choosing the type of shelter

Your two basic choices are to buy a prefabricated tank style shelter that is buried underground, or to build a basement style shelter within your own home, or as an extension.  The only advantages to the buried tank shelter are that it is quicker to install, and covering with dirt is cheaper than concrete.

However, they are more expensive per square foot of usable space, and they often come designed with expensive blast doors and valves, which you don’t need outside of a blast area.  S

adly, many also are designed with costly NBC or HEPA filters inside the shelter, but the sheet metal filter enclosures are not thick enough to stop radiation trapped in the filter from reaching those inside the shelter. The average cost is $50k-$75k, and you can build a lot of basement for that price.

But the worst problem with buried shelters is the fact that you have to go outside and open a hatch to get inside.  The notoriety of bringing in a huge tank shelter on a semi-truck and burying it in your backyard with a crane guarantees that the whole neighborhood is going to know about it.

How do you get in if that entrance is surrounded by others wanting shelter?   All your loading of supplies and equipment is down through that vertical ladder well, which is not easy.  In addition, the ventilation pipes emerge from the ground and are subject to tampering or blocking.  If you do use a buried shelter, put a shed or building over it.

That way the vents are protected from view and tampering.  Still have to cross open ground to get into the shed, which is a security risk.

The basement shelter avoids all of those disadvantages since you access it and stock it with supplies from within your home.  No one can view any of that activity.  Vents go up through walls into the attic, and HEPA air filters can be concealed in or under normal cabinets.

The basement safe room or shelter (never call it a “bunker”) is also easier to conceal, and it should be concealed.  In cases of massive social unrest, you want to have the option of avoiding confrontation by hiding out in a concealed safe room with a steel security door, communications, and alternate battery-powered electricity.

If you do an extension to your home with a basement shelter underneath, label the basement part as non-livable “storage” only, and don’t show any of the plumbing that might pertain to a future shelter.  Install all that after the occupancy permit is granted.  My book on the Secure Home has all of the architectural details on how to do that plus detailed listings of all the equipment necessary to outfit the shelter.

But, if you have an existing basement the best way to achieve total privacy without a permit or inspection, is to build a concealed shelter within the basement.  We have engineered plans to do just that here.

As a minimum, prepare your home to give you added protection without a formal shelter.  In a basement, that would involve building two addition stacked walls of concrete block (6ft high and 8ft across) into a corner of a room away from any window, but leaving a 24” entryway.  Cover that with a makeshift ceiling of 2×4 on 12” centers with ¾” plywood.

Then stack 3 levels solid 4” concrete blocks on top of that makeshift ceiling.  That will give you the minimum radiation protection you need.  Have a port-a-potty inside as well as some food and stored water.  It will be tight, but at least you’ll survive.  If you don’t have a basement, you’ll have to do four block walls inside an above ground room to get the sidewall protection. Do the lowered ceiling on top of those 4 six foot high walls.

It takes about two weeks for gamma rays to dissipate so you will need to buy a radiation meter to tell when it is safe to come out or to go back into a shelter (since in a war, there may be multiple nuclear events).  KI4U.com has a range of nuclear meters at good prices.

Resources:

  • https://www.ready.gov/nuclear-blast
  • Are You Ready – FEMA Guide
  • Nuclear War Survival Skills – Cresson H. Kearny
  • U.S. Nuclear Target Map (Do You Live In a Death Zone?)

Joel Skousen has designed high-security residents and retreats for over 40 years.  He is the author of Strategic Relocation, the Secure Home, The High-Security Shelter, 10 Packs for Survival, and is the publisher of the weekly World Affairs Brief, which analyzes the week’s top stories from a perspective of what the government and the mainstream news won’t telling you.

Filed Under: Prepping

How to Make Homemade Soap Bars for Beginners

September 13, 2018 M.D. Creekmore

how to make homemade soapby Krystal Brown

Making your own soap is an enjoyable and useful activity. Homemade soaps are also better for the skin because they contain glycerin. Glycerin is a natural product of the soap making process. But, with many commercial soaps, the glycerin is removed and used to make lotions and other cosmetics.

With self-made soaps, the glycerin is not removed and you will benefit from its soothing and moisturizing effects.

When you are just starting out making soap, it is not good to use a complicated recipe with expensive ingredients. You do not want to get overwhelmed. You also do not want to waste money on fancy imported oils and 50 different types of milk and additives when you are not yet confident with your craft.

When starting out, it is better to keep things simple and low cost. I am going to teach you how to make an uncomplicated soap using just four ingredients.

<a href="https://www.thesurvivalistblog.dream.press/wp-content/uploads/2017/10/crisco-and-orange-oil-soaps-1.jpg"><img class="size-medium wp-image-39365" src="https://www.thesurvivalistblog.dream.press/wp-content/uploads/2017/10/crisco-and-orange-oil-soaps-1-263x350.jpg" alt="Crisco and orange oil soaps " width="263" height="350" /></a> Crisco and orange oil soaps Making your own soap is an enjoyable and useful activity. <a href="http://amzn.to/2yxcA2j">Homemade soaps</a> are also better for the skin because they contain glycerin. Glycerin is a natural product of the soap making process. But, with many commercial soaps, the glycerin is removed and used to make lotions and other cosmetics. With self-made soaps, the glycerin is not removed and you will benefit from its soothing and moisturizing effects. When you are just starting out making soap, it is not good to use a complicated recipe with expensive ingredients. You do not want to get overwhelmed. You also do not want to waste money on fancy imported oils and 50 different types of milk and additives when you are not yet confident with your craft. When starting out, it is better to keep things simple and low cost. I am going to teach you how to make an uncomplicated soap using just four ingredients. Those ingredients include Crisco, orange essential oil (which is optional), lye and olive oil. You don't have to use any essential oils if you want a fragrance free soap. Usually making soap from scratch involves a “cure” time of 4-6 weeks. During this time, the soap becomes milder and harder. However, I am going to also teach you a simple oven <a href="http://amzn.to/2yxcA2j">processing technique that can make your soap</a> safe to use within a couple of days. <u>Items Needed</u> <ol> <li>Goggles: This is to protect your eyes from the “fumes” generated by the lye water. I have used my old swimming goggles and they worked just fine. You can also get goggles from the Dollar Tree.</li> <li>White Vinegar: This is used to neutralize the lye if any of lye water splashes on you.</li> <li>Rubber Gloves: These protect your hands and can also be obtained from most dollar stores.</li> <li>Stick Blender: I purchased mine for less than $10 from a local discount store.</li> <li>Silicone Cake Molds: I got some from Dollar Tree. I used 5 small silicone cake molds for my soaps. You can also use a regular pan lined with lightly oiled wax paper so that the soap will not stick to the pan.</li> <li>Candy Thermometer: The first time I ever made soap, I didn't have one of these and it made things harder. Get a candy thermometer. I purchased one for a couple of dollars on eBay.</li> <li>Lye: I use “Instant Power Crystal Lye Drain Opener” from Walmart. It costs $5.16 and I still have plenty of lye left over to make more batches of soap. Your lye must be 100% pure lye...not  Drano or anything like that. You can also purchase lye from eBay, Amazon or various online soap making shops. I have heard of people buying the 100%  pure lye from Lowe's as well. You will need ¾ cup of lye for this recipe.</li> <li>Crisco: You will need 3 pounds of this. I got 3 containers of Crisco from Dollar General. Each container was a pound. You can use generic Crisco as well but it must be 100% vegetable shortening.</li> <li>Olive Oil: You will need 1 tablespoon of this. I purchased mine from Dollar General. It must be 100% pure olive oil, not the “olive oil” blend sold at Dollar Tree which is mainly just soybean oil. The olive oil hardens the soap.</li> <li>Orange Essential Oil: I used about ½ of an ounce. It smells heavenly. You can get essential oils on eBay, Amazon and at drugstores such as Rite Aid.</li> <li>Kitchen Scale: This is optional for this recipe (in my opinion). It will make things more precise, but I did not use a scale because I did not have one at the time. I just measured things out carefully using measuring cups and I had no problems.</li> </ol> <strong><u>The Steps</u></strong> <a href="https://www.thesurvivalistblog.dream.press/wp-content/uploads/2017/10/cake-pan.png"><img class="size-full wp-image-39363" src="https://www.thesurvivalistblog.dream.press/wp-content/uploads/2017/10/cake-pan.png" alt="Cake Pan" width="216" height="161" /></a> Cake Pan <ol> <li>Measure out your lye. If you have a scale, measure out 220 grams of lye. If not, very <strong>very</strong> carefully measure out ¾ cup of lye and pour the crystals into a non-metal container.</li> <li>Measure out 330 grams (or 1 and ½ cup) of distilled or filtered water. Very carefully pour the lye crystals into the water. There will be fumes. Stir with a spoon (again no metals are allowed...use plastic or wooden spoons). It is good to place the lye water under the stove exhaust fan if you can. If not, open the windows for adequate ventilation.</li> <li>Melt your Crisco and add your olive oil.</li> <li>After the oils are melted together, turn off the stove and remove the pot from the stove. Use a thermometer to measure the temperature of the oils. The oils should be about 120 degrees.</li> <li>Check the temperature of your lye water. It will be about 175 degrees.</li> <li>You must get the lye water and the oils to a similar temperature. So, place your lye water container in a sink full of ice water until it has cooled down to 97-100 degrees. While you are waiting for this to happen, your oils will be cooling down naturally.</li> <li>When both the oils and the lye water are between 97-100 degrees, mix them together. Pour the lye water into the oils. Use your stick blender to blend the mixture until it looks like pudding. When the mixture reaches this stage, it is said to be at <em>trace</em>.</li> <li>When your mixture reaches trace, add your essential oils to the mixture. Blend well and quickly pour your mixture into your cake pans. Certain essential oils will sometimes cause the mixture to “seize” so work quickly once you add your fragrance oil.</li> <li>Place your soap in the oven at 170 degrees (or on the lowest setting your oven has available. If your oven has a “warming” feature, you can use that). Let the soap stay in the oven for about 2 hours. However, check on the soap every 20 minutes or so to make sure that it does not “bubble over”. The heat from the oven is forcing the saponification process. If you didn't use the oven method, it would take 4-6 weeks after you pour your soaps before you could be able to use them.</li> <li>Let your soap rest for a few hours and then cut it into soap bars.</li> <li>Let the soap rest for another day so the excess water will evaporate and the soap will become milder and harder.</li> <li>Enjoy your homemade soap!</li> </ol> This bar cleans very well and has a medium amount of lather. Many people (myself included) love lots of lather. But, the amount of lather a soap produces does not measure its cleaning ability. My Orange Crisco Soap is not extremely moisturizing like a Dove beauty bar, but it does not strip the skin either. Your entire family can use it or <a href="http://amzn.to/2yxcA2j">you can even sell the soap at flea markets or online</a>. The ingredients are cheap and readily available which make it perfect for a novice soap maker. I showered with my soap 2 days after making it. I have a whole box of soap from this one batch. It's easy, economical and fun. Please try it! <strong>Also Read:</strong> <ul> <li><a href="https://www.thesurvivalistblog.dream.press/diy-rendering-fat-making-soap/">DIY Rendering Fat & Making Soap</a></li> <li><a href="https://www.thesurvivalistblog.dream.press/homemade-laundry-soap/">Judy’s Homemade Laundry Soap</a></li> <li><a href="https://www.thesurvivalistblog.dream.press/soap-thieves-surprising-lesson-prepping/">Soap Thieves, A Surprising Lesson About Prepping</a></li> <li><a href="https://www.thesurvivalistblog.dream.press/making-selling-soap/">Making and selling soap</a></li> <li><a href="https://www.thesurvivalistblog.dream.press/how-to-make-laundry-soap/">Making Laundry Soap</a></li> <li><a href="http://amzn.to/2yxcA2j">Making Soap From Scratch: How to Make Handmade Soap - A Beginners Guide and Beyond</a></li> </ul>Those ingredients include Crisco, orange essential oil (which is optional), lye and olive oil. You don’t have to use any essential oils if you want a fragrance free soap. Usually making soap from scratch involves a “cure” time of 4-6 weeks. During this time, the soap becomes milder and harder.

However, I am going to also teach you a simple oven processing technique that can make your soap safe to use within a couple of days.

Items Needed

  1. Goggles: This is to protect your eyes from the “fumes” generated by the lye water. I have used my old swimming goggles and they worked just fine. You can also get goggles from the Dollar Tree.
  2. White Vinegar: This is used to neutralize the lye if any of lye water splashes on you.
  3. Rubber Gloves: These protect your hands and can also be obtained from most dollar stores.
  4. Stick Blender: I purchased mine for less than $10 from a local discount store.
  5. Silicone Cake Molds: I got some from Dollar Tree. I used 5 small silicone cake molds for my soaps. You can also use a regular pan lined with lightly oiled wax paper so that the soap will not stick to the pan.
  6. Candy Thermometer: The first time I ever made soap, I didn’t have one of these and it made things harder. Get a candy thermometer. I purchased one for a couple of dollars on eBay.
  7. Lye: I use “Instant Power Crystal Lye Drain Opener” from Walmart. It costs $5.16 and I still have plenty of lye left over to make more batches of soap. Your lye must be 100% pure lye…not  Drano or anything like that. You can also purchase lye from eBay, Amazon or various online soap making shops. I have heard of people buying the 100%  pure lye from Lowe’s as well. You will need ¾ cup of lye for this recipe.
  8. Crisco: You will need 3 pounds of this. I got 3 containers of Crisco from Dollar General. Each container was a pound. You can use generic Crisco as well but it must be 100% vegetable shortening.
  9. Olive Oil: You will need 1 tablespoon of this. I purchased mine from Dollar General. It must be 100% pure olive oil, not the “olive oil” blend sold at Dollar Tree which is mainly just soybean oil. The olive oil hardens the soap.
  10. Orange Essential Oil: I used about ½ of an ounce. It smells heavenly. You can get essential oils on eBay, Amazon and at drugstores such as Rite Aid.
  11. Kitchen Scale: This is optional for this recipe (in my opinion). It will make things more precise, but I did not use a scale because I did not have one at the time. I just measured things out carefully using measuring cups and I had no problems.

cake-pan-for making homemade soapsThe 12 Easy Steps

  1. Measure out your lye. If you have a scale, measure out 220 grams of lye. If not, very very carefully measure out ¾ cup of lye and pour the crystals into a non-metal container.
  2. Measure out 330 grams (or 1 and ½ cup) of distilled or filtered water. Very carefully pour the lye crystals into the water. There will be fumes. Stir with a spoon (again no metals are allowed…use plastic or wooden spoons). It is good to place the lye water under the stove exhaust fan if you can. If not, open the windows for adequate ventilation.
  3. Melt your Crisco and add your olive oil.
  4. After the oils are melted together, turn off the stove and remove the pot from the stove. Use a thermometer to measure the temperature of the oils. The oils should be about 120 degrees.
  5. Check the temperature of your lye water. It will be about 175 degrees.
  6. You must get the lye water and the oils to a similar temperature. So, place your lye water container in a sink full of ice water until it has cooled down to 97-100 degrees. While you are waiting for this to happen, your oils will be cooling down naturally.
  7. When both the oils and the lye water are between 97-100 degrees, mix them together. Pour the lye water into the oils. Use your stick blender to blend the mixture until it looks like pudding. When the mixture reaches this stage, it is said to be at trace.
  8. When your mixture reaches trace, add your essential oils to the mixture. Blend well and quickly pour your mixture into your cake pans. Certain essential oils will sometimes cause the mixture to “seize” so work quickly once you add your fragrance oil.
  9. Place your soap in the oven at 170 degrees (or on the lowest setting your oven has available. If your oven has a “warming” feature, you can use that). Let the soap stay in the oven for about 2 hours. However, check on the soap every 20 minutes or so to make sure that it does not “bubble over”. The heat from the oven is forcing the saponification process. If you didn’t use the oven method, it would take 4-6 weeks after you pour your soaps before you could be able to use them.
  10. Let your soap rest for a few hours and then cut it into soap bars.
  11. Let the soap rest for another day so the excess water will evaporate and the soap will become milder and harder.
  12. Enjoy your homemade soap!

This bar cleans very well and has a medium amount of lather. Many people (myself included) love lots of lather. But, the amount of lather a soap produces does not measure its cleaning ability. My Orange Crisco Soap is not extremely moisturizing like a Dove beauty bar, but it does not strip the skin either.

Your entire family can use it or you can even sell the soap at flea markets or online. The ingredients are cheap and readily available which make it perfect for a novice soap maker. I showered with my soap 2 days after making it. I have a whole box of soap from this one batch. It’s easy, economical and fun. Please try it!

Also Read:

  • DIY Rendering Fat & Making Soap
  • Judy’s Homemade Laundry Soap
  • Soap Thieves, A Surprising Lesson About Prepping
  • Making and selling soap
  • Making Laundry Soap
  • Making Soap From Scratch: How to Make Handmade Soap – A Beginners Guide and Beyond

Filed Under: Uncategorized

How to Buy Rural Land Without Getting Conned or Ripped Off

September 13, 2018 M.D. Creekmore

buying-homestead-propertyby MountainSurvivor

About fifteen years ago, when I went to Oklahoma with a friend of mine, we met a man in his mid- to late-fifties that offered to sell us some land that he said he owned. When we went to look at the piece, we saw a small travel trailer sitting there, surrounded by dense stickery brush, and he told us what a good deal he would make us.

After we headed out to discuss buying it from him, the next door neighbor down the road stopped us and asked us if he was trying to sell us the land. When they learned that he was, the neighbor informed us that the guy did not own the three-quarter acre that he had shown us and that his mother had willed him a measly ten feet from the edge of the dirt road. We were relieved that we had not been conned and taken for every cent that we had.

The other day, I was looking at a house on about an acre of land that was for sale on the internet and thought, for the price of about sixteen hundred dollars I could own it, clean it up and either keep it or sell it for a bit of pocket change.

Well, after further investigation, I learned that there was no house at the address that the advertiser had specified nor was there anything in the vicinity for sale which even resembled what I saw on the site. All the red flags were up and I ran as fast as my mouse would click.

The world is full of con artists so anxious to stuff their pockets with greenbacks that they will steal you blind if they have the slightest of chances. But not today because I am going to give you a crash course that will help you avoid looking like a meal for the ruthless vultures.

Now, I am not a real estate agent nor do I know the laws of every state but the principal I am about to share may be applied no matter where you are looking at buying a home or land.

Well, here we go. First, you must look at the land, walk it and verify that the corner posts are in. If you cannot find any then the seller needs to show you exactly where they are. The corner posts are placed into the ground to determine where every edge of a parcel of ground sits.

Without a survey, a landowner will not know where to put a fence, home, buildings, garden, etc. and be assured that they are not infringing on their neighbor’s dirt. Again, verify that a survey has been done by seeing, for yourself, that the posts really are in place.

chickens on the homestead property

Second, you need to do a little easy footwork which will probably take you under thirty minutes per parcel. You should never sign a contract or hand over any cash/trade until you personally, or by phone, contact the Treasurer as well as the Assessor of the County where the land or home is located because their records will enable them to tell you who the actual owner is, what their address is, how much the land is valued at, if the taxes are current or delinquent, the type of use the land has been zoned for such as Recreational which will not allow you to be there year-round, Residential which is usually year round or Ranchland which has it’s own set of rules that are dependent upon the location, possibly if the land is landlocked or legally accessible as well as other details of which only they can tell you about.

If you do not know how to ask for the details, just tell them that you are looking to buy Parcel Number (such and such) in (whatever) County and would like to know what they have on record.

For obtaining the specifications, always have a pen and paper handy, know the parcel number and/or site (situs) address, and the seller’s or real estate agent’s name. Also, most Counties have websites and there are many which provide parcel, tax and other information which is made available to the public.

Please note that, in certain parts of the country, the EPA has a choke hold on land so, if there is a source of water on or nearby a piece they may require that you have an Ecological Study done which will tell you whether or not you can even live on it but be prepared to pay through the nose, or far more than the land’s worth.

And, when purchasing any home or land, verify that an illegal drug dealer, user or manufacturer had ever used the premises because, if they were, the chemicals or drugs that may be left behind can affect your health.

Third, an Escrow Agent must always be involved because their job is to find out if the title is free and clear. You do not want to purchase a parcel of land or home only to later find out that you cannot take full possession because there is a lien or other things tying up the title.

Looking for land is simple if you know where to look or how to search for it. A lot of land goes through Real Estate Agencies and some agents keep a list of properties that they were advertising which they can refer back to if you ask them in a nice way.

Driving around looking for “For Sale” signs, empty or dilapidated houses and paths that are used by vehicles which head onto a parcel of land can lead you right to a purchase.

House and Land Brokers may have what you are looking for or they may know someone who does. Never overlook a broker because they are in business for selling and turning a profit. Check with them for “fixers” that need attention/TLC because if they have been sitting on something for a long time, they are not making any money, and no money means their pockets are not filling up.

If you run into a stubborn broker, one that would rather not sell because they believe the right buyer will come along, just move on and keep trying because, odds are, the tables will turn in your favor.

gardening on the homestead

Banks finance homes and sometimes land. They also like to sell what they foreclose upon because they do not want to lose the interest they would have made by the time the contracts were to be fulfilled. So, all you have to do is call a bank, ask to speak with someone in their loan department and then ask that individual if the bank has any foreclosures.

County Offices are notorious for selling homes, land, and homes with land, foreclosed and abandoned. They acquire them when the owners fail to pay their taxes after a certain period of time. This is where the public lucks out because for the price of the unpaid back taxes they can purchase the properties outright.

And they can do so through either the regular annual or multiple yearly auctions, or surplus sales which are properties which did not sell at the County-held auction(s). To obtain the properties, most Counties require that you submit a bid with payment and then if your bid is accepted, they will provide you with legal documentation.

The County Treasurer always knows when an auction will be held, will have a list of available properties to be auctioned and important information and facts that only they can provide to you as every County and State varies in regards to their rules and bidding processes.

The Internet contains millions of properties for sale. There is so much of it that it would take you years to get through it all. If you like to find things on your own but want to know what to type into the search box, enter “cheap acreage for sale in (the state or location where you are looking)” or “cheap fixers for sale in (again, the state or location where you are interested)”.

You could also type in the first two letters of the state followed by -realestate.net or check your state’s MLS (Multiple Listing Service) which is generally free to the public.

“Owner financing”, “no- or low-down” and “low monthly payments” can be a little hard to find so it is important that you specify that information in the search process but do not give up if you do not find what you are seeking right off. Just be patient and persistent because a search engine contains a lot of information that you may have to sift through before you are successful.

Hopefully our economy will not turn out to be like Greece’s or any nation that has suffered from bankruptcy and we find ourselves “wishing” we had found property and stuck in situations where we cannot even plant food because there is no room, regulations prevent us or we do not have the means or supplies to.

Those who have not found their dirt pie in the sky, what are you waiting for? Do not let your current situation determine when you may begin. Start looking now, begin rounding up the money by selling what you can and working a few extra jobs whenever possible to fill up the piggy bank to secure your future asap.

M.D. Creekmore adds: I found my first property on this website – the bank had foreclosed on it and I bought it directly from the bank. A great book that covers every state, with an eye towards long-term survival is Strategic Relocation: North American Guide to Safe Places.

Recommended Reading

  • Modern Homesteading: Rediscovering the American Dream
  • The Backyard Homestead: Produce all the food you need on just a quarter acre!
  • How To Find and Buy Land for a Small Homestead

Filed Under: Homesteading

Do It Yourself Long-Term Bushcraft Survival Shelter Ideas

September 13, 2018 M.D. Creekmore

long-term bushcraft shelterby Alex P

Veteran bushcrafters innately understand the Rule of Threes. The Rule of Threes is as follows: humans will die after 3 minutes with no air, 3 days without water, or 3 weeks of going without food. At least, those are the most commonly known rules.

One that is equally essential and that gets glossed over is the fact that people can die in three hours without shelter that thoroughly protects them from fatalities in harsh conditions.

You may not think the weather in your area is harsh enough to kill you but you might be surprised. During a 1964 race in England, three competitors were cut down by the cold even though it never dropped to freezing temperatures.

Even without the threat of imminent death, you can still face abundant health risks if you spend an extended period of time exposed to the elements. You name it, Heat, UV rays, cold, rain, snow, all these and more can quickly shorten your lifespan if you are continually exposed to them without a proper shelter to safeguard yourself.

In this world full of uncertainty, there’s always value in being prepared. Knowing what to do in a survival situation could literally determine life or death. If you know how to create survival shelters in the wild you could survive a situation you would have died in otherwise. That’s why we are sharing our top 6 ideas to creating survival shelters in the wild.

Lean-To

Lean-to is probably the most well-known option for creating a survival shelter. You need to find two trees that are close together and a thick stick that can be wedged between the trees. If you can’t find trees and sticks of the right size, you can hammer two sticks into the ground and secure a third between them.

If possible you should then tie the main pole to the supports to prevent a collapse. From there you simply lean a large number of sticks against the pole to create something that looks like half of a roof. Sticks are essential but they aren’t enough, you’ll need to fill in the open spaces between the sticks with moss, leaves, twigs, and other flora to act as a sort of insulation.

Overall, since the lean-to is open on one side the heat that can be kept in is minimal, the lean-to is mainly for achieving a basic level of protection.

Quinzhee

Getting trapped on a mountain with nothing but snow in sight is in many ways a worst case scenario, but that doesn’t mean it’s hopeless. Survival structures can be constructed using snow.

You’ve probably heard of igloos, and the idea here is similar. It’s just that in our idea you don’t need to have the expertise used by Northern natives to create homes from packed snow. You can create what is known as a Quinzhee must faster. You begin by piling up your supplies over an area that is larger than your body.

You then pile snow up around your supplies and pack it down until it’s about 30 inches thick all the way around. Try to keep the snow packed smoothly and evenly to prevent collapse. You then dig your way through the side and to your supplies, remove said supplies carefully, and take shelter in the cave you’ve created. Just make sure to poke a small hole in the top for air to come in or else you might be trading exposure for suffocation.

Basic Teepee

For this famous shelter, you need to start by either finding a thin but sturdy tree or a long pole that you can secure down in the ground. From there you will want to find as many long, straight branches as you can and circle the pole with them, leaning them up against it until you have a completely closed cone of empty space in the middle.

You should then somehow secure the pieces of wood together, tying them at the top with rope or fashioning a sort of cord from materials you find in the woods. Finally, you need to add the insulation, packing on anything you can to contain the heat without leading a collapse.

Debris Hut

The debris hut requires two sticks that stretch a bit beyond the length of your shoulders and one long stick that is larger than your height. You begin by sticking the two short sticks into the ground and leaning against each other so that they form a triangle.

You then place one end of the long stick on top of the triangle sticks and the other on the ground around 6 feet away. You then find as many sticks as you can and lean them up against the one long stick to form a sort of wooden pyramid that leaves just enough room for your body in the space left open. Small debris huts may feel claustrophobic, but that can actually be a good thing.

A small shelter may feel cramped at first but it actually seals in your body heat more effectively. And on the topic of body heat, don’t forget to insulate it, the debris in debris hut refers to the sticks used for the skeleton of the structure and the leaves and grass used for insulation.

Tarp Tent

One of the most helpful things you can have in a survival situation is a tarp. It makes shelter construction so much more simple, all you need to do is find a way to prop it over yourself and secure it down so that it will cover you safely through the night.

The second most helpful thing to carry is probably some sort of rope. If you can tie a rope between two trees and toss your tarp over the rope, you’ll have a tent ready. If you don’t have a rope, then you can wedge a sturdy stick between two trees to create the necessary support.

You can actually make just about any of the structures we’ve listed using a tarp, you simply have to put the tarp on top of the basic support instead of leaves, grass, and other natural types of insulation. Just make sure to secure the tarp with heavy rocks or logs to keep it from being blown away by winds.

Find Natural Shelter

The final of our top 6 ideas to creating bug out survival shelters in the wild offers something to think about in all the previous five scenarios. When creating survival shelters you don’t have to do everything yourself, and in most cases the less you can get away with doing the better off you will be.

Time and energy are everything when it comes to survival, you don’t want to waste time getting fancy with your construction ideas in a survival situation. That’s why it helps to start out with an existing foundation you can build on. If you can find a cave, cliff wall, large leaning tree, or some other sort of natural wall or enclosure then half of the job will be done for you.

The average entirely self-built structure might last a night but if you could be stranded for a longer period of time then finding something solid and natural to build around will save you time and effort in the long run.

Though at that point, you also need to consider things like access to freshwater and sources of nutrition when choosing where to set up your survival base camp. For your convenience, we put together a List of Emergency Essentials for you to check off. Survival is about planning ahead so life doesn’t catch you off guard.

Related and Recommended:

  • Shelters, Shacks, and Shanties: The Classic Guide to Building Wilderness Shelters
  • The Complete Survival Shelters Handbook: A Step-by-Step Guide to Building Life-saving Structures for Every Climate and Wilderness Situation
  • The Bomb Shelter Builders Book
  • The Secure Home

Have you built a shelter in the wild? Why? How did it turn out? Please leave a reply in the comments below…

Filed Under: Bushcraft

  • « Go to Previous Page
  • Page 1
  • Interim pages omitted …
  • Page 69
  • Page 70
  • Page 71
  • Page 72
  • Page 73
  • Interim pages omitted …
  • Page 87
  • Go to Next Page »

Primary Sidebar

Subscribe to Blog via Email

Enter your email address to subscribe to this blog and receive notifications of new posts by email.

Join 7,202 other subscribers
  • Amazon
  • Facebook
  • Substack
  • Twitter
  • YouTube

“Do more with less.”

– Minimalist proverb

Recent Posts

  • Just so you know
  • Weather Update for My Corner of Appalachia
  • Why I’m Ordering Ivermectin + Mebendazole Every Year
  • The Website’s Shutting Down (But Here’s the Plan)
  • You Are Hated! Start Training Like It!

Footer

Recent Posts

  • Just so you know
  • Weather Update for My Corner of Appalachia
  • Why I’m Ordering Ivermectin + Mebendazole Every Year
  • The Website’s Shutting Down (But Here’s the Plan)
  • You Are Hated! Start Training Like It!

More about me

Books I’ve written

Books I’ve read

Follow Me on YouTube

Follow Me on Facebook

Gear I Use and Recommend

Newsletter

Search this site

Follow me elsewhere

  • Amazon
  • Facebook
  • Substack
  • Twitter
  • YouTube

© 2008–2025 M.D. Creekmore · As an Amazon Associate, I earn from qualifying purchases.