• Skip to main content
  • Skip to secondary navigation
  • Skip to primary sidebar
  • Skip to footer

M.D. CREEKMORE

  • Blog
  • Start Here
  • Freedom Files
  • Books
  • Subscribe
  • Facebook
  • YouTube
  • Privacy Policy
  • Affiliate Disclosure
  • Contact
You are here: Home / Archives for Uncategorized

Uncategorized

Here you will find articles that don't fall into another category (or that I forgot to assign a category to), so look out you might find anything here!

Simple Homemade Cleaning Products That Work
January 4, 2019 M.D. Creekmore

homemade cleaning products

by Lynn T

My first prepping goal was to stock a year’s worth of everything we normally use that has a year plus shelf life. This took a few months but we were able to accomplish the goal.  (We did allow for freezer storage for this interim goal, so we’re really more prepared to not have to buy groceries for a year than being REALLY prepared a major long-term disaster.

One thing I noticed is that the storage takes up A LOT OF ROOM!  We have a bedroom, a walk-in closet, an upstairs ‘landing area’ plus several other small areas for all of the storage.  We want to downsize when we buy land soon, so I’ve been trying to figure out how to streamline as much as possible.

Over the past several months I have also started getting more concerned about many of the chemicals we bring into our house and decided to try some of the homemade green cleaners I’ve read about.  After using a few of them I realized how much less storage space they take up.

Most of the homemade cleaners utilize common ingredients, so you could theoretically make all of the cleaners you need from a pretty short list of storage items.  I also realized that most of the ingredients are a lot cheaper than buying pre-made cleaners.

There are a few items that require an upfront investment (like essential oils) but the amount used in these is very small so they will last a very long time.  They are also better for your family and the environment.

I’ve spent a lot of computer time looking for recipes.  I read reviews,  cross-searched ingredients to find other sources that use the same ingredients for cleaning, and looked for multiple blogs/forums/sites that ‘touted’ identical or very similar recipes.  I compiled a group of recipes for my Home Notebook and would like to share these with you.   I’ve also included an ingredient list explanation at the bottom.

Disclaimer:   Although we have made and currently use several of these, I have not tried all of them.  We are still in transition because we have so many products in storage.  I wanted to give credit for the recipes, but since I didn’t save the sources when I copied them, and since I visited many sites with the same recipes, I wasn’t able to find many of the real sources, so my apologies!

Homemade Cleaners

Lavender Anti-Bacterial Spray

– 1 Cup water

– 20 drops lavender essential oil

It smells great and lavender is naturally antibacterial.

All-Purpose Cleaner

– 3 Tablespoons vinegar

– 1/2 Teaspoon washing soda

– 1/2 Teaspoon castile soap

– 2 Cups hot water

It’s a great daily cleaner on everything from counters to floors.  Be careful when mixing this.  It will bubble a lot . . . . so don’t double up to fill up your containers!  And mix over the sink just in case.

Scouring Powder

1 – Make a paste of baking soda and warm water

2 – Make a paste of baking soda with a few drops of castile soap and warm water

Grease Cleaner

– 2 Cups water

– 1/4 Cup castile soap

– 10 drops lavender oil

Bath & Sink Cleaner

This makes a thick paste-like cleaner.  So use a squirt bottle (like a plastic ketchup/mustard bottle from the dollar store)

– 2/3 Cup baking soda

– 1/2 Cup castile soap

– 2 Tablespoons vinegar

– 1/2 Cup water

– A few drops of Tea Tree oil

Dishwasher Rinse Aid

Use plain white vinegar in the rinse aid compartment.

Dishwasher Soap Recipe

– 1 cup borax

– 1 cup washing soda

– 1/4 cup kosher sea salt

– Two packets of Unsweetened Lemonade-Flavored Kool-Aid

****Only lemon, other flavors will dye your dishwasher!****

Put all of it in the container and shake it up.  (It tends to get clumpy after sitting but a good shake will loosen it up).  Per load, you only need a tablespoon or so into each cup of your dishwasher.  I read that is can leave a film on dishes if you don’t use rinse aid.  So use the vinegar in your rinse aid compartment OR in the bottom of the dishwasher.  It was also recommended to wash on the hot cycle. Source:  decorganizecrafts.blogspot.com

Homemade Fabric Softener

– 6 cups HOT water

– 3 cups white vinegar

– 2 cups Suave Refreshing Waterfall Conditioner {or another favorite scent}

Mix conditioner & hot water well, until conditioner is dissolved completely.  Add the vinegar, and mix well.  Store in a large container {empty fabric softener container, empty large vinegar bottle, etc}  Pour into a downy ball… or use approx. 2 tbsp. in the fabric softener spot in your laundry machine… then wash!  Source:  thefrugalgirls.com

Homemade Laundry Detergent

– 1 5.5 ounce bar Fels Naptha soap

– 1/2 cups washing soda

– 1/2 cups borax

– Water

Using a cheese grater or food processor, grate the entire 5.5-ounce bar of Fels Naptha, finely.

Powdered laundry detergent: In a container that has a tight-fitting lid, combine the grated Fels Naptha, washing soda and borax. Stir to mix well. Store in a sealed container that is properly labeled. Use 1 to 2 tablespoons in a front-loading machine, and up to 1/4 cup in a top loader. Note: The amount required depends greatly on the hardness of your water. Experiment by using the lesser amount, and then increase as necessary. Cost: About 15 cents per load when using 2 tablespoons.

Liquid laundry detergent: Place grated Fels Naptha into a cooking pot. Add enough hot water to cover and heat over low heat, stirring, until soap is melted, not boiling. Remove from stove and pour into a large bucket that has a lid. Add washing soda, borax and 3 gallons of hot water. Stir until well incorporated. Cover and allow to sit overnight. In the morning stir again. Use 1/2 cup to 1 cup per load, experimenting with the lesser amount to start, and then increasing as necessary. Note: The liquid version will be “gel-like.” Some call it gloppy and gelatinous. This is normal. Simply give it a quick stir before each use. Cost: About 3 cents per load using 1/2 cup.

What, no suds?! This detergent does not produce suds. Suds should never be considered visual evidence that a detergent is working. Dirty water is the sign that the detergent is doing its job. Because it does not create suds, this is the perfect product to be used in HE front-loading washing machines. 

Source:  debtproofliving.com

Foaming Dish or Hand Soap

Re-use your foaming soap pump container!  Mix your choice of liquid dish or hand soap with warm water at a ratio of 5:1 (water to soap), mix gently.

Homemade 409 Recipe

– 2 Tbsp. Distilled White Vinegar

– 1 Tsp. Borax

– 1/8 cup Dawn Dishsoap

– 1 cup Hot Water

Pour vinegar, borax and hot water into a spray bottle.  Then continue filling the spray bottle with cool water.  Add Dawn last. {no need to shake}  Source:  thefrugalgirls.com

Homemade Glass Cleaner

– 1/4 c. rubbing alcohol

– 1/4 c. white vinegar

– 1 Tbsp cornstarch

– 2 c. warm water

Combine everything in a spray bottle, and shake well. Shake well before using, too, as the cornstarch might settle at the bottom (and subsequently plug the spray mechanism if it’s not mixed in well).  Source:  crunchybetty.com

NOTE:  when beginning to use vinegar (plain or 50/50) to clean windows and mirrors after having used commercial glass cleaners, it may be necessary to add several drops of dish washing liquid to your solution for the first few cleanings to remove the buildup from the surface.  I’m not sure if the cornstarch has the same effect or if the dish soap still needs to be added the first few times.

Homemade Furniture Polish

– Olive oil, walnut oil, or jojoba (my preference as it doesn’t go rancid)

– Water

– Lemon juice

Blend 1 teaspoon oil, 1 teaspoon water, and a squeeze or two of lemon juice in a small bowl. Place a small amount of the mixture on a soft cloth.  Wipe the polish onto a piece of furniture and give it a good buff.

The oil leaves furniture with a glossy shine, while the lemon juice cuts the oil so it doesn’t go rancid (as well as giving a fresh scent that lingers in the air). NOTE: a small amount on the cloth goes a long way!

Make the mixture as you go, so as to create less waste. You don’t want to leave this mixture sitting around because it will probably go bad before you use it again.  If you want a more shelf stable version, use jojoba and replace the lemon juice with white vinegar.  Use Olive or walnut oil to polish food surfaces (cutting boards, serving platters, wood bowls, etc).

Ingredients

  • Lavender Essential Oil – Essential oils can be found online or at health food stores.  I bought a collection at Sprouts Market on one of my trips to town.  They are pricey but the small bottles last a LONG time.
  • Tree Tea Oil – can be found at a health food store and at most drug stores.  Tree Tea oil has a lot of other uses around the home.  But it has a very strong odor!
  • Castile Soap – an all natural soap that is also very strong so a little goes a long way.  I use Dr. Bronners and found it at CVS.  It is also sold at health food stores and I believe Target.
  • Washing Soda – Sodium Carbonate is a strong base that works great as a laundry detergent and has a ton of uses around the house. I use Arm & Hammer Super Washing Soda, found in the laundry section of my grocery store.  NOT TO BE CONFUSED with baking soda!
  • Borax (Sodium Tetraborate)– is a natural mineral compound.  According to a chemistry.about.com article, it has many uses in the home as a natural laundry booster, multipurpose cleaner, fungicide, preservative, insecticide, herbicide, disinfectant, dessicant, and ingredient in making ‘slime’. Borax crystals are odorless, whitish (can have various color impurities), and alkaline. Borax is not flammable and is not reactive. It can be mixed with most other cleaning agents, including chlorine bleach.  I found 20 Mule Team Borax in the laundry section of my grocery store as an ‘all natural laundry booster and multi-purpose household cleaner’.
  • Jojoba oil – is actually a wax ester.  It is all natural, shelf stable, and is non-comedogenic.  It has many health uses, including eye make-up remover, lip balm, massage oil, moisturizer.  I found organic Jojoba at a health food store.
  • Fels Naptha soap – this is a laundry soap found in a soap bar.  Many people experience difficulties in finding it, but I found it in the laundry section at my local (rural) grocery store.  It is also supposed to be good for poison oak and ivy.  HOWEVER, this is not an all natural/pure solution.  Many people have said they substitute Kirk’s Castile Bar soap, ZOTE!, or even ivory if the ingredients in Fels Naptha bother them.

Filed Under: Uncategorized

Fix It Yourself: How to Fix Things Around The House

December 22, 2018 M.D. Creekmore

fix stuff around the houseby Karen I

Being able to repair things is a useful skill to have – believe me, when you’ve knocked your iron off the ironing board repeatedly, it’s awful handy to know how to fix it.   Tackling simple mechanical objects like an iron or (my recently fixed) Foodsaver vacuum machine (see article – Can I Use My FoodSaver® to Vacuum-Seal Mylar Bags?) can be intimidating, but with certain exceptions, you can do it.

First off, find out everything you can about your non-functioning device.  Find the manual (you did keep the manual, yes?  Got it at a garage sale?  Time to Google!), check the manufacturer’s website, check sites that have manuals for sale if absolutely necessary.

You might find that instructions for your device aren’t readily available.  Fear not; much of what is inside an appliance is just air, and there is no magic dust, just mechanical and electrical/electronic parts.

The safety nag:  never, never work on anything while it’s plugged in if the cover is off or there is the possibility of getting shocked.  Electricity is your friend, but it also has a nasty sense of humor and loves to zap you.  Keep water out of electrical devices when you clean as well.

In a pinch, if you have to, a barely damp Q-tip, moistened with rubbing alcohol helps dig out crud and gunk.   Never force things to fit; having to press hard or use a screwdriver to move a latch to get something to fit isn’t forcing, trying to get things to go where they don’t fit or belong with the potential to break is.

Take care if you are using any tools that have sharp edges; you can cut yourself with a screwdriver, so work away from yourself, not toward your body.  You do not want to be driving your husband through a 25 MPH residential district at 40 MPH, panicked and looking for someplace to get his punctured hand fixed as I did once.

A muffin tin or pie pan is useful for keeping parts from rolling off the table, and paper and pencil or pen is useful for making a note of where things go like ‘long screw goes in the upper right-hand hole looking from the front’.

The first step (and hardest, believe it or not) is to get the case off or open it up.   Once you’ve done that, stop and look at the guts of the thing.  Make a diagram of where things are in case you get interrupted, or take a picture.   Doesn’t have to be technical – you can put ‘black pump gizmo’ on your diagram as long as you understand what it is.

You already know what isn’t working, so next, try to figure out just what you are looking at.  In an iron, for example, you have something that holds water to make steam, something to heat the water, something that lets you set how hot the water is, and tubes to get the water from the filling inlet to the water tank and thence to the steaming ports, plus where the electricity comes in (the cord).

The reason for doing this is because you need to find what isn’t working, and if the iron isn’t heating you don’t need to focus on the fancy steam gizmo that lets you shoot a shot of steam, you need to find what heats the water and the path it takes.

Here’s a more detailed example.  My Foodsaver II was acting funny while it was vacuuming a bag, and then completely stopped heating and sealing bags.  This renders the device unusable, and since I had things I wanted to vac-pack, I needed to fix the thing a.s.a.p.

I took it into where I had decent light to work with, and it being unplugged already, began by taking off the bottom of the case.  I set aside the screws, which were all the same length, and gently removed the bottom.  Inside, I noticed that there is an electrical transformer on one side, some wiring, some tubing, and what looks like a pump.

I also noticed that there was a partial blockage of one of the clear tubes that goes from the inlet in the device where you put the open end of the bag to the pump itself.  Solving at least part of the problem, then, was to see if I could get the blockage out because that’s an easy potential fix.  I found the ends of the affected tube, removed it from its fittings, blew out the offending blockage and replaced it.

At this point, I decided to check and see if this resolved the problem, so I put the case back on, minus the screws, and carefully set it on the kitchen counter and plugged it in and tried to seal a spare, empty bag.  The vacuuming part of the problem seemed to be fixed (at least it worked better with no intermittent stalls/chokes), but still no heating and sealing.  Oh, well…back to the repair bench.

The cycle of the machine is to pull out air and then heat and seal the bag of stuff I’m vac-packing, and since the heating and sealing only happens after vacuuming occurs, vacuuming has to be finished before heating can start.  Vacuuming seemed to work, but obviously wasn’t finishing.  Since vacuuming occurs inside what looks like a little pump (there’s a black knob-like thing I could turn and see that a piston-like device moved in and out, so obviously a pump) the next step was to take a look inside the pump itself.

I removed the set screw from the arm going from the motor to the pump arm so that I could remove the arm, onto which the pump piston was attached, and two long skinny bolts with washers and nuts that held on the pump part onto the mechanism that makes it move.

I carefully pulled out the pump piston and looked inside.  Aha!  Gunk, plus some tiny bits of something white, like miniscule rice grain bits, were inside the pump.   I carefully cleaned out any residue with a Q-tip dampened with rubbing alcohol, then got some fine point tweezers and carefully picked out the tiny white bits, then reassembled and replaced the pump in the machine.

I put the case on to test it again, and this time the machine worked, fully vacuuming and then heating and sealing.  The only tools I used were a Phillips screwdriver, fine-tipped tweezers, and my brain.

Now you might think ‘so what, this is a vacuum packer and I need to fix something else’.  Well, the basic process is pretty much the same, no matter what you work on:

  • Identify the problem
  • Open up the device
  • Identify the parts and try to figure out what they do and which ones might be the source
  • See if you can reconnect, blow out, use a Q-tip on, run a pipe cleaner through
  • Reassemble to test
  • Repeat until you’ve fixed the device or determined that you can’t fix it

What if you mess up the device and can’t reassemble it or it won’t work even as good as it did before you worked on it?  Well, think of it this way:  it wasn’t working properly before.  You didn’t lose anything except some time and gained some experience working on things.  Not all devices lend themselves to being fixed by consumers/amateurs, and sometimes all you are doing is forestalling the inevitable:  getting a new one.

Now, there are, as mentioned, exceptions to what can be worked on safely or reasonably.  Most clocks and watches of the mechanical sort are beyond the average DIY’er, and things that require testing while plugged in may fall in that category because of the difficulty of getting the covers on and off repeatedly (and nothing should be tested with the covers off).

Some devices consist of a lot of electronics or things like lasers (DVD players come to mind as an example of things that the consumer can’t easily fix).  However, many devices can be fixed by following this process, and you shouldn’t be afraid to try your hand.

Filed Under: Uncategorized

DIY Secret Hiding Places Within Your Home

December 20, 2018 M.D. Creekmore

secret hiding places

by M. Roberts

Most people have something to hide regardless if the object is valuable, sensitive, dangerous, illegal, or subject to confiscation.  Storing objects in a safe under key or combination lock can be a good security measure, but not everyone wants a large, heavy, and expensive safe and a small safe bolted to the floor can only contain a limited number of items.

A safe of any size also commands attention from thieves and police as something which is virtually guaranteed to hold something special.  Depending on size and weight, thieves sometimes take the entire safe without knowing what is inside.

If the homeowner is present then a burglar with a gun or police with a warrant can persuade them to open the safe immediately.  Again, a safe can provide a high level of security, but sometimes it can also make sense to hide things in other locations around the home.

Most people also tend to hide things in places which can be found quite easily by burglars and police.  For example, objects which have been hidden in a typical home can usually be found in a drawer or closet located in the master bedroom.

Burglars and police know this to be true so they often begin their search in that part of the house.  Regardless if the home invader is a burglar or police, the amount of time they can invest in a search is limited.  To be productive home invaders tend to follow the same basic three-part rule when conducting a search:  1) Look for interesting items which are openly-displayed, 2) shift attention to the most interesting containers, and 3) inspect other containers which are likely to hold something interesting.  If you haven’t guessed already, they are looking for interesting things.

When a home invader begins a search they typically notice openly-displayed things such as a rifle on a gun rack, a plasma television mounted on a wall, or a jewelry box on a chest of drawers.  This process usually only takes a matter of seconds per room before a deeper search begins, but we can slow them down by having more interesting (yet unimportant) things on display.

Taken to an extreme we can create distractions for home invaders, for overwhelming them with a large number of interesting display items can cause them to single out only the most exceptionally interesting things to inspect.

It is quite possible they will overlook an interesting object because it lacks sparkle compared to all the other shiny things in the room.  Another delaying tip is to secure some of those openly-displayed items with locked display cases.  The more time they spend trying to access and investigate displayed items the less time they have to sort through our containers.

We can also create some diversions too.  For example, hiding a gold coin inside a dull matchbook and leaving it on a coffee table will likely be overlooked because it is uninteresting and unlikely to contain anything special, but we can divert their attention away from it even more by placing a beer mug full of common coins right next to it.

In the next phase of the search, their attention turns to storage spaces and interesting containers.  Because there are more containers to search they will prioritize and inspect the most interesting containers first such as a closet, drawers, briefcase, suitcase, gun case, ammunition box, and decorated boxes.

Each time the home invader accesses and inspects a storage space or container they will apply the three-part rule to prioritize their search.  Regardless of how deep their search takes them, they continue to follow the same rule.

It can sometimes be wise to hide certain “give-away” objects in easy-to-find places.  Humans tend to look harder when their search produces little results, but home invaders are apt to call off a search once they found enough interesting things.

We’d like them to leave with nothing, but sometimes (mostly in the case of thieves) it would be better to have them leave early with an armload of minor and insignificant objects than to risk a prolonged search which exposes the things we really don’t want them to find.  Take care, however, not to give them cause to prolong a search.  For example, having an empty handgun box in the closet will inspire them to continue looking for that handgun.

Eventually, the most interesting containers will have been searched and their focus will shift to less-obvious containers which still hold the promise of something interesting.  Examples include mattresses, couch cushions, toilet tanks, and shoe boxes.

They will continue to disregard dull and boring containers which are unlikely to contain something of interest, such as a toothpaste box or bottle of shampoo.  A home likely has hundreds if not thousands of uninteresting containers, everything from sugar packets to garment pockets, so these things will probably not be inspected very closely, if at all.

There is no perfect hiding place as everything can be found with enough search time, but time is something home invaders do not have in excess.  With that in mind, our goals should be to disguise things so they appear to be uninteresting and/or hide things in the most uninteresting and unlikely places while hoping their search time runs out before certain objects are discovered.

As a home invader works his way through a house the pantry is one of the last places to be searched.  They will search for the most interesting objects and containers first which could include storage tubs, but very few people will take the time to carefully inspect each and every can of food.  There are simply too many of them, they are not interesting, and it is unlikely a sealed can of food contains anything but food inside of it.

We can take advantage of that reasoning by using a can to hide small objects such as gold, jewelry, cash, bullets, etc.  First, shop for a can of solid food (e.g. refried beans, cranberry sauce) which meets your size specifications, but is not a brand or food product you would normally consume.  After carefully removing the label from a can of food use it as a template to cut out an identical-sized piece of thin yet firm and flexible cardboard.

Next, place the can on the workspace so it can roll freely and cut it in half using a hacksaw (take care not to bend the can!).  After discarding the contents and washing the two halves of the can, insert the piece of cardboard into one half of the can and cover it with the other half of the can.  The cardstock is the same size as the label so it should fit almost perfectly inside the can to serve as an inner support wall for both can halves.

Tightly pack objects inside the can while taking care to match the original weight of the product, seal it with strong tape, and carefully glue the original label back on to the can.  Place it near the back of the pantry along with dozens of other cans of food to hide it.  Because it is sealed at top and bottom and doesn’t make noise when shaken it will look and feel just like any other can of food.  Yet, the owner will be able to identify by sight which can contain his valuables.

Hiding things under the floorboards is somewhat common but few searchers have the time to thoroughly investigate that possibility.  However, these places can be searched rapidly with metal detectors so it’s not a great idea for hiding firearms, ammunition, coins, and precious metals.  Home invaders do not expect things will be hidden in messy or dangerous such as under aquarium rocks or behind an electrical outlet (turn the power off first!).

These places are commonly overlooked during a search because they do not appear interesting, are unlikely to contain anything interesting, and are not easy to access and inspect.  With a bit of creativity, fake sewage pipes can also be installed in a basement which has screw caps that serve as access points.  Even the most dedicated searcher will likely avoid messing with sewage pipes which could leak or spill stinky human waste everywhere.

A cramped attic filled with loose insulation is another good place as few have the desire or time to sift through all that nasty fiberglass material in a dark and dirty place which is likely full of spiders and mice.  However, because attics are dusty, they may notice foot and hand prints so conceal your tracks carefully.

If long-term storage is desired without the need for periodic access then the open spaces behind internal walls can be used to hide large and small objects.  Repairing damaged drywall does take some skill but few will ever find what has been hidden behind a finished wall.  Scanning a wall with a metal detector is unreliable as metal pipes and electrical wires oftentimes exist behind walls.

Floor level cabinetry, Formica countertops, and virtually all windows and doors have trim, molding or wall guards which can be modified with hinges or strong magnets to become access panels for secret storage spaces.  Stair steps can also serve a cover for an accessible hiding place, but take care to secure it in a way which doesn’t cause an accidental fall.

Most doors of the home are hollow so they could also offer some well-concealed hiding places with access points at the top or bottom of the door.  Keep in mind accessing these empty space areas of the home requires a bit of destruction as well as construction which rely heavily on carpentry skills.

Shoddy workmanship will likely attract attention of a home invader to scrutinize something that is out-of-place so aim for perfection when tackling this kind of project.

Hollowed out furniture has been used to hide things for centuries, yet it’s not a very common practice today.  A table leg doesn’t attract attention because nearly everyone has a few of them in their home.  It’s difficult to determine if it’s hollow just by looking at it and most won’t expend the energy to do a lot of heavy lifting to inspect or access it (especially a pool table), so it can serve as a good hiding place.

Those who have a large library could consider hiding objects in a hollowed-out book as it takes time to inspect each one.  However, this is a fairly common practice.  What is not common is to expect to find a hollowed-out cavity inside a thick a stack of old home/garden magazines which have been tightly bound together with twine.

When an object is too close in our field of view then it often becomes difficult to see, which is the basic concept behind the idea of hiding something in plain sight.  Suppose one desires to hide a map which marks the location of their buried caches.  No one else knows about the map or the buried caches, but the discovery of the map could put your plans in jeopardy.  After all, what else does a person do when they find a “treasure map” but go look for the treasure to find out what it is?

Rather than hide the map it could be used instead to construct a plain-looking lampshade which is visible to everyone.  It will blend in quite well with a room décor theme which includes a globe and a picture of an old map.  Someone could take the time to inspect the lamp itself, but they will likely overlook the obvious and set the lampshade aside when doing so.  It simply isn’t interesting nor likely to contain something interesting.

This isn’t a topic which is discussed publicly very often because those who have great secret hiding places don’t want to reveal their locations.  Even so, understanding a bit about the psychology and methodology involved can help us find or create some really good hiding places, plan distractions and diversions for home invaders, and even motivate them to stop a search sooner rather than later.

Filed Under: Uncategorized

How To Cast Your Own Bullets – A Step-By-Step Guide
December 13, 2018 M.D. Creekmore

How to cast your own bulletsby Jim Shy Wolf

Before we begin, we’ve got to lay down the rules. First, this is a potentially very dangerous activity. The least that can occur is mild burns, progressing to severe burns and culminating in burning down your home or shop. It is mandatory every safety rule is followed- both those of the tool-maker and common sense. Fools will suffer their foolishness: don’t be a fool. Wear safety glasses at all times. If you can manipulate tools wearing gloves, so much the better- wear them.

Also, my experience is that of having been doing this since 1975, without any training other than reading and experience. I am not- repeat: not- a professional nor do I claim to be doing all procedures correctly, only as they’ve worked for me over the years.

With that out-of-the-way, should you decide to engage in this activity, do so at your own risk. I lay no claim nor desire to claim ownership of your errors, foolishness or injuries incurred. We are a Free People, let us act thusly.

We’ve been reading post after post of ‘What’s the best gun I can get for my buck?’ And every person with a weapon has put in their two cents.

We’ve brought those shiny new weapons home and looked at the box and fondled the gun, anxious to get to the range and fire off a few bazillion rounds of bullseyes. So we grab that expensive box of XXX Guaranteed Bullseye rounds and head to the range.

Unless we’re the well-heeled type, after a few boxes we start to realize how spendy this little game is becoming. But we love shooting and begin to wonder if there are ways to cut those costs so we can keep shooting and having fun.

Hark! We can hear the glass shattering as the light breaks ‘pon yon window…

We Can Reload!

Reloading can take many forms with many different tools, but all lead to the same point: a bullet down the barrel headed down range. What we’ll be doing from here on is making our own Guaranteed Bullseye rounds from the ground up. (OK: I’m going to renege on the ‘guaranteed bullseye’ bit since I have no control over another’s quality control. But we’ll get that led down the barrel.) And we’re going to do it from the beginning, starting with making our own bullets.

Required tools are going to be minimal and not very expensive even with today’s weak dollar. As you’ll notice, all my tools are Lee brand. No particular reason other than those are what was available when I wanted the tool. I have no experience with and will make no comment about another maker’s tools because I think such arguments are no more valid than the 9mm vs. .45 arguments. If anyone is interested in pricing Lee products they can go to www.leeprecision.com and peruse the catalog. Otherwise, I will make no claim to usefulness for any particular purpose you intend putting the tool to.

When it comes to doing or learning something, I’m about as low as a human can get on the mental ladder. Which means, if I can do something, I’m absolutely positive there is no one else in the world who cannot do the same thing. So don’t think you’re incapable of learning or that it’s too difficult. Also, think of all we have in today’s world and consider the people who invented it. Really, Folks- cavemen invented the bow and arrow, so how hard can things be to learn? You can do it, be sure of that. After all, it ain’t brain surgery or rocket science. Now, let’s make some bullets…

It takes a very secure man to paint his cave pink… oh, wait- sorry, we’re not painting…(sorry: Honey was nudging me)… but you’re going to get burnt and those burns will be pink, then white, then red. And they’re going to hurt! So be very careful: don’t listen to MSM news, the Tv, Glenn Beck, Rush Limbaugh or especially BSHO while working.

Follow manufacturers’ directions for all tools and keep a fire extinguisher handy. A gel burn-blanket won’t be a bad idea, either.

What We Need…

Our tools will be minimalist: just enough to get the job done well at low-cost and super efficiency.

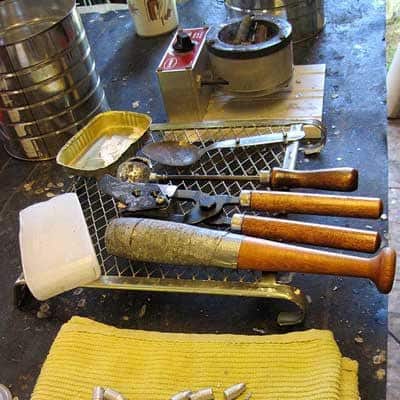
Note the picture above: from the bottom left and going up, you will see a towel. This is what we will drop our molded bullets onto. Some people like a pail of cold water, which also helps make the bullet a little harder.

We will need a slice of wax- any kind will do, I use paraffin. We will use this to flux our lead before molding. Later we’ll use it to make a lubricant.

Besides the wax is a bung stick for working the mold’s sprue bar and to tap the bullet(s) free if needed. Do not use a hammer or metal to beat on your molds.

Next is the bullet mold. This is a two cavity 158-grain Lead Round Nose (LRN) .357 mold. Beside that is the ladle. This is what we dip the lead with to pour into the mold.

Next is a spoon: don’t use your eating utensils for working with bullets. We don’t want to ingest lead particulate. Use dedicated tools for this and all reloading. The spoon is used to load lead into the pot rather than dropping with our fingers. The pot gets very hot and lead can splash. We don’t want accidents.

Finally, the melting pot. Mine will hold two pounds of lead, which gives me about 75 finished bullets of this size.

To make my bullets, I use lead wheel weights, ‘found’ bullets from the range, and lead ingots. Wheel weights are getting more difficult to find since recycling is so rewarding. When the fed made lead shot illegal for ducks, I suddenly found myself in possession of a ton of lead shot- perfect for making cast boolits. (OK, not a ton, but a couple hundred pounds.

If/when TSHTF, some of this shot will go back into shotgun cases.) You can see the dross in the spoon: wheel weight anchors, sand, copper, steel- anything that is foreign to lead will float to the surface to be scooped off before we flux with wax.

casting bullets made easy

Fluxing is taking a thumbnail size piece of wax and dropping it onto the molten lead. Be very cautious here- this will most likely flare up. If your body parts are in the way, you will be burned. Wait for the smoke to clear, then with the spoon, gently scoop the black/dark gray scum from the surface of the melt. Our lead is now ready to be used.

Our ladle/dipper and mold will have to be heated. I use one of two methods, depending on my mood and how antsy I am to get started. The recommended way is to set the ladle in the pot and rest a corner of the mold into the melted lead. If I’m in a hurry, I open the sprue cutter and pour a ladle of melt into the cavities, dump them, and repeat five or six times. You’ll know the mold is hot enough when the bullets come out uniformly neat, with no folds or vacancies in the finished bullet.

As stated earlier, I drop the bullets from the mold onto a folded towel. Since the bullet is still very hot and soft, I have to be careful to not drop them onto each other: they will deform, sometimes badly. Once the molds reach maximum temperature, even dropping from too much height will imprint the towel pattern onto the bullet, so we have to be careful.

A note here about my bullets: these are for the .357 revolver and rifle. I’m not overly concerned with ‘¼ MOA’ results for either of these, just good, acceptable accuracy. Two to three inches at 100 yards is sufficient for my desires. For the LR rifles- .243, .308, 30-06- I don’t cast bullets, I buy them. Reason being, with those calibers I am very interested in ¼ MOA accuracy (though I don’t achieve it often). I can’t make as good a bullet for those calibers as I can buy. Perhaps one day, when the pockets are overflowing…

Once we’ve reached our goal on the number to be molded, turn off the melting pot, set the tools on a fireproof pad and dig out the bullet lube.

The WUT?

Cast bullets shot from modern firearms reach some very hot and fast velocities. As a result, as the bullet goes down the barrel, it leaves small deposits of lead on the lands and grooves. This results in poor accuracy and can lead to barrel damage if unchecked by cleaning and using a lubed bullet. Anyone who has handled .22 bullets knows about the lubricant on them. A greasy, wax type something that… well, is sticky. Bullet lubricant.

Lubes can be bought- Lee sells Alox bullet lubricant, which is supposed to be really good. Others sell their brand and all are probably really good. If anyone has questions on which is better, ask around the gunny sites and you’ll get enough answers to confuse you more.

Since I’m the kind of guy that Honey says is ‘cheap’ because I think spending more than five bucks on a gift for a kid we don’t know is a bit much, I make my own for pennies and save the bucks for other things. Like primers.

To make my cowboy type lubricant, I melt one block (a one pound brick of paraffin is comprised of four blocks) of paraffin in a double boiler. With this is a small 3.75 or 4-ounce jar of Vaseline petroleum jelly. Stir and blend (they’re grease, they’ll blend themselves, really), remove from heat and add about ¼ cup of Marvel Mystery Oil and blend in. No more than a quarter cup or you’ll get a mess. Of course, you could add more paraffin and Vaseline to smooth things out… but why? This quarter pound batch is going to last a long time.

Using aluminum pie tins (‘cuz they’re cheap and everyone has a few), stand about 30-40 bullets nose up and pour enough lube in to cover the lubricant grooves. (Those are the ‘rings’ you see on the bullets.) Don’t go past these- it’s not needed above the groove and just a waste. Once covered, put the tin in a freezer until the lubricant hardens enough to pull itself easily away from the tin.

Once free of the tin, just push the bullet nose until it goes out the bottom side of the lube plate. All done. Now rinse and repeat for the next batch – and this time, you have holes pre-punched to put the bullets in before liquefying the lube and freezing again. Rinse and repeat… until you’re done.

Up next: Putting all this fun together with more fun before the real fun begins.

Filed Under: Uncategorized

Last Month On The Homestead

December 6, 2018 M.D. Creekmore

Well, folks, as they say, it’s better late than never… well, yeah, they (people in general) do say that and it’s true sometimes but not always but then that’s another subject all to itself. Anyways, I should have posted this at the end of November, but things got in the way and I got lost with other projects… namely my other sites that I’ve started.

Why did I start other sites you ask? Well, that’s a good question and let’s talk about that a little right now…

Over the last couple of years, the interest in prepping has taken an immense downturn. Several things have caused this downturn in interest despite the fact that we are in more danger now than we were two years ago… you ask, how’s that? How are we in more danger now than we were two years ago?

After all, Donald Trump is in the Whitehouse and everything is just peaches and mega awesome! We have nothing to worry about now and there isn’t any need to prep anymore because absolutely nothing is going to happen with President Donald Trump at the controls and even if it does he will personally come in on his white horse and rescue you and your family, so you don’t need to prep anymore.

Just take it easy and relax… drink beer, watch the ball games, and go spend your dollars on fancy expensive dinners and shiny trinkets because all is well on the Trump train. Let’s just forget about the nearly twenty-two trillion and growing national debt.

And let’s not forget about the EMP threat… yeah, the threat is still there. Oh, yeah, and the threat of a second Civil War, a war that according to U.S.A. Today a third of Americans think is coming…

And, guess what…Russian hackers are still probing the U.S. power grid as are other nations… and I’m sure that we are doing the same thing to them. Please, read Ted Kopple’s book Lights Out: A Cyberattack, A Nation Unprepared, Surviving the Aftermath!

And, let’s not forget that a hundred years ago, the 1918 H1N1 pandemic swept the globe infecting about a third of the world’s population and killing 50 million to 100 million people… and according to people in the know, it will happen again. Yes, it will happen again, think about it! Common sense people – just because a Republican is in the White House doesn’t mean that all is well and that you can just stop prepping – that’s foolish.

But most people don’t want to think about any of this or they want to pretend that it can’t or won’t happen and even if it does they want to think that they have a savior in the White House that will swoop in and save them before it gets too bad so all that they need to do is sit on their butt and watch the ball games, drink beer and eat potato chips.

People don’t want to think about this stuff because it’s scary and it’s easier for them to convince themselves that nothing is going ever to happen… eat, drink and be happy… all is good. Well, reality check… all isn’t good!

Yes, I voted for Donald Trump against Hillary, but I have enough sense to know that he isn’t Gsome superhuman or a God and really doesn’t have much if any control over most of the threats that could send us spiraling into TEOTWAWKI. Yet, when I talk to people it seems that many have put the man on a God status pedestal when in fact he is only a man and when I speak up and say that and that we still need to be prepping no matter what people give me “that look”, you know the look…

If you stopped prepping because Donald Trump was elected president then you need to pull your head out of your rear-end! All of the threats are still there and other threats are emerging and or becoming more likely to happen! And let’s remember that the presidential election is less than two years away – will Donald Trump win the White House again, will he even run again? I don’t know, but one thing is certain and that is if Donald Trump doesn’t win come November 2020 that a far left liberal or socialist will. Then what?

If anything the election of Donald Trump might have bought us a little more time to prep before the balloon goes up and that’s all… maybe… maybe, not. But the fact of the matter is that the balloon is going to go up and it’s going to pop hard! Will you be ready?

Sadly many have decided to not use this time wisely and instead are sitting on their butts doing nothing to prepare themselves or their family for what is coming. Sure, it’s scary… sure it’s hard… sure you have to get up off the couch and do something, but you had better get with it or suffer the consequences of your laziness and inaction.

And then there are those who stopped prepping because they don’t think prepping is “cool” anymore. When all of the prepping reality shows where flashing on the TV screen nearly every evening some people watching decided the prepping must be cool and so they decided that if it’s on TV and others are doing it that it must be cool and as a result, they themselves started prepping…

Well, after a few seasons those reality TV prepper shows stopped coming on and now not even reruns are being aired. I’m not sure why the shows stopped airing, maybe they couldn’t find anyone else that wanted to have their preps shown over on national television, maybe, it was because the rating slumped, or just maybe “the powers that be” saw that the shows were causing an increase in awareness and that growing awareness was causing the “prepper movement” to grow and they wanted to stifle it.

I’m not sure why the doomsday preppers type shows ended… but it is kinda suspicious that nearly, all of them ended at approximately the same time, however, I do know that it caused a huge decline in interest in preparedness. But that doesn’t mean that the threats and need to prepare aren’t there still. The threats are still there and I think that we are in worse danger of a major SHTF even than we were two or three years ago.

Even when prepping was the “cool and the thing to do” far too many people were “pretend preppers” who liked to read all of the prepper blogs and comment about this that and the other thing, while not really doing anything or very little actual prepping. It’s easier to pretend and or procrastinate than to actually do anything but that doesn’t make the lack of preparation any less dangerous.

Okay, now back to my starting point… why haven’t I been updating this site ten plus times a week like I used to? Because the interest hasn’t been there, so why spend hours and hours every week writing and editing content that few will read? So, I decided that during this “prepping interest slump” that I’d use the time to work on a couple of other projects that I’ve been wanting to work on namely my concealed carry blog at Concealed Carry Today and my newest site Knife Law Insider.

Anyway, things change and I’m starting to see an uptick in traffic and more interest in prepping over the past month or so and that’s great, hopefully, some folks are beginning to wake up once again and that’s great. The more folks who prep the better off we will all be when the balloon goes up… but I have this nagging feeling that time is running out. We might have another year before things start to get really bad and then a domino effect into total economic collapse.

But I digress, sorry that I went on a “rant” of sorts but some things need to be said, or at least I needed to get it off my chest take it for what you want… as they say chew the meat and spit out the bones. Anyways, what have I been doing to prep over the past few weeks… well, let’s see…

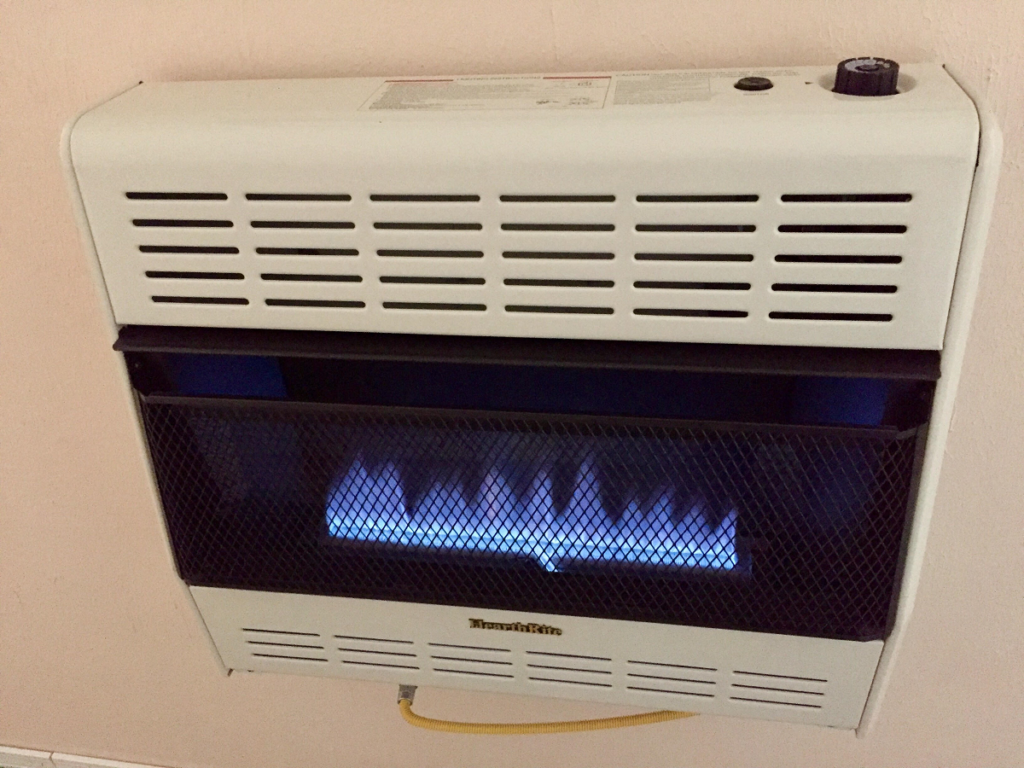
As you know I had natural gas hooked up at my house last month… and now I have this heater heating the upstairs…

New knife – Victorinox Swiss Army One-Hand Trekker Multi-Tool Pocket Knife.
New belt – IndestructiBelt Tactical SuperBIO CCW Gun Holster Belt
New book – Survive Like a Spy: Real CIA Operatives Reveal How They Stay Safe in a Dangerous World and How You Can Too… yes, I have a book addiction.
My hens finally started laying...
My hens finally started laying…
Make a Liberal Cry! The perfect Christmas gift for the Second Amendment supporter in your life – get it now by clicking this link.

Okay, that’s about it for me this month besides some random food storage items and replacing items that have been eaten… One more thing before I end this post… I plan on updating this site regularly and the best way to know when I publish a new article is to click on the bell that is in the lower right corner of the page and allow notifications, that way whenever I post something new you will be notified…

Filed Under: Uncategorized

How to Drive On The Interstate And Survive (Maybe)!

October 13, 2018 M.D. Creekmore

How to drive on the interstateby BCtruck – YouTube

Hi folks, I’m going to give writing an article, another try. While reading the rules for the writing contest I noticed where MD was encouraging people to submit articles, the words “we all have something to offer” struck a chord with me. I spent the largest part of my life driving an 18 wheeler long-haul (over the road). I started in 1977 when I joined the army and I’ve driven one till just recently when I decided to hang it up. Consequently, I’ve learned a thing or two about surviving, driving.

The first thing I will do is break the dangers down that we all face while driving. Those are:

  • Weather
  • speed
  • Impatience
  • egos
  • drunk/drugged drivers
  • inattentiveness
  • sudden equipment failure
  • Construction
  • Complacency

First, If you don’t mind, I would like to toot my horn just a little in the hopes that I can convey to you, what I think qualifies me to give advice on a subject that is often a matter of life and death. From 1980 until 1990, I drove about 120,000 miles a year for a total of 1.2 million miles.

From 1990 until 2010, I drove with my wife sharing the driving duties. In those 20 years, my wife and I put over 4 million miles on several different trucks. One truck we put 1.6 million miles on before we sold it. In all those miles I only had a couple of speeding tickets, no accidents or wrecks of any kind, no log book violations.

My wife had one speeding ticket (57 in a 55 in Littlerock) One incident with a deer in Jackson Mississippi and no logbook violations. I’m proud of my driving record and I’m proud of how well I maintained my equipment.OK, thanks for indulging me. Now let’s get after it!

Weather:

We can’t control it so we have two options. Don’t drive in it, or drive in a fashion that is commensurate to the danger presented by the weather. For instance, rain requires less concern than snow, and snow less than ice. However, I’ve been on roads that had been rained on all day and as the sun went down the road surface froze making it not just a possibility, but a likelihood that a skid off would occur.

My solution to ice, was never ever drive on it unless it turned to ice while i was driving, and then I drove only long enough to find a safe place to park to wait for warmer temps or salt trucks to work their magic.No destination, no type of freight was so important that i would risk the lives of other folks, my equipment, or my own life. You can’t drive safe on the ice. It can’t be done without risk that is greater than the need.

Snow:

There are different types of snow. Snow that is wet and heavy is actually fairly easy to drive safely on, provided you use good judgement when choosing a speed and being prepared to adjust that speed as conditions change. Also, planning your lane changes and exits from the highway well in advance and in such a fashion that your need for lane changes doesnt affect the speed or direction of travel of other motorists.

Maintaining your own safe speed and planning your moves in advance is equally as important as not forcing others to make sudden changes in lane or speed. Snow that is very dry is much easier to lose traction on. My philosophy about snow was, if I can drive without endangering others or my equipment, ill drive.

If it was bad enough for chains, I didn’t drive unless it was to cross a mountain pass like Donner, or get to a safe place and wait for conditions to improve. There is an old truckers adage that goes like this,” you can to slow as often as you like, but you can only go to fast once”. I lived by that.

Speed:

We all get in a hurry. We all have had things that happened to make us late for appointments. The problem with speed is, no one else knows about, or for that matter really cares what problem you had that made you need to speed, and speeding actually does very little to negate the problems you had that you feel necessitate the need for speed.

My advice to those that are in front of an angry late person who wants to go faster than you, is move over and let them go. Passivity on the highway goes a long way in making a problem driver go away and perhaps save you from being a victim of road rage.

I’ll tell a short story about speeders. For the last 11 years of my driving career, my wife and i ran a grueling 6800 mile a week route over and over on the same highways at the same times. We found the same people passing us over and over throughout the day and we almost always ended up at the same stops, at the same time. slow and steady saves fuel, stress, and wins the race.

Impatience: Again, most of us have had things that make us late, but there are people out there that completely fall apart mentally when they are under the stress of facing a boss who will want to know why, or a potential client that will be getting a bad first impression based lateness. I’ve seen first hand, impatience make people do absolutely unbelievable things on the highway. Ive also seen a lot of death caused by impatient folks who made driving decisions based on anger. My advice is the same with angry speeders, move over,  don’t make eye contact. That is a challenge to some people. It’s about arriving in one peace, not about saving face or fighting back.

Egos:

All those years of driving taught me one thing that is incontravertible: you can find out anything you ever wanted to know about persons psyche, by watching them drive. There is something about the anonymity of a car and the power of a steering wheel, that brings out people’s truest, most inner character that they might otherwise try to keep hidden.

Driving allows Out of control egos, people who are otherwise constrained by society and its basic need for politeness, to let out their inner demon. these people are to be avoided at all costs and ive actually seen first hand one out of control ego meet another out of control ego, at 80 miles an hour. Its never pretty.

Be safe, don’t fall victim to the “by God, I know my rights” mentality. It will get you killed by those who couldn’t care less about your rights, life, or anyone else on the highway. If they don’t care about their own life, they certainly don’t care about yours.

Drunk/drugged drivers:

In this modern society, with a pill for everything and alcohol in convenient containers. Drunks and druggies are driving amongst us every mile of any highway we are on. Some of these drugs are prescribed by doctors so people who have mental disorders can function in a society that recognizes immediately if someone “aint quite right”. Unfortunately, these drugs that might help some folks, are easily and often abused and consumed with alcohol.

car-accident

Over the years I developed a keen eye for picking out drivers who were clearly under the influence of something that altered their behavior and judgement. Sudden lane changes for no reason, extreme speed fluctuations.

I even noticed that people who drove cars that were in obvious states of disrepair, were more often the ones that would be under the influence of something. I’m not saying having an older, payed for car means you’re a druggy or drunk, but it is one of the things I used to determine the likely hood of impairment and I was correct, more often than wrong.

Someone who gets on the interstate with broken shocks, cracked windshield and lights not working, are often spending their money on drugs or booze and not car repairs or for that matter, INSURANCE! Be very wary of them. They have nothing to lose and could not care less about damaging your car or leaving you with enormous hospital bills.

Inattentiveness:

If you have a phone, I will call you a liar if you say you’ve never made a call or accepted a call while rolling down the road……. ok , just me? The fact is, as the world changes, we have to adapt to those changes by being extra alert and vigilant. Texting, talking on the phone, messing with complicated stereos and navigation equipment, takes attention from the most important thing you are doing.

I think we’ve all realized this and maybe some of us have even made efforts to try to make ourselves safer from the inattentiveness that goes with technology by looking closely at people in our mirrors and glancing at them when they pass. You can do a lot to enhance your safety, just by recognizing those who aren’t paying attention to their driving and may have a cell phone stuck to their ear.

Increase following distance if your behind them, slow down to a point where they just have to pass you if you are in front of them and don’t be beside them when they realize they are in the left lane and want to turn into the walmart on their right.

Equipment failure: It happens to every machine eventually. Its just the nature of machinery to occasionally fail. For instance, you are driving over a two lane bridge with no emergency lane and suddenly your car stalls. There you are, can’t go forward, rolling backward will make it even worse.

What do you do? Fist and foremost is get your family out and in front of your vehicle by a couple hundred feet. Then do what ever it takes to get the attention of cars coming up behind you to recognize that there is a problem (of course you’ve already put your emergency flashers on). When you are certain that folks coming up behind you, see your car is disabled, then you can make repairs or call the police to direct traffic until a tow truck gets there.

This reminds me of something that non truckers might not realize. Tires on 18 wheelers are prone to Throwing their caps off, while going down the road. I hated caps and never ever used them. It was quite a bit more expensive, but i alway bought new tires.

Sadly, recapped tires are a fact of life and what you don’t know can kill you. I drive on the highway in my pickup and i never “hangout” near an 18 wheeler. I either pass quickly, or if i cant pass, i wait for traffic to clear beside him and pass only when I can get all the way around him. Those caps coming off will go clean through a windshield and do major damage to a vehicle.

Don’t follow an 18 wheeler any closer than you feel you can react if one comes off. Trucks see a lot of miles everyday and the profit margin is so slim that there are a lot of drivers who choose cash in their pocket over properly maintaining their equipment. It’s just human nature I suppose.

There aren’t many who get away with bad maintenance for very long before they are caught by the DOT, but in between those time, a lot can happen. Dont ever be afraid to call the state police and report a truck that has obvious defects that could hurt folks. Other truckers do it, and we all want to be safe on the road.

Construction: Its everywhere! Its everywhere!! You have two types of people whenever you lose a lane or come up on sudden construction. You have those that immediately recognize the need for a decrease in speed and enhanced attentiveness, and you have those who see an easy opening to get ahead of a whole bunch of people who care about others. Don’t fight them. Don’t react to them. let them pass and just keep doing what you know is right. You can’t change the world, its evilness or right a wrong, with your car.

Complacency: When you do something over and over, a part of your brain that manages redundant tasks, takes over the mundane repetitive act of driving and allows the rest of your brain get up and roam about the cabin. DON’T DO IT!!! Truckers fall prey to the natural way the brain works frequently.

When (not if) you find yourself falling victim to complacency, you lose your edge, your attention to what lays around the next bend or a car on the side of the road that just had its hood closed and the driver door shut. Always Always, look as far down the road as your eyes can see and never-never never fall into complacency.

Thanks for reading folks. I think I’ll do an article about staying safe from bipedal predators while on the road at a later date and if its something you might like to hear about. peace love and groovy, BC.

You can find my YouTube Channel Here.

Filed Under: Uncategorized

  • « Go to Previous Page
  • Page 1
  • Interim pages omitted …
  • Page 26
  • Page 27
  • Page 28
  • Page 29
  • Page 30
  • Interim pages omitted …
  • Page 33
  • Go to Next Page »

Primary Sidebar

About the author

M.D. Creekmore is the author of five books on preparedness and self-reliance, and the creator of The View From Appalachia YouTube channel. Read more→

Appalachian Freedom Files ⬇️

Appalachian Freedom Files
Hundreds of preparedness and self-reliance resources on a USB drive for offline access.

Subscribe to Blog via Email

Enter your email address to subscribe to this blog and receive notifications of new posts by email.

Join 7,043 other subscribers

Footer

Recent Posts

  • WHAT THEY SAY VS. WHAT THEY LEAVE OUT
  • Have We Lost the Right to Be Left Alone?
  • Are You Still Here?
  • You Have Less Time Than You Think
  • This Is Happening Right Under Our Noses

Start Here

    • About M.D.
    • Freedom Files
    • Books
    • YouTube
    • Newsletter


Follow me elsewhere

  • Amazon
  • Facebook
  • Instagram
  • Twitter
  • YouTube

© 2008–2026 M.D. Creekmore · As an Amazon Associate, I earn from qualifying purchases.