• Skip to main content
  • Skip to secondary navigation
  • Skip to primary sidebar
  • Skip to footer

M.D. CREEKMORE

  • Blog
  • Start Here
  • Freedom Files
  • Books
  • Subscribe
  • Facebook
  • YouTube
  • Privacy Policy
  • Affiliate Disclosure
  • Contact
You are here: Home / Archives for Uncategorized

Uncategorized

Here you will find articles that don't fall into another category (or that I forgot to assign a category to), so look out you might find anything here!

We Are All Going To Die! Here Is How To Prepare For It.

October 13, 2018 M.D. Creekmore

how-prepare-for-deathby Lake Lili

None of us really ever want to believe that our lives will end.  We prep so that we have covered our bases for our survival and that of our loved ones.  Most of us hope that we have put things right with our families and right with Our Heavenly Father before our time comes.  Sometimes it is not possible to do, and sometimes we are forced to rely on the decision making of others, at a time when we most want control of those decisions.

As you age, who do you want making your decisions for you?  Think about it hard.  Sit down with a pad and pen and do some planning.  Do you have your will put together?  Who is inheriting all your preps?  Do you want to live on a respirator?

Have surgery for cancer at the age of 95?  Do you have one child who will let you go and another who wants you to live through every heroic measure?  Time to think it through…  Time to do some communicating…

Look at this as another form of prepping.

  1.  Make an appointment with your doctor and get a baseline on your health.  Make sure that your doctor knows your family history and that you follow-up on all the tests the doctor wants done.  Then stop fooling yourself and accept the hand you are dealt.
  2. Work with your doctor to make yourself as healthy as possible and start doing the things that you know you need to be doing anyways – eat right, quit smoking, lower your alcohol consumption, and exercise regularly – and no fooling yourself into thinking that walking the dog down to the end of the block and back is exercise.  It’s not.  It doesn’t count.

So when you have got all of those basics under control the next conversation you need to have with your doctor is about the laws in your province or state regarding medical powers of attorney and living wills.  In Newfoundland where I live you need to have an Advance Health Care Directive (AHCD) written that names your Substitute Decision Maker (SDM), and a back-up.

In it you need to address issues like blood transfusions, organ donations, surgical interventions, long-term care options and Do Not Resuscitate (DNR) orders.  DNRs, however, do require a separately completed form, which you can get from your doctor.  The AHCD will not apply in the event of an emergency (car accident) or if you are involuntarily committed for psychiatric care.

If your SDM declines the role at the time, then the Province will appoint your doctor as your SDM.  So, all the more reason for you to have a good relationship with your doctor and for him to know what you want.  In Newfoundland, Living Wills & Powers of Attorney do not apply to medical issues.  Newfoundland will recognize the legality of the paperwork completed in other Provinces if you are visiting, but if you live here for longer than 6-months then you need to get the proper paperwork completed.

In Ontario, you need to have a Power of Attorney for Personal Care (POAPC) that covers your personal decisions, such as housing and healthcare.   However, you will require a living will to communicate your wishes should you become sick and unable to communicate your wishes.

Most often people write a living will saying that they do not want to be kept alive by artificial means should they have no hope of recovery. Technically this makes the living will an “advance directive”.  Even with an advance directive, Ontario still requires the completion of a DNR form.

When the Power of Attorney and an advance directive living will are combined it is called a Proxy Directive.  All of which tells you that when it comes to healthcare and possible end of life scenarios, governments will make it as complicated as possible so as to ensure that they cannot be held liable by your heirs.

In Tennessee, the laws allow for advance directives for health care decision making.  The directives can be called the “Living Will” or “Advance Care Plan” and the “Medical Power of Attorney” or “Appointment of Health Care Agent”.  The forms that need to be completed are here: https://health.state.tn.us/AdvanceDirectives/

We are a transient society and laws seem to change and evolve quickly in this area, so check your paperwork and ensure that it still meets your provincial or state laws. They are all different too.  So if you live in Tennessee but spend large amounts of time in Florida or Arizona, then you need to make sure the correct forms are completed for those locations too.

You may also need to check and ensure that the medical coverage you are denying in your AHCD will not invalidate your health care coverage.  It may be in writing somewhere in the fine print but talk to your medical insurer and get it in writing.

Once all of that is done sit down with the family member you want to designate your substitute decision maker.  If they agree make sure that they understand your reasoning and that your request will not conflict with their personal or religious beliefs.  Have them sign-off on all the paperwork, so that it is understood that you have reviewed these directives with them and that they are understood.

Now it’s time to go talk to the rest of the family.  Some will be offended but most will understand and be relieved that they will not be required to make end of life decisions.  But now is the time to find out if someone is going to make a fuss about your directives and get it ironed out.

So you have been to the doctor, you are working to get healthy, you’ve talked to all the family, and you have all your paperwork completed.  There are a couple of things you now need to do with that paperwork.

  1. File a copy with your lawyers so they have it with your will (and get one of those if you don’t have it.  After all you have worked so hard on your preps, make sure they will go to a good home)
  2. Give your SDMa copy for their records.
  3. Make sure you talk with your family and friends so that they know who you have designated as your SDM.  Also, tell them about your medical decisions – again argue it out now so that are not fighting you SDM.
  4. Give a copy to your doctor so that it is in your medical file.
  5. Contact your health insurer and give them a copy.
  6. If you have a file at a local hospital, walk into their admissions area and ask them to add a copy of the paperwork to your file.
  7. In Canada, our passports have a scan feature that can hold files.  My sons contains his custody paperwork.  Mine contains the custody paperwork and my AHCD.  The Passport office was quite obliging about adding it onto the file when I renewed my passport.

In other words, cover all your bases so that the medical decisions you make, and the person you have chosen to ensure they are implemented, are recognized and taken into account.  Do it now before you are diagnosed with something that could legally incapacitate your decision-making abilities.  None of us want to end up like Casey Kasem.

Filed Under: Uncategorized

Living in Your Car to Save Money or Out of Necessity

September 21, 2018 M.D. Creekmore

living in a car tipsby J. Cirerol

For over a year, I slept and lived in my car in Los Angeles, California. I moved to Los Angeles for a dream and did not realize how expensive it was to live there.

So I began planning in my head and thinking about how I might save money and how I might get out of the frustrating living situation I was in at the time. I decided living and sleeping in my car would be an idea that would satisfy both of those things I wanted for my life in Los Angeles. It was truly a survival experience.

Throughout my time sleeping and living in my car, I learned a tremendous amount. It was a very tough time as well. But it did, in fact, help me achieve my goals of saving money and being able to live on my “own” in my car.

It didn’t come easy getting that life though. There were many learning experiences. I began writing a book while I was sleeping in my car. About how to live in a car. There are many different aspects when it comes to sleeping and living in your car successfully.

Living in your car takes a plethora of survival skills. It truly is a “survival” experience attempting to live in your car.

I was doing this so I could save money and get ahead in life. You have to sacrifice in life if you want to get ahead in life. That’s what I have learned. Especially in this economy today, you never know when hardship may hit and having these survival skills in your pocket may just save your life one day when you experience hardship.

I saved a great deal of money and had extra money I wouldn’t have had if I was paying rent somewhere.

I am going to go over a few key aspects it takes to successfully live in your car. Even if you never have to live in your car in your life, it’s good to be prepared. You never know what life may throw your way one day.

What to do for Food:

When it comes to food, there are many options when living in your car. My purpose for living in my car was saving as much money as I could. So I keep that in mind when thinking about food.

Canned Foods: There are canned foods such as beans, pastas, and tuna. Have a can opener ready or preferably have an easy to open top. That makes things much easier. Like canned fruits or fruits in plastic cups work as well. They store well too.

Peanut butter and Jelly sandwiches are easy to make in a car. Just have a plastic knife to use to make it.

Homeless shelters: Sometimes or much of the time homeless shelters give free food away as well. Just find one in your local area.

Protein Bars: These are pre-packaged, somewhat healthy and easy to eat on the go.

Fast Food: This is a somewhat cheap and accessible option but I generally went for the foods that were in a grocery store as they were cheaper.

In grocery stores, they usually have a bakery or already-cooked foods section and these are somewhat affordable as well. I used to get 2 pieces of fried chicken and some potatoes and it was decently priced and nice to have some “real” food for a changes sometimes.

Where to Sleep:

Where to sleep is probably one of the most key elements of sleeping in your car. A good sleeping area can make or break you living in your car. You have to find a place that is safe but also a place where you can stay on the down-low enough to not be noticed.

I personally slept at a 24-hour grocery store I used to work at. I lucked out. But I’d say if you can manage to sleep at a 24-hour store somewhere that would be good. Or in a neighborhood that is safe where you can stay under the radar.

Once you do find that place you have to make sure to do everything you can to not be noticed.

Your car has to be primed and ready.

I had dark tint on my windows some of the time I slept in my car. If you don’t, you can put dark towels up in front of all windows. You have to be conspicuous though and make sure no one is around when you put them up. Just go to your spot, park, shut the car off and set the towels up.

That is what I did. Make sure you choose the same place for sleeping every night. It makes things a lot easier. Don’t tell anyone where you sleep.

Have the radio off long before you get to your spot so you don’t draw any attention to yourself. Additional tip: do not open your doors once you get to your spot or get out of your car at all. It only draws more attention to yourself.

Where to take Showers:

Keeping your hygiene good is absolutely key to sleeping and living in your car and staying unnoticed. The more you are noticed the worse it is for you. You have to give an appearance you are not homeless. If not, you will be kicked out of a lot of places you may hang out at. I took showers at a gym. I got a monthly gym membership. It was only $40 a month.

So it was not much. I got to both workout and get clean. I recommend having a backpack with everything you need for the shower and a combination lock to lock up your stuff while you are in the shower.

Where to Spend Your Spare Time At:

There are a few options of where to hang out on your day off work or when you have free time.

Fast food chains. They usually have free WiFi for laptops. If you keep a low profile, it’s likely you will go generally unnoticed. Just make sure to keep to yourself for the most part. I didn’t even buy anything much of the time and no one cared to be honest.

Public libraries are great places to hang out in your spare time especially if you have a laptop. There is free WiFi that does not expire like many food places. There are usually a good amount of seats. It is nice and cool inside or warm depending on the climate where you live.

Malls are a decent area to hang out at as well. To find a seat and read a book or walk around. Just as long as you don’t have to pay for parking to be at a mall then it’s great.

A gym is a great place as well. You can work out for a while to kill time and be inside.

Also, if you have made any friends or anything like that, then that will help a ton as well.

Key items to Keep in your Car:

  1. A gallon of drinking water: It’s important to always stay hydrated when living in your car. You are always going, always on the move much of the time. There were many times it was after work and I hadn’t had any water. It was always nice to have my gallon of water in the back seat under a towel. It costs about $.25 to fill it up at a grocery store.
  2. Pain medicine: Very useful when you have any kind of pain. There were many times while I was living in my car, it was late at night and my head was throbbing. It was nice to reach in my little soccer bag and take some pain medicine and be able to sleep peacefully after that.
  3. Car Fan: At night time I find it tough to sleep without some background noise, so this came in handy. It costs about $20 at an automotive store. It is enough wattage to be on all night and not kill the battery. Many nights it is too hot to sleep in a car without a fan. In the summertime, if I didn’t have a fan I would have suffered greatly.
  4. Power Inverter: This is a device you can plug into your cigarette lighter and charge your laptop, cell phone, or any other electronic device as long it is a small enough wattage. It costs about $20 at many stores. Be careful what you charge. Some things will kill the battery if you charge it too long. Try to charge things while driving when possible because it doesn’t use the battery. The one I had had was 100 watts, which means anything you charge has to generally generate less electricity than that.
  5. Sleeping Bag: A good sleeping bag is key in any environment. Even in Los Angeles, in the winter and many times other seasons of the year as well I needed it. If I hadn’t had a good sleeping bag, I would have frozen and been very uncomfortable the entire night.
  6. Snacks/ Food: It is important to always have some sort of food in your car. Preferably on the floor on the passenger seat side as I did. I used that section for my food. It was easy when I got hungry, I could just reach over and grab a banana to eat when I needed it. It’s crucial to always have at least some stuff ready to eat anytime you may need it. Not eating can cause many problems. There were many times after work I was extremely hungry and was leaving work and had a piece of fruit I reached for and ate right from my car.
  7. Jumper Cables: Sometimes for a couple different reasons, I found that my car battery died and I needed a jump. Most likely because I left the lights on or I charged my electronics too long without driving. It was a pain standing in front of a store asking people if they had jumper cables. I eventually got some jumper cables so when my car battery died, all I had to do was ask anyone who had a car around me if they could give me a jump rather than also having to ask them if they had jumper cables too.
  8. Vitamin C: Living in your car is not a normal thing obviously. There is more wear and tear and hardship than if you had a place to live. So it’s important to keep your immune system up. Vitamin C boosts the immune system. Anything you can consume with a lot of Vitamin C is great. Oranges or any drinks that have vitamin C in them are great. You cannot afford to get sick in your car when you already have enough other things to worry about.
  9. Spare Keys Container: Having spare keys around are very important while sleeping in your car. You never know when you may need them. I kept a spare key for my car always in my wallet. Also, I went to an automotive store and got 2 containers for about $10 that store keys and have a magnetic cylinder on the back so you can connect it to any metal at the bottom of your car for when you lose or lock your keys in your car. Make sure to put it where no one can see it. Make sure no one knows it is there. Only you.

There are many important aspects to surviving living in one’s car. These are a few of the key ones. The key thing is keeping a low profile in all you do. That way, you can have the longevity to stay in your car as long as you need to.

You have to stay mentally strong and continually aware and focused on everyone and everything around you. Keep your head up. Always know it is not forever and is only a temporary situation.

Also Read:

  • Homeless Survival Tips – What to do if You’re Homeless and Unemployed

Filed Under: Uncategorized

Will Pacemakers Survive an EMP?

September 14, 2018 M.D. Creekmore

Pacemaker survive an EMPby Arthur T. Bradley, Ph.D.

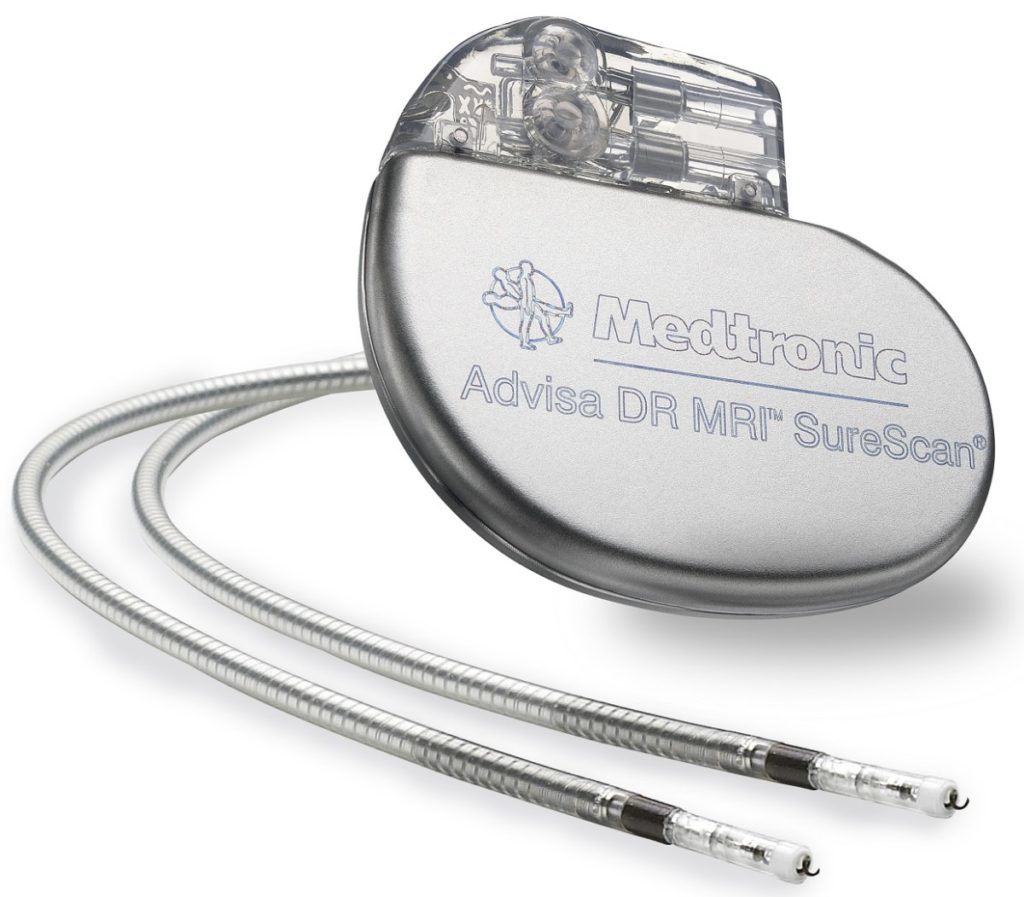
A surgeon recently wrote to ask whether a modern pacemaker would survive an EMP. It would have been easy to provide a gut reaction and say, “No way!” After all, an EMP might generate fields on the order of 50 kV/m. But is that answer correct?

The surgeon went so far as to ask the pacemaker manufacturer (Medtronic) if they thought the device would survive. The company didn’t have an answer, but they did provide a set of known conditions that the pacemaker would survive (see Table 1). That information proved crucial to dialing in on what I hope is an educated answer.

Table 1: Medtronic provided max power levels vs distance

Field Strength (watts) Distance Required (feet)
< 3 0.5
3-15 1
15-30 2
30-50 3
50-125 6
250-500 10
500-1,000 20
1,000-2,000 30

From literature (IEC E1 HEMP Signal), we can assume that a 50 kV/m E1 pulse would generate a total energy of about 0.1 Joules per square meter. Converting that to watts requires assuming both a pulse width and an area. For this back of the napkin calculation, let’s assume a pulse width of 5 nanoseconds and that the pacemaker, including wires, measures 0.1 square meters. Neither are exactly right, but they’re close enough for this first-order estimate.

Converting the energy to watts is done by:

Equation emp

The Medtronic table obviously doesn’t go this high, but we can assume that power rolls off based on the inverse square law (i.e., 1/d2). In other words, for every doubling of distance, the power drops by 4. Therefore, if we assume that the pacemaker will survive 2,000 watts at a distance of 30 feet (per the Medtronic table), we can extrapolate safe ranges for higher power levels, as shown in Table 2.

Table 2: Extrapolated max power levels versus distance

Power (watts) Distance (feet)
2000 30
8000 60
32,000 120
128,000 240
512,000 480
2.05×10⁶ 960
8.19 x10⁶ 1,920
32.8 x10⁶ 3,840

This would suggest that Medtronic’s pacemaker could survive (without resetting) an EMP detonation that occurred at a distance greater than 960 feet. For simplicity, let’s round up and say that it would survive if the detonation occurred at >1/4 mile.

Given that a nuclear EMP will be most effective if it is detonated at least 25 miles in the atmosphere (above the Source Region) and will likely be at altitudes 10 times that height for greater coverage, it suggests that Medtronic’s pacemaker would easily remain operational.

The disclaimer, of course, is that all these calculations are back of the napkin. There are numerous sources of possible error, including the frequency content that Medtronic assumed when creating their table, the non-ideal roll off of power versus distance, the energy density of the E1 pulse, etc.

With all that said, the safe distances calculated are so much smaller than the actual detonation height (i.e., 1/4 mile vs 250 miles), I think it’s certainly reasonable to argue that such non-idealities won’t change the final conclusion.

In short, these calculations suggest that modern pacemakers, assuming that they perform similar to Medtronic’s, would have a very high likelihood of surviving a high-altitude nuclear EMP.

If you’re interested in learning more about EMPs and solar storms, kindly check out my book, “Disaster Preparedness for EMP Attacks and Solar Storms.” Exhaustive family preparedness information can also be found in my “Handbook to Practical Disaster Preparedness for the Family.” Finally, if you’re looking for an exciting post-apocalyptic saga, check out “The Survivalist (Frontier Justice)”.

Here are some of my favorite prepping gear

Thank you for investing your time in this article, and I sincerely hope it has provided valuable insights to strengthen your survival preparedness. As a survivalist, I make use of a variety of tools and gear, many of which have proven to be indispensable in my journey. Here, I’ve compiled a list of some of my favorite survival gear, which I believe you will find beneficial as well.

These are affiliate links, meaning if you decide to use any of them, I’ll earn a commission at no additional cost to you. However, I assure you that these recommendations come from personal experience – these are the exact tools I trust, use, and confidently recommend to everyone, including my own family.

  1. Long-Term Food Storage: ‘My Patriot Supply‘ is my top choice for emergency food supplies. Their selection caters to long-term storage needs, ensuring you’re always prepared.
  2. Water Filter: Clean, safe drinking water is a priority in any situation. This water filter has served me well, and I trust it will for you too.
  3. Versatile Cooking Solution: The Zoom Versa Cook Stove is a reliable, versatile cooking solution perfect for outdoor and survival scenarios.

I’ve compiled an extensive, frequently updated list of my top survival gear recommendations for your convenience. Equip yourself with the best and latest gear here.

Remember, true survival isn’t merely about making it through – it’s about effectively navigating and thriving in challenging circumstances. Equip yourself well, stay informed, and always be prepared.

Filed Under: Uncategorized

How to Make Homemade Soap Bars for Beginners

September 13, 2018 M.D. Creekmore

how to make homemade soapby Krystal Brown

Making your own soap is an enjoyable and useful activity. Homemade soaps are also better for the skin because they contain glycerin. Glycerin is a natural product of the soap making process. But, with many commercial soaps, the glycerin is removed and used to make lotions and other cosmetics.

With self-made soaps, the glycerin is not removed and you will benefit from its soothing and moisturizing effects.

When you are just starting out making soap, it is not good to use a complicated recipe with expensive ingredients. You do not want to get overwhelmed. You also do not want to waste money on fancy imported oils and 50 different types of milk and additives when you are not yet confident with your craft.

When starting out, it is better to keep things simple and low cost. I am going to teach you how to make an uncomplicated soap using just four ingredients.

<a href="https://www.thesurvivalistblog.dream.press/wp-content/uploads/2017/10/crisco-and-orange-oil-soaps-1.jpg"><img class="size-medium wp-image-39365" src="https://www.thesurvivalistblog.dream.press/wp-content/uploads/2017/10/crisco-and-orange-oil-soaps-1-263x350.jpg" alt="Crisco and orange oil soaps " width="263" height="350" /></a> Crisco and orange oil soaps Making your own soap is an enjoyable and useful activity. <a href="http://amzn.to/2yxcA2j">Homemade soaps</a> are also better for the skin because they contain glycerin. Glycerin is a natural product of the soap making process. But, with many commercial soaps, the glycerin is removed and used to make lotions and other cosmetics. With self-made soaps, the glycerin is not removed and you will benefit from its soothing and moisturizing effects. When you are just starting out making soap, it is not good to use a complicated recipe with expensive ingredients. You do not want to get overwhelmed. You also do not want to waste money on fancy imported oils and 50 different types of milk and additives when you are not yet confident with your craft. When starting out, it is better to keep things simple and low cost. I am going to teach you how to make an uncomplicated soap using just four ingredients. Those ingredients include Crisco, orange essential oil (which is optional), lye and olive oil. You don't have to use any essential oils if you want a fragrance free soap. Usually making soap from scratch involves a “cure” time of 4-6 weeks. During this time, the soap becomes milder and harder. However, I am going to also teach you a simple oven <a href="http://amzn.to/2yxcA2j">processing technique that can make your soap</a> safe to use within a couple of days. <u>Items Needed</u> <ol> <li>Goggles: This is to protect your eyes from the “fumes” generated by the lye water. I have used my old swimming goggles and they worked just fine. You can also get goggles from the Dollar Tree.</li> <li>White Vinegar: This is used to neutralize the lye if any of lye water splashes on you.</li> <li>Rubber Gloves: These protect your hands and can also be obtained from most dollar stores.</li> <li>Stick Blender: I purchased mine for less than $10 from a local discount store.</li> <li>Silicone Cake Molds: I got some from Dollar Tree. I used 5 small silicone cake molds for my soaps. You can also use a regular pan lined with lightly oiled wax paper so that the soap will not stick to the pan.</li> <li>Candy Thermometer: The first time I ever made soap, I didn't have one of these and it made things harder. Get a candy thermometer. I purchased one for a couple of dollars on eBay.</li> <li>Lye: I use “Instant Power Crystal Lye Drain Opener” from Walmart. It costs $5.16 and I still have plenty of lye left over to make more batches of soap. Your lye must be 100% pure lye...not  Drano or anything like that. You can also purchase lye from eBay, Amazon or various online soap making shops. I have heard of people buying the 100%  pure lye from Lowe's as well. You will need ¾ cup of lye for this recipe.</li> <li>Crisco: You will need 3 pounds of this. I got 3 containers of Crisco from Dollar General. Each container was a pound. You can use generic Crisco as well but it must be 100% vegetable shortening.</li> <li>Olive Oil: You will need 1 tablespoon of this. I purchased mine from Dollar General. It must be 100% pure olive oil, not the “olive oil” blend sold at Dollar Tree which is mainly just soybean oil. The olive oil hardens the soap.</li> <li>Orange Essential Oil: I used about ½ of an ounce. It smells heavenly. You can get essential oils on eBay, Amazon and at drugstores such as Rite Aid.</li> <li>Kitchen Scale: This is optional for this recipe (in my opinion). It will make things more precise, but I did not use a scale because I did not have one at the time. I just measured things out carefully using measuring cups and I had no problems.</li> </ol> <strong><u>The Steps</u></strong> <a href="https://www.thesurvivalistblog.dream.press/wp-content/uploads/2017/10/cake-pan.png"><img class="size-full wp-image-39363" src="https://www.thesurvivalistblog.dream.press/wp-content/uploads/2017/10/cake-pan.png" alt="Cake Pan" width="216" height="161" /></a> Cake Pan <ol> <li>Measure out your lye. If you have a scale, measure out 220 grams of lye. If not, very <strong>very</strong> carefully measure out ¾ cup of lye and pour the crystals into a non-metal container.</li> <li>Measure out 330 grams (or 1 and ½ cup) of distilled or filtered water. Very carefully pour the lye crystals into the water. There will be fumes. Stir with a spoon (again no metals are allowed...use plastic or wooden spoons). It is good to place the lye water under the stove exhaust fan if you can. If not, open the windows for adequate ventilation.</li> <li>Melt your Crisco and add your olive oil.</li> <li>After the oils are melted together, turn off the stove and remove the pot from the stove. Use a thermometer to measure the temperature of the oils. The oils should be about 120 degrees.</li> <li>Check the temperature of your lye water. It will be about 175 degrees.</li> <li>You must get the lye water and the oils to a similar temperature. So, place your lye water container in a sink full of ice water until it has cooled down to 97-100 degrees. While you are waiting for this to happen, your oils will be cooling down naturally.</li> <li>When both the oils and the lye water are between 97-100 degrees, mix them together. Pour the lye water into the oils. Use your stick blender to blend the mixture until it looks like pudding. When the mixture reaches this stage, it is said to be at <em>trace</em>.</li> <li>When your mixture reaches trace, add your essential oils to the mixture. Blend well and quickly pour your mixture into your cake pans. Certain essential oils will sometimes cause the mixture to “seize” so work quickly once you add your fragrance oil.</li> <li>Place your soap in the oven at 170 degrees (or on the lowest setting your oven has available. If your oven has a “warming” feature, you can use that). Let the soap stay in the oven for about 2 hours. However, check on the soap every 20 minutes or so to make sure that it does not “bubble over”. The heat from the oven is forcing the saponification process. If you didn't use the oven method, it would take 4-6 weeks after you pour your soaps before you could be able to use them.</li> <li>Let your soap rest for a few hours and then cut it into soap bars.</li> <li>Let the soap rest for another day so the excess water will evaporate and the soap will become milder and harder.</li> <li>Enjoy your homemade soap!</li> </ol> This bar cleans very well and has a medium amount of lather. Many people (myself included) love lots of lather. But, the amount of lather a soap produces does not measure its cleaning ability. My Orange Crisco Soap is not extremely moisturizing like a Dove beauty bar, but it does not strip the skin either. Your entire family can use it or <a href="http://amzn.to/2yxcA2j">you can even sell the soap at flea markets or online</a>. The ingredients are cheap and readily available which make it perfect for a novice soap maker. I showered with my soap 2 days after making it. I have a whole box of soap from this one batch. It's easy, economical and fun. Please try it! <strong>Also Read:</strong> <ul> <li><a href="https://www.thesurvivalistblog.dream.press/diy-rendering-fat-making-soap/">DIY Rendering Fat & Making Soap</a></li> <li><a href="https://www.thesurvivalistblog.dream.press/homemade-laundry-soap/">Judy’s Homemade Laundry Soap</a></li> <li><a href="https://www.thesurvivalistblog.dream.press/soap-thieves-surprising-lesson-prepping/">Soap Thieves, A Surprising Lesson About Prepping</a></li> <li><a href="https://www.thesurvivalistblog.dream.press/making-selling-soap/">Making and selling soap</a></li> <li><a href="https://www.thesurvivalistblog.dream.press/how-to-make-laundry-soap/">Making Laundry Soap</a></li> <li><a href="http://amzn.to/2yxcA2j">Making Soap From Scratch: How to Make Handmade Soap - A Beginners Guide and Beyond</a></li> </ul>Those ingredients include Crisco, orange essential oil (which is optional), lye and olive oil. You don’t have to use any essential oils if you want a fragrance free soap. Usually making soap from scratch involves a “cure” time of 4-6 weeks. During this time, the soap becomes milder and harder.

However, I am going to also teach you a simple oven processing technique that can make your soap safe to use within a couple of days.

Items Needed

  1. Goggles: This is to protect your eyes from the “fumes” generated by the lye water. I have used my old swimming goggles and they worked just fine. You can also get goggles from the Dollar Tree.
  2. White Vinegar: This is used to neutralize the lye if any of lye water splashes on you.
  3. Rubber Gloves: These protect your hands and can also be obtained from most dollar stores.
  4. Stick Blender: I purchased mine for less than $10 from a local discount store.
  5. Silicone Cake Molds: I got some from Dollar Tree. I used 5 small silicone cake molds for my soaps. You can also use a regular pan lined with lightly oiled wax paper so that the soap will not stick to the pan.
  6. Candy Thermometer: The first time I ever made soap, I didn’t have one of these and it made things harder. Get a candy thermometer. I purchased one for a couple of dollars on eBay.
  7. Lye: I use “Instant Power Crystal Lye Drain Opener” from Walmart. It costs $5.16 and I still have plenty of lye left over to make more batches of soap. Your lye must be 100% pure lye…not  Drano or anything like that. You can also purchase lye from eBay, Amazon or various online soap making shops. I have heard of people buying the 100%  pure lye from Lowe’s as well. You will need ¾ cup of lye for this recipe.
  8. Crisco: You will need 3 pounds of this. I got 3 containers of Crisco from Dollar General. Each container was a pound. You can use generic Crisco as well but it must be 100% vegetable shortening.
  9. Olive Oil: You will need 1 tablespoon of this. I purchased mine from Dollar General. It must be 100% pure olive oil, not the “olive oil” blend sold at Dollar Tree which is mainly just soybean oil. The olive oil hardens the soap.
  10. Orange Essential Oil: I used about ½ of an ounce. It smells heavenly. You can get essential oils on eBay, Amazon and at drugstores such as Rite Aid.
  11. Kitchen Scale: This is optional for this recipe (in my opinion). It will make things more precise, but I did not use a scale because I did not have one at the time. I just measured things out carefully using measuring cups and I had no problems.

cake-pan-for making homemade soapsThe 12 Easy Steps

  1. Measure out your lye. If you have a scale, measure out 220 grams of lye. If not, very very carefully measure out ¾ cup of lye and pour the crystals into a non-metal container.
  2. Measure out 330 grams (or 1 and ½ cup) of distilled or filtered water. Very carefully pour the lye crystals into the water. There will be fumes. Stir with a spoon (again no metals are allowed…use plastic or wooden spoons). It is good to place the lye water under the stove exhaust fan if you can. If not, open the windows for adequate ventilation.
  3. Melt your Crisco and add your olive oil.
  4. After the oils are melted together, turn off the stove and remove the pot from the stove. Use a thermometer to measure the temperature of the oils. The oils should be about 120 degrees.
  5. Check the temperature of your lye water. It will be about 175 degrees.
  6. You must get the lye water and the oils to a similar temperature. So, place your lye water container in a sink full of ice water until it has cooled down to 97-100 degrees. While you are waiting for this to happen, your oils will be cooling down naturally.
  7. When both the oils and the lye water are between 97-100 degrees, mix them together. Pour the lye water into the oils. Use your stick blender to blend the mixture until it looks like pudding. When the mixture reaches this stage, it is said to be at trace.
  8. When your mixture reaches trace, add your essential oils to the mixture. Blend well and quickly pour your mixture into your cake pans. Certain essential oils will sometimes cause the mixture to “seize” so work quickly once you add your fragrance oil.
  9. Place your soap in the oven at 170 degrees (or on the lowest setting your oven has available. If your oven has a “warming” feature, you can use that). Let the soap stay in the oven for about 2 hours. However, check on the soap every 20 minutes or so to make sure that it does not “bubble over”. The heat from the oven is forcing the saponification process. If you didn’t use the oven method, it would take 4-6 weeks after you pour your soaps before you could be able to use them.
  10. Let your soap rest for a few hours and then cut it into soap bars.
  11. Let the soap rest for another day so the excess water will evaporate and the soap will become milder and harder.
  12. Enjoy your homemade soap!

This bar cleans very well and has a medium amount of lather. Many people (myself included) love lots of lather. But, the amount of lather a soap produces does not measure its cleaning ability. My Orange Crisco Soap is not extremely moisturizing like a Dove beauty bar, but it does not strip the skin either.

Your entire family can use it or you can even sell the soap at flea markets or online. The ingredients are cheap and readily available which make it perfect for a novice soap maker. I showered with my soap 2 days after making it. I have a whole box of soap from this one batch. It’s easy, economical and fun. Please try it!

Also Read:

  • DIY Rendering Fat & Making Soap
  • Judy’s Homemade Laundry Soap
  • Soap Thieves, A Surprising Lesson About Prepping
  • Making and selling soap
  • Making Laundry Soap
  • Making Soap From Scratch: How to Make Handmade Soap – A Beginners Guide and Beyond

Filed Under: Uncategorized

Palmetto State Armory (PSA) AR-15 Review
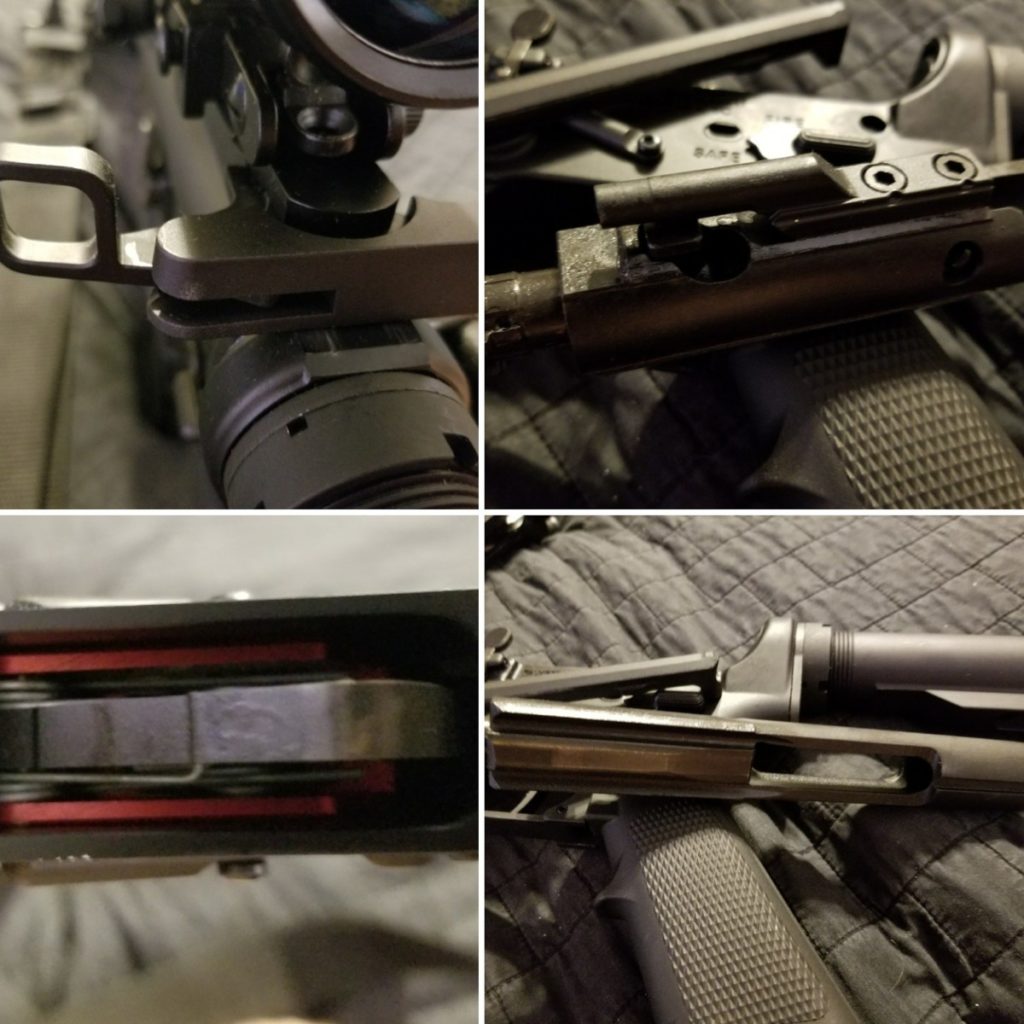
September 11, 2018 Jesse Mathewson

Photo of rifles and ar-15's

Palmetto State Armory firearms are a “MADE entirely IN America” firearms manufacturer that has created a stand out product within an industry full of products. There have been dozens even hundreds of AR15 manufacturers within the United States, among these, there are few that hold up to the full expectations of what an AR15 can be.

Modern AR15s can be extremely reliable, accurate, and versatile firearms. Palmetto State Armory is one of the few manufacturers that has consistently turned out a product I am proud to own and use.

It should be noted that I have at NO point received compensation or product from Palmetto State Armory for writing this article, in fact, I have purchased out-of-pocket the large percentage of reviews I do.

Please remember this when commenting, I am disabled, 40 years old and write reviews because you all deserve to have honest reviews in your corner. Even when a product is received gratis (as is not the case with this article) I provide completely honest reviews. Lying only hurts the liar in the end!

Personally, I discovered Palmetto State Armory AR15s a few years ago when I purchased one from a friend. After using this one for quite a bit I quickly discovered that it was an amazing piece of hardware. I then decided to purchase from Palmetto State Armory myself, and did so, purchasing the following items over the course of two years.

  1. PSA 16″ 5.56 NATO 1/7 Mid Melonite 11″ Keymod Freedom Upper – w/BCG & CH
  2. PSA AR-15 Complete Blem Lower – Classic Edition
  3. PSA Freedom Complete 6 Position Mil-Spec Diameter Buffer Tube Assembly
  4. PSA 5.56 Premium HPT/MPI Full Auto BCG, No Logo & PSA Charging Handle with Tactical Release Latch
  5. PSA 5.56 HPT/MPI Bolt Carrier Group
  6. PSA 5.56 Premium HPT/MPI Full Auto Bolt Carrier Group
  7. PSA 10.5″ 5.56 NATO 1:7 M4 profile carbine length gas tube

Interestingly I have not yet had a negative experience and this is, to be honest rare. After all, everything man-made can and does eventually fail especially firearms. I own several Glock 19s, and have had maybe 4 failures to fire and or feed or eject, in almost all cases it was ammunition related, in two cases it was gun related, I had failed to perform the necessary replacement of springs/ parts that wear out first. Like changing the oil in your car, maintenance is essential in firearms.

photo of two ar-15 rifles a bolt action and glock handgun

For instance on my Glock’s I change barrels every 30,000 rounds, firing pins every 50-60,000 and pins and springs every 5-10,000 rounds, on the gun and in magazines. This ensures continued relatively flawless reliability. Additionally, I do not use sub-par ammunition.

Especially when practicing, I use Aguila, Speer Lawman or MEN German milsurp for practice purposes. And Speer gold dot for self-defense. With my rifles, the same is approximately true, with variations in some rifles depending on the amount of use.

This means that in a given year I could change barrels as many as 4 times if I run a gun hard enough, obviously for 22lr firearms this is not such a large issue, and I have easily gone well over 50,000 rounds before needing to change out springs etc., barrels, if maintained well, will outlast me.

photo of an AR-15 rifle and rifle parts

In my high-pressure carbines and rifles such as the AK and AR variants specifically from Palmetto State Armory, I have found I need to do less maintenance while still seeing exceptional performance overall. The only other brand firearm that even came close in longevity and quality was my Delton Sport model which had a little over 65,000 rounds through the barrel before I replaced gas rings, barrel (it had begun keyholing) and buffer assembly.

It is still running like a mule today, accurate, wonderfully reliable and an amazing firearm. Now, to date I have only been able to put around 28,000 rounds through my oldest Palmetto State Firearm, (prior to melonite/ barrel is chromium steel mix) however, it is still running hard, it is not my defensive tool, as to be honest I am running it specifically to see what fails first. The only issue I have seen is the gas stake on bolt loosening (I tightened and used loc-tite) but no failures overall.

ar-15 scope

I called Adam Ruonala the Chief Marketing Officer for Palmetto State Armory to ask some serious questions about their processes. (On a side note, he is like all of the individuals working with Palmetto State Armory approachable, and honest!)

  1. Do you make your barrels in-house?

Yes, we make our barrels in-house. Exception for the hammer forged barrels, all other barrels stainless, and nitride barrels –

  1. Are all major components (eg., stripped lowers/ barrels and bolts) machined in-house?

Bolt carrier groups currently are outsourced, however, we are in the process of bringing it in-house to keep all – they are made in the United States!

  1. Does the same apply to AR10s and your Ak47 line?

Yes, absolutely the same applies to all firearms made and or stamped Palmetto State Armory!

shooting 100-yard milk jugThe reality is that AR and AK platforms are adult lego’s they are not difficult to put together, in fact, there are dozens of videos showing people building AK47s using shovels and AR’s using a plethora of parts from a dozen different manufacturers.

What is a not well-kept industry secret is that your name branded AR carbines like Spikes Tactical, BCM, and even COLT have many if not all of their parts outsourced and simply stamp their name on it and then raise the price 200-500% and make crazy claims of infinite reliability?

The reality is quite different, comparatively, I have run my Delton and Palmetto State Armory guns against all of the above and in almost every case have continued to run long after they began having failures, feeding, firing, and more.

A popular YouTube channel that destruction tests both AR and AK rifles called The AK Operators Union recently proved that Palmetto State Armory is, in fact, the ONLY all American made AK rifle to date, to pass their stringent 5000 round destruction testing.

*

They also destruction tested the AR15 Freedom model, currently going for under $450 through Palmetto State Armory – and guess what, it passed again!

*

And the AR’s I have tested, well, lets just say that as it stands today I have yet to be disappointed. In fact on August the 6th I will be doing the 1000 yard milk jug challenge with a Palmetto State Armory AR, specifically the PSA 16″ 5.56 NATO 1/7 Mid Melonite 11″ Keymod Freedom Upper – w/BCG & CH the only specialized adjustments I have made are adding a Bushnell 4.5-18x40mm BDC AR scope, P.O.F. trigger (made in Arizona) single stage 4.5lbs and a CVLife 9”-13” Bipod, everything else is exactly as it came from the factory – To make this an even better event, I am using 69 grain IMI MatchKing ammunition, each round being used will be weighed and measured to ensure continuity in load but they will be as loaded by the factory.

The 6th of August is my 40thbirthday and I plan on making a bit of a splash by completing this challenge from the Long Range Shooters of Utah Association with what amounts to a stock AR15 with a 16” barrel – something I think will be a first. And yes it may take a week, as my editing skills are atrocious, but after letting the officials review the video, and editing it, I will post for all to see!

Here is the thing folks, regardless what name brand you are currently in love with, from Ruger through Colt, the odds are the barrels are made by Palmetto State Armory or one of the other 2 or 3 actual builders of barrels in the country and re-branded. In some cases the parts are outsourced too Taiwan or Korea, while Palmetto State Armory keeps its parts entirely in house, or are in the process of bringing everything under one roof! AND THEY DO IT FOR LESS than anyone else on the market today!

What are the pros to owning a PSA (Palmetto State Armory) AR or AK over any other brand name –

  1. Pricing, they offer regular daily deals that are far lower than most manufacturers and do so while ensuring a product that functions well easily 97% of the time (all man-made-products can and do fail at times)
  2. They offer an in-house 1911, AK47, AR10 and AR15 – and do so with components made IN HOUSE!
  3. They have absolutely great customer service, I have never had a single member of their staff be rude, and in fact when I am down South again plan on stopping in and meeting them, I am that impressed with their services.
  4. Quality, overall their quality as has been proved by myself and many independent individuals is second to NONE, in fact, I would suggest to any new owner or older owner looking for a backup piece, go to their website, sign up for daily alerts and take advantage of their daily deals!

Cons –

  1. For the first time, I have none, absolutely NO cons to owning a Palmetto State Armory part of the entire firearm!

So do you have anything to add, what are your experiences, and by all means feel free to share FIRST hand experiences with me. Comment below and if you enjoyed this article and want to see others, share and thanks again!

Free the mind and the body will follow…

Filed Under: Uncategorized

What’s The Best Rifle Sling For The AR-15?

September 9, 2018 M.D. Creekmore

photo showing a two-point sling configuration
by Joe Nobody

One extremely important accessory for a shoulder-fired weapon is frequently overlooked by preppers. It is unpretentious, cheap, readily available, and easy to install. It’s the sling.

Suffering from a lack of sex appeal, lost in a plethora of available furniture, and definitely not the cover-girl of gun porn, the lowly sling often suffers from a lack of appreciation – until your body has paid the price.

Through the years, I have conducted numerous training sessions and can now easily identify the guys and gals who have experience in the field… the folks who have carried a long gun for an extended period of time. Their slings are functional and comfortable – like an old pair of well-worn blue jeans or a seasoned pair of boots.

They fit, function, and perform critical tasks without fanfare or ritz. Those who have ignored this critical component suffer – sometimes badly. More on that down-article.

No doubt some of you are wondering, “Why is Joe ranting on and on about something as simple as the humble sling? It’s just a length of material that you use to attach a weapon to your body – right?”

Not really. Not in a practical application:

In the gun-candy store, it’s easy to get distracted by lights, lasers, and fancy optical doodads. At the range, other shooters rarely stroll over and say, “Wow, what a nice sling.” In the gun safe, they tangle and annoy. But if you ever have to keep a shoulder-fired weapon on your person for extended periods of time, there is nothing you’ll appreciate more than a good sling.

photo showing how to use a sling as a plumb lineMany of the folks I work with haven’t spent a lot of time with a weapon in the field. That’s not a criticism or a sin; it’s simply a fact that few occupations or lifestyles demand the need or naturally deliver those experiences. Most of us do not walk into corporate America carrying a long gun.

Even the gents who have served for years in the infantry may not consider that their military experience will likely differ from that of a post-event prepper. Protecting the homestead while accomplishing daily activities, chores and movements is different than the routine of a soldier who is a component of a fighting unit.

I often challenge my friends to perform one simple task without leaning their rifle against a tree – set up camp. Pitch the tent, build a fire, and empty the packs while wearing your blaster. The experience can be a real eye-opener.

Take that exercise one step further; envision a typical post-event day from dawn to dusk with security as part of your plan. This mind-movie will help you realize the need for comfortably accommodating your weapon. Unless you find yourself surviving in a densely populated urban area, you’ll most likely spend a lot more time carrying your rifle than shooting it. This is a critical point. You probably won’t be fighting, sweeping, clearing, or defending all the time. (If your environment requires such diligence, it might be time to consider another location.)

Photo of Joe Nobody climbing a ropeYou will, most likely, be spending countless hours gardening, gathering, harvesting, and performing manual labor. If there is no rule of law, you’ll probably want a firearm close by, or on your person. You may spend considerably more time traveling by foot than you do now. There’s a reasonable chance you’ll be outside and exposed for significant portions of the day.

All of this translates into the lowly sling playing an important role. The wise prepper will evaluate this humble piece of kit now, rather than later when it’s too late. Prove that you can carry that blaster comfortably, securely and in a manner that is “mission configurable.”

Types of Rifle Slings

For years, there were two basic types of slings: Single-point and 2-point. (For a short time, there was a 3-point sling, but it faded from the market quickly.)

A few years back, the single-point sling was all the rage. It debuted as a cool accessory, and droves of shooters wanted to convert their battle rifles to accept this option. For most, this was a huge mistake.

Single-point slings are for SWAT teams, hostage rescue units, and other outfits that are expecting short duration encounters of intense violence. Single-point slings are great for moving a weapon to the weak-side shoulder, close-quarters combat, and other tactics that require a lot of movement of a weapon.

They, however, suck as a way to secure a long gun for extended periods while on the move.

Infantry soldiers, hunters, search and rescue responders, and probably preppers need slings that secure the weapon tightly against the torso. This configuration allows running, jumping, climbing, walking, and picking berries without the rifle banging into knees, thighs, or more personal regions between a male’s legs. A hot barrel can make this capability even more critical.

Consider that you may need to slide the rifle around to your back if you have to use your hands to carry something heavy or to climb. You’ll want to be able to tighten and tuck that fancy AK either in front or across your shoulders and do so in a way that doesn’t rub off significant swaths of flesh.

Recently, a new design has eliminated the need to make a choice. Several vendors now offer what I call “hybrid” slings that easily convert from single-point (when you’re expecting to fight) to a more comfortable two-point arrangement. This nifty invention gives us preppers the best of both worlds.

When shopping for a sling, consider these factors:

  • Be aware of the strap width and thickness. When you have a pack, body armor, load-rig, jacket or other paraphernalia on your shoulders, strap-pollution can be an issue. Wide and thin slings are typically the best option.
  • At least one connection point should swivel. This avoids tangles, twists, and hang-ups.
  • Metal rings, clips, and buckles will hold more weight than their plastic counterparts.
  • Look for quick adjustment straps. These are extremely handy.
  • Quick Detach (QD) connectors are also great innovations. Over the years, I’ve been in numerous situations where I wanted to get the weapon off my body in a hurry. QD mounts work well.
  • The company Magpul probably offers the most configuration/options: http://store.magpul.com/category/slings

But wait. Carrying the weapon is only part of the equation:

photo showing a sling converted into a single point sling

Have you ever read those great articles on a gazillion uses for paracord? Well, a good rifle sling has its own list of secondary applications. Not as many as 550-cord, but more than many people realize.

A sling can be used to provide a brace for several different shooting positions. Used correctly, it can steady a shooter’s aim.

Or how about an angle indicator for non-level shots? If you live in a mountainous or hilly country, you know that making a shot 40 degrees down into a valley requires some adjustment. Often, it’s difficult to judge the correct angle. This handy little accessory can help you with the estimate by creating a plumb line.

Properly selected, a sling can form a tourniquet, elevate an injured arm, tow something, fashion a stretcher or drag bag… the list could go on and on.

Essentially, a sling is a fancy 4-foot section of very strong rope. What could you do with that in an emergency situation?

Consider a scenario where you have three people in your group and need to climb a tree in order to scout. Three of these cords attached end-to-end would yield a 12-foot section of climbing rope.

In my fictional series, Holding Their Own, the protagonist uses his rifle sling and backpack straps to make a safety harness for a dangerous climb.

What I have come to respect most about preppers is a mindset of adaptability and creativity. I’m sure if you put 50 like-minded individuals in a room, they would devise dozens more innovative uses for this little length of material.

All the best! Visit Joe’s website, www.joenobodybooks.com, for more articles, reviews, books, and other resources for those who believe in the self-reliant lifestyle.

Recommended Reading

  • AR-15 Rifle Builder’s Manual: An Illustrated, Step-by-Step Guide to Assembling the AR-15 Rifle
  • AR-15 Skills & Drills: Learn to Run Your AR Like a Pro
  • How To Shoot Your M16/AR-15 In Training And Combat

Filed Under: Uncategorized

  • « Go to Previous Page
  • Page 1
  • Interim pages omitted …
  • Page 27
  • Page 28
  • Page 29
  • Page 30
  • Page 31
  • Interim pages omitted …
  • Page 33
  • Go to Next Page »

Primary Sidebar

About the author

M.D. Creekmore is the author of five books on preparedness and self-reliance, and the creator of The View From Appalachia YouTube channel. Read more→

Appalachian Freedom Files ⬇️

Appalachian Freedom Files
Hundreds of preparedness and self-reliance resources on a USB drive for offline access.

Subscribe to Blog via Email

Enter your email address to subscribe to this blog and receive notifications of new posts by email.

Join 7,043 other subscribers

Footer

Recent Posts

  • WHAT THEY SAY VS. WHAT THEY LEAVE OUT
  • Have We Lost the Right to Be Left Alone?
  • Are You Still Here?
  • You Have Less Time Than You Think
  • This Is Happening Right Under Our Noses

Start Here

    • About M.D.
    • Freedom Files
    • Books
    • YouTube
    • Newsletter


Follow me elsewhere

  • Amazon
  • Facebook
  • Instagram
  • Twitter
  • YouTube

© 2008–2026 M.D. Creekmore · As an Amazon Associate, I earn from qualifying purchases.