• Skip to main content
  • Skip to secondary navigation
  • Skip to primary sidebar
  • Skip to footer

M.D. CREEKMORE

  • Blog
  • Books
  • Newsletter
  • Gear I Use
  • About
  • Contact
  • Facebook
  • YouTube
  • Blog
  • Books
  • Newsletter
  • Gear I Use
  • About
  • Contact
  • Privacy Policy
You are here: Home / 2018 / Archives for October 2018

Archives for October 2018

Can I Use an Emergency Space Blanket for Camping?

October 9, 2018 Jesse Mathewson

emergency blanket for camping
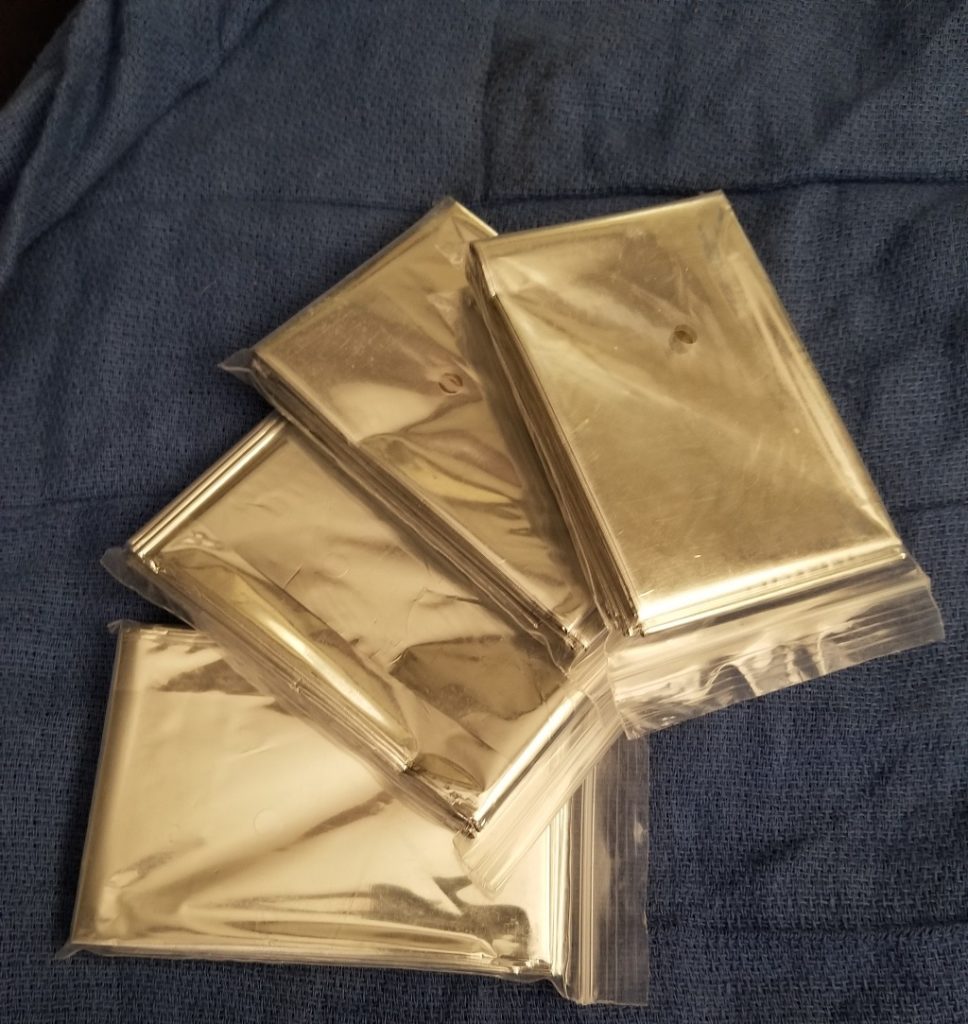
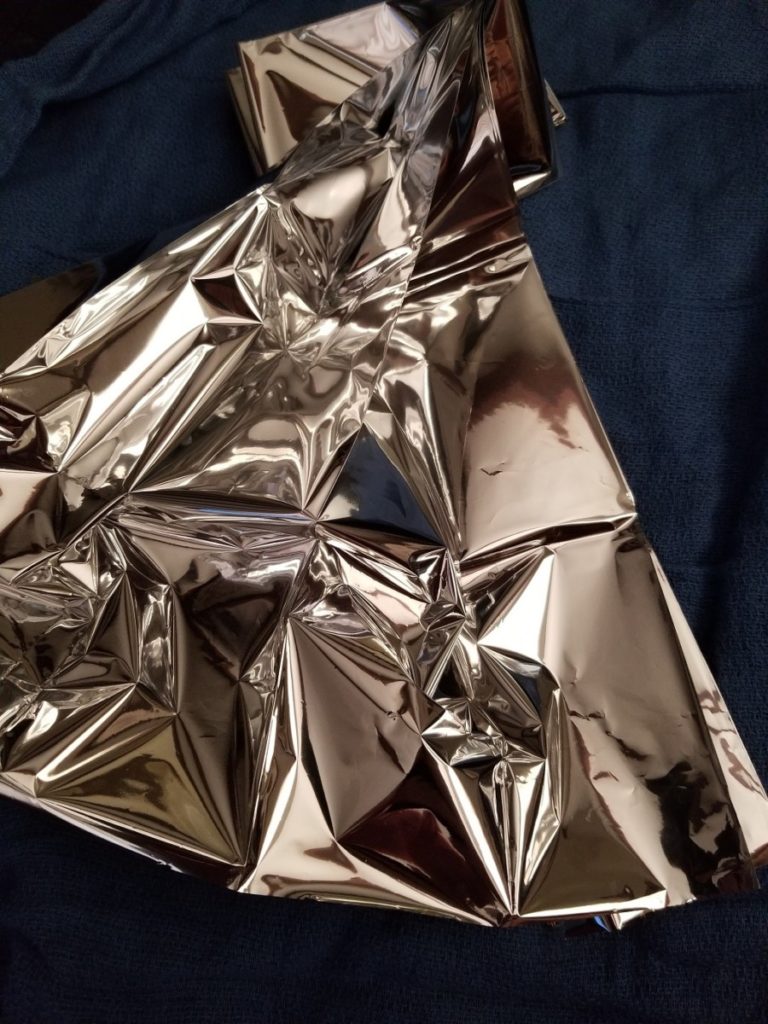
Invented in 1964 for the space program, and used to keep Skylab from overheating these are an amazing invention. Consisting of thin sheets of plastic coated with vaporized aluminum, this was done to ensure extremely low weight with a high net benefit/ reflective nature.

They are basically the same width as a human hair. Average weight between 0.5 and 5 ounces, they are truly indispensable.

So why review a space blanket? There are hundreds of manufactures of space blankets, why review any of them? It is an essential item of note that space blankets CANNOT create heat they merely reflect it, as well as light and even air depending on use.

Even with something so seemingly inconsequential as a space blanket understanding what they are, how they can be used and how they should be used is essential to understanding that you can indeed get space blankets that are really not a good quality. So what can space blankets be used for? This is the fun part, the easy part, and the essential knowledge part!

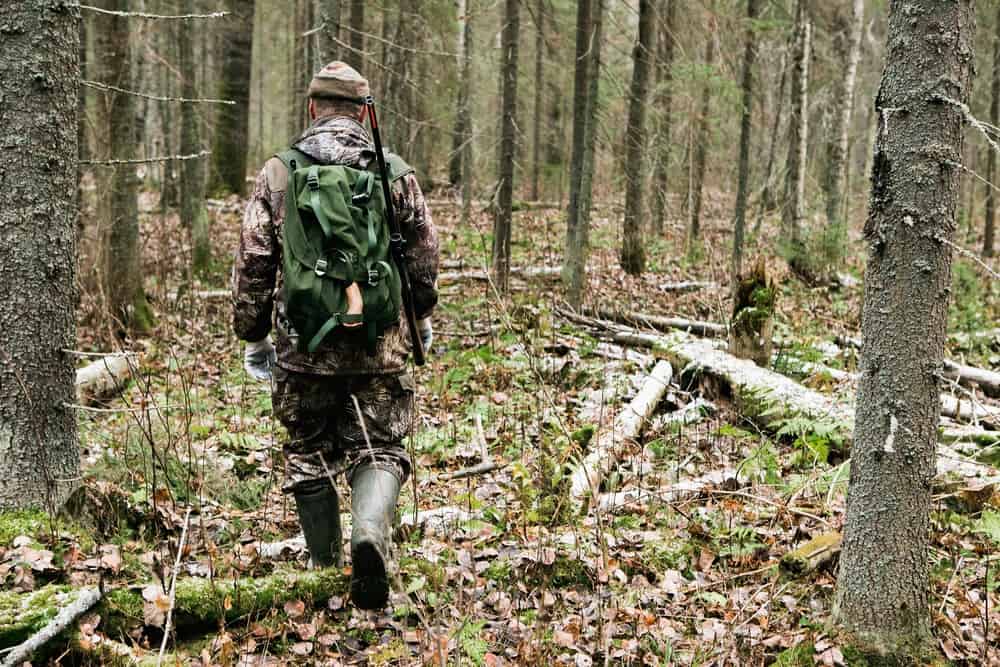
  1. Blanket to protect against the elements – carry a minimum of one per EACH member of the house and at least 2 extras in every vehicle and a minimum of two for each bag.
  2. Shelter/Shade – this is where the extra blankets come in handy, at a cost ranging between 0.23 and $6 apiece they like tourniquets are not something to scrimp on as far as amounts go, I suggest a minimum of two per bag and two spares in every vehicle kit (on top of one per family member) personally I purchase them by the case and have 3-4 per person in every kit!
  3. Fire Reflector – certainly some of us “can build a fire using two sticks and dead wood – shoot we don’t even need a knife!” however, the reality is much more difficult than the fantasy life we wish we lived. Using one of these to reflect a fire’s light and heat into the shelter (built out of another one) so that the blankets (also space blankets) will keep us from freezing or dying of exposure is both simple, inexpensive and DOES NOT use up valuable energy stores putting together!
  4. Water Purification by way of a solar still, exceedingly easy and fun to build this approach to water purification can work very well and provide much-needed water with overall weight being far less than bringing even a Sawyer Mini Filter with us. (And I always have one of those!)
  5. Solar Energy – expand your solar panels ability by reflecting more light into it!
  6. Solar Cooking – using a framework similar to the fire reflector you can harness the suns energy and warm or heat water allowing for some cooking, and believe me, a warm meal when things are down makes a HUGE difference!

There are many different uses that you can figure out as you go. I firmly suggest purchasing and using Shemaghs for head wraps, neck wraps and more. Instead of using a reflective space blanket use a shemagh for things like carrying additional items, hammocks, and wraps on the body.

emergency blanket for camping

However, this is up too you and I am certain you can find others uses for these amazing tools, though I would be quite careful with carrying or wrapping and tying things with space blankets simply because they are NOT designed for this type of thing and will break rather easily when used in this manner.

Over the years I have used multiple brand name space blankets and can honestly say that silver, gold expensive or not there is really not a huge difference in them. In fact these days most of them are manufactured in China and or manufactured using the same base components that are being made in China.

Unlike two decades ago, made in China does not hold the same stigma it once did. I am certain some of you may remember Nissan, Datsun, Honda, and Toyota in their initiation into the United States car market. T

hey went through the initial “not made in America” and quality issue problems, however, this has since been rectified and these days Toyota, Honda and even Nissan are made in the United States and far superior in most ways to “made in Mexico/ GM products”.

The reality is simple, production costs far less thanks to a lack of unions and entitled millennials in China and other manufacturing centers. Technologically China, Korea, and Japan have either surpassed or are equal to us in many areas. With the advent of global business linked through the internet, it is simply more cost-efficient to produce outside of the United States these days.

Someday we may see a return to American made and proud of it, however, even with firearms people are quickly learning made in America really isn’t the same anymore. To be competitive American companies cut corners instead of lower wages, this leads to bad products in many sectors from Automotive through Camping supplies.

Space Blankets are themselves a product that can be and is made outside of the United States and is made quite well. I suggest this 10 pack of Mylar Space Blankets cost averages out too $7 shipped, and I have never had any issues with them.

In fact, the pictures show these blankets being used and I have even reused them on several occasions for up too 4 days each, though you should understand this is not always possible, it does not take much to puncture a space blanket!

If you want to use the gold colored ones you will spend a bit more, and honestly will not get a larger return in value, this again comes from direct experience. However, the choice is yours, for myself saving a few bucks on things that have a definite use limit and or shelf life is smart prepping. You can do that with these and NOT sacrifice quality in any way.

emergency blanket for camping

Swiss Safe is a name brand blanket that costs several dollars more per blanket, however, they are green with a gold one included. $18 for 4 blankets, if you so desire these instead. The advertised thickness is 12-mils with the Swiss Safe blankets and the others are maybe 10 mils at most, honestly, this is not a huge deal as thickness is ONLY a pricing thing when you get into mils with space blankets, there is no significant difference in strength or overall usefulness.

Additionally, they crinkle quite loudly when you are taking them out regardless brand, sound carries much further than a reflection on a snowy, cold day!

So what uses do you have for a space blanket? Have you used one, or two? Do you use one as a ground cover and another as a blanket? How do you use them?

Thanks for reading and as always please let me know if you have anything you would like to review or see a review on!

Free the mind and the body will follow…

Filed Under: Bushcraft

How Much Food Should a Prepper Have?

October 8, 2018 M.D. Creekmore

How Much Food Should a Prepper Have?by SW

A prepper should have at least a three month supply of food in storage at all times. Keep in mind that a three-month food supply is a bare minimum, with a years supply or more being ideal. When striving for a years supply it’s best to build your food supply in smaller increments of one month at a time to avoid making mistakes and feeling overwhelmed.  

Here’s the deal

We all come to this journey our own way. For me, I started in gardening, then moved into homesteading, and on one of the homesteading sites, I got introduced into prepping. I will be the first to tell you that I’m not a prepper. I consider myself more of a homesteader with prepper tendencies. As such…, this article will probably reflect some of those thought processes.

When I started down this road I kept looking for blog posts or videos that would tell me I need to store XXX number of whatever item. No matter how hard I looked I could never find what I was actually looking for. Then it finally dawned on me. I’m looking for the answer in the wrong place and the wrong form.

If you have spent (or will spend) anytime on prepper/survivalist type websites you will see a phrase that comes up time and time again and that’s to store what you eat, and eat what you store!

I don’t know who coined the phrase but it is exactly true. Let’s, however, take it to the next level. Not only should you only store what you eat – but you should also only store what you use.

Don’t buy something just because it’s on sale… especially if you know you will never use it. Most things have to be rotated to maintain their freshness, or usefulness (like batteries). If you’re not using it, then it’s kinda hard to rotate it.

I could tell you that you need to store 600 pounds of rice, but I wouldn’t be doing you any good in saying that. So instead I’d like to use this article to help you figure out what you need to store and how much for your situation. Maybe you don’t like rice… so storing 600 pounds would be a waste.

What’s the bottom line?

I will say this… this article is not going to be the magic bullet all by itself. You will have to put in the work but I can promise you, it will be time well spent for your future peace of mind. I am also going to use this article to teach you how to figure out what you need for a years supply.

Let’s go back to the 600 pounds of rice. Do you like rice? Do you know how much rice you normally eat? Do you know how much rice it takes to make a serving? To further this rice discussion I’ll use myself and what I have found that works for me.

I have decided that for me a serving is a ¾ cup of rice and I can fit 5 servings inside a quart mason jar. There are about 2 1/2 cups of rice in a one pound bag. That would give me around 3.33 servings per 1 pound bag. Now.. I have a baseline to work from.

Let’s assume that if and/or when the SHTF you don’t really want to upset your culinary applecart. You want to hopefully have that aspect of your life somewhat intact. Currently, you eat rice three times a week. With that in mind, you’d need three servings a week (or one pound of rice). To continue that menu for a full year, you’d need 52 pounds of rice put back.

Granted.. this will give you a little extra because you can actually get 3.33 servings out of a pound of rice. Now that 52 pounds are just for one person. If you have a family of 4 then you’d need to store 208 pounds of rice to maintain your three meals a week routine.

I’d also be willing to wager that you don’t particularly like just plain rice. Me personally… I like to dress mine up with either chicken, beef, or ham. So with that in mind… I’d need 52-pint jars of each of those to go with my rice for the meal.

A pint jar can hold about a pound of meat. I can say this… with ¾ cup of rice and a pound of chicken, you could actually feed two people… they won’t be busting at the seams full, but they won’t be hungry anymore.

My best advice would be to make the meal and see how you and your family do on that ration. What about spices and salt? You need to figure out what you like and then how much you use per recipe.

Using the 3 meals of rice per week, we have figured out that we need 52 pounds of rice, 52 jars of chicken, 52 jars of beef, and 52 jars of ham. This will feed 1-2 people each day for that meal. What are you going to eat the other 4 days of the week, or the other meal or two in the day?

Look

What I am trying to show you is how to figure out what you need to store by making a menu of what you like to eat and that is easily stored. When I say easily stored, I don’t mean just rice and beans. There is very little that can’t be canned or dehydrated for easy storage.

Have you thought about canning up your own meals? It could either be a dehydrated meal in a jar, or something fresh like chili, soup, or something else. Just think… If there are only a couple of people you’re trying to feed, a quart jar of chili would fit the bill for a meal. If you’re doing chili one day a week, then 52 quarts of chili would last you a year.

The key is to figure out a menu that you can live with, and then figure out what it will take to create that menu for a year (or whatever time frame you decide on). Now that you have a menu, you have your goals for what you need to store, and you can work towards those goals. There is nothing that says you have to eat rice and beans the whole time.

Maybe you want to mix it up and have a two-week revolving menu. Basically, have something different every day for two weeks then start over again. The choice is yours and is up to you and your family on what you like to eat.

One of the websites I visited took the revolving menu to a new level. Instead of just staying with those 14 meals they had theirs set up for a 10 or 12 meal menu. Once or twice a week they had an open day to try new recipes. Sometimes it was completely new, and sometimes it was utilizing their stockpiles in a new way to create something different.

Those extra days will give you a chance to experiment and not become bored with the menu. If you trying new things with your stockpiles then you’re never really off course. That extra day also added some spice to the weekly meals.

Maybe in a SHTF scenario, you can’t have lamb chops or whatever else you really like, but why not indulge in them while you can.

As I mentioned above… another reason for creating a menu is to see what you need to have in your food preps. How many meals use salt? Do you know how much salt it will take to create just one meal for a year? What about using salt after the meal is cooked?

By having your recipes printed out and placed in a binder, not only will you be helping yourself, but you’ll be helping others that may be going thru the situation with you. With those recipes printed out (even if it’s something you came up with in your head) you will be able to sit down and calculate just how much of a single ingredient you need to prepare that meal for a year, or whatever time frame you’re shooting for.

It would also help someone else prepare the meal if you happen to be injured or engaged in another task when it came time to cook the meal. With the recipe printed out then no matter who cooks it, it will come out somewhat the same (providing they don’t burn it). This will most likely help with the overall morale of the folks in your group. It will be one less thing that changes when everything else around them is going to crap.

Now you can see why I stated at the beginning of the article that “this article is not going to be the magic bullet all by itself … you will have to put in the work but I can promise you it will be time well spent for your future peace of mind.” Hopefully, this will give you some idea on how to figure out what you need to store for your food preps. Each and everyone is different. What I store you may not like and vice versa.

It gets better

Let’s move from food to other home goods that we use. When I started doing this.. it was an eye-opener to me.

Do you actually know how long your bar of soap lasts? What about that stick of deodorant? How about that tube of toothpaste? Or that roll of toilet paper? Have you thought about how long it takes your cat or dog to go thru a bag of food? What about kitty litter, or flea collars?

All of these things will dictate how much you need to store. When I started trying to store extra of the things mentioned above I used a baseline of one item per month (not including the TP). Then I actually started tracking my usage and found some things that were off. Some for the good… some for the bad.

Here are some of the things that I found when I started tracking my usage. Of course, this is just a baseline for you because your mileage may vary.

Let’s start with our loveable pets first. I had figured I could manage a month on a 50-pound bag of food. I was wrong! I actually went thru that bag in about 25 days. That info is nice to have because now I know I don’t have as much stored up as I thought. As for my kitty… she’s still going strong on a 6.3-pound bag of food. It’s been a month and nine days and she might have about a week’s worth left. So I can figure about a month and a half on her food.

As for a bar of soap… that all depends on the variety of soap you use. I have found that a bar of Dove lasts longer than Irish Spring or Lever 2000. I can get around a month and a half out of a bar of Dove and IMO is a better soap than the other two.

My remaining Irish Spring & Lever 2000 will be set aside for barter if the need arises. I’ll fill up my stores with Dove. Keep in mind, if you have more than one person using that bar you’ll have to divide the time down according to the number of folks using it, or you could take the easy way out and say a bar of Dove per person per month.

Just like the soap… the size of your deodorant plays a factor in how long it will last. When I initially started, I made the assumption that a stick would last a month. Well… I was right, and I was wrong. If I am using the 2.7 oz stick of Degree I can make it just barely over a month. However, if I am using a 2.6 oz stick of Sure…

I am a little under a month. This just goes to show you that you really need to figure out how long whatever you use lasts. If I would have stayed with the assumption that 12 sticks of Sure would have lasted me a year then at some point before that year was up I’d be a little stinky.

While I currently don’t know how long a tube of toothpaste or shampoo will last, it won’t be long and I’ll be tracking them due to opening up a new one.

Put this thought process towards everything you use on a daily or weekly basis. Do you plan on washing dishes? How long does your bottle of dish soap last? What about that box of laundry detergent? How long does a bottle of toilet bowl cleaner last? Why am I harping on cleanliness?

Let’s think about this for a moment. There is a myriad of reasons we prep. Like most of us… I’m not concerned about just one event… I am thinking about multiples that could happen. IMO the most likely is a financial collapse which will eventually lead to a societal collapse.

Both of which will end up with martial law and a possible second civil war. In either case… uncleanliness leads to disease and sickness and we really don’t want to face that possibility when it might be hard or impossible to get to medical care.

If the S really does HTF then we will have enough to worry about. Why not plan for ways to help keep yourself from getting sick in the first place? An infected cut could be very dangerous when there is no medical care available. You are storing basic medical supplies, aren’t you?

At some point during this journey, your preps will grow to the point that you may not remember how much of a particular item you have compared to your goal for that item. This is where an inventory plan will come in handy. This is something I have been working on and I think I have it finally figured out. I utilize two different types of inventory methods.

To start off with… let’s assume that you have decided you need 96 cans of corn for your yearly meal plan. Considering that you should already be rotating your stockpiles, how do you keep track of the cans that are on the shelf without having to physically take the time to count each and every one… every time you do an inventory?

The simplest way I learned was from another site (I can’t take credit for this one). Take a piece of graph paper and make a column on the left-hand side.

Make it wide enough so you can list your supplies. Then for each and every can you have in stock make a “/” mark in the graph squares. You’ll want to leave several lines between the various suppliers. Then once you remove a can from the shelf converts the “/” on the far left to a “X”. Whenever you add to your supplies just add more “/” on down the line.

Now you can see at a glance (by a quick count of the “/”) how many of a particular item you have on hand. If you’ll keep these inventory forms hanging from a clipboard in your pantry or storeroom it won’t take long at all to keep it up to date.

If you’re storing home canned goods or vacuum-sealed jars, you really should check the seals once a month. I have had some jars that were sealed with oxygen absorbers lose their seal after a while. Thankfully I was able to catch them pretty quick and properly vacuum seal them with the food saver and jar attachment (these were done before I got that wonderful device).

As such I am physically pressing down on every lid, and I can count every jar of a particular item at that time. If I didn’t want to keep a running total on the graph paper I could always update the sheet once a month. You just have to figure out what works best for you and your situation.

The other inventory method I use is a custom sheet I made up in my spreadsheet program. It is used for those items that I don’t want (or it would be impossible) to track each and every item using the graph paper method. This sheet is still a work in progress, but I’ll give you basics behind it. Maybe you can give me ideas to finish it out and make it better.

The column on the left that has the item I am tracking, and along the top, I have the month and year as a header for each additional column. Then each month I just write down the quantity of the item on the left in the appropriate month/year column. So far I am using this type of inventory form for my ammo/reloading supplies. Can you imagine using the graph paper method to track each and every bullet in 3 bricks of 22LR. You’d be marking hash marks for a very long time.

This sheet works out pretty well, but I am trying to come up with a way to improve it. In any given month I may purchase more ammo, shoot some ammo, or reload some ammo. Or all of the above.

As of current… this takes another sheet to keep track of the amounts on hand in order to accurately update the main inventory form. I would love to figure out a way to merge the two. As it stands… my main inventory form will allow me to keep track of 10 months worth of numbers on a single page.

If I was just counting cans of stuff, or rolls of toilet paper this sheet would be great for a monthly inventory sheet. But when you’re counting loose rounds it’s best to only do a major count once they have a form to add and subtract as needed each month.

I have found that these two methods of inventorying my supplies work best for me (until of course, I find a better way LOL). They are easy to keep up with and for the most part, you can tell at a glance how much of an item you have on hand. I know that there will be some that say… I don’t need inventory forms, I have a good memory. All I can say is… must be nice. Seriously though. Think about this.

Let’s say you have five different calibers of weapons and your initial goal is 500 rounds for each weapon. You’ve got 320 rounds for your AR, 525 rounds for your 12ga, 480 rounds for your 45, 1575 rounds for your 22LR, and 489 rounds for your 30-06 thanks to a recent target practice round. Having the inventory forms would make it easy for you to see just how many boxes of what caliber you need to buy (with the funds available) to work your way back up to your goals.

There will be no guessing and your money will be best spent where it is needed. Maybe your ’06 is close enough and you’d rather spend your funds to help bring up the numbers for your AR? With the inventory form, you can make an informed decision about your purchases.

The same goes for any other item that you’re tracking. Let’s go back to some of what we have discussed so far in this article. I know I want to have a years supply on hand, so on the inventory form in the supplies column, I’ll have something that looks like this.

  • Deodorant (14 sticks)
  • Dove Soap (8 bars)
  • Dog Food (15 sacks)

You get the idea… so now when it comes time to make out my shopping list I can use my inventory form (instead of physically going and counting my supplies each time I want to go shopping) to help create my list. I can see from the “/” marks that I’m 2 bars shy of my goal for soap, or I’m actually over on the amount of deodorant I need thanks to a recent sale and extra being purchased last time.

With time… Inventorying your supplies will make your life and shopping list easier. There will be no more guesswork and spending money on things that you really didn’t need to complete your goals.

I know I’m getting long winded so I’ll try to cover this next section quickly. The last thing that I feel is crucial to how much you need to store is your resupply plan. I don’t mean to step on any toes, but with this next statement… I fear there is no way around it. Most preppers won’t survive a long-term event. Now quit hollering at the computer monitor… I can’t hear you.

Before you break out the rope to string me up… hear me out. From a lot of the video’s I have watched on YouTube and some of the websites I have visited, most think that if they have cases upon cases of whatever they will be good to go. Their plan is to ride out the event and then restock once it’s over. For most things… that’s a pretty good plan, and you’ll be better off than 90% of the population.

But what if the event turns out to be like Syria? Their civil war has been going on for over two and a half years now and there really doesn’t seem to be an end in sight. Your cases upon cases will only last for so long, and if we are in the middle of a civil war then do you really think you’ll be able to get more cases from your favorite freeze-dried or dehydrated food supplier?

IF this country ends up going to war with itself then there is no doubt in my mind that it will be a long drawn out ordeal. The feds aren’t gonna give up power easily, just like the Syrian govt isn’t giving up easily.

Besides… isn’t that what prepping is all about. Trying to prepare for the worst. Aside from nukes on our own soil or an EMP that puts us back in the stone age… the worst thing I can fathom is a civil war. It will ugly and drawn out.

Thus you need to have a resupply plan. I have had folks tell me… I have several seed vaults, and I’ll just plant a garden when the SHTF. Well… I hope you like being hungry! There is a definite learning curve to gardening successfully, especially if that gardening successfully entails having to completely feed you and your family. Yes, there are some that have a green thumb, but for the majority of us, it is a learned skill… just like anything else.

This is why I consider myself a homesteader with prepper tendencies. My main goals in life are not to amass cases upon cases of whatever product. My main goal is to become self-sufficient so I don’t have to rely on products from other locations to survive. Some will say… I live in the great white north, or in a subdivision so I can’t homestead. Horse hockey!

I’ll give you the knowledge you need to start your research and prove that you CAN do it.

For those that just have a small backyard and think they can’t make a difference in their self-sufficiency, I’d like you to do a little research on the Dervaes family in California. They have a 1/10 acres lot and they produce 7,000 pounds of organic produce annually (as of 2010). Some of the ways they achieve this is thru succession planting and square foot gardening.

They also utilize vertical gardening to reach the lot’s full potential. Here is a short 15 min video on YouTube showing their urban homestead. It’s an inspirational video and worth your time.

For those that live in the great white north that think they can’t raise a garden that will provide food all year long. I’ve got news for you… You can. Eliot Coleman lives up in Vermont and raises food year round in his gardens.

He is the pioneer of the Four Season garden and you can find his book Four-Season Harvest: Organic Vegetables from Your Home Garden All Year Long on Amazon (click here to check availability and current price). It is chocked full of good, practical information to help you become more self-sufficient by raising your own garden produce… even in the dead of winter.

Guess what I am trying to say is this. Formulate a resupply plan and then stock up in bulk on those things you can not grow or produce yourself. That will save you space and money, plus ensure that you have food when you really need it.

Even if you’re not able to completely feed yourself or your family on what you can grow… every little bit helps. If you’ll start gardening now or raising chickens & rabbits, you might be surprised at how much you can grow when the time comes.

One last thing to think about… and then I’ll hush. IF it goes south… here are a couple items you may have not thought about stocking up on.

Hiking boots & leather gloves. Considering the Syrian civil war is moving towards 3 years… I’d have at least 3 pairs in reserve. If you are staying home to either protect the fort or out doing manual labor trying to provide for your family then you’re gonna go thru some footwear.

You don’t want to be without when you really need them. If you’re not used to manual labor… gloves can save your hands. After 15 minutes of hoeing my corn this spring I had blisters, so they are worth the investment.

Ziploc bags. If you have a plan to share with others in need… you need to have a supply of Ziploc bags on hand. You don’t want to hand them a Mylar bag of goodies. This just screams.. I have a stockpile. Instead, have them wait outside and transfer the goodies into a Ziploc bag that way it looks like your sharing what little bit you do have.

Blank paper. Paper can be used for all sorts of things… but have you thought about using it as a safety signal. Let’s say half your group goes out to hunt or patrol. The half left at home is faced with a fight or flee situation and they decide it’s safer to flee and regroup to take the house back.

On your way out… grab a piece of paper and wad it up and throw on the ground. Then the returning party can scope out all entrances to the house upon returning. If they see paper then they know to meet at a predetermined area. This way they are not walking into a bad situation. If the raiding party picks up the paper they are most likely to toss it back down because there will be nothing on it to interest them.

In closing… I hope that I have given you some things to think about when it comes to figuring out what and how much you need to store. If you’ve got any tips on figuring out what & how much to store, or how you track your inventory… then please share down in the comments below. Thanks for taking the time to read my long-winded ramblings.

Authors Edit

I had written this then decided to mull it over for a couple of days to see if there was anything I wanted to add or change. During that time I came up with a new way to inventory my ammo and reloading supplies. I have included a graphic so maybe it will help others.

Instead of being able to log 10 months worth of data, I am able to log 6 months, but I get everything on one page. I used the numbers and calibers from this article for the graphic. (you didn’t think I’d actually show you what I have do ya?)

Article-Graphic

Resources:

  • Food Checklist – What Foods Should A Prepper Store?
  • 21 Point Prepper’s Checklist For Stocking Up at Walmart

Filed Under: Prepping

How to Make Trees Grow Faster [and healthier]

October 8, 2018 M.D. Creekmore

The Grandma White Method – From “The Complete Book of Composting” Copyright 1960 by J. I. Rodale

how-to-grow-trees-fast
Fruit trees will get off to the best start if fed a steady diet of compost. Humus is important if trees are to be productive, disease-free and fast-growing. Use your compost as a mulch as well as a steady source of nutrients to your growing trees.

Using Compost For Tree Growth

Start right from the very beginning. Use compost to start and nourish your tree. We cannot recommend commercial, chemical fertilizers which do not add humus to the soil. You must add organic matter to the soil if you want productive, disease-free trees. Soil that is well supplied with humus retains moisture and has good drainage and aeration.

As humus decomposes, it releases a continuous supply of plant food in contrast to the “flash” action produced by chemical fertilizers. It encourages the existence of beneficial bacteria and earthworms. It fights erosion and over-compactness of the soil.

Every tree grower must have a compost pile. Use your compost as a mulch around each tree. Your trees need nitrogen, phosphorus and potash and your compost pile should contain these nutrients in good proportion.

When organic expert Herbert Clarence White of Paradise, California, plants a tree, he doesn’t even glance at the little instruction sheet that the nursery sent with the stock. He proceeds to plant the tree using an unusual method handed down to him by his grandmother years ago.

Grandma White’s method has worked so well for Herbert over the years that he has used it to plant hundreds—possibly even thousands—of trees. He has seen fruit trees planted by Grandma White’s method show 3 or 4 feet of new growth in a year, and start bearing crops in only a couple of seasons.

You start out by digging a hole 3 feet wide and 3 feet deep in which to plant your young tree. That size hole is much bigger than is usually recommended, but a big hole is the heart of Herbert’s method and he insists on it.

Separate the topsoil from the subsoil that is dug from the planting hole. In the bottom of the hole place, a couple of pieces of 4-inch drain tile and plug up the ends with stones. Fill up the bottom foot of the hole with a mixture of equal parts of topsoil, peat moss and finished compost, plus about five pounds of phosphate rock or colloidal phosphate.

The top 12-inch layer—consisting of a mixture of compost, thoroughly soaked peat moss, leafmold, colloidal phosphate, and rich topsoil, is most important. This is the immediate “seedbed” where the tender young feeder roots will be working.

No raw manure or chemical fertilizer should ever contact this area. Such materials will seriously burn the roots, and perhaps even kill the tree outright. Even raw manure, used as a mulch at the top has often proved disastrous to newly planted trees. So go slow on the manure!

On top of that mixture place a layer of small rocks. The next one-foot layer consists of pure topsoil. Now put into the hole a large stone. Spread the roots of the tree over that stone, then fill the rest of the hole with the compost-topsoil-peat-phosphate-rock mixture.

As mulch over the planting, place one inch of compost, 3 inches of leaves, plus a layer of stones if desired. White also advises putting 250 to 500 earthworms in the top compost layer, and adds this postscript to the description of his method:

Does all this sound too weird and grotesque? Too utterly fantastic? If so, far be it from me to try and convince you. But if you are just a wee bit interested in watching a miracle, just try it out on one little tree—following the planting plan as indicated in the diagram carefully—and it will be hard for you to believe your own eyes when that baby tree starts growing.”

planting-trees-fast

Here is the “Grandma White” method for planting trees. Start out by digging a hole that is 3 feet wide and deep, separating topsoil from the subsoil. Place drain tile, stones at the bottom, filling the hole with topsoil, compost, peat moss, and mineral powders.

In treating a sick tree, or one which has failed year after year to produce a crop, use the same formula as used in planting a baby tree. In other words, make a “blend” or mixture consisting of ½ yard (12 bushels) topsoil; 2 bushels compost (completely decomposed); 2 bushels leaf mold (completely broken down); 20 pounds colloidal phosphate (or rock phosphate); and 20 pounds of rock potash.

The above formula will be sufficient for a young tree from 2 to 6 years of age that has shown little vitality and below average growth. This enriched earth will be used to fill the 20-inch holes that encircle the young tree. (Dig 8 holes, 8 inches in diameter and 20 inches deep, around the tree at the drip line.)

The next step in “treating” a sick tree is to level off the land around the trunk a little beyond the drip line of the branches and to build a sturdy dike just outside the ring of 20-inch holes. Ten pounds of each of the two above-mentioned minerals should then be spread from the trunk of the tree out to the rim of the basin and worked lightly into the soil with a rake.

One inch of compost and leaf mold (mixed) should then be added to the area within the basin and spread out evenly.

If domesticated earthworms are to be used in this “health-building” program, they should be spread over the compost (from 500 to 1,000) and covered with a 3-inch leaf mulch. A little cornmeal or coffee grounds spread on the compost before spreading the leaves would help to give the worms a good start in their new environment.

Filed Under: Homesteading

What Survival Skills Does A Prepper Need?

October 5, 2018 M.D. Creekmore

bushcraft skills for survival

Top 15 Essential Prepper Skills to Learn Now!

Any person who sets out to acquire a set of survival skills must start with a brutally honest self-assessment. If you don’t make a truthful appraisal of where you are in terms of your survival skills and knowledge, you have no reliable means of getting to where you want to be.

Do an inventory. In what areas are you most skilled? Where are you definitely lacking? Are you well versed in firearms but lack knowledge about water purification? Have you amassed an impressive food pantry but have no way to protect that food should the need arise?

Do you have a stocked first aid kit but don’t know how to use it? Just as a business that fails to take regular inventory cannot succeed, neither can a survivor who doesn’t tabulate his resources. You need a starting point, and today’s assignment is to take an inventory of your essential survival skills. As you read through the following list, check off those skills you have mastered so you can focus on those skills on which you need to improve.

1. Food processing

Many survival planners overlook food processing in favor of more exciting elements of preparedness. This is a mistake. Learning how to prepare basic survival foods is one of the most important elements of long-term disaster preparedness.

2. Bulk food storage

Without adequate quantities of stored foods, your demise is virtually guaranteed after a major catastrophe. Storing and rotating basic grains, beans, and other foodstuffs isn’t difficult; anyone can learn how to do it properly in an hour or two.

You will find everything you need to know here and here.

3. Emergency medical care

Every survivalist should have sufficient medical training. A good start is taking a basic cardiopulmonary resuscitation (CPR) and first aid class; check with your local Red Cross for scheduling. If time and finances allow, taking EMT classes is an excellent idea.

Don’t overlook herbal medicine, which may be all you will have to work with after a disaster.

Please read my article Prepper’s First Aid and Medical Checklist to find out about getting medical training, alternative medicine, kits, and even birth control methods.

4. Gardening

Because of space and finances, most of us cannot cache enough food to last the rest of our lives. We’ll need to replace our stored foods with fresh supplies.

Gardening is an excellent way to do this and can be easily learned with instruction and practice. It is amazing the amount of food that can be grown in a small space under proper conditions.

5. Preserving food

Food preservation is an important survival skill, as most fresh foods spoil fairly quickly, resulting in a loss of quality, edibility, and nutritional value. You should learn how to can, dry, freeze, cure (salt or sugar), smoke, pickle, bury, vacuum-pack, jelly, and/or pot food.

6. Hunting

Contrary to popular belief, all wild game will not disappear after a collapse, natural or manmade. Most people would rather stand in a food line waiting for a handout than scour the backwoods for wild game.

And let’s not forget that the extent of most people’s hunting skills doesn’t go beyond the latest hunting themed video game.

7. Trapping

Trapping is more practical under survival conditions than hunting. By setting a trap, you can be other places doing other things while the trap does the hunting for you. Learn to build and set snares, deadfalls, box traps, fish traps, and steel traps.

Becoming a proficient trapper is not difficult—all you need to do is get off the couch and learn by doing.

8. Firearms repair

Basic firearms repair (replacement of broken parts) isn’t difficult if you have the parts needed when something breaks. You don’t need to learn how to repair every make and model of firearm in existence. You do need to have an in-depth understanding of your firearms: how they work and how to maintain and repair them.

9. Self-defense skills

The most effective self-defense techniques are also the easiest to master. Striking vulnerable points, biting, and eye gouging are simple and effective techniques that can be learned quickly and, when applied with aggression and precision, can bring down the most determined attacker.

10. Firearms proficiency

If you’re new to firearms, a basic safety course is highly recommended before learning defensive skills. Concealed-carry permit classes are held in most areas, as are hunter education programs. I suggest you participate in both.

The National Rifle Association (NRA) offers a number of classes that are most helpful.

11. Water purification

Another simple skill often overlooked is water acquisition and purification.

12. Using tools

You should have a survival toolbox of basic tools, including hammers, saws, drills, screwdrivers, winches, vise grips, wire cutters, and files. Your toolbox should also include the skills needed to put these tools to good use.

13. Raising small livestock

Raising livestock for food goes hand-in-hand with gardening, hunting, and trapping to ensure sustenance during hard times. I highly recommend Barnyard in Your Backyard by Gail Damerow and Secret Livestock of Survival which covers everything you need to know about making livestock part of your survival food plan.

14. Home power

While it may be possible to survive with no electrical power at all, having some source of electrical current will make life much easier. My solar setup cost me under $600, including the batteries, and the price of building my homemade electrical generator amounted to just under $100.

15. Investing

After getting your survival necessities in order (e.g., food, water, medical supplies, shelter, defense), you need to start thinking about investing in barter goods, such as .22-caliber ammo, pocketknives, and “junk” silver coins. Just be sure not to make the mistake of going into debt while investing in these metals.

And don’t overlook learning how to barter – here is a list of the ten top barter items.

Check your skills (be honest!) against the list above. If there are areas in which you are lacking (and there will be if you’re being honest), then get to work filling in the gaps. What skills do you have now? What skills do you need to learn or build upon?

Filed Under: Prepping

Building A Mobile Solar Power Station

October 4, 2018 M.D. Creekmore

solar power stationby Dan W

One of the more important things we’ve wanted to include with our other prepping supplies is a communication system. Something beyond two cans and a string! Should a catastrophic event occur we don’t expect help in the form of government assistance will be readily available.

Besides, we are leery and don’t think we’d want that kind of help ……….. even if it was offered. At least not until things have shaken out a bit and we have a better feel for what is going on.

However, it will be important especially during the early phase of an event to be able to receive broadcasts (if there are any) to stay apprised of situations both near and far. Forewarned is forearmed!

We discussed just who it might be that we wanted to communicate with, why, and the type of equipment we’d need. There’s a big difference between active and passive communicating. Getting active on the airwaves right away using a radio transmitter did not seem to be a wise thing to do.

Better to stay quiet and attentive while things shake out. The time will come when communicating with those outside your immediate vicinity will not be as risky. Until you know what is going on, why broadcast your presence?

power station diagram

Maintaining communications with those in your tribe is important. If we had to leave our compound for any reason it would be beneficial to stay in close contact with those afield. Small handheld transceivers satisfy this need but eventually, we’d need to be able to actively communicate over greater distances.

A more powerful transceiver of some sort would be needed. We were torn between choosing a Shortwave or a CB Transceiver. These two devices each fill a different function in communications equipment: The Shortwave Transceiver is a long range device while a CB Transceiver is more suited to relatively short range communications.

power station diagram
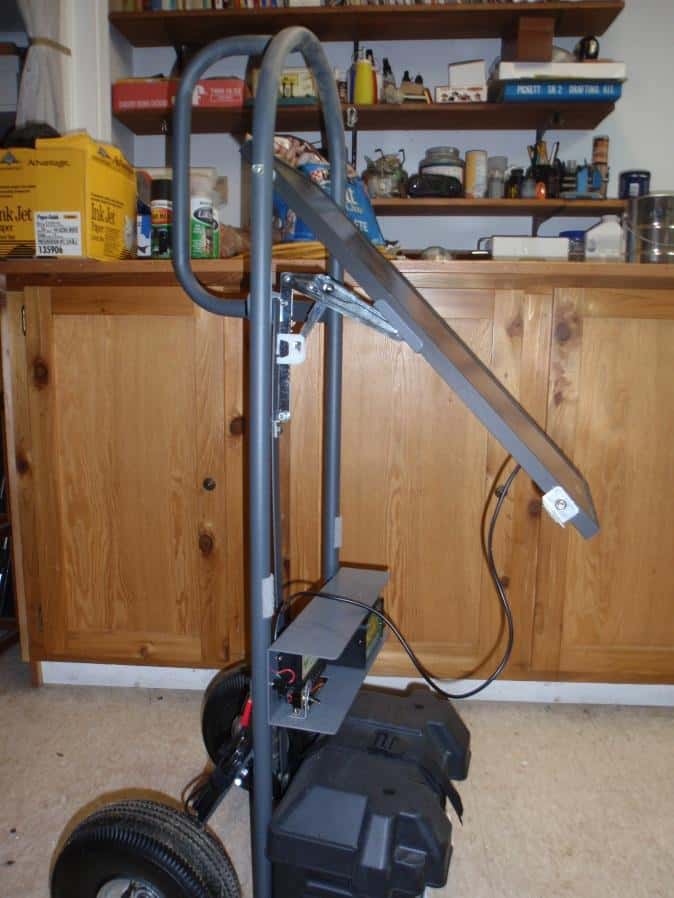
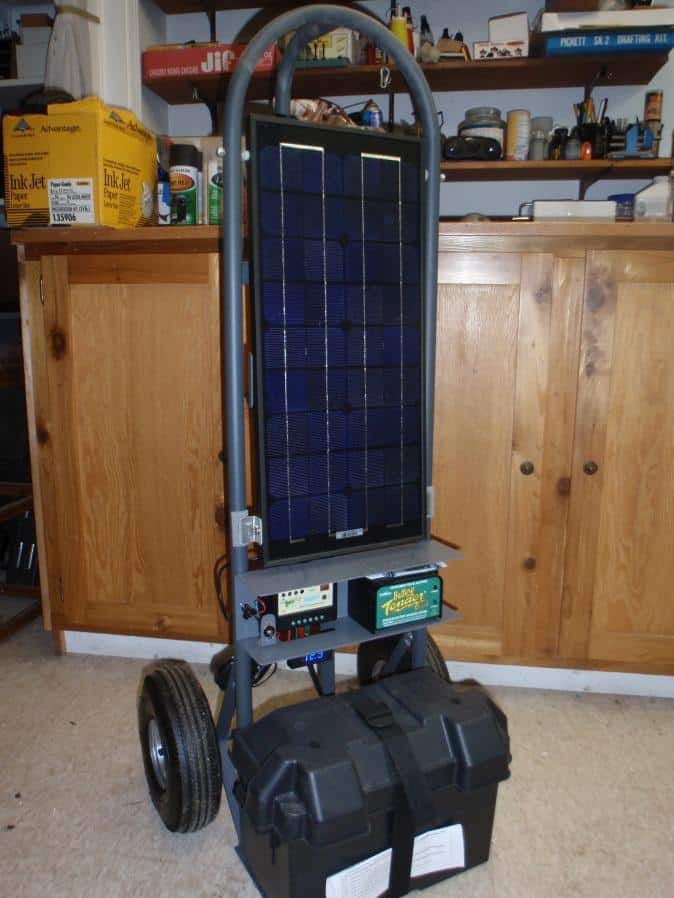
Setting up and using a shortwave system is more complex than using CB devices. There is a definite need for both types of devices in a complete communications system, but did we want to purchase and set up both types? Would only one type suit our needs?

After much discussion regarding the pros and cons of each, we decided to go with a CB Transceiver as our main unit. Our choice was based on our feelings that we really don’t need to actively communicate with anyone at long ranges (other than listening). To cover all bases we may still purchase a hand-held SW Transceiver at a later date.

We analyzed our needs to determine what devices we’d want to assemble for our communication station. Our “want” list quickly evolved into a “need” list. These are the generic items we settled on:

  • A professional quality CB Base Station combined with an excellent antenna system would allow us to reach out across our valley.
  • Handheld CB Units (x4) would amplify the flexibility of our base station and give us roving communications capability. We wanted units with rechargeable batteries and an adapter for an external antenna.
  • FRS (Family Radio Service) Band Transceivers (x4) for use around our property (short range).
  • A multi-band radio (AM/FM/Aircraft/SW + SSB) would be our ears to the outside. This would have to be high quality, high gain radio.
  • An emergency frequency scanner that could monitor police, fire & EMS, plus the Aircraft bands; further adding to our ability to monitor what is going on locally.
  • A small inexpensive multi-function AM/FM, CD, Cassette player for entertainment. A life without music is unthinkable, so I consider being able to listen to recorded music a crucial aspect of surviving.

These devices would compose our communication and entertainment system. We knew what equipment we wanted to use, but needed to address the issue of how they would be powered? What would it take to ensure we had enough self-generated electricity to meet the need? What other items did we have, or plan to get, that would also need power? It’s always a good plan to plan for more capacity than what you think you will need.

Mobile power station

The only other key items in our cache needing power (either directly or by charging its batteries) were: our Voice Alert Intruder Warning Station and sensors, several Night Vision scopes, the Marine Band transceiver on our boat, and a bunch of flashlights. Only the Voice Alert was added to our “needs power” list for the purpose of calculating total electrical load requirements.

I mentioned a Marine Band Transceiver in the previous paragraph. Let me digress for a moment to discuss where it might fit into the scheme of things. Since Marine Band frequencies are different from FRS, CB, and standard SW Band and since folks in a survival mode would likely be using those more common devices to communicate; using a marine band radio to connect with your friends provides a small measure of “secure communications”.

mobile solar power station

At least it would be somewhat more secure than other methods of communicating over the airwaves. People living in landlocked areas don’t tend to think about Marine Radios and would probably not be monitoring those frequencies. Back to the main topic.

Primary Considerations

Starting with the assumption that there would be no grid electricity or phone system operative, our communication devices would need to be powered by whatever electricity we could generate. We’ve got a large gasoline generator that will provide a lot of juice, enough to run our home if needed.

But even with rationing our supply of gasoline it will only last so long. Scrounging for more fuel during the first few months of chaos might prove to be unproductive, as well as a very risky chore.

Wind or water power is not an option where we live so that’s out of the equation. Solar power is an obvious choice. A bank of solar cells, charging a bank of batteries, powering an inverter to produce AC power, is feasible; but I have some reservations regarding this type of arrangement.

First is the number of solar cells required to produce adequate charging current and second is the number of batteries that would be needed.

Those two issues, plus our northern locale and the reduced daylight hours during the 6 months of our winter cycle (at Winter Solstice we have about 8 hours of daylight) made me reluctant to bite the bullet and put our funds into a large, complex solar power supply.

The ratio of expense versus return just didn’t seem to make a large solar-powered system worthwhile. I wanted a system with as few components as possible. The more components there are within any system, the greater the likelihood one will fail; thus rendering the system inoperative.

Considering all of my negative concerns, solar power still seemed to be the answer. I decided to compromise; I’d use solar power on a smaller scale to power our communications system. With a working solar power supply, we could then hold back on using our generator. This has a positive impact since the generator is noisy and would attract attention. A solar charger is silent.

System Design Criteria: I searched through commercial products to see what was available but couldn’t find anyone device that had the features I was looking for.

Nowhere was there a solar-powered, battery based, a multi-voltage power supply that would suit my wants and needs.

So, I decided to design my own. I wanted to follow the time-proven “KISS” philosophy of design ………….. Keep It Simple Stupid! The result is a system that is based on two main components: A Portable Solar Battery Charger and a Power Panel.

  • The Solar Charger needed to be portable so I could easily move it around the property to wherever the sunlight was strongest.
  • The Solar Charger would need to be able to recharge a slightly discharged Deep Cycle 12 vdc RV battery within 8 – 10 hours.
  • The portable Solar Charger should have an onboard 120vac-12vdc charger to provide one more way to charge a battery.
  • The battery used would need to have enough capacity to power the equipment for at least 12 hours out of a 24-hour cycle.
  • Two batteries would be used initially, although more can be added if desired.
  • Each day (of the use cycle) the batteries would be swapped. The freshly charged battery would come into the house to be connected to the power panel. It would replace the battery that had been used the previous day & night. The slightly discharged battery would then be rolled outside (on the Solar Charger) for recharging.
  • The Power Panel would be designed so as to provide easy access to facilitate battery and device connections.
  • The Power Panel would supply 12, 9, 6, 3, and 1.5 vdc as well as 120vac at amperage levels required by the devices (Radio, CB Station, etc.).
  • 120VAC would be supplied to the Power Panel by three sources: Normal Grid connection, Generator, and an onboard 12vdc to 120vac Inverter.
  • All of these DC voltages, plus the 120 VAC, would be readily accessible on the face of the Panel. A connection would be by the use of common connectors, alligator clips, terminal strips and the like.

The Portable Solar Charger and the Power Panel would comprise a very flexible electrical supply system. As long as we had grid power or were using our generator the Solar Charger and the Power Panel would remain in standby mode.

Electrical Sizing: Once I had decided on the general details for the charging station and power panel, I set about figuring which specific communication devices I wanted to purchase. This was necessary so that I would know what the estimated total power requirements were for each device.

That way I could ensure my system would be adequate for the load. As I said earlier, I wanted to be able to have a way to communicate via CB, be able to listen to what was being broadcast locally on emergency channels, receive worldwide broadcasts, and play CD’s or cassettes (yes I still have boxes of them).

After shopping around, I selected a CB base station by Galaxy, a world/all band receiver from Grundig, a Uniden300 Channel Broad Band Base Station Emergency Frequency Scanner, and a nice little Sony AM/FM/Cassette/CD Radio & Player. Another electrical device that would be connected to the Power Panel is our Voice Alert System base station.

I obtained the amperage requirement specifications for all of these devices. Both idle and operational mode values were figured into the equation. The total wattage needed would be my guide in choosing an appropriately sized battery as well as other assembly components.

The Voice Alert Perimeter Defense system (which would be on almost all of the time especially at night) draws less than a ½ amp/hour. If the CB Base Station is turned on it will draw less than ½ amp/hour in the Receive-Only mode, and less than 1 amp when transmitting.

The World Band Receiver uses less than ¾ amps/hour. The scanner uses less than ¾ amps and the Cassette/Cd player uses ½ amp/hour at a normal sound level. If the CB Transmitter or the Inverter was in use the current draw would be greater: meaning that the battery would need longer to recharge.

And of course, the louder the audio setting the more current these units will draw. If all of them were turned on at the same time the total current draw is still well within the arbitrary 5 amp limit.

After a search, I selected a Deep Cycle RV battery made by Interstate (SRM-27) that was rated to provide 12vdc @ 5 amps 19 hours. It would be a rare occurrence when all of these devices were in use at the same time so in all likelihood, the battery would actually be put to use for less than 12 hours a day.

This battery was perfect and would work well to satisfy my initial target value of 5 amps. The Interstate battery would work just fine!

Portable Solar Charger Design: Having settled on the major components, and the overall design of the portable solar charger and power panel, I began the actual layout design work. I settled on using a common hand truck purchased at a local retailer as the base on which to design the portable charger.

The hand truck was large enough to accommodate all of the components. It would work well as the batteries are heavy and unwieldy to carry around. An additional plus is that the entire charging station can be rolled into the house for security and to facilitate the battery exchange.

The Solar Power Charging Station is essentially a 20-watt solar panel connected to an SP Charge Controller. The solar panel is mounted on the hand truck so it can be pivoted at the top on a vertical plane. This allows it to be angled so as to best capture the rays of the sun, yet present a slim profile when not in use.

I added a special locking hinge that allows the angle to be easily set. The Solar Panel Battery Charge Controller moderates the output of the panel and keeps the battery from sulfating over time. A very small meter was added so I could monitor the voltage of the battery as an indicator of its charge level. T

o give added flexibility to the unit I added a small 120vac charging unit. A heavy plastic battery box is mounted on the foot of the dolly. Each of the electronic devices was mounted to the hand truck so as to be able to easily remove them. This was done so the individual components could be stored in my grounded Faraday Shield cabinet ………… just in case!

Power Panel Design

The Power Panel is simply a fixed panel that has a variety of quick connect terminals and cables that can be selected and connected with ease. It has two inputs: 12vdc (using battery clips) from the batteries currently in use) and 120vac (using a standard extension cord type connector plugged into a wall outlet). The 120vac is used when our generator is running and supplies 12vdc by powering a standard charger.

The 12vdc to 120 vac inverter is also mounted to the panel. I added a switch so I can choose between Generator/Grid 120vac or Inverter 120vac). The inverter I chose is a Power Bright PW1100. It will provide 1100 watts and draw roughly 9+ amps when used at its max capacity.

It is not a true sine wave inverter but then again I don’t need one. I do not foresee having to use the inverter all that much, but it’s nice to have it wired in and available if needed.

There are no indicator lamps as they just add to the load on the supply. The output connections are all switched and labeled to reduce confusion. I did add a 12vdc switched light (low current LED) to illuminate the panel and immediate surrounding area.

The best radios in the world are worthless unless connected to a good antenna. To complete my communications system I bought a Solarcon I-MAX 2000 24’ CB/HAM Base Station vertical antenna. I constructed a 40’ long-wire receive only antenna.

Both are mounted on the roof peak of my home and feed into my office. The roof peak is approximately 40’ high so the antennas are nicely elevated. These antennas extend the operating range of the CB and significantly improve the reception of any receiver.

to be on the safe side I also added a lightning arrestor. There are other antennas available but I believe that the ones I have chosen are a good compromise.

Details

Major components of my Solar Charger, Power Panel, and the Communication Devices:

•CB Radio, Galaxy DX-2547 AM/SSB CB Base Station
•Eaton (Grundig) 750 Satellite AM/FM Stereo/Shortwave/Aircraft band Radio
•Sony CFDS05 CD/Cassette/AM/FM Radio
•Uniden 800 MHZ 300 Channel Base or Mobile Scanner (BC355N)
•Cobra HHRoadTrip Hand Held CB Radio (x4)
•Maybe: Baofeng UV5RA Ham Two Way Radio 136-174/400-480 MHz Dual-Band Transceiver
•Instapark 20W High-Efficiency Mono-crystalline Solar Panel
•HQRP Solar Panel Controller 10 AMP @ 150 Watt
•Power Bright P-1100 12vdc-120vac Inverter
•Solarcon I-MAX 2000 24’ CB/HAM Base Station Antenna
•Battery Tender 021-0156 Battery Tender Plus 12V Battery Charger True Gel Cell Model (x2)
•Mini Blue Digital Panel Voltmeter 4.5 – 30v for 9, 12, and 24 vdc (x2)
•Adjustable Drafting Table Hardware, lift up ratchet support, sold By Rockler
•Wineguard DS-3000 “J” Pipe support for antennas (x2)
•Coaxial Lightning Antenna Surge Protector LP350
•Hand Truck with air-filled tires, $60 @ Home Depot
•Misc. screws, bolts, wire, coaxial cables, etc.
•Custom mounting plate for Charge Controller, etc.

As of this writing, the Portable Solar Charger has been completed and works as designed. A “maintenance level” charger is kept on both batteries to ensure they are always fully charged. Assembly of the Power Panel is in progress and I expect it to be completed in the near future.

Below you’ll find several photos on the Portable Solar Charger and a very basic schematic for the electrical connections. They should give you an idea of how I put it together. It’s not necessary to be an electrical engineer to assemble a system like this.

All of it is basically a “plug and go” type arrangement with common components readily available off the shelf. You too can put one together and tailor it to your own needs.

Define what you want to do, what type of devices it’ll take to do it, then make a parts & components list. Be sure all of the components you’re going to put together are compatible and will give you the power you need.

Almost everything I used is available online or at your local hardware store. I did have a local metal shop fabricate an aluminum square “C” shaped plate for mounting the SP Controller and small battery charger. The purpose of the “C” shape, beyond providing a mounting plate, is to shield those two components from the weather.

Filed Under: Power Generation

Hiluckey Solar Charger Review

October 4, 2018 Jesse Mathewson

solar charger review

Legally I have to tell you if I have received the product or any compensation for writing this review. As with the large majority of products I review, I have not received this product or any compensation. There may be affiliate links in the material that utilize Amazon as a platform. However, unlike other blogs, we follow the laws here, even if the laws are intrusive.

Additionally due to recent comments and emails received, I want to remind everyone that the vast majority of products on the market today are not made in one country alone.

When it comes to GPS, communications, national weather service radio, electronic reading devices and more having extra power and or the ability to charge using the sun is an essential prep. Over the years I have tested and used several different battery backup systems.

All of them have worked, but some have worked far better than others. The Hiluckey 10000mAh Solar Charger has worked very well. Sadly, Elon Musk does not have an easily affordable version yet!

This charger/ battery pack comes with extra features that are fun but ultimately not why I purchased the unit. For your benefit, the extra features are as follows, 2 LED flashlight diodes with 3 modes (Bright/ SOS/ strobe), small compass (it works though I wouldn’t rely on it), and a solid well made silicone rubber case that protects it from shocks and dust and splash damage.

The best features are the addition of a new generation solar panel for charging and a well made 10000mAh battery with an IC chip for easy battery evaluation and limiting to prevent overcharging and promote the best charging depending on the drain.

With indirect (cloudy days/winter) sunlight in Arizona, the unit charged from 25% all the way through 100% within 6 hrs. On a nice clear day with direct sunlight in early spring, it easily charged through 100% within 4 hrs. Again this was in Arizona, the important thing to recognize is that Arizona is at a nearly perfect latitude for the use of solar energy.

We have in fact one of the best overall climates for the use of solar year round with an average of 270 days a year of sun and easily over 175 days annually with full sun. This unit would work well in most areas across the United States and while it may take an extra day to recharge on just the sun alone in less sunny areas, its ability to hold a charge for over a month makes it an easy addition to my pack.

Its storage capacity maintains 100% for over 3 weeks and for myself did not drop below 4 lights for well over 4 weeks.

For the various natural disaster seasons across the United States I would suggest having one or more of these on standby, with a quick check and top off every month or so you should have the power you need when you need it.

solar charger review

For instance, if you live along the East Coast or on Islands across the Atlantic and or Pacific rim having additional chargers for your electronic needs can mean the difference in a Hurricane, Typhoon, or severe tropical storm.

For those of us in flood, fire or tornado areas having additional power for our small electronics could make it easier for help to get here. At an average of $22 apiece, these are worth every penny invested and will quickly repay the money spent after the first camping expedition you take with your children or grandchildren.

When it comes to batteries for GPS, modern cell phones, electronic books and many other small items the standard is between 1000 and 3000mAh in size. This means that the backup battery which weighs just slightly more than an Amazon Kindle Fire or the same as a modern cell phone or GPS unit will charge most of those units several times over before needing to be recharged itself.

It is my suggestion that you setup check-in times as standards for immediate and extended family members and friends; in the times between check-in and use simply power the units down to conserve energy. You will find that most modern batteries will easily hold their charge for up too 2 weeks when this approach is used.

So in review, what are the pros of the Hiluckey 10000mAh Solar Charger?

  1. 10000mAh battery size allows for multiple charging events for most modern small electronics.
  2. It is a small size in comparison to many other units for the ability it has, this makes it easy to store and efficient.
  3. The solar panel is a newer generation and works very well allowing for multiple options from plugging it in through using the sun when available.
  4. Solid construction with shock-resistant silicone armor and dust cover help keep it dust free and resistant to splash damage. (I put it in an industrial grade zip-lock bag for full water protection)
  5. Lights are very bright and work very well, strobe is a great setting and is the last click allowing an easy one-touch on approach.
  6. Compass works, while I do not rely on small compasses like this, having them and knowing how to use them really do benefit your kit.
  7. Pricing is reasonable for the quality of the product you are getting, $20-25 will get this shipped right to you. Two of them are less or the same as most other units being currently advertised with similar attributes.

At this time I have not found any real cons to owning this unit. I understand that many of you probably have similar setups, I would suggest that the added benefit of a working solar panel and modern IC chip for better control makes it an invaluable addition. As with all my reviews, it is important to remember that my goal is not to sell it but rather just show you if it works or does not.

Free the mind and the body will follow

Filed Under: Gear Reviews, Power Generation

  • « Go to Previous Page
  • Page 1
  • Interim pages omitted …
  • Page 3
  • Page 4
  • Page 5
  • Page 6
  • Go to Next Page »

Primary Sidebar

Subscribe to Blog via Email

Enter your email address to subscribe to this blog and receive notifications of new posts by email.

Join 7,202 other subscribers
  • Amazon
  • Facebook
  • Substack
  • Twitter
  • YouTube

“Do more with less.”

– Minimalist proverb

Recent Posts

  • Just so you know
  • Weather Update for My Corner of Appalachia
  • Why I’m Ordering Ivermectin + Mebendazole Every Year
  • The Website’s Shutting Down (But Here’s the Plan)
  • You Are Hated! Start Training Like It!

Footer

Recent Posts

  • Just so you know
  • Weather Update for My Corner of Appalachia
  • Why I’m Ordering Ivermectin + Mebendazole Every Year
  • The Website’s Shutting Down (But Here’s the Plan)
  • You Are Hated! Start Training Like It!

More about me

Books I’ve written

Books I’ve read

Follow Me on YouTube

Follow Me on Facebook

Gear I Use and Recommend

Newsletter

Search this site

Follow me elsewhere

  • Amazon
  • Facebook
  • Substack
  • Twitter
  • YouTube

© 2008–2025 M.D. Creekmore · As an Amazon Associate, I earn from qualifying purchases.