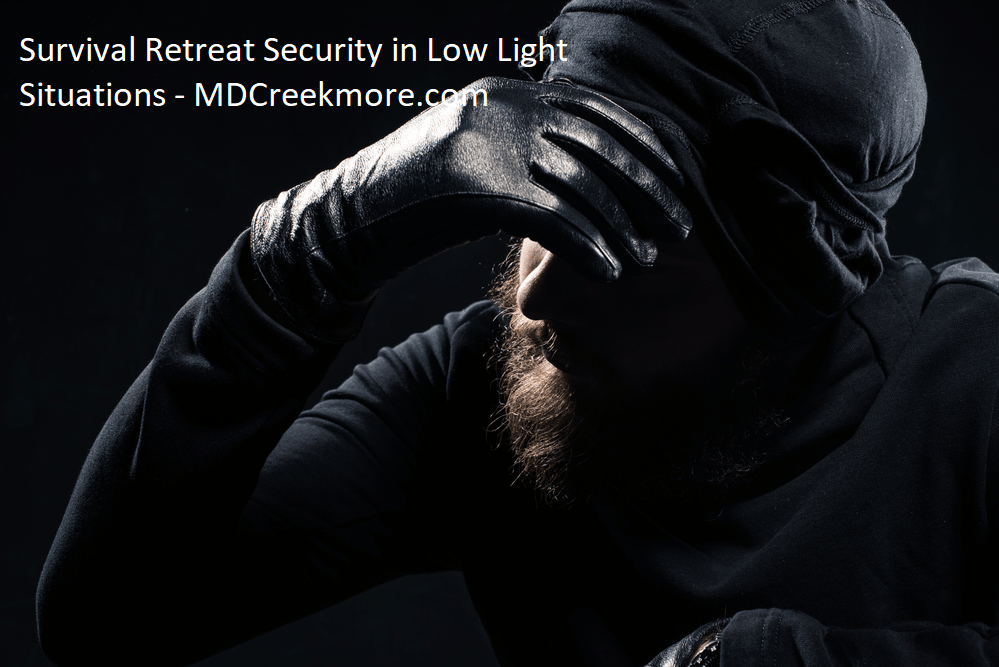
• Skip to main content
  • Skip to secondary navigation
  • Skip to primary sidebar
  • Skip to footer

M.D. CREEKMORE

  • Blog
  • Books
  • Newsletter
  • Gear I Use
  • About
  • Contact
  • Facebook
  • YouTube
  • Blog
  • Books
  • Newsletter
  • Gear I Use
  • About
  • Contact
  • Privacy Policy
You are here: Home / 2018 / Archives for December 2018

Archives for December 2018

How to Be a Prepper in an Apartment

December 21, 2018 M.D. Creekmore

How to Be a Prepper in an Apartment

by K.M. Nevel

Given that the majority of Americans live in heavily populated urban areas, it’s likely that many of us are living in apartment and condo complexes and buildings, whether by choice or out of necessity. It’s reasonable to assume that apartment renters are just as likely as a homeowner, if not more so, to suffer a disaster or emergency event, so survival preparedness is critical.

But living in an apartment presents several challenges to even the most experienced survivalist. The two biggest issues that an apartment renter must consider when preparing for that disaster or worst-case scenario are security and a lack of storage.

Security is hard to come by in an apartment complex, for many reasons. Perimeter control is especially difficult. Parking lots are rarely well lit and the same can be true for courtyards and walkways. If your building is lucky enough to have a doorman, they’re usually not anyone who is well-trained or capable of fending off an intruder or determined burglar. Security alarms are often ignored completely in favor of more insurance company friendly fire alarms.

Those same insurance company policies may allow for “security cameras,” but the likelihood that anyone is monitoring them is slim and, on the rare occasion that they are working, they can be defeated, bypassed or avoided altogether.

Dogs are usually prohibited because of the noise and the potential damage involved, and, even if you’re fortunate enough to live in a dog-friendly complex, you’ll likely be restricted to a smaller dog that’s more bark than bite. The good news is that, while a smaller dog won’t protect you physically, it will give you plenty of warning that you’re about to have company. Enough time to allow you to fist your firearm of choice, for example.

Another threat to your security are those pesky neighbors that seem to mind everyone’s business but their own. The ones who watch you hungrily as you move in, eyeing with envy your widescreen TV and your camera gear.

These same neighbors seem to be present whenever you come back from the range, too, looking on as you carry various weapons cases and expensive camping gear into your abode. They can always be found in the lobby when the mail comes, noting your gun catalogs and survival magazines. You can almost estimate in your head the number of days until your place is robbed and your valuables taken.

Major modifications to your doors and windows are usually not an option, so security upgrades can be limited. The landlord probably won’t allow you to reinforce door and window frames, so a visit to the hardware store is the best you’ll be able to manage, but anything that blocks or slows down an intruder is a step in the right direction.

Obviously, in an apartment complex environment, weapons security is incredibly important. Gun safes are great to have, but they are tough to move up flights of stairs if you’re above the first floor or two, and they take up a lot of space. You won’t be able to bolt it to the floor, but I guess you could always lay it on its back and use it as a coffee table.

Absent a gun safe, put trigger locks on all your guns. Savvy burglars may not bother with them if they can’t find the keys, and, if they are stolen, they’ll at least be unusable and therefore more likely to be recovered by police.

Storage space can be an equally complicated issue when you live in an apartment. I suppose you can stack canned goods and ammo boxes in the shapes of chairs and couches, but, even with the right cushions, your friends are going to notice. Hilarity will then ensue at your expense.

Storage space inside your apartment is at a premium and is likely taken up by belongings that you use every day. Long-term storage for items that you rarely – if ever – use, is hard to come by. A spare bedroom can be utilized, of course, and it will keep supplies out of your way but close enough to rotate into your pantry, when appropriate.

A basement can also be modified to fill this need, and, with a little shelving, can be an ideal storage space for a multitude of survival goodies.

Finding an apartment with a securable garage can make things much easier, especially if you plan on having enough supplies on hand to last a month or so. Water, food, ammo, first aid supplies and other emergency equipment can take up a lot of room, so you’d better plan on parking your car somewhere else.

An open parking space with a storage bin can also be used, but again, theft is a problem. Hinges are easily removed and even the best padlock can be defeated with a suitable application of force and determination.

You may also consider a storage facility if you can afford the expensive rates. Storage lockers come in a wide variety of shapes and sizes – and are priced accordingly – but you should make sure that it’s close enough to reach, by foot, when things get ugly. Otherwise, you just provided supplies for your morally-challenged neighbors on the other side of town when the proverbial crap hit’s the fan.

A better alternative is to find some like-minded friends who live in the neighborhood and form a security plan that addresses the need – and storage – of essential items for all of you in the event of an emergency. Such a plan is also handy when money is an issue since you will have the advantage of several incomes to purchase common supplies.

In addition to having critical items readily available, you’ll have the added benefit of trusted companions to rely upon at critical moments. And that can mean the difference between life and death, no matter how well supplied you are.

Failing any of these, the trunk of your car can be a godsend. Emergency water, food rations, first aid kit, spare batteries, and extra ammo can all be stored safely and for long periods of time, and nobody but Superman is going to know it’s there. This provides the added benefit of being handy if you’re caught away from home when disaster strikes.

As an added security measure, disable the trunk release on the dashboard of your car so that the key is needed to open the trunk. This will defeat the smash-window-pop-trunk-steal-goodies method popular among car burglars and thieves.

Even with limited space and the increased risk of theft, apartment residents can be prepared for any eventuality. Secure your property as best you can, discuss evacuation plans with friends and relatives, build your stockpiles (essentials first, then goodies) and, first and foremost, prepare for the defense of yourself and your family. When tragedy strikes, you’re going to be on your own.

And finally, given the state of the world at this moment, you’d better start today.

Filed Under: Prepping

Everyday Carry Checklist – What Are The EDC Essentials?

December 21, 2018 M.D. Creekmore

Everyday Carry Checklist What are your EDC essentials

By Lee Forbes

My wife and I are new to prepping and have been at it for only seven months. I have been very pleasantly surprised by the things I’ve been getting out of this pursuit which I did not expect when I started. Among these things are; closer bonding with my family, less time in front of the TV, a growing sense of purpose and control over my financial affairs and life, but most of all I’ve come to appreciate the wealth of ideas and inspiration provided by my fellow preppers, and prep sites like this one.

By circumstance, we are suburban preppers and at this point, we’ve improved our ability to sustain ourselves significantly by securing an off-grid permanent water supply, and heat sources for one year. Additionally, we have gone from the “3 days of food in the cupboards” category to having a rich variety of foodstuffs for six people for six months.

With only four of us actually in the household, this is another great idea taken from our fellow preppers…”expect company when TSHTF”. We are continuing to increase our food supply toward the next benchmark of one year.  Along the way we have had a ton of fun as a family, experimenting with canning, Dutch Oven cooking, building dedicated shelving in the garage for our supplies, our first vegetable garden, and most of all…creating and adjusting our vehicle-based bug-out bags.

Another aspect of prepping  I’ve come to enjoy is how preparing for what may come includes the need to parallel plan for “bugging in” and “bugging out”. The crux of this planning it seems to me, for most of us, is to expect an “event” to occur when we are away from the house.

My best guess is the chances are about 50/50 for the average prepper that they will be away at work, doing errands, visiting, or some such when then need to put their plan into action occurs. This brings us to the topic of the first and arguably most important preparation element for Doomsday…the everyday carry bag (EDC).

I have spent a fair amount of time researching many sources on this and experimenting with my own EDC. After much thought toward the actual and practical rationale for an EDC, I humbly offer my opinion that most folks carry around too much stuff in their EDCs.

Carrying a bag of any kind everywhere you go is not as natural in our culture for men as it is for women, and this is perhaps why I found doing so to be so bothersome and hard to get used to.

I carried a book bag all through college, but it has been a number of years and I found carrying and EDC to be mildly annoying …this got me to thinking…man or woman, you should balance being prepared with being overloaded with stuff which in reality you most likely will never actually need instantly at your fingertips…

Cool and necessary stuff to be sure, but much of it is even cooler when it is handy in my vehicle. Less is more they say, especially if carrying a bag everywhere you go is still something you’re getting used to.

The process for me worked out nicely in the end though, and went something like this…The current trend in EDCs seems to be being prepared for multiple contingencies with on the spot solutions for any emergency…

I submit you should trim your EDC to only those items needed to get you the four or five hundred yards between you and your vehicle which, more than 99% of the time, is one minute or less from wherever you may be. Fewer items in your EDC doesn’t mean giving them up, it means only keeping them in your vehicle Bug Out Bag (BOB) instead…still available when needed.

The question becomes how many times in the last year have you been more than a minutes’ walk away from your vehicle? Here, one might argue the possibility that something could happen to your vehicle, or prevent you from getting to it…a Tornado slings your car into the next county, or more likely someone breaks into it, or steals it…or what if you’re trapped in a building?…but how likely is it really that you would ever need some of these items and you wouldn’t have a few minutes to get to your vehicle to get them?

Sometimes you just have to make an assumption and go with it…I’ve concluded the odds of such a scenario are so small that I am comfortable with the risk, and the benefit is I have to have less in my EDC. This makes for a smaller, less bothersome bag.

The idea here is to think in terms of packing your EDC for two things only, 1.) Tools for overcoming whatever could stand between you and your vehicle, and 2.) Items so necessary if you couldn’t reach your vehicle, you’d be screwed without them. At your vehicle-based BOB you can have everything you need for the three days on the road it may take to cover the miles back to your home or your bug-out location…in the meantime, you don’t have to carry anything non-essential with you everywhere you go.

If you are in an office, at a movie, or shopping somewhere, will you really need to change your socks and underwear right then and there? Or could it wait until you get to the parking lot to your car? Will a sudden and immediate need ever arise where you must build a fire in the lobby of a Denny’s using waterproof matches and a magnesium stick? or could it wait until you’ve cleared that location in your vehicle, and are settling in for the night hours later and down the road?

When I first started carrying my EDC about five months ago it was a full-size nap sack and while I liked having all the gear with me, but it wasn’t quite worth the hassle of juggling it every time I was on the move. After embracing the two assumptions above, I settled on the Maxpedition Jumbo Versa Pack (click here to check current price and availability on Amazin.com).

I now use this smaller satchel type bag for a combined purpose of essential EDC items, and everyday items. Even with the essential items, I have identified, this bag is still just big enough for me to also include my I-Pad and my 5×9 folio with some work papers I routinely need.

Now I know I’ve been talking about streamlining this whole time, so why am I adding different non-essential items? For one good reason…by combining the two I still have less of a load than I did before, and the bag now serves two purposes (EDC, and stuff I actually need every day at multiple locations). I hate to say it but…A man purse…It is practical for me on two levels now and it makes it even more worth the hassle of carrying it around.

I would also mention you could look at the similar bag offered by 5.11 which swaps the open top bottle side pocket for a second zipper pocket (You can still fit a bottle of water inside the main compartment and it makes the bag even lower profile). My bag is black and this makes it appear to be an ordinary briefcase type bag, suitable for business, and it calls no attention to itself when I’m walking around in the community. It is so nondescript in fact that after five months of carrying it with me everywhere; I’ve yet to have one person ask me anything about it…think about that!

So then, an empty (And smaller) EDC bag sits before you…what should go in it?

Based on our two assumptions above, is physical danger a possible barrier between you and your vehicle? Absolutely…In goes the handgun! (Assuming you are not already wearing it on your person).

Could darkness be an impediment? Very possible…in goes the mini LED flashlight.

Stuck in an elevator somewhere? Building collapsed and you’re trapped? A bottle of water and a bag of trail-mix would be handy, as would a whistle, a pocket knife, and a glow stick.

Need news, weather, and sports while riding out a hurricane? A charging cable for your smartphone is at hand. No power to charge your Smartphone? A 4-cell AA battery auxiliary charger is the size of an Altoids tin and will keep you tied to the airwaves for days.

On an unrelated note, if you don’t have a Smartphone yet, get one! The downloadable apps are far too valuable a tool for a prepper to not have. (Not all “events” result in the immediate disabling of cellular and satellite networks). To have the internet at your fingertips, files with libraries of everything from knots to raising rabbits, maps, GPS, built-in compasses, and on and on…

I especially like the Tune-In radio station app giving access to virtually every radio station on the planet, and you should also look at downloading the 5-0 Radio Police Scanner App with tens of thousands of police and fire frequencies (including those from your immediate vicinity) for you to listen in on 24/7.

So what else should go into the bag? What might occur in your presence that wouldn’t allow time to run to your vehicle, grab what is needed out of your BOB, and return? A medical emergency? Very possible…Here I can go on a final, and short tangent and offer advice to my fellow peppers on first aid.

I spent seven years as a Paramedic in some of the meanest streets of America, and I have two pieces of very practical advice which will make you highly effective during medical emergencies if followed. Have the right supplies, and the right training…that’s it. What are the right supplies for your EDC? This will blow your mind…one 4″ roll of Kerlix, and one 4″ roll of Coban…That’s it…

These two items are sufficient for all but the most massive traumas, traumas which by definition are more than certain to be fatal in any case. Kerlix is an absorbent gauze roll which can be wrapped around wounds, or shoved whole into larger wounds, where direct pressure is needed to staunch severe bleeding.

Coban resembles the commonly known Ace bandage, but it has the unique quality of being a self-adhesive (but not sticky to the touch). This allows the roll to be used loosely as a wrap that sticks to itself or wrapped tightly to maintain any desired level of direct pressure to a wound beneath. I recall on a number of occasions using Coban even as a tourniquet. It can also be easily torn into sections and/or strips for multiple wounds or smaller wraps of small cuts on the extremities.

These two items require no scissors, pins, clips, or gloves to use, and they both will fit in the palm of your hand at the same time…They are in fact the Swiss army knife of first aid. I should clarify here I am not saying a roll of Kerlix and Coban are all the first aid supplies you will ever need, but they are just enough, just in time from an EDC to allow you to get to your car and back with a larger kit if needed. From the EDC perspective, it is a most effective balance.

What about first aid training? Like many things in prepping, knowledge seems to be the key to everything. I think all serious peppers do the right things in practice with weapons, drilling on bug out plans, researching and doing sustainability skill set building like gardening, animal husbandry, learning knots, etc, and medical skills should be no exception. As a minimum, I recommend a course through the American Red Cross for first aid training. They have chapters everywhere and offer an inexpensive and effective introduction to the practice.

For serious preppers I further recommend a trip to your local community college for enrollment into a Level 1 Emergency Medical Technician course (EMT-1). The beauty of the community college system in America is, without so much as a G.E.D. to one’s name, any adult can go down and pay a reasonable fee to enroll in a one semester-long course (about 80 hours, or 4-5 hours per week, of mixed lecture and hands-on training, spread over 16 weeks). You will learn skills that will serve you and others for life…not a bad deal!

So, back then to our now half full EDC…That’s about it for the essentials…a weapon, food, and light…signaling and information gathering…There are some other items I carry which can’t be justified as tools to remove obstacles between my vehicle and myself, but much like you I imagine, I will carry them anyway, just because they come in handy…and because I have the room now!

These items include; 2 Kleenex tissue pocket packs, Carmex lip balm, earbuds for the music files on my phone, a small Bic lighter (I know, but they are so small, why not?) a couple of crystal light drink mixes, a small digital camera in an equally small padded case, a 3×5 notepad and pen, an extra clip for the gun (because I watch too many movies), a flat of aspirin, a flat of gum picks (I’m starting to get why women carry purses…), two heavy-duty 24” zip ties, and an expired gift card half wrapped with 6 feet of duct tape and the other half with 2’ of Paracord (Very compact) and I still have room to spare.

I continue to experiment and I’d be interested in what others have to say on the subject for sure. I’m feeling pretty good about this plank in our strategy and we are focusing now on our Bug-Out Vehicle and Bug-Out Location. We still have a ton of work in front of us but are enjoying the process itself, and we are learning from our fellow Prepper’s every day. Thanks to you all!

Filed Under: Bugging Out

Survival Retreat Security in Low Light Situations

December 21, 2018 M.D. Creekmore

Survival Retreat Security in Low Light Situationsby SurvivorDan

While the grid is up or generators are running, I suggest layers of lighting. Security lights (check these out at Amazon.com) around the residence are the norm. They should be aimed out and be annoyingly blindingly bright.
I have two sets on separate circuits so if one set has malfunctioned or is taken out I can turn on the other and still illuminate the same area.

I like automatic motion sensors coupled with the ability to manually control the lights. If you have outbuildings, have lights mounted both motion-sensor activated and manually controlled from your residence. I also like some low/medium wattage lights on my perimeters as back-lighting intruders may be useful.   If the perimeter lights are disabled then you will know that there could be some mischief coming.

Preserving your natural night vision:

Simple idea, but reducing your exposure to artificial lighting (including the flare of your match) preserves your night vision. The use of low-level red/amber LED lights for map reading and locating supplies and weapons during a confrontation will also help preserve your night vision. After thirty minutes in the darkness, your eyes are capable of detecting much more than you would expect them to be able to discern.

Also, there are more light receptor rods (used for scotopic or low light vision) 15 to 20 degrees out from the focal point of your retina, so turning your head slightly from side to side provides better discernment of objects in extremely low light than staring directly at them.

If you are thusly barely able to detect your assailants (but you are certain they are your attackers) when you look directly through your sights you will only see blackness but as you know they are likely there, fire at the center of the darkness. I know this flies in the face of the old axiom to always being absolutely sure of your targets.

Anyone who has been in a firefight and fired at the muzzle flashes and into the darkness knows there are exigent circumstances where the positives of such tactics outweigh the negatives.

Speaking of muzzle flashes I have demonstrated to students at night fire training that the flash image target (a muzzle flash or a momentarily illuminated target) moves as you move and thus you miss. You turn your head slightly or move your entire body and when firing you are firing at a ghost retinal image that is not where it was generated.

So keep your head still when firing at flash-retinal / ghost images. If your immediate zone is too hot then just fire for effect while moving. Movement is life and that same slight side to side head movement as you move to a new firing position through uneven terrain will aid you in seeing where you are bugging out to.

Not light related per se, but when all is dark your ears may be your only way of ‘seeing’ what your attackers are doing and where.  Protecting your hearing will help in the darkness. Those with electronic shooting hearing protection will have an advantage over unequipped attackers as they will be deafened by gunfire while you are not.

Also, the adjustable sound amplification capabilities of most electronic ears can provide you with an edge.  Some makes of electronic ears offer directional discernment capability.

Flashlights:

Bright tactical flashlights (strobe preferred) should always be on your person and pre-positioned throughout the property (Check this one out!). There are many, low power consumption (LED) but high lumen output handheld tactical lights available on the market today. {I am currently in the process of converting my old incandescent (power hungry) Surefires to the new LED lamps.}

I have used such lights to temporarily blind, disorient and often discourage a would-be attacker. So bright handheld pulsing lights can be a non-violent deterrent and if not, he who can see what he is shooting at has the advantage.

But, don’t forget that they can see your light too. Still, given my druthers, I would rather be the fellow blinding an assailant with my tactical light’s strobe setting whilst applying all necessary counter-measures.

Long guns should be equipped with mounted tactical lights with on/off momentary touch switches. Handguns, not rail equipped can be used in conjunction with techniques (see Harries Technique, et al) to direct the light in your support hand while simultaneously providing additional control to your dominant hand held the weapon.  There are off-set or oblique tactical lighting techniques that make it more difficult for your attackers to know where you are at.

Try moving through your house with your tactical light off to the side, away from your body and being pulsed momentarily aimed off the ceiling or a wall at an angle away from your path. Much harder for someone concealing themselves to know where you are at any exact moment.  Many gun shops and ranges offer tactical light classes and I heartily recommend such training. Invaluable.

Pre-arranged light based codes will serve you well if other communications systems fail.

When the grid is down you will need flashlights that can be recharged with solar panels or other means (see MD Creekmore’s recommendations here). Sure you can have hurricane lamps and torches but then you are mostly illuminating the wrong target……yourself. There was a good reason that many battles in bygone times were fought in the daylight.

Night Vision Devices:

Night glasses are telescopes or binoculars with large diameter objectives. Large lenses can gather and concentrate light, thus intensifying light with purely optical means and enabling the user to see better in the dark than with the naked eye alone. Such binoculars are useful but their obvious advantage is reduced by the limited dilation capabilities of the human pupil. Still good to have a set handy.

The best and most widely available type of night vision devices is the NVDs.   Few have good NVDs and have familiarity with them. But if you have either night vision goggles (take a look at these on Amazon.com) or night vision binoculars and can maintain them grid down, then you rule the night.

They have drawbacks too as those that incorporate active illuminators can be detected by counter-snipers. Most commercially available NVDs are passive image intensifiers but even those may be temporarily incapacitated by a blinding light directed at you. Fortunately,  most devices will adjust quickly.

No night vision device is perfect but in the absence of adequate tactical lights and NVDs amongst your attackers….you will rule the night. Looking out with night vision devices at a field full of exposed crawling tangos, who think they are unseen, is a confidence builder and a game changer. Combine your night vision superiority with suppressed weapons and it becomes a lop-sided firefight. Your side has a high probability of prevailing.

Tracers:

Bullets coated with or built with a base filled with a pyrotechnic chemical composition (typically strontium nitrate compounds combined with magnesium or phosphorus) which start burning immediately after exiting the muzzle of the weapon providing a visual guide as to the trajectory of the bullets fired, allowing for quick adjustment if off target.

Tracers would have an obvious advantage particularly during a low-light or nighttime gunfight, allowing a gunner to ‘walk’ his rounds in on an attacker’s position.  The downside is that the attackers can ‘trace’ back the path of the bullets to the gunner, thus targeting him.  Still…would could come in handy if applied judiciously.

Flashbang devices:

Think cherry bombs or homemade – sodium chlorate/antimony, charcoal/aluminum or magnesium powder, etc. Blinding flash-bang devices may be deployed against attackers in order to blind and deafen them while you shield yourselves from their brief but intense light and sound. Your vision may be limited in the darkness but you can help blind your attackers.

Flares:

If you need to suppress nighttime infiltrators, flares are a good tool. Tube-launched parachute flares would be nice. I’d settle for some pistol launched maritime flares. Fiery arrows (lit road flare bearing?) have been used in the past to illuminate and even immolate foes and would still prove useful. I’m sure some of you could come up with a lot of homemade flare recipes.

Strategically pre-positioned firewood piles with a remotely triggered ignition set-up (gasoline and Tannerite?) could come in handy if you have tangos whom you need to illuminate. In extreme exigent circumstances, extra Tannerite and ball bearings might negate the need to illuminate them.

(Remember that any booby traps may make you subject to arrest and/or civil liability.)

For those surprised that I appear a bit more militant and hardcore than usual, I might point out that many of these measures may discourage would-be attackers from attempting or continuing an assault on your retreat. Violence is my least favorite solution to a problem. Avoiding a fight is always my first choice.

But failing that……rule the night and apply sufficient violence to end the threat.

Filed Under: Security

DIY Secret Hiding Places Within Your Home

December 20, 2018 M.D. Creekmore

secret hiding places

by M. Roberts

Most people have something to hide regardless if the object is valuable, sensitive, dangerous, illegal, or subject to confiscation.  Storing objects in a safe under key or combination lock can be a good security measure, but not everyone wants a large, heavy, and expensive safe and a small safe bolted to the floor can only contain a limited number of items.

A safe of any size also commands attention from thieves and police as something which is virtually guaranteed to hold something special.  Depending on size and weight, thieves sometimes take the entire safe without knowing what is inside.

If the homeowner is present then a burglar with a gun or police with a warrant can persuade them to open the safe immediately.  Again, a safe can provide a high level of security, but sometimes it can also make sense to hide things in other locations around the home.

Most people also tend to hide things in places which can be found quite easily by burglars and police.  For example, objects which have been hidden in a typical home can usually be found in a drawer or closet located in the master bedroom.

Burglars and police know this to be true so they often begin their search in that part of the house.  Regardless if the home invader is a burglar or police, the amount of time they can invest in a search is limited.  To be productive home invaders tend to follow the same basic three-part rule when conducting a search:  1) Look for interesting items which are openly-displayed, 2) shift attention to the most interesting containers, and 3) inspect other containers which are likely to hold something interesting.  If you haven’t guessed already, they are looking for interesting things.

When a home invader begins a search they typically notice openly-displayed things such as a rifle on a gun rack, a plasma television mounted on a wall, or a jewelry box on a chest of drawers.  This process usually only takes a matter of seconds per room before a deeper search begins, but we can slow them down by having more interesting (yet unimportant) things on display.

Taken to an extreme we can create distractions for home invaders, for overwhelming them with a large number of interesting display items can cause them to single out only the most exceptionally interesting things to inspect.

It is quite possible they will overlook an interesting object because it lacks sparkle compared to all the other shiny things in the room.  Another delaying tip is to secure some of those openly-displayed items with locked display cases.  The more time they spend trying to access and investigate displayed items the less time they have to sort through our containers.

We can also create some diversions too.  For example, hiding a gold coin inside a dull matchbook and leaving it on a coffee table will likely be overlooked because it is uninteresting and unlikely to contain anything special, but we can divert their attention away from it even more by placing a beer mug full of common coins right next to it.

In the next phase of the search, their attention turns to storage spaces and interesting containers.  Because there are more containers to search they will prioritize and inspect the most interesting containers first such as a closet, drawers, briefcase, suitcase, gun case, ammunition box, and decorated boxes.

Each time the home invader accesses and inspects a storage space or container they will apply the three-part rule to prioritize their search.  Regardless of how deep their search takes them, they continue to follow the same rule.

It can sometimes be wise to hide certain “give-away” objects in easy-to-find places.  Humans tend to look harder when their search produces little results, but home invaders are apt to call off a search once they found enough interesting things.

We’d like them to leave with nothing, but sometimes (mostly in the case of thieves) it would be better to have them leave early with an armload of minor and insignificant objects than to risk a prolonged search which exposes the things we really don’t want them to find.  Take care, however, not to give them cause to prolong a search.  For example, having an empty handgun box in the closet will inspire them to continue looking for that handgun.

Eventually, the most interesting containers will have been searched and their focus will shift to less-obvious containers which still hold the promise of something interesting.  Examples include mattresses, couch cushions, toilet tanks, and shoe boxes.

They will continue to disregard dull and boring containers which are unlikely to contain something of interest, such as a toothpaste box or bottle of shampoo.  A home likely has hundreds if not thousands of uninteresting containers, everything from sugar packets to garment pockets, so these things will probably not be inspected very closely, if at all.

There is no perfect hiding place as everything can be found with enough search time, but time is something home invaders do not have in excess.  With that in mind, our goals should be to disguise things so they appear to be uninteresting and/or hide things in the most uninteresting and unlikely places while hoping their search time runs out before certain objects are discovered.

As a home invader works his way through a house the pantry is one of the last places to be searched.  They will search for the most interesting objects and containers first which could include storage tubs, but very few people will take the time to carefully inspect each and every can of food.  There are simply too many of them, they are not interesting, and it is unlikely a sealed can of food contains anything but food inside of it.

We can take advantage of that reasoning by using a can to hide small objects such as gold, jewelry, cash, bullets, etc.  First, shop for a can of solid food (e.g. refried beans, cranberry sauce) which meets your size specifications, but is not a brand or food product you would normally consume.  After carefully removing the label from a can of food use it as a template to cut out an identical-sized piece of thin yet firm and flexible cardboard.

Next, place the can on the workspace so it can roll freely and cut it in half using a hacksaw (take care not to bend the can!).  After discarding the contents and washing the two halves of the can, insert the piece of cardboard into one half of the can and cover it with the other half of the can.  The cardstock is the same size as the label so it should fit almost perfectly inside the can to serve as an inner support wall for both can halves.

Tightly pack objects inside the can while taking care to match the original weight of the product, seal it with strong tape, and carefully glue the original label back on to the can.  Place it near the back of the pantry along with dozens of other cans of food to hide it.  Because it is sealed at top and bottom and doesn’t make noise when shaken it will look and feel just like any other can of food.  Yet, the owner will be able to identify by sight which can contain his valuables.

Hiding things under the floorboards is somewhat common but few searchers have the time to thoroughly investigate that possibility.  However, these places can be searched rapidly with metal detectors so it’s not a great idea for hiding firearms, ammunition, coins, and precious metals.  Home invaders do not expect things will be hidden in messy or dangerous such as under aquarium rocks or behind an electrical outlet (turn the power off first!).

These places are commonly overlooked during a search because they do not appear interesting, are unlikely to contain anything interesting, and are not easy to access and inspect.  With a bit of creativity, fake sewage pipes can also be installed in a basement which has screw caps that serve as access points.  Even the most dedicated searcher will likely avoid messing with sewage pipes which could leak or spill stinky human waste everywhere.

A cramped attic filled with loose insulation is another good place as few have the desire or time to sift through all that nasty fiberglass material in a dark and dirty place which is likely full of spiders and mice.  However, because attics are dusty, they may notice foot and hand prints so conceal your tracks carefully.

If long-term storage is desired without the need for periodic access then the open spaces behind internal walls can be used to hide large and small objects.  Repairing damaged drywall does take some skill but few will ever find what has been hidden behind a finished wall.  Scanning a wall with a metal detector is unreliable as metal pipes and electrical wires oftentimes exist behind walls.

Floor level cabinetry, Formica countertops, and virtually all windows and doors have trim, molding or wall guards which can be modified with hinges or strong magnets to become access panels for secret storage spaces.  Stair steps can also serve a cover for an accessible hiding place, but take care to secure it in a way which doesn’t cause an accidental fall.

Most doors of the home are hollow so they could also offer some well-concealed hiding places with access points at the top or bottom of the door.  Keep in mind accessing these empty space areas of the home requires a bit of destruction as well as construction which rely heavily on carpentry skills.

Shoddy workmanship will likely attract attention of a home invader to scrutinize something that is out-of-place so aim for perfection when tackling this kind of project.

Hollowed out furniture has been used to hide things for centuries, yet it’s not a very common practice today.  A table leg doesn’t attract attention because nearly everyone has a few of them in their home.  It’s difficult to determine if it’s hollow just by looking at it and most won’t expend the energy to do a lot of heavy lifting to inspect or access it (especially a pool table), so it can serve as a good hiding place.

Those who have a large library could consider hiding objects in a hollowed-out book as it takes time to inspect each one.  However, this is a fairly common practice.  What is not common is to expect to find a hollowed-out cavity inside a thick a stack of old home/garden magazines which have been tightly bound together with twine.

When an object is too close in our field of view then it often becomes difficult to see, which is the basic concept behind the idea of hiding something in plain sight.  Suppose one desires to hide a map which marks the location of their buried caches.  No one else knows about the map or the buried caches, but the discovery of the map could put your plans in jeopardy.  After all, what else does a person do when they find a “treasure map” but go look for the treasure to find out what it is?

Rather than hide the map it could be used instead to construct a plain-looking lampshade which is visible to everyone.  It will blend in quite well with a room décor theme which includes a globe and a picture of an old map.  Someone could take the time to inspect the lamp itself, but they will likely overlook the obvious and set the lampshade aside when doing so.  It simply isn’t interesting nor likely to contain something interesting.

This isn’t a topic which is discussed publicly very often because those who have great secret hiding places don’t want to reveal their locations.  Even so, understanding a bit about the psychology and methodology involved can help us find or create some really good hiding places, plan distractions and diversions for home invaders, and even motivate them to stop a search sooner rather than later.

Filed Under: Uncategorized

Buyer’s Guide: Eberlestock Halftrack Pack Review

December 20, 2018 M.D. Creekmore

Campfire in the woods

by The Angry Prepper

Eberlestock’s Halftrack is a great bag (check the current price and availability at Amazon.com).  This bag is made of tough stuff  & is very dependable.  The Halftrack is a 50 Liter bag that weighs about 6lbs. & 12oz.  For starters, this bag has every feature I have ever looked for in a bag.  The first thing I noticed is the excessive amount MOLLE webbing on the outside of the bag.  There is a nice size compartment at the top of the bag.  Good for holding smaller items.  There is also MOLLE webbing on the top of that compartment.

There are compression straps on both sides of the bag.  There are two large side-mounted compartments on both sides of the bag.  They can be used to hold two 3-liter hydration systems or extra gear.  There are 2 smaller pockets called Catch-All pockets on both sides of the bag, located at the bottom with drawstring assist.  There are also 2 tunnel pockets behind the side-mounted compartment.  The tunnel pockets can be used to carry skis, long poles, Shotguns & other long equipment.

There is a flat pocket on the front of the bag.  You can put a book or two or hold paperwork.  The shoulder harness & straps are great. They are comfortable as they cinch & un-cinch with ease.  The shoulder harness is adjustable as well.  Providing you with better support to carrying your load.  Now, the waist belt is one of the many features into why I bought the bag.  It fits around my waist & it doesn’t cut into me.  The waist belt is very comfortable & stays on my hips.  There is MOLLE webbing on both sides of the waist belt as well.

Halftrack Back
Halftrack Back

The Halftrack is a front loader, which makes getting to your gear easier & avoids a lot of digging around in your bag.  There is MOLLE webbing inside the bag as well.  Another feature that I like is the fold-down shelf that separates the main chamber into an upper & lower chamber.  There is also a mesh flap in the rear of the main compartment.  It serves as a radio rack but for civilians, you can store more gear.

At the bottom of the bag, there is a lightweight pull out rain cover.  That covers the entire bag.  So, there are a total of 5 compartments with the Fold Down Shelf down, 6 compartments if you raise the Fold Down Shelf & 15 pockets throughout the bag.

This bag is tough & very comfortable.  The padding on the back of the bag is very comfortable. The design reduces sweating & allows for some air to the back. I would recommend the bag to anyone looking for a great tactical bag to use.  I do recommend tactical gear for civilian use because most tactical gears are tough as nails.

As A Bug Out Bag:

This is where this bag makes its mark.  As a Bug Out Bag, this bag holds a lot of gear. The bag’s features make storing & retrieving gear easy.  The front-loading feature is great because it reduces your having to dig through the bag to get an item out.  The 6 liters of water you can carry is another huge feature.

The two side-mounted compartments allow you to carry 1.5 gallons of water, which adds an additional 12 lbs. to the bag.  Instead of carrying water, you can also store gear in the side-mounted compartments.  If you pack the bag right, you can store 5 – 7 days worth of gear.  There are 12 smaller pockets on the inside of the bag alone, which allows you to store smaller items.  Smaller items such as extra ammo, 550 cord, emergency blankets, & paperwork.

Durability & Comfort:

To test out its durability & comfort.  I used the bag as an EDC & walked to work.   The walk is 3 miles.  I made sure I had the same amount of weight as my regular Bug Out Bag.  When walking with the bag I noticed that it stays square on the back & doesn’t shift around.

The shoulder harness plays a great role in carrying your Bug Out Gear.  With the harness being adjustable it makes carrying the load easier.  The shoulder straps don’t cut into you, no matter how much weight you put in.  I have thrown the bag around to test its durability.

It holds up well.  The strong stitching throughout the bag also holds together well.  The buckles are sturdy.  The clips are tough after repeated use.  It doesn’t keep rain out well so I suggest using the rain cover that comes with the bag.

MOLLE Webbing:

Using the MOLLE webbing on this bag, you can MOLLE all kinds of gear to it.  You can MOLLE medical pouches (which should put on the side or front of the bag), you can MOLLE water bottle pouches (which should be put on the waist belt for easy access), & you can MOLLE miscellaneous pouches for whatever you need them for.  The MOLLE webbing is stitched in strong & doesn’t tear away so easily.  You can also MOLLE  gear on the inside of the bag to make up more compartments, that will allow you to carry even more gear.

Practice:

The Halftrack is a great bag but you should always practice with whatever Bug Out Bag you own.  A Bug Out Bag is an extension of you.  This bag will save your life, it will feed you, keep you warm, & shelter you. You have to know how your bag will feel on your back after walking a certain distance.  By practicing ahead of time, you will have made all the necessary adjustments that were needed.  Get to know how it handles on your body.

Conclusion:

My opinion is that the Halftrack makes for a great Bug Out Bag.  Yes, there are others that are cheaper & can get the job the done.  But I would rather spend the money & have a dependable bag on my back then have a cheap bag that might disappoint.  The Halftrack is worth the money.  Remember, you get what you pay for & if you pay for this bag you will not be disappointed.

Note: This article was written a while ago when the Halftrack was my main Bug Out Bag.  I later made it my EDC then it became my wife’s Bug Out Bag (She now has her own fitted Bug Out Bag).  The Halftrack is now my work bag with my everyday essential items.  I now own the Eberlestock Skycrane two as my main Bug Out Bag, which I’ll have a review on soon.

Filed Under: Gear Reviews

DIY Backup Power System for Home or Off-Grid Cabin

December 20, 2018 M.D. Creekmore

DIY Electricity

by Papa Bear

The Dallas Observer published a report[i] recently that Texas has the worst electric grid in the nation. This was based on a North American Electric Reliability Corp report[ii]. That’s not very encouraging. They are also reporting that there is the possibility of rolling blackouts in 2013.

For a couple of years, I have had the interest in setting up a backup power system for home use. There is a mobile system that provides power to work a couple of times per month and is a backup system when at home. It provided power for 2 freezers, a refrigerator, and a fan during 3 days of outage one summer several years ago. But we really want a system that has the specific purpose of supporting the house.

When looking for a mobile 120 volt (V) system I did talk to an “expert” who wanted to sell the best system that they had. He wanted to get me excited about selling power back to the electric company. After redirecting the talk with the expert to a mobile plan, and taking some of his advice, it proved to be an exercise in frustration.

Not wanting another talk with another overconfident salesman I decided to plan the home system. One essential requirement is to start with home power needs. There are charts available that will show what most appliances consume.

Another way is to check the sticker on the appliance and see what the manufacturer states is the power usage. Another way is to use a meter that will measure the power usage.  The most well known and used is a meter called Kill-A-Watt.

There are other brands that perform the same function.  Plug it into a 120V outlet, plug your appliance into it and let it run for a day or two.  It does not store the information so you must write it down before unplugging.  Check the number of watts (W) that it has used, the total time that it was plugged in and do the appropriate math for 1 day of consumption.

Example: our medium size freezer was tested for 2.76 days giving us an average consumption of .938 KW per day.

Doing this with each 120V appliance can give a measure of our household needs. Remember that the appliances may not be all running at the same time.  The total consumption will be one of the concerns in picking batteries and charging them.

How do you pick a battery system?

Let’s look at some battery definitions. Cold Cranking Amps. Cold Cranking Amps is a rating used in the battery industry to define a battery’s ability to start an engine in cold temperatures. The rating is the number of amps a new, fully charged battery can deliver at 0° Fahrenheit for 30 seconds, while maintaining a voltage of at least 7.2 volts, for a 12-volt battery. The higher the CCA rating, the greater the starting power of the battery.

Open Circuit Voltage (O.C.V.) The voltage of a battery when it is not delivering or receiving power. It is 2.11 volts for a fully charged battery cell.

Reserve Capacity (RC) Reserve Capacity, (RC) is a battery industry rating, defining a battery’s ability to power a vehicle with an inoperative alternator or fan belt. The rating is the number of minutes a battery at 80 degrees F can be discharged at 25 amps and maintain a voltage of 10.5 volts for a 12-volt battery.

RC is the number of minutes a new, fully charged battery at 80 degrees F will sustain a discharge load of 25 amps to a cut-off voltage of 1.75 volts per cell (10.5V on 12V battery). This battery rating measures more of a continuous load on the battery and is a much better indicator of how it will operate bilge pumps. An RC number given in the specification indicates that it is more than just a cranking battery and probably a hybrid starting battery. This is a very useful rating for a boater.

Reserve capacity is directly, though not completely, related to battery plate size and quality. As a general rule, cranking batteries have little reserve capacity after cranking operation unless they have thicker plates. If they have thicker plates, it will have a lower CCA rating.

Amp-Hour – battery rating: AH is a common battery rating for batteries. Amp-hour rating of battery capacity is calculated by multiplying the current (in amperes) by time (in hours) that the current is drawn. Variations of the amp-hour battery rating is the most used rating. It most commonly signifies a deep cycle, marine or industrial battery.

Example: A battery which delivers 2 amperes for 20 hours would have a 40 amp-hour battery rating (2 x 20= 40). This is known as the 20-hour rating versus other ratings based on times such as 5, 8 and 100 hours, but also at different amperage rates. Such ratings are given based on what is considered most useful for the intended application.

A battery intended to supply low amperage for long periods, for example, would use the 100-hour method, whereas a 5-hour rating would likely be for a high amperage rate. The 20-hour method is most common.

Marine – It seems as if every battery manufacturer today sells “marine” batteries but, as mentioned earlier, many such take considerable liberty with the term. Some marine batteries are deep cycle, others are hybrids, while others are pure hokum. True marine batteries are designed for dual use of engine starting and house service and are therefore hybrids (not true deep cycle). These will have spongy, porous plates that are significantly thicker than automotive batteries.

They will be larger and heavier than auto batteries. A true marine battery will tolerate up to 50% discharge, whereas a deep-cycle and industrials tolerates up to 80%, whereas an auto battery will quickly die at such discharge rates.

Numerous batteries found in small boats will be labeled “auto/marine” and the only way to tell the type is by cutting it open and examining the plates unless you are buying a reputable brand, but it’s still a pretty good bet that any battery so labeled isn’t going to be very good. There are also very many brand names of this type, and also many of low quality.

Deep-Cycle – These batteries are distinguished by having much thicker plates (1/4″ or 0.270″ for Surette), nearly seven times thicker than an automotive battery, but high-quality batteries will have solid lead plates versus others made of a lead powder composite. Lead powder plates allow for much more rapid charging but also deteriorate much faster, whereas solid or more dense and thicker plates are slower charging but have a much longer service life.

Deep cycle batteries withstand greater abuse and thousands of charging cycles and have much greater service life than the other two types. They do not, however, have as great cranking or burst power, being designed to provide power over longer periods of time. These are best for use with inverter systems. They are identifiable by their cost of 2-3 times that of other types and 20 hour AH ratings. The number of brand names of this type is relatively small since the cost is higher. Good quality ones are usually not found in discount stores or mass retail outlets.

Golf Cart – batteries are generally a quasi-deep cycle similar to marine, and though not as good as batteries with solid plates, they are better than the auto/marine types. Usually set up in banks of six-volt batteries, these have a greater number of plates to provide longer periods of use under a constant power demand and deep discharging. T-105, US2200, and GC-4 are common identifiers. These batteries can discharge up to 80% without being damaged. They are not better for use with inverters than true deep cycle batteries.

Industrial Batteries – “Industrial” or “commercial” has long been used as a designation for deep cycle batteries used in forklifts, sweepers, floor cleaners and similar battery-powered machinery. Similar to golf cart but usually true deep cycle types with much heavier and pure lead plates up to around 0.270″ thick. These batteries can discharge up to 80% without being damaged.

Yet another type name has crept into the lexicon recently, is the RV type. Most RV types sold are cranking batteries or hybrids as indicated by their higher cranking power but lower reserve power.

Obviously, the deep-cycle is the preferred battery type for marine use but for its one drawback of being less able to provide high cranking power. This is overcome simply by increasing battery size.

AGM Batteries – AGM stands for Absorbed Glass Mat which contains the electrolyte absorbed in a mesh of Boron-Silicate glass fibers. Thus there is no fluid electrolyte to leak or spill nor will they suffer from freeze damage. There are two big advantages of this type. First, it can be charged with conventional chargers without fear of damage from modest overcharging.

Second, water loss is reportedly reduced by 99% because hydrogen and oxygen are recombined within the battery. Further, this type has a modestly lower self-discharge rate of 1-3% versus up to 15% with standard lead-acid batteries. The AGM is a true no maintenance battery.

It otherwise has similar characteristics as the standard lead-acid battery. They have yet to see much use in boats, probably due to the higher cost. These are widely used in battery back up power systems and solar systems.

The downside is the cost of around 2-3 times comparable standard batteries. Thus their greatest benefit is for installations where it is hard or impossible to ventilate charging fumes such as the interiors of sailboats.

So which one?

The battery type that you pick will usually be determined by the available budget.  Getting the biggest and best there is may be nice but won’t help a bit if it means going into debt to do it.  Also, with multiple batteries in a battery pack, they should all be purchased at about the same time and be the same type/kind. Never mix older batteries with newer ones. The older ones will degrade the new ones. It should be apparent, but let’s say it anyway: never depend on a single battery of any kind.

Searching online shows the full range of battery types. The true deep cycle batteries have AH ratings that are high but so is the price tag. Many of the lead-acid and AGM batteries are 6V which means you would need to buy them in pairs. One pair would be hooked up in series to make 12V. That means positive post of one 6V battery to the negative post of the other, and negative post of the first battery to the positive post of the other.

Normally individual 12V batteries will be cabled together in parallel. What this means is that the positive connections will all be linked and all the negative connections will be linked as well. In this way, your 12V battery pack will give you a combined reserve power. If you are working with 6V batteries you would connect the positive connection of one battery to the negative connection of the other, then the negative of the first to the positive of the second. That would produce 12V.

Think of it this way: parallel connection increases amperage, series increases voltage. Standard battery cables are ok to use. Try to keep them all the same length. If your batteries have screw terminals connect to those instead of the battery post.

How many is enough?

There is no easy answer to this question. If you listen to the solar experts they will tell you to buy 2 times the number of batteries that you think you will need. Their justification is that you should not use more than 50% of the battery’s reserve so that you do not shorten its life.

In the beginning, I used a single battery for mobile power. Yeah, that was dumb. It was adequate for the task but that was all. For extended use, I replaced the single battery with 3 marine/deep cycle batteries of the same size. That number was based on available space and budget. Using that trio in parallel connection has shown itself to be a good choice for the task. Based on personal experience, decide how much battery power is needed to meet your expected daily power consumption then add at least 20%. The extra should be enough cover what you did not plan for.

Deep cycle batteries will typically last 4-5 years. That is the lifespan not the warranty. Expect to replace them. Knowing that their end of life is coming you could plan your next purchase 1-2 years in advance, using that as the time to make an expansion in capacity if need be.

Is there any maintenance?

With a lead-acid battery, which are sometimes called a flooded lead battery, you must periodically check the fluid level. This means opening a plug and viewing the level. If the fluid level is below a marker then you must fill it until it reaches the marker. In most cases, there is a ring at the end of a short column.

The fluid must touch the ring. Fill the battery with distilled water. Do not use tap water, filtered water or purified water. There will be minerals in it that will shorten the life of the battery. AGM batteries do not have a level to be checked.

Over time all batteries will collect dust on the top. Wipe the dust off as there is a very small possibility that it will conduct power between posts. Also, check the connections to make sure they are still tight. Check the terminals and cables for any sign of corrosion.

How to use the batteries

There are 12V appliances available. If you want to get ideas to go to a large truck stop and look at the 12V accessories that are offered for the truckers. There are fans, slow cookers, toaster ovens, and coffee makers just to name a few. At RV stores you can also see small refrigerators, lights, and other accessories. Online searches can turn up major items such as deep freeze and larger refrigerators[iii].

Feeding 12V power into your home is not difficult. There are 2 basic plans: feed power from the battery pack directly to the location of the appliance, or feed power to a point where it is distributed as needed. The 2nd method is similar to the load center for your household current. We are planning on having some 12V products so a load center will be part of this plan. Electronics supply stores often sell security camera systems.

One accessory for the security cameras is a 12V power load center that is fed from a built-in transformer. This should be easily adaptable as a load center for a 12V system. The 2 terminal blocks at the top of the box are for connecting the devices needing power. You can make one yourself or buy one.

12V boxMost of the time we will need 120V power for the existing appliances. There will be a need for an inverter. It will take the 12V power and produce the 120V that need. Since we have estimated or measured the amount of the appliances will use we can use this to decide how large of an inverter is needed.

The 120V power that comes into our homes is alternating current (AC). It is graphically illustrated as a sine wave because the power flows forward then backward by the same amount. In the USA this flow, or cycle, occur 60 times per second. In many other countries, it cycles 50 times per second.

Inverters are made to produce either step wave or sine wave. A step wave imitates the 60 cycle sine wave but in incremental steps. The sine wave inverter makes a smooth flow of power. If your power needs include medical devices such as a CPAP machine then you will want a sine wave inverter for the device power supply. Note that the sine wave inverters are more expensive than the step wave inverters. You can run 2 inverters, step wave, and sine wave, from the same battery pack if need be.

The first mobile inverter I had was a 1000W major brand that came from the solar expert’s store. It proved to be completely inadequate. What I later learned was that the total wattage is split among the outlets. So if the inverter produces a total of 1000 watts and has 2 outlets, each outlet can support a load of 500W.

Some inverters have 2 values in their specifications: continuous load and surge. In that case, the surge amount is divided by the number of outlets. So if the inverter has a 1250W capacity with 2000W surge each outlet will have a capacity of 1000W. Unless the inverter specs show a surge, there is none. The total value is all you have to work with.

Many inverters have LED indicators that show the amount of power that is being taken from the batteries and voltage level. Most will also have cooling fans that are thermally controlled. Those that do not specifically say they have thermally controlled fans will keep the fans running all of the time. This means that the inverter is taking power from the batteries when it may not be needed. Most inverters will also have a low power shutoff. If the voltage drops below 10.5V the inverter will not run.

There are inverters that go to 240V of you have a need. These can be used on a well pump for example. These require 24V supplied by the batteries.

Inverters can power devices that are plugged directly into them. A good extension cord running between the inverter and the appliance is one method of doing this. Another is to connect to the household wiring via a transfer switch. The transfer switch is usually an external switch that cuts out grid power and supplies power from the inverter.

Ways to recharge them.

Charging batteries is not done at 12V. Most charging methods will be about 15.5V. Most charging systems talk about charging in amps not watts. There is an easy way to convert:

Amps x Volts = Watts

This first one may sound silly but the basic battery charger found in most automotive or farm stores will work. If your backup power system is waiting for the next grid outage this will keep the batteries peaked.

Make sure that it is an automatic charger as they will start at their maximum value and make the charging current taper to a minimum until the battery system is fully charged. It will then act like a “maintainer” to keep the batteries from self-discharging.

A trickle charger is the same thing as a maintainer. It puts a very small amount of amps, usually 1A, when the battery needs it. This also works if your power system is on light duty until the next outage. There is a manual charger but you must monitor the charger. When the charger shows that the batteries are fully charged you must disconnect the charger.

The next type of the charging method would be 12V automotive alternator that is mounted on an exercise bicycle or some similar device. There are a couple of alternators to choose from but the easiest to work with is a model that has an internal regulator. Another way is to use a small gas engine to run the 12V alternator. There is a web site[iv] that shows how to make your own small engine charger and sells parts to do this with.

Many of the AC producing gas generators, usually those below 4000W, have a connection for 12V. The documentation for these generators say 2 things that are of interest: the 12V connections are only for charging batteries and they are not regulated.

Using the 12V output from one of these generators to the batteries would easily lead to an overcharge situation which would be very bad for the batteries. To prevent this means connecting an automotive regulator to the 12V output then connecting the regulator to the 12V battery pack.

So at this point, you might wonder, if there is an AC generator why use the inverter? If your batteries are very low connect the AC appliances to the generator while the batteries are charging. Unless there is an unlimited supply of fuel for the generator, and it is completely silent, you will not want to have it running all the time.

Next up in the power chain would be a windmill. They are great for producing power, can be configured for 12V or 24V and have very little upkeep. One little problem: they require a minimum of 10 mph of constant wind speed in order to produce electricity. Some of us cannot get that much wind speed. A secondary problem is visibility. They are up in the air, rotating blades, acting like a beacon to anyone who is without power.

Finally, there are photovoltaic or solar panels. In most towns and cities they can be seen attached to the flashing stop signs or school zone signs. It is the same concept as home use.

Solar panels can be purchased in single panels or in sets. They are as small as 5W or currently as large as 290W. The choice is not easy and neither is the price. When selecting panels remember that the higher values may mean a faster charge but the batteries usually respond better to a slow steady charge.

The maximum power of any panel will be achieved when the panel is in “ideal” position. Ok, what does that mean? Simply put, the panel must be directly facing the sun. In other words, if the panel is perpendicular with the sun then it is directly facing the sun. When the sunlight strikes the panel at an angle the power output drops. Open circuit voltage for solar panels can be anywhere from 17.2V up.

In the 1980s there were experiments done with solar panels. One of these tests was to devise tracking systems so that the panels were kept facing the sun. Most of the early methods proved to be difficult to work with.

Another thing that was done was to place the panels at an angle that more closely matched that of the sun. For example: if the location was Denver, CO the latitude[v] is 39 degrees meaning that the panels should be mounted at the same angle from horizontal.

Today people generally point them in a south facing compass direction and put them at a 45-degree angle. Not ideal for maximum utilization but it is easy to set up. Modern tracking systems are available.

Another possibility is to have multiple panels but not all pointed at the same compass direction. Place them at several compass directions so that a lower peak current will occur but be spread out over a longer time. For example, if there are 5 panels in the solar array place each of them at 5 compass angles along the path of the sun. With solar panels, it is possible to mix panels with different output.

The solar panel approach will require a charge controller. This is a device that takes the input from the panels and feeds it to the battery system until the batteries are charged. The smallest one will handle a total of 105W or 7A. Better ones can support 30A or more and will show the state of charge of the batteries. All of the charge controllers prevent the batteries from discharging through the solar panels when the sun is down.

There is a small amount of upkeep with solar panels. You should keep the surface clean. Dust and dirt that accumulates will cut down on the amount of sunlight that the panels get.

Now what?

Let’s look at all this as 2 possible choices – one where finances are unlimited, and the other where there is a budget.

Open-ended system.

Description                              Type                           Quantity

AGM batteries                        210AH                           8
Inverter                                   7000W 24V                   1
Transfer switch                                                              1
Solar Panels                            95W                               12
Charge controller                    24V                                1
Tracking system                                                             1

The batteries would be wired into a 24V system in order to feed the inverter. The transfer switch would perform the cutover during a grid failure. The tracking system would make sure that maximum power is delivered to the batteries.

While convenient it becomes too easy to live in the house with a full power system. It does not give the incentive to conserve during difficult times. The movement of the tracking system may attract attention.

Budget system.

Description                              Type                           Quantity

Deep cycle/marine batteries     #29                               5
Inverter                                     3000W 12V                 1
Solar Panels                              40W                             5
Charge controller                                                           1

The budget system would be manually connected to appliances. It is possible to run some things, such as freezer and/or refrigerator from the inverter all the time. That way there is no loss of food in the event of an outage while away from home. The panels do not all have to be purchased at the same time, plus they could be mixed with smaller ones that turn up on sale.

Disclaimer

I do not have all the answers. This discussion does not include all the possibilities or all the details. Any product that may appear in a web link is not an endorsement.

[i] http://blogs.dallasobserver.com/unfairpark/2012/07/texas_has_worst_electricty_gri.php

[ii] http://www.nerc.com/files/2012SRA.pdf

[iii] http://www.altestore.com/store/Refrigerators-Freezers/Solar-Powered-Refrigerators-Freezers/c639/

[iv] http://theepicenter.com/tow082099.html

[v] http://en.wikipedia.org/wiki/Longitude


Filed Under: Power Generation

  • « Go to Previous Page
  • Page 1
  • Page 2
  • Page 3
  • Page 4
  • Page 5
  • Interim pages omitted …
  • Page 7
  • Go to Next Page »

Primary Sidebar

Subscribe to Blog via Email

Enter your email address to subscribe to this blog and receive notifications of new posts by email.

Join 7,202 other subscribers
  • Amazon
  • Facebook
  • Substack
  • Twitter
  • YouTube

“Do more with less.”

– Minimalist proverb

Recent Posts

  • Just so you know
  • Weather Update for My Corner of Appalachia
  • Why I’m Ordering Ivermectin + Mebendazole Every Year
  • The Website’s Shutting Down (But Here’s the Plan)
  • You Are Hated! Start Training Like It!

Footer

Recent Posts

  • Just so you know
  • Weather Update for My Corner of Appalachia
  • Why I’m Ordering Ivermectin + Mebendazole Every Year
  • The Website’s Shutting Down (But Here’s the Plan)
  • You Are Hated! Start Training Like It!

More about me

Books I’ve written

Books I’ve read

Follow Me on YouTube

Follow Me on Facebook

Gear I Use and Recommend

Newsletter

Search this site

Follow me elsewhere

  • Amazon
  • Facebook
  • Substack
  • Twitter
  • YouTube

© 2008–2025 M.D. Creekmore · As an Amazon Associate, I earn from qualifying purchases.