
I am a fan of Work Sharp products, owning several and having purchased a few for gifts and various applications over time. In this case the Pocket Knife Sharpener is a brand new product that WorkSharp decided to allow me to test! So in this case, I did receive a product (that I will be buying more of) […]
Blog
Best Generator for Campers and Emergency Backup Power
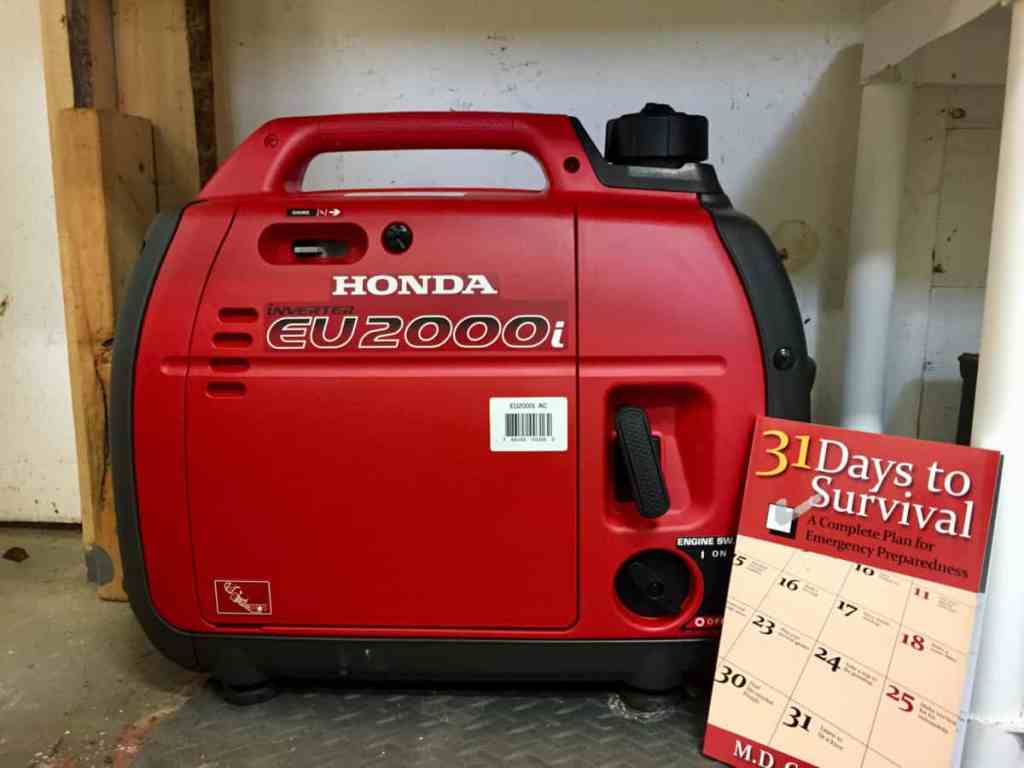
You never know what life is going to throw your way. Whether your property runs on solar power, wind power, water power, the power company grid, or a combination you should expect something to happen regardless of how well you design your power system or how well the power company has provided power in the past. […]
Alternative Energy Sources For The Homestead Part Three – Water Power

Off-grid living will give you a life of security and freedom that few experience today.
You will be living a sustainable life; a life where you are producing more than you consume. A life where you are not dependent on outside resources because you create your own resources. An environmentally responsible life that uses renewable sources to create energy.
But when you’re not getting your electricity from a power company, or the ‘power grid,’ where do you begin?
For many, this might seem daunting. But you have options. Solar and wind power are an option many choose, but they can often be inconsistent. With micro-hydro systems or water power, you don’t have that volatility. Water generally runs throughout the day, regardless of the time of day or weather conditions outside. If you have the right resources on your property, you can produce large quantities of electricity.
Perfect for off-grid living. Ready to get started?
Kephart by Condor Knife and Tool Review

It should be common knowledge by now, I have a serious steel addiction. My dad has built knives for most of my life, I also built a few and own several dozen at any given moment. When it comes to useful tools I am a firm believer in having a good knife around always! The Kephart by Condor Knife & Tool is one of my personal favorites when it comes to daily use. Originally it was designed by Horace Kephart author of Camping and Woodcraft one of the amazing books I own in print (and will be reviewing for you all soon).
It was during his time spent in the Great Smoky Mountains of North Carolina that he wrote Camping and Woodcraft and designed the Kephart blade. Around 3 years ago I read an article on this particular blade type and being an avid collector and user of good steel, decided to do some searching for one. Now it should be noted that I firmly believe in the value of a good blade, specifically the Morakniv line of knives. However, I am always looking for other blades that may fit different or similar roles and the Kephart is a blade that can do that!
Homesteading and Preps For The Week: May 19, 2018
Well, folks, I’m happy to let you all know that this site is growing at what I consider a spectacular rate with a DAILY average of over 100 people signing up for our newsletter/site updates! Yes, you read that right! Over 100 per day… every day… this is great! The goal of any site owner […]
Alternative Energy Sources For The Homestead Part Two – Wind Power

Wind can provide a great source of energy for you and your family when you are living off-grid or for a backup power source.
By choosing a life off-grid, you are choosing a life of independence, a life of self-sufficiency. It is a life where you use the resources the Earth provides and only take what you need. The grocery store doesn’t provide your food, your backyard does.
But it’s not the easiest life. It’s much simpler to just flip a light switch and not even think about where that electricity came from. Because for most people, that electricity just came from some power company that you are vaguely familiar with.
But when you live off-grid, you harvest the energy.
One of your options for energy when you live off-grid is wind power. This invisible mass of air that we often complain about can provide energy to your home. And you can get started yourself. But what does that entail?
Alternative Energy Sources For The Homestead Part One – Solar Power

Moving off the grid doesn’t mean that you have to give up every modern convenience you enjoy today. If you don’t want to. And you don’t need to rely on having gas for your generator.
Solar power has become a popular option for many people in cities and suburbs hoping to save money. But it can also be a great option for those who don’t want to be connected to a traditional source of power.
Those who truly want a life of self-sufficiency away from the power grid can enjoy it with solar power in many locations.
Heritage Rough Rider .22 Revolver Review – Is It Any Good?

Everyone needs a .22lr firearm. Specifically, one that is accurate and reliable, the Heritage Rough Rider is an accurate, reliable handgun! Now before we get any further, the Heritage Rough Rider is a single action handgun that comes in several varieties and barrel lengths. It will chamber the .22lr, .22 short and with a cylinder change .22wmr.
As with all single action handguns, accuracy is a matter of perspective and ability as well as understanding your individual firearm and ammunition combination. I originally purchased this handgun to have something that my son would enjoy. It is inexpensive running $136 after taxes from my local firearms dealer and easily $120-$145 depending on your location. This allowed for someone with limited funds to purchase a firearm without a large investment in the event it was not seen as a valuable addition to the family.
Homesteading and Preps For The Week: May 12, 2018

Well, folks, here we are again. I hope that you are as excited to be here as I am… I’m loving this new site and it’s growing much quicker than my old Survivalist Blog site which took years to gain any traction. I learned from my mistakes with the other site, and also what works […]
Concealment Strategies Against Social Unrest, Theft, or Confiscation

It is wise to prepare to conceal your supplies from the government as well as from desperate people who may turn to looting and theft in order to survive.
In this article, I’m going to talk about strategies for concealment rather than specific designs—which have to be customized to each specific situation, and shouldn’t be published anyway, lest they become compromised.
Remember too that you must be prepared to secure people as well as your supplies. Social unrest and even government may be a threat to your person as well, and your supplies won’t do you any good if you are dead. A well designed safe room can provide for both protection of people and your essential supplies if they have temporary living facilities included for an emergency where you may need to get out of harm’s way.
DIY Solar Projects Made Simple – Even Forrest Gump Could Do This

Most folks have the “idea” that solar costs lots of big bucks. But the truth of the matter is – solar energy is an investment. Like big power company’s that buy a nuclear power plant. There is a big (one time) upfront investment for the company that will usually pay off later.
You would do the same thing – invest in a pile of components that will become your personal utility. The cost of taking care of your utility is minimal – after the initial purchase. You don’t have any monthly bills – it is YOUR utility. Why is solar worth having? Because it gives you power. The power comes from the sun and goes into your pocket – if you got it. Solar power is nice and quiet – use a night-light to go to the bathroom.
A-zoom Snap Caps and Wall Anchors: weekly product review
Legally I have to write a disclosure here, I PURCHASED THE Snap Caps and Wall Anchors BEING REVIEWED HERE WITH MY MONEY and did not receive anything in exchange for a review of any type… A-Zoom snap caps are an important part of anyone’s shooting supply. They run between $8-$15 for 6 or 10 on […]