• Skip to main content
  • Skip to secondary navigation
  • Skip to primary sidebar
  • Skip to footer

M.D. CREEKMORE

  • Blog
  • Books
  • Newsletter
  • Gear I Use
  • About
  • Contact
  • Facebook
  • YouTube
  • Blog
  • Books
  • Newsletter
  • Gear I Use
  • About
  • Contact
  • Privacy Policy

Blog

How Do You Handle Emergency Food Storage?

July 20, 2018 M.D. Creekmore

by Moira M

As I write this, we are in the middle of Winter Storm Jonas. There is 13″ of snow in the yard and the closest paved road is five miles away. I haven’t been off the property in five days and did not make a trip to the store to stock up for this storm. Doom and gloom time? Not really. The power was out for about 12 hours this morning. We had coffee, bacon, eggs and toast for breakfast courtesy of the propane camp stove. If necessary, we could wait here happily for the next week or two eating a variety of foods with or without electricity. I always wonder how it would be if we ever had to put our preps to actual use. So far I’m pretty pleased with how we have handled the little mini-crises we have had.

What is the best way to handle emergency food storage? The answer is different based on your situation. Your budget, your family size, your storage area, your special dietary needs, and your location all affect how you handle emergency food storage. But there are some common ideas that everyone can use.

The first rule is that anything is better than nothing. If you don’t have any food in the house, you are completely unprepared for emergencies. While some people may not believe there are people with no food in the house, consider college students (especially in dorms with meal plans for the cafeteria) and singles living in large cities. Everyone needs to have at least a three-day supply of food for something as simple as a hurricane or blizzard. Even a case of the flu could keep you stranded at your house for a few days.

Four Factors of Food Storage

It is important to consider four factors with food storage: shelf-life, calories, nutrition and morale. All four play a vital role in emergency food storage.

Commercially prepared food is usually marked with an expiration or best by date. Many people consider it safe to eat foods after the actual expiration date as long as the packaging is secure, and the food looks and smells good. If you were starving after a disaster, I’m sure you would agree. However, that would be one of the worst times to get food poisoning. Obviously, the food doesn’t instantly go bad at midnight on the date stamped on the package, but how long after is questionable and likely varies from can to can. Home processed foods may be even more in question due to the many factors that can influence the process of canning, dehydrating, sealing, etc. Choosing foods with the longest shelf life and using the oldest food, while replacing it with newer food is a good plan.

The current suggested diet in America is 2,000 calories per day for an adult. Many diets, designed to help lose weight, recommend that you not dip below 1,200 calories per day. You could possibly aim for 1,500 calories per day as long as the adults were not performing a lot of physical activity, such as waiting for a storm to subside. Those performing physical activity such as clearing debris from roads, cutting and splitting firewood, and hiking may require in excess of 2,000 calories per day. If the disaster was very short-termed then the calorie deficit would likely not matter much, but over the long-term physical problems would appear.

Everyone should be familiar with the effects malnutrition has on the body. Like calorie intake, nutrition probably doesn’t matter very much over a short-term disaster. In long-term disasters, it may matter very much. Proper nutrition is important to good health. Likely if you were unable to resupply with good food due to a long-term emergency, you would also not have access to good medical care either.

Morale is often overlooked in food storage discussions. Remember that mental health is important as well, so be sure to include items that your family likes as well as some treats as part of the supply.

How Do You Decide What to Store?

The simplest method to start storing food is to simply pick up a few extra items each time you shop. Choose items you use regularly that have a shelf life of at least one year. When you buy another of that item, you put the newest one in storage and move the older one into the cabinet for use. This has the advantage of being easy to do and allows you to take advantage of items you find on sale. However, it may result in a bunch of assorted ingredients that may not make a normal meal. Gummy bears, green beans and a tin of sardines is better than nothing, though.

Another fairly simple method is to choose one meal your family likes and on each shopping trip, purchase the ingredients to make it three times (or six, or twelve, etc.). This allows you to build a stock of complete meals that your family enjoys. It is flexible in that you can purchase as many sets of the meal as you can afford at the time. Over the course of a year, you would have several days’ worth of a variety of meals that your family likes. You may not be able to take advantage of sales as easily, but it is a pretty solid plan.

An easy, but more expensive way to amass food storage is to purchase commercially prepared freeze-dried/dehydrated meals. You’ve seen these meals in your sidebar advertising if you do an internet search for anything related to prepping. They can be found in catalogs and in the camping section of Wal-mart and sporting goods stores. You can purchase one meal or a sealed container with a multi-day, multi-person supply depending on your needs and budget. Most of these allow you to open the bag, add hot water and wait a few minutes. Those who like these meals note that they are easy, relatively light-weight, very long-term storage, and delicious. Doubters point out that they are expensive and may contain questionable ingredients for preservation.

The final food storage method I’ll address here is what I’ll call the basic ingredient method. You purchase items like flour, cornmeal, sugar, salt, powdered milk, and so on. Even more basic would be hard wheat berries, dried corn or popcorn, and other grains which must be ground with a mill before use. The original items generally have a much longer storage life than a commercially prepared mix. They are versatile because you can make many things with these ingredients. The downside is that if you must store recipes unless you and everyone with you can cook from scratch without them. These items generally require more preparation, longer cooking time and perhaps more equipment compared to the simplicity of opening a can of prepared soup or adding hot water to the camper meal noted above. If you choose this method (and I recommend it as part of your plan), remember to have a trial run of the recipes from time to time. You need to make sure you have what you need. In a disaster, you can’t run to the store for milk and butter, or anything else.

My recommendation is to do all of these together and monitor your supplies to make sure you can make a variety of meals in various circumstances. A friend of ours approached food storage simply. He bought several month’s worth of rice and bouillon cubes. I will admit that this will keep bellies full. However, after a few days, I’m guessing they’ll want something other than rice and bouillon. It is great that he did something – which is again better than nothing! Now that he has taken that step, he can add more items bit by bit. Canned or dehydrated meats and vegetables, plus some sort of bread would be great additions and allow for a bit of variety in his meals.

At first, I looked down on the fancy freeze-dried meals for prepping. Who really needs easy beef stroganoff in a disaster? I can make bread from scratch, thank you very much. Then I realized that these meals are the take-out/frozen pizza night solution for an emergency. If you’ve had a busy day clearing a giant tree that fell in your yard, do you really want to make a meal from scratch? Instead, you can do something simpler and quicker, whether it is boiling pasta to serve with canned sauce or adding the boiling water to the easy beef stroganoff. I’ve tried several of these meals now, and they really are quite delicious. Say what you want about powdered eggs. These people add meat and other flavoring, and they are wonderful. It doesn’t line up with my plan to eat fewer processed foods, but there is a place for that convenience in my food storage. Using all of the methods together gives you the greatest flexibility. You get complete meals, variety and flexibility, and convenience all in your food storage.

How Is Your Food Packaged?

This is also a good time to consider how your survival food is packaged. We’ve all seen the massive containers of food in bunkers on movies. A number ten can is contains about 110 ounces of food. If you don’t have access to refrigeration, you have to eat it all before it spoils. That may be possible if there are a lot of you, but not as easy if you are a couple or small family. The small amount of money you save by buying one larger can instead of eight smaller cans really isn’t worth it at that point. Also, you can more easily transport, share or trade your supplies if they are in smaller containers. (Some of you may be thinking that you’d never share in a post-apocalyptic scenario. Remember that it may be a blizzard and your elderly neighbors ask to borrow a can or two of soup to tide them over a few days. It is probably a better idea to build neighborhood goodwill by helping and a small can says you had a little extra where a bigger can may identify you as a prepper, and thus a target, in a real disaster).

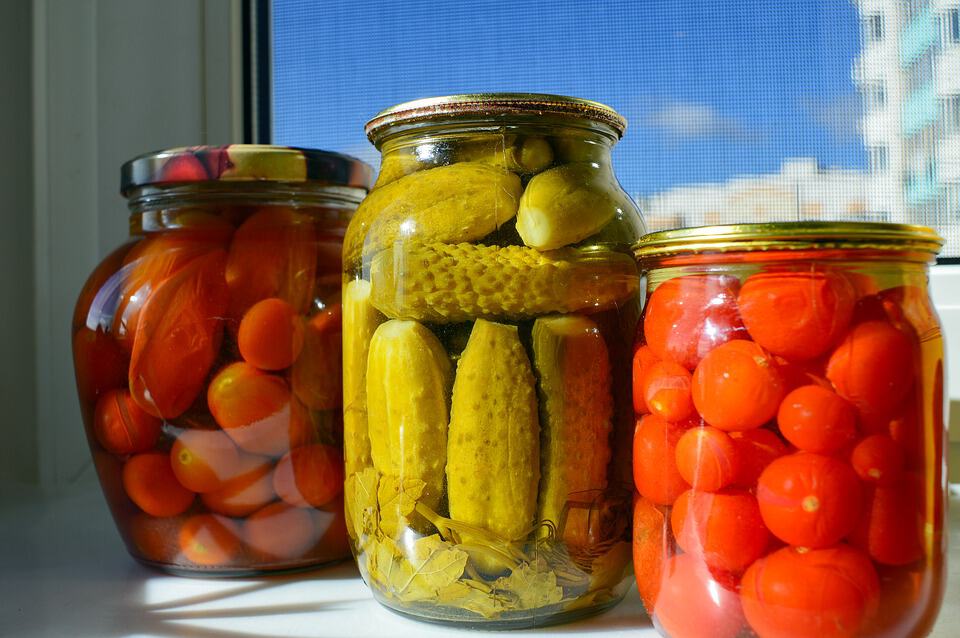
The food must be securely packaged against air, humidity and pests. If the original packaging isn’t secure, repackage the food. This allows you to break up bulk purchases into smaller portions. I love to use my FoodSaver to seal food in mason jars or in plastic bags. The sealed bags can be placed in food safe buckets to deter pests. I’ve seen a tip recently to pour salt into the bottom of the bucket before adding the sealed bags. The salt absorbs moisture and is food safe in case of ingestion. Depending on the storage condition, the salt could be used for food preservation in the future. Many people use mylar bags with vacuum sealers and/or oxygen absorbers to store food in various quantities. These mylar bags are often stored in food safe buckets as well. We’ve stored rice and other such food in clean, dry two liter bottles. There are many options. Consider what you are storing, where you are storing it, and how you’ll be using it. Do your research and actually test your methods now while you can go back to the grocery store if your plan fails.

How Do You Track Food Storage?

I prefer to use a spreadsheet. I have columns for quantity, category, description, expiration date, size, calories and total calories (quantity times calories). I have tabs for home canning, professional canning and other goods. This allows me to see how much I have of each item and calculate how many day’s worth of calories I have. I’m able to sort by expiration date and know what I need to work into the menu over the next week or so. I can review the list and see what I need to restock on the next store trip. You can use the spreadsheet to re-inventory the food storage.

You can place a printout of the inventory in your food storage area so that you can update it as you add or use items. You can also put a white board or chalk board up to note added or used items and update your spreadsheets when you have the time. If other people in the household will be getting items from your food storage, then you should make it as simple as possible for them to record updates.

Whatever you decide to do, make sure that you do track your food storage in some way. Be sure to use items or donate them to charity before they expire. Be able to calculate how long your food storage will stretch. You may be unhappily surprised at how fast it will go!

What Do You Need Other Than Food In Food Storage?

There are many things other than food that you may need for food storage that isn’t food:

  • Vitamins – Vitamins may be a good option in an emergency when you may not be getting the proper nutrition on a regular basis. This might be even more important for children and expecting mothers.
  • Meds – Everyone should have a good first aid kit plus medicines to treat the usual illnesses, and the best place to keep it may be with food storage. It may be helpful to at least store medicines to treat acid reflux, indigestion, and other food related problems with your food storage. Plus, burns and cuts are known to happen in normal kitchen tasks, and may be more frequent when cooking with alternative fuels and light sources.
  • Grain Mill – If you store wheat berries or corn kernels, you would use this to grind them into flour or corn meal. The wheat berries and corn kernels have a longer shelf life than flour and corn meal but naturally require more work on your part. Electric models are easier when you have power, manual are useful in power failures.
  • Meat Grinder – If you want to process meat into ground meat or sausage, this is the tool. Again, electric models are easier when you have power, manual are useful in power failures.
  • Canning Jars and Equipment – If the power fails, you may be able to salvage perishables in your refrigerator and freezer by canning them. You can use a pressure canner or water bath canner with alternative fuel sources like propane and wood fires. For really long-term disasters you would need canning jars to preserve food to last all year.
  • Dehydrator – If you have a dehydrator that you can run on alternative power, you may be able to use it to salvage refrigerator and freezer items as well. In the right weather conditions, you can dehydrate food on screens in the sunshine. Note – laying the thinly sliced food on one screen will work, but if you get a little fancier, you can hinge two framed screens together. This way bugs don’t start a conga line on your dried tomatoes.
  • Seeds – If something interrupts the supply chain you may need to grow your own food. Make sure that they are heirloom seeds so that you can use the seeds from this year’s crop to grow next year.
  • Livestock – This isn’t a possibility for some, due to where they live. I suggest starting with a few hens, which make great gateway livestock. Hens can provide fresh eggs, which is a great ongoing, fresh and nutritious food. Goats, sheep and cows can provide milk and meat. Remember that a dairy animal is a big commitment, because they must be milked once or twice a day without fail.
    Note – you do not need a rooster to get eggs. Hens lay eggs with or without a rooster. If a rooster is present, you may get fertilized eggs. This is great if you want to make more chickens, but traumatizing if your child is making brownies (maybe scarred-for-life traumatizing – I know someone who won’t eat eggs after this sort of thing and it has been thirty years). I’ve heard it said that if you refrigerate fertilized eggs on day one, nothing develops and you’ll never know the difference. It is a matter of personal preference whether to get a rooster (can make more chickens to resupply meat and eggs), or not (no additional chickens, but also no “half baby chick/half egg” and no crowing). A compromise would be two coops or a divided coop.
  • Pet food – my dogs would be ecstatic if I ran out of dog food and had to feed them people food. Other people’s dogs have allergies that would cause trouble. Lay in a supply for any household pets and livestock you have.
  • Lanterns, Oil Lamps, or Candles – If you want to cook early or late in the day, you’ll need to be able to see to cook, eat, and clean up after!
  • Paper goods – I generally avoid the waste of disposable plates, napkins, cutlery and cups. However, in an extended power outage there are times you need a break from the dishes. This is especially true if you are on a well, and have to use a generator or hand pump to get water (perhaps more so if you have to carry it from a river and filter/boil it first).

Random Tips

Practice cooking, especially with foods you store for emergencies, but really any practice is better than none. An emergency is really not the best time to learn. You may waste food you need to last through the emergency. Also, you will identify things you need to add to your food storage, such as spices, water supply, alternative cooking methods and so on.

Plan meals to reduce waste. If you don’t have access to refrigeration, only cook enough for one meal. If you can refrigerate foods (like outdoors in winter, in a sealed container in a spring or river) then plan to have vegetables, with or without meat that can be combined into a soup or stew the next day. This is good advice generally. Check your perishable food once or twice a week and plan a meal to use up produce, dairy, and leftovers before they spoil.

Include foods that don’t require cooking. If you go camping and rely on a campfire for cooking, you understand the need to have food that won’t require you to keep a fire going all day long. You may want to have peanut butter and jelly sandwiches, peanut butter crackers, along with fruit (fresh or dried) and other such foods. This is also great for if you’ve had a long day working and just need to eat as quickly and simply as you can.

When camping, I like to keep cleanup simple. After dishing up the food, I fill an empty pot with water. This can be the cast iron Dutch oven you just made dinner in or a spare pot. When you’re finished eating, you have hot water ready to wash dishes!

What Do I Make With Food Storage?

I suggest everyone make a folder of recipes to keep with the food storage. That way you will have a custom set of recipes that you have everything to prepare (because you have been storing it, right?) and that your family likes.

Old cookbooks are great as well. They assume that you will cook with original ingredients instead of mixes. They are also less likely to include modern electrical appliances like microwaves and food processors.

How to bake over a camp fire: I use a cast iron Dutch oven. The edges of the lid are curved upwards so that coals can be added to the top for baking. Using a lid-lifter (a cast iron stick with a hook on the end) the lid can be carefully removed and replaced so that food can be checked without coals falling onto the food. Mine came with a small rack that fits inside the Dutch oven. A metal pie plate can be placed on top of the rack to create a baking atmosphere in the Dutch oven and prevent the bottom from scorching before the food has baked through. If you don’t have a rack, you can improvise  With a little practice it works very well.

Here are some recipes from my collection. Dehydrated or canned versions of various ingredients may be substituted.

Survival Bread

2 cups oats
2 1/2 cups powdered milk
1 cup sugar
3 Tbl honey
3 Tbl water
1 pkg. lemon or orange Jell-O (3oz)

Combine oats, powdered milk and sugar. In a medium pan, mix water, Jell-O and honey. Bring to a boil. Add dry ingredients. Mix well. (If the dough is too dry, add a small amount of water a teaspoon at a time.) Shape dough into a loaf. (About the size of a brick.) Place on cookie sheet and bake at 350 degrees for 15-20 minutes. Cool. Wrap in aluminum foil to store. This bread will keep indefinitely and each loaf is the daily nutrients for one adult. To prepare this over a fire, place the loaf in a pie pan on a rack inside a Dutch oven. Place over coals and move coals to the lid of the oven to bake.

Recipe Note – I had to add quite a bit of water to make this into a dough – I’d say about a half cup. Also, this could be made in a Dutch Oven over the fire if desired.

Cornbread

1/2 cup butter (1 stick – divided)
2 eggs
1 cup buttermilk (or 1 cup milk plus 1 Tbs. White Vinegar, let stand a few minutes; or just use the milk as-is)
1/2 tsp. baking soda
1 cup cornmeal
1 cup all-purpose flour
1 tsp. salt
Optional – 1/3 cup sugar (I don’t put sugar in my cornbread, but some people do)

Begin by preheating the cast iron skillet over the fire while you get the cornbread mixed. Melt 6 Tbs. butter in the skillet. Keep an eye on the butter so it doesn’t scorch.

In a bowl, combine eggs, buttermilk, baking soda, cornmeal, flour and salt. Pour in the melted 6 Tbs. butter from the skillet. Stir to combine thoroughly, but don’t beat.

Put the remaining 2 Tbs. butter in the skillet. Slide it around with a spoon or rotate the skillet to coat the entire bottom and about an inch up the sides. Don’t burn yourself. Once the butter is melted and the skillet coated, pour in the cornbread mixture. Put the skillet over the low coals and put the lid on. Add coals to the top. Check it after about 15 minutes. It may take up to twenty, but you don’t want to let it burn.

You may have to turn the skillet during cooking or move it to warmer/cooler spots of the coals as it cooks to maintain an even temperature. Using a lid lifter, carefully check for doneness and remove from heat when ready. See my earlier posts for a more thorough explanation of baking with cast iron.

To bake this cornbread in the oven, you follow the same recipe. Place the cast iron skillet with 2 Tbs. butter in the cold oven and preheat to 375. Mix the remaining ingredients and carefully pour into preheated skillet. Bake for 15-20 minutes until crust is lightly browned (and usually cracks will appear in the crust). You don’t use a lid on the skillet when baking in the oven.

Basic Bread

5-6 cups all purpose flour
2 packages of active dry yeast (or 4 1/2 tsp. yeast from a jar)
1 1/2 tsp. Salt
2 cups warm water (120-130 degrees)
Cornmeal
1 slightly beaten egg white
1 Tbs. water

In a large bowl, combine 2 cups of flour, the yeast, the salt and the warm water (the water is a little warmer because you are compensating for room temperature flour).Stir thoroughly to combine ingredients, scraping the edge of the bowl as you go. Continue to stir until thoroughly mixed and the gooey dough begins to pull apart in strands when you pull the spoon away. Mix in another 1-2 cups flour. You want to use as little flour as necessary to get the dough ready for kneading. You’ll add more flour as you knead and too much flour causes all kinds of problems in baking bread – tough crust, too dense bread, etc.

Turn the dough out onto a floured surface and knead for 8-10 minutes. Add remaining flour a little at a time when the dough gets sticky as you knead.  Shape dough into a ball. Place dough ball in a lightly greased bowl, cover with a cloth and put in a warm place to rise.

After the dough has roughly doubled in size, punch it down (push it down with your hands) and turn it out onto a lightly floured surface. Divide it in half and cover with a cloth. Allow it to rest for about 10 minutes.

If you are able to bake this bread in a Dutch oven with the pie pan on a rack arrangement, that may work best. If not, put it directly in the Dutch oven and bake it – you’ll just need to flip it half way through cooking. Bake over the fire for about 30 minutes and add more time as needed.

Chicken Corn Chowder

3-4 medium potatoes or can of potatoes
1 onion or dehydrated onion flakes
1 can cream of chicken soup
1 can corn
1 can chicken (can be omitted if desired)

For fresh potatoes, boil potatoes and onion in just enough water to cover potatoes. When potatoes are tender, reduce heat to simmer and add remaining ingredients. Drain corn and chicken first, if desired to have a thicker soup. A bit of cornstarch may be added to thicken soup if desired.

If you use canned potatoes, simply add all ingredients along with all liquid from cans and simmer until warm and flavors mingle. Add a bit of cornstarch to thicken if desired.

For either recipe, add salt, pepper and garlic salt to taste.

Note that other ingredients may be substituted, depending on what is available. Also, this recipe may be placed in a pie crust for a delicious pot pie. Use what you have and try to mix flavors that sound compatible to you.

Chili

1.5 pounds ground beef (venison, pork sausage, or a combination would work too)
1 medium onion, chopped
3 cloves garlic, chopped
1 bell pepper, chopped (or sweet peppers, or add hot peppers too if you like them)
2 qt. diced tomatoes
1 pt. tomato sauce
1 can kidney beans, drained (completely optional for those who don’t put beans in chili!)
3 T chili powder (you can use a chili seasoning packet if you prefer)
1 T garlic salt
a few fresh chopped tomatoes from the garden

Get a good bed of coals. Place a sturdy grill over the coals or set up a tripod or other cooking ensemble. Suspend a cast iron Dutch Oven over the coals and start cooking.

Sauté the onions, garlic and peppers. Brown the ground beef or other meats. Then add the tomatoes, tomato sauce, beans and spices. Stir together. Let the chili simmer, stirring occasionally

Let the chili simmer slowly, stirring occasionally. Make sure it is over a good, warm spot on the fire, but not boiling violently or sticking. Let it cook down until it thickens and the flavors merge. You can eat it after a half hour, or let it simmer for hours. This makes great leftovers if properly refrigerated.

Filed Under: Prepping

Moving Toward Self-Reliance for the Working Poor

July 18, 2018 M.D. Creekmore

by Sandra

homesteading and prepping

There are many of us who are or have been classified as the working poor, meaning we are employed and we earn a few bucks above the national poverty level ($12,140 for a single person and $25,100 for family of 4—2018 figures), but we don’t earn enough to pay for everything, e.g., food, shelter, transportation, medical, child care, etc. We live paycheck-to-paycheck; robbing Peter to pay Paul. I am not a big fan of government handouts but when I was down and out I sure would have accepted a few until I could get back on my feet.

According to the dictionary, self-reliance is the state of not requiring any aid, support or contact for survival; it is a type of personal independence. Another version of self-reliance is confidence in one’s own capabilities, judgment, or resources; freedom. I know many people with confidence, even arrogance in their abilities; but I don’t know anyone who is totally self-reliant. Instead, I like to say we are working toward becoming more self-reliant.

This article is for the people who think being prepared and learning to be more self-reliant is out of reach for them. These are folks who work one or two jobs, pay rent, make car payments, don’t have medical insurance and don’t really own anything. I used to be that way and I still have people in my extended family just like this; good people who are running the maze and think they are trapped. Some may be slightly depressed because they’re in the same downward cycle of go to work, come home, go to sleep and repeat the cycle day in and day out.

They are sick and tired of being sick and tired. I know because I have been there. Getting out of the “I’m trapped” (victim) mode is important. As Viktor Frankl wrote, all people will suffer tribulation but each individual can choose how to cope and overcome it. So, break the cycle, set goals and try to do one thing a day that will help you work towards independence. Try it; one thing a day which moves you toward self-reliance is not that difficult.

There are many stages of self-reliance but most of us begin with realizing that no group nor the government is able nor wants to help us. Just read/watch the news for a week or so and you will understand what I am saying. If you don’t want to be a victim then the next thought should be realizing you (and your family) will always be way down the list to receive help. That should lead you to the “aha” moment of I/we have to move toward self-reliance now while there is time, rather than later when a disaster event occurs.

A Change of Attitude

The first step in gaining independence is changing your attitude from “I can’t” to “I can.” Many people have been told and/or treated as if they were stupid, told they are less than someone else or compared to (insert name here), which can produce a defeatist attitude.

Don’t get me wrong; I’m not a fan of the liberal “everybody-is-a-winner” policy because success at anything can be brutal and painful; young people need to realize they are going to be evaluated by someone all their working careers.

But negative school or work evaluations do not translate to “you-have-no-value.” If you are a believer, do seek support from your religious leaders. Realize that everyone has a positive value; it just surfaces in different ways. So take off the destructive baggage you have been carrying around and realize you can become more self-reliant if you want to.

Control Your Money; Spend Less and Save More

Beginning the self-reliance journey, one of the primary things to do is to get control of your spending and debt. Almost every depressed person I know is in financial bondage. As long as you are in debt to someone or some company or some bank, they control you, you are the servant; the lender is the master.

As many articles have mentioned, getting out of debt is worth the sacrifice. If you don’t have a budget for your family, make one; at least list how much and where you spend $$ each month. It will be an eye-opener to see how much money you fritter away on temporary pleasures.

Pay for the critical items first; for me that was shelter (apartment rent) but for you it may be transportation or medicine. I figured I could always stand in line for the church food handout. Sometimes I was late with the electrical bill but I would call them and tell them the payment would be late. They never cut my electricity off. When my old car broke down, I found a retired fellow who liked to fix old cars and he fixed the car quickly and would let me pay him off a little every week. I never missed a payment to him.

  • Start Saving Today and Live Your Homesteading Dream Tomorrow

Don’t Try to Compete With Others

Stop trying to keep up with your brother, sister, neighbor, etc. and discipline yourself. I have family members who try to impress others by having a bunch of stuff; boats, ATVs, lots of parties, vacations every year, etc.; but they are in debt to everyone in town.

Live within your salary and income. Pay cash for most items and put some cash away each month for emergencies or get-out-of-town funds, even if it is $5, it is a start and it will grow. My very first savings account began with $1.00 each week.

Be Thrifty With What You Earn or Have

All the usual money-saving tips apply: shop at thrift stores or yard sales, on trash day scavenge in affluent neighborhoods for cast-off furniture, planters, toys, repurpose old items into needed items, etc. A very wise person made me memorize this little jingle: “Use It Up, Wear It Out, Make It Do, or Do Without!” Don’t waste things.

Before you throw something away ask yourself if there is anything else you could use it for. Here on the farm, we have a boneyard of items that could provide additional uses, like PVC pipes, wiring, old lawn tractors, old gutters, chains, fencing, scrap wood, etc.

Take care of things; maintain tools, cars, appliances, etc., so they will last longer. This will give you money for emergencies. There also the 4 Rs: reduce, reuse, recycle and repurpose. If you can incorporate these phrases into your daily life you will move more rapidly towards self-reliance.

A long time ago I decided instead of spending money each day for a soft drink out the machine, I would buy a liter of soda and take it to work with me. It only saved me around $4 a week, but that $4 gave me $200 of extra money each year.

Later on, I gave up soda all together and switched to water. As a young mom, dead tired from working 10 hours, picking up the kids from daycare I often wanted to stop at a fast food place to get something to eat.

Exercising some self-discipline on those nights, instead of $10 of happy meals, it was grilled cheese or PB&J when we got home. That gave me about $500 more of emergency money in a year. If you can cut out $30-$40 of restaurant eating each month you can purchase a silver coin each month.

Pay Cash Instead of Using a Credit Card

Stop using those credit cards for everyday stuff; keep one credit card for real emergencies and cut the rest up so you won’t be tempted. Take a get-out-of-debt course or read the book. Thousands of people have been helped by these courses.

Many sellers will give the buyer a no interest deal if the total amount is paid within 6 months. If you can pay cash, ask the seller for a 10% discount, most independent stores will give it to you. Paying cash for most things really controls how much you spend; if it’s not in your pocket you won’t spend it.

If you have a new car payment loan make a deal to trade the car and get a reliable used car. A neighbor of mine had two cars he was paying 5% loans on. He went to a car dealer and traded in both cars and got a used SUV, which freed him from $1000/month payments and reduced his cost of insurance and maintenance. If you have to drive long distances for work (salesman or regional manager) talk your manager into giving you a company vehicle. They can get it wrapped in company advertising and it can be a marketing deduction for the business.

The Poor Credit Syndrome

If you have poor/bad credit, work with your creditors to get relief. You don’t have to hire a company to negotiate a reduction of the amount owed. Call your creditors up and have a truthful discussion with a second or third level manager. To lenders, some money is better than no money.

Most credit card sponsors will dramatically reduce the amount owed. Once out of debt, don’t be tempted to spend money you don’t have. Work to improve your credit. If you receive a direct deposit check, you can work with your bank to “loan” you money.

For one of my kids, the bank gave him a $200 loan, which he did not spend but left the money in his account, and the bank took an automatic payment of $50/month from his wage check. When the loan was repaid, the bank gave him a positive credit reference on the big 3 credit check companies.

If you use a credit card do so only for emergencies and if your credit is average to good, negotiate a reduction of percentage on your charges. Call up the card sponsor and get your percent rate reduced. Most banks will lower the percent to 5-6-7 percent instead of the usual 18 or 20 percent charge on the unpaid balance. Many people pay the balance off at the end of every month.

A friend of mine who works for one of the big 3 credit companies told me it is best to pay one charge over a 2 or 3-month period each year, which improves your credit rating (go figure?). It shows that you are reliable and meeting your commitments when you repay on a short-term charge.

Last year I bought a scratch and dent refrigerator on sale for no interest charged if paid within 6 months. I paid the amount off in 3 payments to make the credit companies happy. My friend also told me to pay cash when I shop at discount or thrift stores because if you use a credit card there it looks like you can’t afford new things, which in turn, lowers your credit score.

Make the effort to manage needs versus wants; often times our desires are bigger than our wallets. Instead of taking the family to Disney World, go camping or to a local water park. Kids will beg for the world but they will be happy with your time and attention.

Teenagers will cry and complain they don’t have a $900 I-phone and unlimited talk-text-data plan that costs you hundreds of dollars a month. But rather than do without a phone, they will take a $100 Straight Talk smartphone with an unlimited talk-text-data plan for $45/$55 month.

Overcoming Dependence on Commercial Stores

Many years ago, after analyzing my spending habits, I decided to cut my weekly trips to various stores to once a month. This was really hard for me because all the best stores were on my way home from work and weekly sales helped to stretch the ole budget.

It took about five months to get to once-a-month shopping. I had to not spend the weekly grocery $$ on anything else, inventory the items I had on hand, plan some menus, make lists of needs (versus wants), drive to the farmer’s market and improve my self-discipline. Just achieving this one goal gave me the confidence to try to reduce my dependence on commercialism, plus it saved me a minimum of $100, usually $150, every month.

In recent years, some stores are offering to pull your orders for you (online order and local pickup). You can just go to the pickup window or park in a certain spot and your order is available in minutes with no wandering around the store. This saves time and stops the impulse spending! There are lots of ways to save money and I bet readers can list at least 50 easy ways in the comments section.

Don’t Become a FEMA Statistic

Realizing you need to get ready for emergencies is a big step toward self-reliance. Sure there are weather emergencies, tornados, hurricanes, floods, etc. These things are usually temporary and relatively easy to prepare for because you know they are coming…maybe not the exact date, but you know your location experiences these types of natural disasters and you better be ready for them. If you live up north you will have blizzards and flooding.

If you live in tornado alley you need a basement or separate storm shelter stocked with necessities. If you live near water sooner or later you will experience a flood. If you live in the east or south you are going to get hurricanes, severe thunderstorms, and flash flooding.

If you live out west you will have droughts and wildfires. And if you live on the west coast you will have fires, mudslides, earthquakes, volcano eruptions and flash floods. There are lots of articles on internet sites explaining when, how and what to prep for natural disasters and even more articles on how to prepare to evacuate if needed. Take them seriously and store what you need to shelter in place or to evacuate.

Moving Toward Self-Reliance for an Emergency

Working towards self-reliance also means being able to cope with family and societal disasters. For example, what happens if you lose your job? How in the heck are you going to support yourself and your family? You may be eligible for unemployment benefits but believe me that check doesn’t go far.

How much savings do you have stashed in a bank or somewhere else? Depending on the state you live in and your cultural background, you may be able to get some assistance for example, food stamps, free public transportation and job training. But it takes time to receive these benefits and you have to fill out the forms, talk to the folks behind the desk and be willing to meet their requirements.

When I was unemployed, the state required me to apply for two jobs a week, either in person or via resume. I had to list those companies on a form and take/mail the form to the unemployment office in order to receive the check. I did not qualify for medical care and my kids were too old for WIC. I got a temporary job training the trainers in the job core, but I still got some unemployment and I was still looking for a permanent job.

After 8 months of being unemployed, I got a job in my field at half the salary of my previous job. By then my husband was mowing lawns for people and businesses and I got a second job keeping books for a small company. But we survived, mainly because we had some savings and about a 10 month supply of food stored.

There are many worse things than losing your job so you need to ask yourself if you are emotionally and spiritually secure to cope with a catastrophic loss. Losing your home in a wildfire or earthquake, severe accidents or war injuries where a limb is lost or the body paralyzed does happen to good people. Family members do pass away and many without insurance to help the surviving family.

These are life-changing events and if you are not emotionally and spiritually prepared they can overwhelm you. Without God to comfort you during such devastating events, healing may take much longer and some folks may never recover from such a devastating loss.

Moving Toward Self-Reliance While Living in the City

I understand that not everyone can or wants to live out in the country. I used to live in the city in order to have a decent paying job and go to night school. Every time I changed jobs or apartments I moved further out of the city. Eventually, I ended up at the furthest little town on the edge of a large metro area. This meant cheaper rent plus it was great for safety and quality of life, but terrible on the commute.

I talked my employer into letting me work early hours (05:30 to 14:30), rather than the standard work shift. It was good for them because the stuff that people didn’t get done at night, I would come in early and finish.

This enabled me to beat morning and afternoon rush hour traffic and get home in time for the kids getting out of school, thus saving the cost of extended care for the kidos. Less time sitting in rush hour traffic and no after-school daycare meant more money in my pocket.

Learning to Grow Some of Your Own Food

The first things to disappear in an emergency are food and water. A big phase of self-reliance is learning to grow some of your food. I say ‘learning’ because gardening is more than putting seeds in the ground. Mother Nature is in charge and no matter how long you have been gardening, the weather, the bugs, the dirt, even the seeds can change your harvest.

For a while, I had to plant double the fruits and vegetables I wanted because at least half of them died! Every year I tried something different to see if one way worked better than another. Even now, some years I can grow summer squash and some years I can’t. This year I sprayed a homemade potion for beetles and I almost killed a tree!

The city apartments I lived in didn’t have patios or balconies so I didn’t grow any vegetables. However, a family from church shared their excess fruits and vegetables with me and encouraged me to try planting vegetables in window pots.

Of course, it wasn’t a huge harvest of radishes and cherry tomatoes but it got me thinking about a future garden. When I eventually moved to another apartment I wanted a balcony for potted vegetables. Nowadays, cities sponsor garden plots so apartment dwellers can have gardens. Just do your research and garden in groups. Other people working in a garden can help you learn and could become friends.

If you live in a city townhouse or single family home, even the strictest HOA will allow some container gardening or a small garden in the yard. You can plant a few fruits and veggies mingled with lovely flowers, maybe an apple tree. Growing a salad garden with lettuce, tomatoes, and cucumbers is moving toward self-reliance. If you start something you will be moving towards self-reliance.

Many of you already know that when you cut off the root end of spring onions, celery or romaine lettuce, etc., you can stick them in potting soil and they will sprout again. Just an old can or large yogurt container with a drain hole in the bottom, some decent soil and water will get you veggies growing in a window.

Food prices keep going up; so anything you can grow, even if it is in a pot in a window, gives you experience, saves money and puts you ahead of where you were six months ago. When you can live somewhere with a bit of a backyard, turn it into an experiment and grow some veggies!

If you don’t grow your own veggies or have a garden now, buy from the farmer’s market or road-side vendors or on sale at bulk stores and learn to preserve what you buy. Get a pressure canner and the Ball Blue Book on canning. I got my first canner at a yard sale along with a couple dozen canning jars.

I’ve had that canner for 38 years and it still does the job. When I lived in the city I used to buy fresh veggies from a Vietnamese family who had a roadside table. I asked them if they had any ugly vegetables for canning and they began bringing me a box of tomatoes, cukes, squash, peppers, peaches, etc., every week. They had the biggest laugh selling me the uglies for half price, but I always thought I got the best deal!

Overcoming Water Worries

There is nothing worse than that terrible feeling when your water goes out. Anticipating and planning for the lack of water-on-demand will go a long way in keeping your family calm during a crisis or temporary outages. Having the newer toilets which flush with 1.3 gallons (instead of 2.5 gallons) makes difference in emergencies because you can store less water to flush.

Having water stored in gallon containers for your small animals, dishwashing, flushing toilets and having several cases of bottled drinking water on hand allows you to focus on the emergent issues. Get one of those bathtub size bladders comes with its own pump to fill with water for emergencies they are relatively inexpensive and easy to store. Just a few simple steps will keep you moving toward self-reliance, even if you live in an apartment.

Practicing Good Health Care and Learning First Aid Procedures

A very important part of moving towards self-reliance is health care, first aid or emergency treatment. I don’t want readers to think I am against doctors and hospitals; that is not the case. I wouldn’t be alive today if it weren’t for good medical professionals and hospital care. I suggest folks change their mindset from “I’m not a doctor so I can’t do anything,” to “Is this something I can treat at home?” I recently read about a hand, foot and mouth disease going through daycare centers and schools. There is no pill or cure and although it looks scary; it can be treated at home with TLC for about 2 weeks.

I knew a rancher out west who broke his ankle during calving season; he and his son set the bone and used his western boot as a cast. When he finally went to the doctor (days later) he wouldn’t let the doctor cut the boot so they used vegetable oil to work the boot off. He let them put a cast on because his foot was itching and the boot made it impossible to scratch his foot. I remember thinking that is one tough dude but when I look back on the event I realize he lived a lifetime of home-based medicine and was comfortable with setting his own bone.

I used to think a majority of folks could handle what I would call “the usual health problems,” such as colds, sore throats, flu, sprained wrists or ankles, or common diseases like chickenpox, stomach and bowel issues; but I have been proven wrong on that assumption. I have neighbors who run their kids to a specialist for antibiotics when they have runny noses or throw up, others who call an ambulance at the drop of a hat and a bunch of neighbors who can’t tell the difference between when to use home treatments or to go to the doctor.

For those folks (probably not in this audience) who identify with running to the doctor, please take some classes/courses in basic health care, many of the courses are free from the local county extension service or fire departments. Get a copy of “Where There is No Doctor” (free download from the internet) along with similar books and read and study them. If you have a grandmother or other senior citizen nearby, talk to her/him about how she/he handled illnesses at home.

A good basic website detailing free home remedies is https://commonsensehome.com/home-remedies/.

If you have an on-going medical issue where you need to be monitored by doctors/PA/nurses, ask them to get you home monitoring equipment so you can cut back on doctor visits. I have a medical issue that is not going away, but I cut my monthly visits to once or twice a year by getting online monitoring. I can still get face-to-face visits if I think I need them, but not having to drive 2 hours each way, every month, to the doctor’s office is liberating.

Learning to Use Herbs and Essential Oils

There are tons of articles and books about herbs and essential oils, when and how to use them and several experts on this blog who can advise you on what to keep on hand. Essential oils and herbs can save you big $$ on medical bills if you are uninsured or under Obamacare.

A while back I had an attack of vertigo which totally changed what I could do and where I could go. I couldn’t drive nor attempt any work where I could fall nor handle any kitchen utensils due to dizziness and loss of balance. A friend gave me her doctor’s name and said he had helped her over a period of 6 months with pills and inner ear procedures.

I could not endure vertigo for that long as I don’t have someone to do my work or drive me around. I asked for advice on the blog and some knowledgeable people shared with me their experience about peppermint oil and oil of oregano. I immediately followed their counsel and even though oil of oregano tastes worse than antifreeze, I was healed in 3 days. The cost of the essential oils was about $15 while my friend told me her medical bills were over $3500.

Learning to Differentiate Between Medical Issues

I am not saying people shouldn’t go to doctors and other medical professionals; all I’m suggesting is folks need to learn to tell the difference between a medical emergency and when chicken soup, aspirin and bed rest is appropriate for healing. You can save a bunch of money if you can learn to recognize symptoms. Talk to a nurse or doctor, get some used medical books sold on Amazon and eBay and obtain the necessary items for basic health care and first aid. This moves you another step toward self-reliance.

Taking Advantage of Free Services

Some drug stores have free tests (like blood pressure) plus free or low prices on a group of tests (blood pressure, Body Mass Index (BMI), glucose and total cholesterol screenings) several times a year. Check out a Kroger Food Store or CVS/Walgreens store that have walk-in clinics to have a required school/CDL/work physical. We found the Kroger charged $85 for a basic physical with a urine test, while the doctor’s office charged $145. The Diabetes website (http://www.diabetes.org/) offers a free diabetes risk test to determine if you are heading in that direction.

Costco members can get a free heart, diabetes, osteoporosis, and lung health screenings throughout the year at some locations. If you live in or around a large city or metro area there are lots of free health screenings from organizations like The Kidney Fund (www.kidneyfund.org). A word of caution, there are some scammers lurking out there so be careful what personal information you give out; we have never been asked for anything other than our name. Never give your medical insurance ID number, Social Security number, or banking information to anyone.

Self-Learning, Education, and Training

I get it that you are tired after working 10 hours a day and going to night school is hard; but; knowledge is power. Maybe going to college for a professional degree is not for you; maybe a technical apprenticeship in plumbing, electricity, welding, engine repair, etc., might better fit you. A degree or license does not guarantee you will get the best job; instead, it gives you more options. Knowledge and skills help you learn to be more self-reliant.

Currently, YouTube and similar video sites offer how-to instructions on an unbelievable number of things. Most of these can be downloaded for future reference. Even the smallest cities and counties have public libraries providing a free loan of books, movies, DVD courses, etc. If they don’t have a book you want they will order it from another library for you.

The larger cities and counties have evening and weekend adult education programs for minimum costs which include courses covering things like basic auto mechanics, house painting, basic plumbing, etc. When I lived in the city I took an adult education basic auto mechanics course to learn how to perform standard service on my car.

But it also taught me to know what-was-what so I wouldn’t get ripped off by some unscrupulous person if I took my car to a shop. Later on I took a beginner gardening class held on Saturday mornings at the county’s gardening site.

Some things you can learn and practice on your own but other things you will need guidance/supervision so you don’t hurt yourself or your family. The school of hard knocks, aka experience, certainly teaches us, but it is time-consuming. I would rather learn from someone else’s mistakes than make those same mistakes myself. Whatever learning you can acquire now will save you time and money later.

Learning to Use Renewable Resources or to Create Usable Products

I read an article a while back and the author said “If you are a prepper, there comes a point after your preps have been consumed there is no way to keep living.” Unfortunately, I misplaced the website and can’t give credit on who said it; but I recognize it as a simple truth. Look around you right now; what are you using or making that can be a renewable resource? Solar and wind power are renewable energy sources but you need a supply of equipment to harness them.

Small livestock such as chickens, ducks, rabbits, pigs are renewable resources that are relatively easy to raise if you have a little bit of private land. Many people are on prescription medications; what happens when you can’t get access to those medications?

Do you know enough about herbs, natural plants or essential oils to substitute healing herbs for medication? If your power goes out for weeks how will you heat your home? Do you have a wood stove?

If your city/county water supply is damaged or contaminated will you have water to use? Do you have a water source to give you access to drinking, cooking, bathing water plus water for your animals? The list goes on and on. Learn to be more self-reliant now to survive in the future.

Trading and Bartering

At some point, alternatives will be needed. As I said earlier, I don’t think there is anyone who is totally self-reliant. Even the mountain men, Alaska homesteaders, or southern swamp people need gasoline, kerosene, cast iron cookware, etc., etc. A lot of what we don’t have or can’t make can be bartered for, but we have to have something the other person wants to make a good trade.

Homesteading in 2018 is hard physical work and the older we get the harder it is. I really don’t want to go back to living a “Little House on the Prairie” lifestyle, but I know all of us must learn to be more self-reliant, especially for water, food, and shelter.

I don’t know how to make gasoline or propane, nor can I smelt iron ore to make tools; however, there are a lot of things I CAN do which are survival related. This knowledge can be used to trade and barter for what we can’t do or don’t have.

Some of the most valuable assets are located out in the country and on farms, such as sources of water, hidden gardens, small livestock and a forest full of trees for building or fuel and which also feeds and shelters wildlife. But can you make clothing, repair shoes/boots and preserve food in multiple ways along with other survival skills? These will be powerful bartering assets when the time comes.

If you are not prepared for emergencies, if you are without self-supporting skills, if you have a dream of becoming independent, begin now to work toward becoming self-reliant. Take an inventory of your knowledge, skills, and abilities so you can determine what you need to learn in order to survive in the future. Don’t wait for a Haiti or Venezuela crisis to come to your area. Do one thing a day which moves you toward independence, self-reliance, and self-confidence.

Filed Under: Self-Employment

Review: Alive After the Fall™ by Alexander Cain

July 16, 2018 Jesse Mathewson

lantern for emp

Electromagnetic Pulse’s have been apart of the subculture of doomsday prepping since the 1970’s. The specter of ultimate doom causing humans to revert to their pre-industrialized days scares many of us. There have been dozens of books written by professionals regarding a man-made EMP or natural similar event occurring. Alive After the Fall™ was written approximately two years ago by Alexander Cain, which is the pen name for someone who supposedly has a Doctorate in Theology and Archeology.

My research has turned up over 4000 different doomsday prophecies dating back as far as 400 B.C., none of these has come true and most of them including Nostradamus and others are at best vague “prophetic” ramblings by individuals more interested in personal fame and fortune at the moment. ¹ So it with apprehension that I read this E-Book. It is my goal, however, to provide you with reviews of applicable literature. So here goes the review!

I agree with the authors premise, an EMP event is quite possible and in fact likely whether it be natural or man-made. Unfortunately, this is where my agreement ends. The author adds just enough “science/math” to support their continued statements as being fact. Sadly, this could not be further from the truth and why I personally adjusted from being a “doomsday” prepper to an everyday prepper years ago. The statement, “we’ve established that an EMP incident will fry all electronics regardless whether they are plugged in or not…” unfortunately is not correct.

While some electronics will, in fact, become disabled, with modern electronics this is actually less of a long-term issue than an immediate issue while the disruption is occurring. Testing completed and evidence available shows that modern electronics due to the use of non-metallic components are less likely to have issues. Additionally, the reality is that North Korea does not have the potential and Russia simply has no reason to attack us.²

Now I should mention, I agree that there is a potential for these types of events, I disagree with the “facts” the author presents and his approach in using your fear to sell a book. Given the lack of principles evidenced by the author in refusing to use their real name or provide any validation as to their purported credentials, I find it difficult to believe anyone willingly believed and even acted on the message in the book. Additionally, the author promotes preparing in ways that are unsustainable and impossible for anyone making under 125,000 dollars a year.

Additional critiques are the author’s insistence on conflating Decibels and MHz with the following science sounding line. “Rooms built in this way have been shown to offer at least 80 db of shielding, but up too several hundred Mhz.” This line shows the ignorance of the author. The real science here is more difficult, 1,000,000 h or hertz makes up a Mhz. The measurement of 0 db is equal to 1000 h, additionally, it is a measure of sound specifically. ³ Given how sound is measure from what I gather, the author’s statement effectively invalidates itself and was likely taken without any real research from another crackpots website versus actually researched with any desire to impart truth. (it is important to note that unlike the author I am not using fake credentials in a different field to convince my readers of somethings existence, rather I as someone who has no formal experience or education in electromagnetic theory and its relation to electromagnetic pulses generated by man or nature on the earth, is simply attempting to introduce what little truth I have in this area)

I will say that the author was correct in at least two areas in the book, the information on the necessity of clean water and the authors desire to have more than one plan. These alone, however, do not make the book worth purchasing. In fact given the premise that the book was marketed with a date of destruction ending in January of 2017 I believe, it failed in every other way. I could go on to explain any number of reasons why this is a terrible purchase, however, I will simply leave you all with this warning.

If it seems to good to be true, or if as a religious person another religious person claims to “know the time”, RUN AWAY, do not give that person or persons your money and absolutely avoid disseminating the included information. I firmly believe if living a prepared life, however, after 41 years on this earth and having weathered dozens of natural disasters and personal major life-changing events I can honestly say, “if you need to believe that the world is about to end to be prepared in your life…you have not lived.”

This book is absolutely a DO NOT BUY!

Free the mind and the body will follow…

Links and related references: 

  • ¹ The millennium and end-of-the-world predictions. (n.d.). Retrieved from http://www.religioustolerance.org/end_wrld.htm
  • Moore, R. (2017, September 22). Perspective | Why Americans love doomsday prophecies. Retrieved from https://www.washingtonpost.com/news/acts-of-faith/wp/2017/09/22/why-americans-love-doomsday-prophecies/?noredirect=on&utm_term=.2a9dc16b546e\
  • The 15 Greatest End of the World Prophecy FAILs. (n.d.). Retrieved from https://www.ranker.com/list/the-12-greatest-end-of-the-world-prophecy-fails/ivana-wynn
  • ² Electromagnetic Pulse – EMP Myths. (n.d.). Retrieved from https://www.futurescience.com/emp/EMP-myths.html
  • https://newatlas.com/portable-e-bomb/11522/
  • Researchers developing portable E-Bomb – New Atlas newatlas.com
  • https://science.howstuffworks.com/e-bomb3.htm
  • Non-nuclear EMP Weapons – How E-Bombs Work | HowStuffWorks science.howstuffworks.com
  • http://www2.siba.fi/akustiikka/index.php?id=38&la=en
  • Basics of Acoustics – Hertz, cent and decibel www2.siba.fi

Filed Under: Gear Reviews

Homesteading and Prepping Open Discussion Weekend Forum

July 14, 2018 M.D. Creekmore

community forum

This open discussion forum is just that an open discussion where you can post your preps and homestead progress for the week, or ask questions about any topic that you need help with.

All that I ask is that you keep the discussion somewhat related to the topic of prepping and or homesteading.

Worth Checking Out:

  • My Newest Blog Project – TN Concealed Carry
  • My Brothers New YouTube Channel Tennessee Redneck.
  • And a new fiction book that one of my readers just released Alien Outpost.
  • And last but not least check out Concealed Carry Resources and Knife Laws in Tennessee.

Alright… now over to you all…

Filed Under: Uncategorized

How To Make Pepper Spray At Home

July 11, 2018 M.D. Creekmore

by Jarhead 03

make your own pepper spray

In the event of an economic collapse or other unknown situation where you can no longer purchase pepper spray, you may come upon a situation where the firearm is not needed, conserve ammo, keep animals and pests away from plants or you just don’t like guns. You may have to make it yourself and thankfully it’s easy to make the best pepper spray at home.

Please note: Making your own pepper spray involves risk of injury so don’t accidentally spray yourself and use caution. If you have breathing difficulties have someone else make it for you or make it in a well-ventilated area.

Making your own pepper spray can be as simple as stocking up on dried pepper/chili or growing your own and a delivery system. You can make it to carry on your person or make a wide dispersal device for groups. You can buy them at most department stores, nurseries, garden centers or on Amazon and do a search for any of the following peppers/chili.

Selecting the Pepper/Chili:

The following are types of peppers/chili recommended and the rating heat index of each pepper/chili:

The Scoville Heat Unit is the rating or “hotness of peppers” that measures on a scale of mildest to hottest. I am going with the hottest and easiest to acquire. If you know a hotter pepper/chili and where to get it please let me know.

The lowest heat index recommended is the Red Cayenne pepper at 30,000 SHU to 60,000 SHU.

The middle heat index is the Thai or Thai Bird Chili at 50,000 SHU to 150,000 SHU.

At the top of the are the Scotch Bonnet chili and the Habanero chili at 100,000 SHU to 350,000 SHU, the Red Savina Habanero at 350,000 SHU to 650,000 SHU and the Ghost Pepper or Naga Jolokia Pepper which is considered the hottest at 800,000 to 1,500,000 SHU.

The 10% Capsaicin pepper spray issued to LE can vary from 2,000,000 SHU to 6,000,000 SHU compared to store-bought pepper spray containing 2% to 10% Capsaicin vary from 500,000 SHU to 2,000,000 SHU.

You are capable of using the oil you could deliver a greater amount of Capsaicin but what I’m presenting is an effective means of delivery without having to own a pepper farm.

Delivery System:

Homemade delivery systems can be effective although you may not get the same results as the LE brands I’m showing you how to make.

Delivery systems are as simple as a one to three-ounce spray canister you get in the travel section for toiletries and up to 32-ounce spray bottles reminiscent of the glass cleaner bottles where you squeeze the trigger in a spray mist or stream. You can also make a delivery system with Garden hand pump pressure sprayers as well as the one to four-gallon hand pump pressure sprayers used for gardening, pest control, and weed control. Of course the larger the container the more pepper/chili you will need.

The Process:

Step 1. Container preparation.

Inspect your spray bottle or pressure sprayer for leaks by filling it with water. If the device leaks when tilted, lying on its side or after excessive spraying then choose another container. You don’t want it dripping or leaking in your pack, vehicle, purse or hand.

We will be making enough for a pint of pepper spray.

Step 2. What you need.

  • Six peppers or chili’s, the hotter the chili or pepper the better. You can use more pepper/chili if you like to get it as potent as possible.
  • Garlic, two medium or one large-sized bulb or two tablespoons of minced in a jar or powdered if you don’t have it (the odor repels some bugs and people)
  • A method of drying the pepper/chili (dehydrator, stove, solar oven or sun-dried)
  • Rubber gloves (to handle the pepper and oils)
  • Safety glasses (to keep it out of your eyes)
  • N95 mask or another respirator (prevent inhalation especially if you are sensitive)
  • Vegetable chopper or knife and cutting board to break it down.
  • Blender, grinder or coffee grinder (crush the pepper/chili and garlic)
  • Two sealable containers (I used a 32 oz. sports drink bottle and a16.9or 20 oz. bottle)
  • Strainer or cheesecloth (to remove the pits and seeds that will block the flow to spray)
  • Funnel (allows it to flow in the container saving as much as possible and prevent a mess)
  • A well-sealed container for storing unused pepper spray. Keep it in a cool place or fridge.
  • Vinegar or Isopropyl Rubbing Alcohol (this is used as the delivery system and it keeps the pepper and Capsaicin intact longer than water would as well as already contains an irritant to the senses)
  • Baby oil or mineral oil (this is used to latch on to the body or clothes)

NOTE: If you are using this around plants, trees, and vegetables to fend off pests and animals or don’t have it, you can substitute the vinegar, alcohol and baby oil with water. If you are running low on vinegar or alcohol you can add water to make up the difference in measurements.

Step 3. Preparing the pepper/chili.

I am giving instructions for those with and without a blender or grinder.

  1. Dry the peppers/chili by means of a dehydrator, sun-dried, solar oven or set in the oven at a low temp.
  2. a. Place the peppers/chili in the blender.
  3. b. Cut, chop or grind the peppers/chili as fine as possible then place in a bowl.
  4. a. Place the garlic bulb or bulbs in the blender.
  5. b. Mince, chop or grind the garlic and place in the bowl.
  6. a. Two tablespoons of baby or mineral oil into the blender.
  7. b. Two tablespoons of baby or mineral oil into the bowl.
  8. a. Add twelve ounces of alcohol or vinegar into the blender. Blend on high for two to three minutes until purged.
  9. b. Add twelve ounces of vinegar or alcohol and mash and grind until it’s as close to being as smooth as possible. You can slowly add the alcohol or white vinegar as you blend it to avoid splashing.
  10. Pour it into the larger bottle with a funnel to let it sit overnight in a cool place to react and increase the effectiveness of the solution.
  11. When ready get your funnel, strainer or cheesecloth and water bottle. Place the funnel in the smaller16.9 oz. to 20 oz. water bottle then place the strainer or cheesecloth over the funnel.
  12. Pour the pepper/chili mixture into the water bottle using a funnel and strainer. Any leftover remnants from the strainer can be used in the garden or trash area to keep pests and animals away.
  13. You now have pepper spray and can store it in the refrigerator or a cool place and it’s ready to pour in your sprayers at any time. Since it is sitting in vinegar or alcohol it should last anywhere from a month to three months. I sprayed an opossum in my trash can with a garden pressure sprayer and he darted out of there. I haven’t seen him in two weeks. I used a solution around my garden and the neighbor’s dog won’t go near the fence.

Step 4. Cleaning the container and blender/grinder after use.

A solution of bleach and water will counter the oils left behind in the container. Mineral Oil and soap and hot water can be used to clean out the blender or grinder. Use caution when cleaning the containers by wearing safety glasses and gloves.

NOTE: You can make pepper spray with powdered/ground pepper instead of home-grown or store-bought dried peppers/chili but the intent is to get the maximum use of the pepper/chili and garlic. If you do store Cayenne or hotter pepper/chili powder here are the instructions:

  1. Take eight tablespoons of Cayenne pepper or four tablespoons of habanero pepper and pour it into a 32 ounce or 1L bottle
  2. Take two tablespoons of powdered or minced jars garlic and pour it into a 32 ounce or 1L bottle.
  3. Add two tablespoons of baby or mineral oil and pour it into a 32 ounce or 1L bottle.
  4. Add 14 ounces of alcohol, vinegar or water and pour it into a 32 ounce or 1L bottle.
  5. Shake bottle well and let it sit overnight in a cool place to react and increase the effectiveness of the solution.
  6. With a funnel and cheesecloth or towel, you can pour it into the 16.9 oz. to 20 oz. water bottle and you are ready to store or place it in your dispenser.

Disclaimer. The content that is posted on here is for general information purposes only – see our full disclaimer here.

Filed Under: Security

Review: Slime Self-Sealing Tube for Bicycles

July 9, 2018 Jesse Mathewson


Here in Arizona, we enjoy bicycling, we also enjoy one of the densest populations of spiny flora on the planet. This combination is absolutely terrible for bicycle tubes. This is a review of one product I have found for my bicycle that works quite well and allows us to maintain pressure even when we encounter the inevitable patch of cacti or mesquite laying across a pathway. As with most of my reviews this product was purchased by myself and has been tested for several years with my children and self.

First, let’s get the downside out of the way, these tubes cost on average $15 for two depending on size, we as a family have 26” x 1.75-2.25 tires on our bicycles. We chose mountain and beach style cruisers over road bikes for several reasons, the largest being the lack of maintained roads in many places where we regularly travel. Using M.D. Creekmore Amazon link you can find them here! Now, if you are a regular bicyclist you will know that these tubes are actually not that expensive when you look at what you are getting in return.

Extended use alone makes these a valuable investment. They are not great for road bikes or competitive bicyclists simply because they are heavier and can seem unwieldy after installation. Personally, I have never noticed balance changes. While they are somewhat heavier again, the benefits outweigh these perceived negatives. The company warranties them for up to 2 years after installation. Honestly, I can say that prior to using these I was spending $5-9 every other month on new tires, even with patch kits, which can still be used on these if necessary. Given the sheer amount of unseen thorny threats, these have paid for themselves several times over.

We keep a full set available at all times just in case, and I have a full sized 200psi hand pump that will work in a pinch for vehicle tires as well. I also have a small hand pump and toolkit with patches that sits next to the small trauma kit under my bicycle seat. I should mention I got all of our bicycles for little or no money, two were purchased from local pawn stores for under $30 after a little elbow grease both work great and two others were either gifts or were added on by others in trade. So if you ever see our family riding “designer” bicycles, remember, “designer” can be had for far under new pricing if you are willing to look!

I can highly recommend Slime Self-Sealing Tubes for your bicycles! We enjoy them as a family and yes, I do ride a bicycle, after all, you have to stay in some type of physical shape and this is a lower impact approach.

Free the mind and the body will follow…

Related: 

  • Work Sharp Pocket Knife Sharpener: Weekly Product Review
  • Ten Amazing Book Related Life Hacks for the Modern Homesteader

Filed Under: Gear Reviews

  • « Go to Previous Page
  • Page 1
  • Interim pages omitted …
  • Page 75
  • Page 76
  • Page 77
  • Page 78
  • Page 79
  • Interim pages omitted …
  • Page 87
  • Go to Next Page »

Primary Sidebar

Subscribe to Blog via Email

Enter your email address to subscribe to this blog and receive notifications of new posts by email.

Join 7,202 other subscribers
  • Amazon
  • Facebook
  • Substack
  • Twitter
  • YouTube

“Do more with less.”

– Minimalist proverb

Recent Posts

  • Just so you know
  • Weather Update for My Corner of Appalachia
  • Why I’m Ordering Ivermectin + Mebendazole Every Year
  • The Website’s Shutting Down (But Here’s the Plan)
  • You Are Hated! Start Training Like It!

Footer

Recent Posts

  • Just so you know
  • Weather Update for My Corner of Appalachia
  • Why I’m Ordering Ivermectin + Mebendazole Every Year
  • The Website’s Shutting Down (But Here’s the Plan)
  • You Are Hated! Start Training Like It!

More about me

Books I’ve written

Books I’ve read

Follow Me on YouTube

Follow Me on Facebook

Gear I Use and Recommend

Newsletter

Search this site

Follow me elsewhere

  • Amazon
  • Facebook
  • Substack
  • Twitter
  • YouTube

© 2008–2025 M.D. Creekmore · As an Amazon Associate, I earn from qualifying purchases.